Creating/Editing Music Finder Records
CVP-709/CVP-705 Reference Manual
33
If you want to abort your edits, touch [Cancel].
4
Touch [Create] or [Save] to save the created/edited Record.
Touching [Create] will add the new created Record to the Music Finder display. Touching [Save] will overwrite your
edits to the existing Record.
By registering Song or Style files in various locations (Preset, User and USB) into Music Finder, you can easily call up your
favorite files.
NOTE
If you want to register files in a USB flash drive, connect the USB flash drive containing the data to the [USB TO DEVICE]
terminal.
1
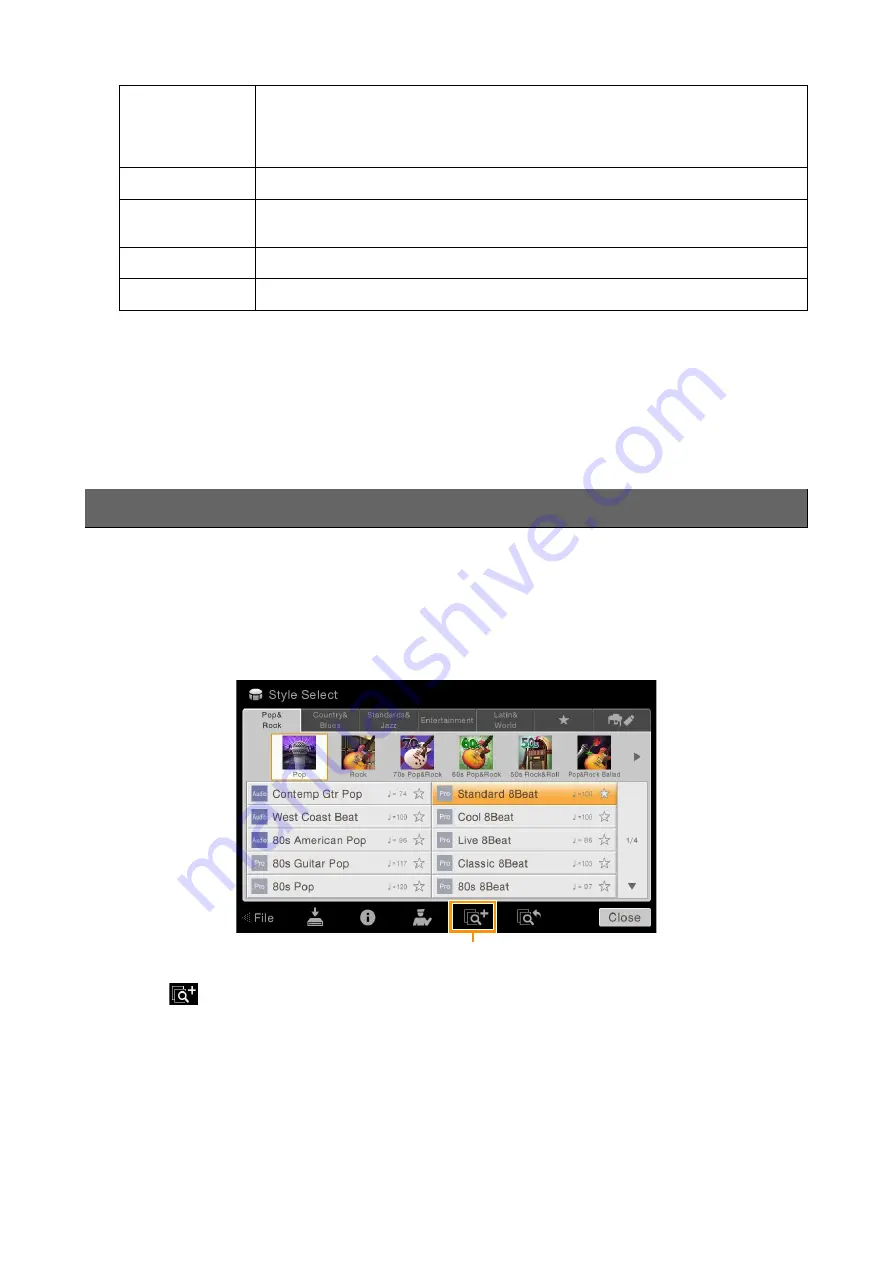
In the Song or Style Selection display, select the desired file.
2
Touch
(Add) to call up the Create Record display.
As necessary, you can change the Music title and keyword, etc. (
).
NOTE
To cancel the operation, touch [Cancel].
3
Touch [Create] to create a new Record to which the Song or Style selected in step 1 is
registered.
4
Check that the created Record is shown in the Music Finder display.
In the “Style” column of the Record to which the Song is registered, “(MIDI Song)” or “(Audio Song)” is shown.
Beat
Lets you enter the desired Beat which will be used for sorting the Records. This is not
available for Song Records.
NOTE
The setting here is just for sorting the Records, and does not affect the actual beat of the
specified Style.
Tempo
Lets you enter the actual Tempo value. This is not available for Song Records.
Section
Lets you specify the Style Section setup which will be called up when this Record is
selected. This is not available for Song Records.
Genre
Lets you select the desired genre.
Keyword
Lets you enter the keyword for searching the Records.
Registering a Song or Style to a Record
2


