background image

CVP-601 Owner’s Manual

41

2

V

oi

ces 

 Pla

yi

n

g th

keyboa

rd

 –

Voice Types

Voice Characteristics

The Voice type and its defining characteristics are indicated above the Voice name — 
Live!, Cool!, Sweet!, etc. For detailed explanation, refer to the Reference Manual.
In this section, only Super Articulation Voices (SA) is explained. These Voices have 
special characteristics you should be aware of, and they require specific performance 
techniques to bring out all of their expressive qualities.

SA Voices (S.Articulation!)

The SA Voices provide great playability and expressive control in real time.
For example, with the Guitar Voice, if you play a C and then a D in a very legato 
way, the D note would sound as a “hammer on,” without the string being plucked 
again. 
Depending on how you play, other effects such as finger noises (for the Guitar 
Voice) will be produced.

You can also use the pedals to add articulations to the SA Voices (page 42). For details 
on how to best play each SA Voice, call up the information window (pressing the [7

(INFO) button in the Voice Selection display).

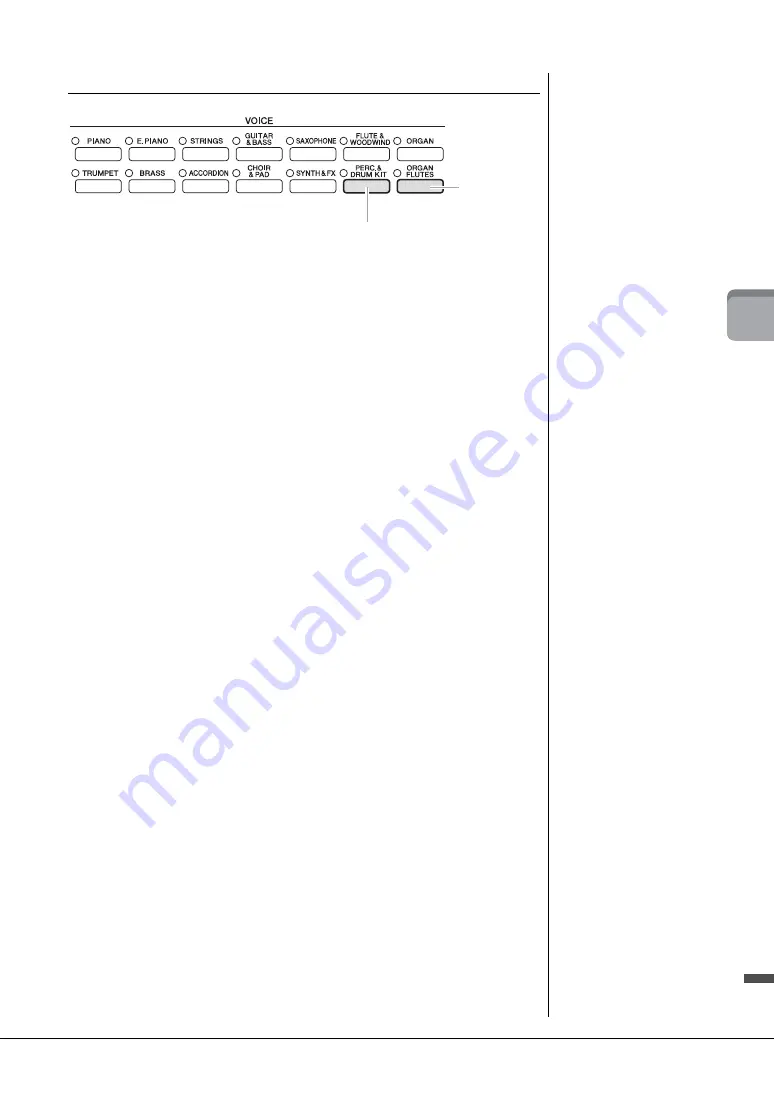
Organ Flute 
Voice
(page 45)

Percussion/Drum Voices

When one of the Voices is selected from this button, you can play various 
drums and percussion instruments or SFX (sound effects) sounds on the 
Keyboard. Details are given in the Drum List of the separate Data List.

NOTE

SA Voices are only compatible 
with other models which have 
those types of Voices installed. 
Any Song or Style data you’ve 
created on the instrument using 
this Voice will not sound properly 
when played back on other 
instruments.

NOTE

SA Voices sound differently 
depending on the keyboard 
range, velocity, touch, etc. 
Hence, if you apply a HARMONY/
ECHO effect, change the 
transpose setting or change the 
Voice Set parameters, 
unexpected or undesired sounds 
may result.

Summary of Contents for Clavinova CVP-601

Page 1: ...ploi afin de tirer pleinement profit des fonctions avancées et pratiques de votre instrument Nous vous recommandons également de garder ce manuel à portée de main pour toute référence ultérieure Avant d utiliser l instrument lisez attentivement la section PRÉCAUTIONS D USAGE aux pages 4 et 5 Pour plus d informations sur l assemblage du pupitre de clavier reportez vous aux instructions figurant à l...

Page 2: ...dly We sincerely believe that our products and the production methods used to produce them meet these goals In keeping with both the letter and the spirit of the law we want you to be aware of the following Battery Notice This product MAY contain a small non rechargeable battery which if applicable is soldered in place The average life span of this type of battery is approximately five years When ...

Page 3: ...ightning storms or when unused for long periods of time 14 Refer all servicing to qualified service personnel Servicing is required when the apparatus has been damaged in any way such as power supply cord or plug is damaged liquid has been spilled or objects have fallen into the apparatus the apparatus has been exposed to rain or moisture does not operate normally or has been dropped UL60065_03 CA...

Page 4: ...ay If it should appear to be malfunctioning discontinue use immediately and have it inspected by qualified Yamaha service personnel Do not expose the instrument to rain use it near water or in damp or wet conditions place on it any containers such as vases bottles or glasses containing liquids which might spill into any openings If any liquid such as water seeps into the instrument turn off the po...

Page 5: ... the desired listening level Do not insert a finger or hand in any gaps on the key cover or instrument Also take care that the key cover does not pinch your finger Never insert or drop paper metallic or other objects into the gaps on the key cover panel or keyboard This could cause physical injury to you or others damage to the instrument or other property or operational failure Do not rest your w...

Page 6: ...to wipe any water off immediately with a soft cloth Saving data Saving and backing up your data Edited Songs Styles Voices and MIDI settings are lost when you turn off the power to the instrument Save the data to the USER tab display page 27 USB flash memory When you change settings in a display page and then exit from that page Data other than above edited Songs Styles Voices and MIDI settings et...

Page 7: ...tion formats GM System Level 2 is a standard specification that enhances the original GM and improves Song data compatibility It provides for increased polyphony greater Voice selection expanded Voice parameters and integrated effect processing XG is a major enhancement of the GM System Level 1 format and was developed by Yamaha specifically to provide more Voices and variations as well as greater...

Page 8: ...e performance functions and expressive power found only on grand pianos such as having repeated plays of the same note perfectly articulated even when playing at high speed or with partial key release Piano Room If you want to simply play the Clavinova as a piano you can use the Piano Room function to conveniently call up relevant piano settings with a single button press True Acoustic Piano Feel ...

Page 9: ...ent features and get more enjoyment out of this instrument Play Along with Song Data Chapter 4 Songs Record Your Performance Chapter 5 Recording MIDI Audio Playing and Recording from USB Flash Memory Chapter 6 USB Audio Call Up the Ideal Voice and Style for Each Song Chapter 7 Music Finder Connect to an iPhone iPad Chapter 10 Connections Playing Back Songs page 58 Play along with a Song data and f...

Page 10: ...his instrument to the iPhone iPad MIDI Reference Contains both the MIDI Data Format and the MIDI Implementation Chart which allow you to confirm MIDI messages transmitted recognized by this instrument The above materials are available for downloading from the Yamaha Manual Library Access the Yamaha Manual Library then enter your model name CVP 601 for example in the Model Name area to search the m...

Page 11: ...riate Panel Settings for the Selected Style One Touch Setting 54 Calling up Optimum Styles for Your Performance Style Recommender 55 Turning Style Parts On Off and Changing Voices 56 Adjusting the Volume Balance Between Style and Keyboard 57 4 Song Playback Playing and Practice Songs 58 Playback of Songs 58 Displaying Music Notation Score 61 Displaying Lyrics Text 61 Turning Song Channels On Off 6...

Page 12: ...Style Song channels on or off LCD and related controls page 21 USB button pages 27 73 Calls up the display for selecting a file on the USB flash memory FUNCTION button Lets you make advanced settings and create your original Styles and Songs For details see the Reference Manual on the website PART ON OFF buttons page 40 Turns the keyboard parts on or off AUDIO button page 73 Plays back audio Songs...

Page 13: ... Controls F3 G3 A3 B3 C4 D4 E4 F4 G4 A4 B4 C5 D5 E5 F5 G5 A5 B5 C6 D6 E6 F6 G6 A6 B6 C7 E E A C C D B B Music rest page 17 Guide lamps page 62 Standby On switch page 14 Pedals page 34 I O connectors pages 17 and 89 Key cover page 14 ...

Page 14: ...ng on locale CAUTION Hold the cover with both hands when opening or closing it Do not release it until it is fully opened or closed Be careful to avoid catching fingers yours or others especially children s between the cover and the unit CAUTION Do not place objects such as a piece of metal or paper on top of the key cover Small objects placed on the key cover may fall inside the unit when the cov...

Page 15: ...ot using the instrument for a long time make sure to unplug the power cord from the wall AC outlet Force quitting the instrument The power cannot be turned off by pressing the Standby On switch while recording or editing or while messages are displayed If you need to force quit the instrument press and hold the Standby On switch for longer than three seconds NOTICE If you force quit the instrument...

Page 16: ...ears briefly and Auto Power Off is disabled The setting is retained even if the power is turned off Auto Power Off NOTE Throughout this manual arrows are used in the instructions indicating in shorthand the process of calling up certain displays and functions NOTICE Depending on the instrument status the power may not turn off automatically even after the specified period of time elapses Always tu...

Page 17: ...he instrument Two sets of standard stereo headphones can be connected If you are using only one pair of headphones you can plug them into either of these jacks Using the Headphone Hanger A headphone hanger is included in the instrument package so that you can hang the headphones on the instrument Install the headphone hanger using included two screws 4 x 10mm as shown in the figure Using the Music...

Page 18: ...character input 1 Call up the operation display FUNCTION J UTILITY TAB L R OWNER 2 Use the 4 5 buttons to select the desired language You can adjust the contrast of the display by turning the LCD CONTRAST knob located to the left of the display Changing the Display Language Adjusting the Contrast of the Display 2 1 ...

Page 19: ...J UTILITY TAB L R OWNER 2 Press the I OWNER NAME button to call up the Owner Name display Refer to page 28 for character entry details Showing the Owner Name in the Opening Display Display the version number To check the version number of this instrument press the 7 8 VERSION buttons in the display in step 1 above Press the EXIT button or the 8 button to return to the original display ...

Page 20: ...of the A C and E buttons to show a specific Demo Pressing the E button plays back the overview Demo continuously calling up the various displays in sequence The sub menus are shown at the bottom of the display Press one of the 1 8 buttons corresponding to the sub menu 3 Press the EXIT button repeatedly if necessary to exit from the Demos Playing the Demos NOTE To return to the next higher level me...

Page 21: ...menu Example 1 Example 2 Display based Controls A E buttons see below TAB L R buttons page 22 1 8 buttons page 22 DIRECT ACCESS button page 24 DATA ENTRY dial and ENTER button page 23 EXIT button page 23 F J buttons see below In the File Selection display page 27 the A J buttons can be used to select the corresponding respective files The A and B buttons are used to move the cursor up or down The ...

Page 22: ...iple pages exist in the display the page numbers P1 P2 are shown at the bottom of the display Pressing the corresponding 1 5 button changes the display page If a menu appears in this section of the display use the 1 8 buttons to select the desired items If a menu appears in this section of the display use the 1 8 buttons to select the desired items If a parameter appears in slider or knob form use...

Page 23: ...conveniently use the DATA ENTRY dial in tandem with the 1 8 buttons to adjust parameters indicated in the display This convenient technique also works well with pop up parameters such as Tempo and Transpose Simply press the appropriate button ex TEMPO then rotate the DATA ENTRY dial and press ENTER to close the window EXIT button Pressing the EXIT button returns you to the previously indicated dis...

Page 24: ...button press 1 Press the DIRECT ACCESS button A message appears in the display prompting you to press the appropriate button 2 Press the button or pedal corresponding to the desired setting display to instantly call up that display For example pressing the GUIDE button calls up the display in which the Guide mode can be set Refer to the separate Data List for a list of the displays that can be cal...

Page 25: ...name will be displayed 4 Song name and related information Displays the currently selected Song name time signature and tempo Pressing one of the 5 8 buttons calls up the Song Selection display page 58 5 Registration Memory Bank name Displays the currently selected Registration Memory Bank name Pressing the J button calls up the Registration Memory Bank Selection display page 84 6 Volume Balance D...

Page 26: ...of USB Audio Player is in standby a REC WAIT indication appears While recording a REC appears Registration Sequence Indicates the sequence order of the Registration Memory if programmed page 85 numbers which can be called up via the TAB L R buttons or the pedal For instructions on programming the sequence refer to the Reference Manual on the website ...

Page 27: ...folder operation menu You can save and manage your data files copy move delete etc from this menu For detailed instructions refer to pages 67 71 File Selection Display Configuration 1 2 3 NOTE The data both pre programmed and your own original are saved as files USB display You can open the File Selection display for a specified file from the USB button USB A SONG B AUDIO C STYLE F VOICE G REGIST ...

Page 28: ...ter the selected character move the cursor or press another letter input button Alternately you can wait for a short time and the character will be entered automatically For details on entering characters refer to Other character entry operations below 4 Press the 8 OK button to actually enter the new name and return to the previous display Entering Characters 1 4 2 3 NOTE Depending on the display...

Page 29: ...versed area at once press the 8 CANCEL button Selecting custom icons for files shown at left of file name 1 Press the 1 ICON button to call up the ICON SELECT display 2 Select the icon by using the A J buttons 3 5 buttons or DATA ENTRY dial The ICON display includes several pages Press the TAB L R buttons to select different pages 3 Press the 8 OK button to apply the selected icon While holding th...

Page 30: ...the operation is complete the instrument will be restarted automatically Data Backup NOTE Before using a USB flash memory be sure to read Connecting a USB Storage Device on page 91 2 3 NOTE Completing the backup restore operation may take a few minutes NOTICE Move the Protected Songs which are saved to the USER display before restoring If the Songs are not moved this Backup operation deletes the d...

Page 31: ...s the entire instrument for optimum piano performance No matter what settings you ve made from the panel you can instantly enter the Piano Room by a single button press for calling up the piano settings and creating the desired piano sound 1 Press the piano shaped PIANO ROOM button This operation calls up the Piano Room display and the panel settings for the Piano performance Restoring the Piano D...

Page 32: ...he Desired Setup in the Piano Room A PIANO Calls up the popup window which lets you select the desired Piano Voice by using the A B buttons F ENVIRONMENT Calls up the popup window which lets you select the desired environment by using the F G buttons H LID POSITION Calls up the popup window which determines how much the virtual piano lid is opened by using the H I buttons 8 DETAIL Calls up the pop...

Page 33: ... 1 Press and hold down the PIANO ROOM button for two seconds or longer A message appears on the display 2 Press the G LOCK button to call up the Piano Lock display The panel settings will be locked in the Piano Room settings you made To disable Piano Lock press and hold the PIANO ROOM button for two seconds or longer again STRING RESO 5 Turns the String Resonance on or off DAMPER RESO 6 Determines...

Page 34: ...appropriate for the Voice is automatically assigned to the center pedal Using the Pedals Left Pedal Center Pedal Right Pedal Half pedal While playing the piano with Sustain and you want to slightly mute the sustained sound release the pedal from maximum position to half position or higher NOTE Certain Voices such as STRINGS or BRASS sustain continuously when the right center pedal is pressed NOTE ...

Page 35: ...he TEMPO buttons to set the tempo Pressing and holding either button lets you continuously increase or decrease the value You can also use the DATA ENTRY dial to adjust the value To reset the tempo press the TEMPO buttons simultaneously 3 Press the EXIT button to close the Tempo display Using the Metronome NOTE The number in the display indicates how many quarter note beats there are in one minute...

Page 36: ...ecome tarnished across the ages When this occurs polish the pedal with a compound designed for piano pedals Before using the compound make sure to read the instructions for proper usage NOTICE Do not use paint thinners solvents cleaning fluids or chemical impregnated wiping cloths Otherwise the pedal may become discolored or degraded Tuning Unlike an acoustic piano this instrument does not need to...

Page 37: ...lay Make sure that the PART ON OFF RIGHT1 button is also turned on If it is turned off the right hand part will not sound 2 Press one of the VOICE buttons to select a Voice category and call up the Voice Selection display The preset Voices are categorized and contained in appropriate folders Voice category selection buttons on the panel correspond to the categories of the preset Voices For example...

Page 38: ...buttons or press the same VOICE button again 4 Play the keyboard NOTE The Voice type and its defining characteristics are indicated above the Preset Voice name For details on the characteristics see page 41 and the Reference Manual To listen to the demo phrases for each Voice Press the 8 DEMO button to start the Demo for the selected Voice To stop the demo press the 8 button again ...

Page 39: ... desired Voice 5 Play the keyboard The Voice selected for RIGHT 1 page 37 and the Voice selected here are sounded simultaneously in a layer NOTE You can save the settings to Registration Memory See page 83 Quickly selecting Voices for the Right 1 and 2 parts You can quickly select the Right 1 and 2 part Voices just from the Voice category selection buttons Press and hold one Voice button then pres...

Page 40: ...dently to each of the three keyboard parts Right 1 Right 2 and Left You can combine these parts by using the PART ON OFF buttons to create a rich ensemble sound When the LEFT part is off the RIGHT 1 and 2 Voices can be played over the entire keyboard When the LEFT part is on keys lower than F 2 the Split Point are set for playing the LEFT part and those higher than the Split Point are set for play...

Page 41: ... finger noises for the Guitar Voice will be produced You can also use the pedals to add articulations to the SA Voices page 42 For details on how to best play each SA Voice call up the information window pressing the 7 INFO button in the Voice Selection display Organ Flute Voice page 45 Percussion Drum Voices When one of the Voices is selected from this button you can play various drums and percus...

Page 42: ...ONSOLE TAB L R TUNE 1 3 TRANSPOSE Tuning By default the Tuning of the entire instrument is set to 440 0 Hz and the Scale Tuning is set to equal temperament You can change these settings from FUNCTION A MASTER TUNE SCALE TUNE You can also adjust the Tuning parameter for each part keyboard parts Style parts and Song parts on the TUNE page of the Mixing Console display page 86 For details refer to th...

Page 43: ...lti processor effect system which can add extraordinary depth and expression to your sound 1 Call up the operation display DIRECT ACCESS EXIT 2 Select the desired part for which you want to add effects 3 Press the VOICE EFFECT button to call up the VOICE EFFECT display Applying Voice Effects 1 2 3 4 ...

Page 44: ... types such as chorus and delay are included The DSP switch is used to turn the DSP Digital Signal Processor effect on or off for the currently selected keyboard part The DSP Variation switch is used to change between variations of the DSP effect You could use this while you play for example to change the rotating speed slow fast of the rotary speaker effect 5UD DSP VARIATION 4 I HARMONY ECHO When...

Page 45: ... Creating Original Organ Flutes Voices 1 2 5 4 3 What is Footage The term footage is a reference to the sound generation of traditional pipe organs in which the sound is produced by pipes of different lengths in feet 1 A B ORGAN TYPE Specifies the type of organ tone generation to be simulated Sine or Vintage 2 C ROTARY SP SPEED Alternately switches between the slow and fast rotary speaker speeds w...

Page 46: ...to specify the touch sensitivity HARD 2 Requires strong playing to produce high volume Best for players with a heavy touch HARD 1 Requires moderately strong playing for high volume MEDIUM Standard touch response SOFT 1 Produces high volume with moderate playing strength SOFT 2 Produces relatively high volume even with light playing strength Best for players with a light touch NOTICE The setting wi...

Page 47: ...he entire instrument FUNCTION A MASTER TUNE SCALETUNE TAB L R MASTER TUNE Scale Tuning FUNCTION A MASTER TUNE SCALE TUNE TAB L R SCALE TUNE Changing the part assignment of the TRANSPOSE buttons FUNCTION D CONTROLLER TAB L R KEYBOARD PANEL A B 2 TRANSPOSE ASSIGN Editing Voices Voice Set Voice Selection display 6 VOICE SET Disabling automatic selection of Voice Sets effects etc FUNCTION E REGIST SEQ...

Page 48: ...y yourself Rhythm is one of the most important parts of a Style Try to play the melody along with just the rhythm You can sound different rhythms for each Style Keep in mind however that not all Styles contain rhythm channels 1 Press one of the STYLE category selection buttons to call up the Style Selection display 2 Press one of the A J buttons to select the desired Style Pressing one of the 1 4 ...

Page 49: ... the keyboard page 40 becomes the Chord section and chords played in this section are automatically detected and used as a basis for fully automatic accompaniment with the selected Style 3 Press the SYNC START button to enable synchronized start 4 As soon as you play a chord with your left hand the selected Style starts Try playing chords with your left hand and play melody with your right hand 5 ...

Page 50: ...ces of certain songs and in certain genres Keep in mind however that the Styles may not necessarily be appropriate or even harmonically correct for all songs and for all chord playing In some cases for example playing a simple major triad for a country song may result in a jazzy seventh chord or playing an on bass chord may result in inappropriate or unexpected accompaniment Pianist P These specia...

Page 51: ...pecifying the chords Depending on the song arrangement AI Full Keyboard may not always produce appropriate accompaniment For other types refer to the Reference Manual on the website C D E F G A B Cm Dm Em Fm Gm Am Bm C D E F G A B 7 7 7 7 7 7 7 GM AM BM CM DM EM FM 7 7 7 7 7 7 7 Cm Dm Em Fm Gm Am Bm 7 7 7 7 7 7 7 For users who are unfamiliar with chords this handy chart features common chords for ...

Page 52: ... the Intro finishes playing the Style playback automatically shifts to the Main section ENDING rit I III buttons The instrument features three different Ending sections to add an ending before stopping Style playback When you press one of the ENDING I III buttons while Style is playing back the Style will automatically stop after the ending is played You can have the ending gradually slow down rit...

Page 53: ...reaks in the rhythm of the accompaniment Press the BREAK button during Style playback When the one measure Break pattern finishes playing the Style playback automatically shifts to the Main section Adjusting the Tempo TEMPO buttons By pressing the TEMPO or button you can decrease increase the tempo over a range of 5 500 While the TEMPO pop up is shown on the display you can also use the DATA ENTRY...

Page 54: ...tart playing the Style 3 As soon as you play a chord with your left hand the selected Style starts Each Style has four One Touch Setting setups Press other ONE TOUCH SETTING 1 4 button to try out other setups Appropriate Panel Settings for the Selected Style One Touch Setting NOTE You can also create your own One Touch Setting setups For details refer to the Reference Manual on the website NOTE Yo...

Page 55: ...o select the beat 2 2 Play the rhythm you have in mind on the Drum or Piano section for one or two measures along with the metronome The note on timing at which you play is analyzed for a few seconds then playback of the most recommended Style starts In addition the candidates of the other recommended Styles are listed in the display Example 1 Play the following rhythm on the Piano section Bossa N...

Page 56: ...ain 3 Press the EXIT button to close the CHANNEL ON OFF display Turning Style Parts On Off and Changing Voices Style channels RHY1 2 Rhythm 1 2 These are the basic parts of the Style containing the drum and percussion rhythm patterns BASS The bass part uses various appropriate instrument sounds to match the Style CHD1 2 Chord 1 2 These are rhythmic chord backing parts commonly used with piano or g...

Page 57: ... POINT CHORD FINGERING TAB L R CHORD FINGERING Style playback related settings FUNCTION C STYLE SETTING SPLIT POINT CHORD FINGERING TAB L R STYLE SETTING Split Point settings FUNCTION C STYLE SETTING SPLIT POINT CHORD FINGERING TAB L R SPLIT POINT Calling up panel settings to match the Style Repertoire Style Selection display A J 5 REPERTOIRE Memorizing an original One Touch Setting MEMORY ONE TOU...

Page 58: ...e USB flash memory device connect the USB flash memory device containing MIDI Song data to the USB TO DEVICE terminal beforehand 3 If you select the PRESET tab in step 2 select a Song category by using the A J buttons The preset Songs are categorized and contained in appropriate folders 4 Select the desired Song by using the A J buttons You can also select a Song by using the DATA ENTRY dial then ...

Page 59: ...ion hold down the SONG STOP button and press the PLAY PAUSE button once again Pause Press the PLAY PAUSE button Pressing it again resumes Song playback from the current position Queuing the next Song for playback While a Song is playing back you can queue up the next Song for playback This is convenient for chaining it to the next Song smoothly during stage performance Select the Song you want pla...

Page 60: ...ictions for protected Songs Commercially available Song data may be copy protected to prevent illegal copying or accidental erasure They are marked by the indications at the upper left side of the file names The indications and relevant restrictions are detailed below Prot 1 Indicates Preset Songs saved to the User tab display and Disklavier Piano Soft Songs These cannot be copied moved saved to U...

Page 61: ...website When the selected Song contains lyric data you can view it on the instrument s display during playback 1 Select a Song steps 1 4 on page 58 2 Press the LYRICS button to call up the Lyrics display When the Song data contains lyrics data the lyrics are shown on the display You can look through the entire lyrics by using the TAB L R buttons when the Song playback is stopped As Song playback s...

Page 62: ...lamps indicate the notes you should play when you should play them and how long you should hold them down You can also practice at your own pace since the accompaniment waits for you to play the notes correctly Here mute the right hand part and try practicing the part using the guide lamps 1 Select a Song and call up the Score display page 61 2 Turn the GUIDE button on 3 Press the TRACK 1 R button...

Page 63: ...int A of the range to be repeated Press the REPEAT button again at the ending point B After an automatic lead in to help guide you into the phrase the range from Point A to Point B is played back repeatedly Other guide functions There are additional functions in the Guide features for practicing the timing of playing the keys Any Key for Karaoke Karao key or for playing at your own tempo Your Temp...

Page 64: ... 3 Press the FF button to advance to the Point B location 4 Press the REPEAT button again to specify Point B Advanced Features Refer to the Reference Manual on the website Chapter 4 Editing Music Notation settings SCORE 1 8 buttons Using the Auto Accompaniment features with Song playback ACMP ON OFF STYLE CONTROL SYNC START SONG STOP PLAY PAUSE STYLE CONTROL START STOP Song playback related parame...

Page 65: ... stereo WAV format of normal CD quality resolution 44 1kHz 16bit it can be transmitted to and played on portable music players by using a computer This simple method lets you start recording immediately without specifying a part you want to record to 1 Press the SONG REC button and the STOP button simultaneously A blank Song for recording is automatically set 2 Press the SONG REC button 3 Start re...

Page 66: ...EXIT button 5 Press the SONG PLAY PAUSE button to play back the recorded performance 6 Save the recorded performance as a file Press the SONG SELECT button to call up the Song Selection display The recorded performance will be saved as a file in the Song Selection display For details see next section NOTICE The recorded Song will be lost if you change to another Song or you turn the power off with...

Page 67: ...election display press the TAB L R buttons to select USER or USB as save destination 2 Press the 6 SAVE button to call up the file naming display 3 Enter the file name page 28 Even if you skip this step you can rename the file at any time after saving page 70 4 Press the 8 OK button to save the file The saved file will be automatically located at the appropriate position among the files in alphabe...

Page 68: ...nnels to REC then assign the desired part to the channel by using the C D buttons If you want to record the Right 1 part to channel 1 for example press the 1 button while holding down the REC button to set the channel 1 to REC Then use the C D buttons to select RIGHT 1 3 Start recording Recording begins automatically as soon as you play a note on the keyboard or start Style playback 4 Press the SO...

Page 69: ...aking it easier to find and select your original data 1 In the file selection display select the appropriate tab USER or USB to which you want to save the data by using the TAB L R buttons If you want to create a new folder within the existing folder also select the folder here 2 Press the 7 FOLDER button to call up the naming display for a new folder 3 Input the name of the new folder see page 28...

Page 70: ...l order Copying or Moving Files This operation lets you copy or cut a file and paste it to another location folder You can also copy a folder but not move it by using the same procedure 1 Call up the display containing the file folder you want to copy 2 Press the 3 COPY button to copy or 2 CUT to move The pop up window for the Copy Cut operation appears at the bottom of the display NOTE Files in t...

Page 71: ...phabetical order Deleting Files Folders This operation lets you delete a file folder 1 Call up the display containing the file folder you want to delete 2 Press the 5 DELETE button The pop up window for the Delete operation appears at the bottom of the display 3 Press one of the A J buttons corresponding to the desired file folder To cancel the selection press the same A J button again Press the 6...

Page 72: ...ting Editing Songs Song Creator FUNCTION F DIGITAL REC MENU A SONG CREATOR Recording melodies Step Recording TAB L R 1 16 Recording chords Step Recording TAB L R CHORD Re recording a specific section Punch In Out TAB L R REC MODE Editing channel events TAB L R CHANNEL Editing chord events notes System Exclusive events and Lyrics TAB L R CHORD 1 16 SYS EX or LYRICS ...

Page 73: ... played back 1 Connect the USB flash memory device containing the audio files to play back to the USB TO DEVICE terminal 2 Press the AUDIO button to call up the USB AUDIO PLAYER display 3 Press the H FILE SELECT button to display the audio files saved to the connected USB flash memory 4 Press one of the A J buttons corresponding to the file you want to listen to Playing Back Audio Files NOTE The i...

Page 74: ...e volume by pressing the 8 button Playing back audio files repeatedly Press the D REPEAT MODE button then set the REPEAT MODE of the audio file by using the D button OFF Plays through the selected file then stops SINGLE Plays through the selected file repeatedly ALL Continues playback through all the files in the folder containing the current file repeatedly RANDOM Randomly and repeatedly plays ba...

Page 75: ... amount of recording time 80 minutes per recording though this may differ depending on the capacity of the particular USB flash memory 1 Connect the USB flash memory to the USB TO DEVICE terminal 2 Set the desired Voice etc which you want to use for your performance For information setting the Voice see page 37 for setting the Style see page 48 for using the AUX IN jack see page 90 NOTE Specifying...

Page 76: ...and a message indicating the file name is displayed NOTE The USB flash memory of USB1 is selected as the recording destination when multiple USB flash memory devices are connected You can confirm the contents of USB1 in the file selection display called up by pressing the H FILE SELECT button on the USB AUDIO PLAYER display NOTICE Never attempt to disconnect the USB flash memory or turn the power ...

Page 77: ...in order to use the Music Finder function more conveniently and effectively we recommend that you download the Records panel settings from the following website then load them to this instrument 1 Download the Music Finder panel settings file from the website to the USB flash memory http download yamaha com 2 Connect the USB flash memory which contains the panel settings file to the USB TO DEVICE ...

Page 78: ...records currently in the instrument and replace them with the records of the selected file Press the G YES button at the confirmation prompt 8 Press the F YES button in the message display indicating completion of the replace operation to call up the MUSIC FINDER display By checking the number of records in the MUSIC FINDER display you can confirm the record has been replaced 7 The number of recor...

Page 79: ...up from the MUSIC FINDER display is called a Record There are three following different records Panel Settings Setting data such as Styles Voices etc Song SONG Song data which is registered to the Music Finder from the Song Selection display page 58 Audio AUDIO Audio data which is registered to the Music Finder from the USB Audio Selection display page 73 ...

Page 80: ...rds by MUSIC STYLE BEAT and TEMPO Press the G SORT ORDER button to change the order of the records ascending or descending When sorting records by MUSIC you can use the 1 button to skip up or down through the songs alphabetically When sorting records by STYLE you can use the 4 5 button to skip up or down through the Styles alphabetically Simultaneously press the and buttons to move the cursor to t...

Page 81: ...ection display After selecting the desired Style press the EXIT button to return back to the Search display To clear the entered Style press the H CLEAR button D BEAT Specifies the time signature for the search All beat settings are included in the search if you select ANY E SEARCH AREA Selects a specific location the tab of the upper part of the MUSIC FINDER display for searching 1UD ALL CLEAR Cl...

Page 82: ...K USB A SONG B AUDIO C STYLE A J 6 ADD TO MF 8 OK Recalling the registered data from Music Finder MUSIC FINDER 2 3 To play back the recalled Song data MUSIC FINDER 2 3 SONG CONTROL START PAUSE To play back the recalled audio data MUSIC FINDER 2 3 AUDIO 3 PLAY PAUSE MUSIC FINDER 2 3 J AUDIO Creating a set of favorite Records MUSIC FINDER TAB L R ALL H ADD TO FAVORITE Editing Records MUSIC FINDER 8 ...

Page 83: ... can be registered with the Registration Memory function 2 Press the MEMORY button in the REGISTRATION MEMORY section The display for selecting the items to be registered appears 3 Select the items you want to register Select the desired item by using the 2 7 buttons then enter or remove the checkmark by using the 8 MARK ON 8 MARK OFF buttons To cancel the operation press the I CANCEL button 4 Pre...

Page 84: ... For instructions on saving refer to page 67 About the lamp status Red Data registered and currently selected Green Data registered but not currently selected Off No data registered NOTE The panel setups registered in the numbered buttons are preserved even when you turn off the power If you want to delete all the eight current panel setups turn the power on while holding the B6 key right most B k...

Page 85: ...he currently selected Registration Memory Bank by pressing the DIRECT ACCESS button and one of the REGISTRATION MEMORY 1 8 buttons in sequence NOTE When recalling the setups including Song Style Audio file selection from a USB flash memory make sure that the appropriate USB flash memory including the registered Song Style is connected to the USB TO DEVICE terminal Advanced Features Refer to the Re...

Page 86: ...play then set the values on each part display to create the desired sound The operation to set the value is the same as in step 2 To select the target parts Press the MIXING CONSOLE button repeatedly to call up the display for the following parts in sequence PANEL PART Use this display when you want to adjust the balance between the entire Song part entire Style part Right 1 part Right 2 part and ...

Page 87: ...ration Memory page 83 To save the STYLE PART display settings Save them as Style data 1 Call up the operation display FUNCTION F DIGITAL REC MENU B STYLE CREATOR 2 Press the EXIT button to close the RECORD display 3 Press the I SAVE button to call up the Style Selection display for saving your data then save it page 67 To save the SONG CH 1 8 9 16 display settings First register the edited setting...

Page 88: ... Adjusting Panning Volume MIXING CONSOLE TAB L R VOL VOICE Changing the Voice MIXING CONSOLE TAB L R VOL VOICE C H 1 8 VOICE buttons A J Editing FILTER parameters MIXING CONSOLE TAB L R FILTER Editing TUNE parameters MIXING CONSOLE TAB L R TUNE Changing an Effect type MIXING CONSOLE TAB L R EFFECT F TYPE Editing EQ parameters MIXING CONSOLE TAB L R EQ ...

Page 89: ...age to the devices first turn on the power to the instrument then to the external device When turning off the power first turn off the power to the external device then to the instrument Since this instrument s power may automatically be turned off due to the Auto Power Off function page 16 turn off the power to the external device or disable Auto Power Off when you do not intend to operate the in...

Page 90: ...pecial setup is necessary Example 2 Controlling Song Start Stop by footswitch Connect a footswitch FC4 or FC5 to the AUX PEDAL jack To assign the function to the connected pedal select SONG PLAY PAUSE in the operation display FUNCTION D CONTROLLER TAB L R PEDAL NOTICE To avoid the device damage first turn on the power to the external device then to the instrument When turning off the power first t...

Page 91: ...connect two USB flash memory devices at the same time to a terminal you should use a USB hub device The USB hub must be self powered with its own power source and the power must be on Only one USB hub can be used If an error message appears while using the USB hub disconnect the hub from the instrument then turn on the power of the instrument and re connect the USB hub When connecting a USB cable ...

Page 92: ...B flash memory to be formatted from the device list The indications USB 1 and USB 2 will be displayed depending on the number of the connected devices 4 Press the H FORMAT button to execute the Format operation NOTICE The format operation deletes any previously existing data Make sure that the USB flash memory you are formatting does not contain important data Proceed with caution especially when ...

Page 93: ... For details refer to iPhone iPad Connection Manual on the website page 10 For information about available application tools access the following page http www yamaha com kbdapps Connecting to a Computer NOTICE Use an AB type USB cable of less than 3 meters USB 3 0 cables cannot be used NOTE The instrument will begin transmission a short time after the USB connection is made When using a USB cable...

Page 94: ...djust the position of the holders to the width of the iPad and set the iPad on the holders Holders NOTICE To prevent the iPad from falling note the following points Never submit the instrument or iPad to strong shocks Doing so may cause the iPad to fall from the music rest even though the iPad is set firmly Make sure that the music rest is set firmly Before moving the instrument make sure to remov...

Page 95: ...for example in the Model Name area to search the manuals http www yamaha co jp manual MIDI IN Receives MIDI messages from another MIDI device MIDI OUT Transmits MIDI messages generated by the instrument to another MIDI device MIDI THRU Simply relays the MIDI messages received at MIDI IN For detailed information about the instrument s MIDI settings refer to the Reference Manual on the website Conne...

Page 96: ...ration display FUNCTION J UTILITY 2 Use the TAB L R buttons to call up desired page CONFIG 1 General settings such as Fade in out time Metronome sound Tap Tempo sound etc CONFIG 2 General settings such as speaker output Intelligent Acoustic Control IAC pop up display time etc MEDIA Settings related to a connected USB flash memory such as formatting page 92 and confirmation of memory size OWNER Set...

Page 97: ...Settings 3 If necessary use the A B buttons to select the desired parameter 4 Change the settings by using the 1 8 buttons or execute the operation by using the A J buttons For details of the Utility settings refer to the Reference Manual on the website ...

Page 98: ...hat they will not hide the connectors on the bottom of A Remove all parts from the box Confirm that all parts shown in the illustration are provided 1 Attach C to D and E 1 Untie and straighten out the bundled pedal cord Do not discard the vinyl tie You will need it later in step 5 2 Attach D and E to C by tightening four long screws 6 x 20 mm Preparation Before Assembling Have a Phillips head scr...

Page 99: ...ly as seen from the front 2 Secure A by tightening six short screws 6 x 16 mm from the front 5 Connect the pedal cord and power cord 1 Insert the plug of the pedal cord into the pedal connector 2 Attach the cord holders to the rear panel as shown then clip the cord into the holders 3 Use a vinyl tie to take up any slack in the pedal cord 4 Insert the plug of the power cord into the power connector...

Page 100: ...o an appropriate location Does the instrument make a rattling noise when you shake it Tighten all screws Does the pedal box rattle or give way when you step on the pedals Turn the adjuster so that it is set firmly against the floor Are the pedal and power cords inserted securely into the sockets Check the connection If the unit creaks or is otherwise unsteady when you play on the keyboard refer to...

Page 101: ...E dial All keyboard parts are set to off Use the PART ON OFF RIGHT 1 RIGHT 2 LEFT button to turn it on The volume of the individual parts may be set too low Raise the volume in the BALANCE display page 57 Make sure the desired channel is set to ON pages 56 62 Headphones are connected disabling the speaker output Unplug the headphones Make sure that the Speaker parameter is set to ON in the Utility...

Page 102: ... the keyboard Styles in a USB storage device cannot be selected If the size of the Style data is large about 120 KB or greater the Style cannot be selected because the data is too large to be handled by the instrument Song Songs cannot be selected This may be because the language settings have been changed Set the appropriate language for the Song file name page 18 If the size of the Song data is ...

Page 103: ...e instrument The compatible formats is only WAV The DRM protected files cannot be played back Recorded file is played back at a different volume compared to when it was recorded The audio playback volume has been changed Setting the volume value to 100 plays back the file at the same volume as when it was recorded page 75 Mixing Console The sound seems strange or different than expected when chang...

Page 104: ...STER VOLUME control NO 15 NO 3 Standby On switch Opening display 14 NO 4 DEMO DEMO display 20 NO 5 METRONOME ON OFF NO 35 NO 6 TRANSPOSE TRANSPOSE pop up 42 NO 7 TAP TEMPO NO 53 NO TEMPO TEMPO pop up 53 NO 8 STYLE CONTROL POP ROCK PIANIST Style Selection display 48 NO ACMP ON OFF NO 49 NO AUTO FILL IN NO 53 NO INTRO I III NO 52 NO MAIN VARIATION A D NO 53 NO BREAK NO 53 NO ENDING rit I III NO 52 N...

Page 105: ...6 47 YES REGIST SEQUENCE FREEZE VOICE SET REGISTRATION SEQUENCE 85 NO FREEZE 47 YES VOICE SET 85 YES DIGITAL REC MENU SONG CREATOR 64 87 YES STYLE CREATOR 57 87 YES MIDI MIDI template selection display 95 YES UTILITY CONFIG 1 96 YES CONFIG 2 96 YES MEDIA 96 YES OWNER 18 30 96 YES SYSTEM RESET 96 YES PART ON OFF RIGHT1 RIGHT2 LEFT NO 40 NO AUDIO USB AUDIO PLAYER display 73 YES SONG CONTROL SONG SEL...

Page 106: ...GIST BANK REGISTRATION BANK pop up 84 NO MEMORY REGISTRATION MEMORY CONTENTS display 83 NO 1 8 NO 83 NO B VOICE CONTROL PIANO PERC DRUM KIT Voice Selection display 37 NO ORGAN FLUTES Organ Flutes VOICE SET display FOOTAGE 45 NO VOLUME ATTACK 46 YES EFFECT EQ 46 YES C ONE TOUCH SETTING 1 4 NO 54 YES OTS LINK NO 54 NO D VOICE EFFECT VOICE EFFECT display 43 YES No Button Control Display Page Referenc...

Page 107: ...2 Pedal Number of Pedals 3 Half Pedal Yes Functions Volume Sustain Sostenuto Soft Glide Song Play Pause Style Start Stop etc Display Type Monochrome QVGA LCD Size 320 x 240 dots 4 6 inch Contrast Yes Score Display Function Yes Lyrics Display Function Yes Language English Japanese German French Spanish Italian Panel Language English Cabinet Key Cover Sliding Music Rest Yes Voices Tone Generation To...

Page 108: ...r Fingered Fingered On Bass Multi Finger AI Fingered Full Keyboard AI Full Keyboard Style Control INTRO x 3 MAIN VARIATION x 4 FILL x 4 BREAK ENDING x 3 Custom Style Creator Yes Other Features Music Finder Max 1200 Records One Touch Setting OTS 4 for each Style Style Recommender Yes Songs Preset Number of Preset Songs 65 Recording Number of Tracks 16 Data Capacity 300 KB Recording Function Yes Com...

Page 109: ...e Type 9 Miscellaneous PIANO ROOM Yes Storage and Connectivity Storage Internal Memory about 2 8 MB External Drives Optional USB Flash Memory Connectivity Headphones x 2 MIDI In Out Thru AUX IN Stereo mini AUX OUT L L R R AUX Pedal Yes USB TO DEVICE x 1 USB TO HOST Yes Sound system Amplifiers 25W x 2 Speakers 16cm x 2 Acoustic Optimizer Yes Accessories Owner s Manual Data List Music Book 50 greats...

Page 110: ...ast 18 Copying 70 Cord holders 98 CUT 70 D Damper pedal 34 Damper Resonance 33 DATA ENTRY 21 Data List 10 Deleting 71 DEMO 12 20 dial 21 Direct Access 24 Drum Kit 12 41 Drum Voices 41 DSP 44 E ECHO 44 Editing Voices 47 EFFECT 87 ENDING 52 ENTER 21 Entering Characters 28 ENVIRONMENT 32 EQ 87 EXIT 21 F Factory programmed Settings 29 Fast Forward 60 File 69 File formats that can be played back Audio ...

Page 111: ...ng 70 Multi Track Recording 68 MUSIC 81 Music Finder 77 Music Notation 61 Music Rest 17 94 O OFF 74 One Touch Setting 54 Organ Flutes Voices 45 OWNER 96 Owner Name 19 P Panel Button Chart 104 PANEL PART 86 PART ON OFF 12 40 Pause 59 Pedal 34 Pedal Box 98 Pedal Cleaning 36 Percussion 41 Performance Assistant Technology 64 Phrase Marks 60 Pianist 50 Piano Lock 33 Piano Reset 31 Piano Room 31 Pitch 4...

Page 112: ...e channels 56 Style Characteristics 50 Style file compatibility 50 Style name 25 STYLE PART 86 Style Recommender 55 Super Articulation Voices 42 SYNC START 52 SYNC STOP 52 Synchro Start 59 System Exclusive events 72 SYSTEM RESET 96 T TAB 22 TAP TEMPO 12 53 Target sound for recording Audio 75 TEMPO 12 53 Tempo 35 53 TEMPO FROM 81 TEMPO TO 81 Touch 32 Touch Sensitivity 46 Transporting 36 TRANSPOSE 1...

Page 113: ...CVP 601 Owner s Manual 113 ...

Page 114: ...aker or fuse circuits or install AC line filter s In the case of radio or TV interference relocate reorient the antenna If the antenna lead in is 300 ohm ribbon lead change the lead in to co axial type cable If these corrective measures do not produce satisfactory results please contact the local retailer authorized to distribute this type of product If you can not locate the appropriate retailer ...

Page 115: ...umaine qui pourraient advenir lors d un traitement inapproprié des déchets Pour plus d informations à propos de la collecte et du recyclage des déchets d équipements électriques et électroniques veuillez contacter votre municipalité votre service de traitement des déchets ou le point de vente où vous avez acheté les produits Pour les professionnels dans l Union Européenne Si vous souhaitez vous dé...

Page 116: ...REECE Philippos Nakas S A The Music House 147 Skiathou Street 112 55 Athens Greece Tel 01 228 2160 SWEDEN Yamaha Music Europe GmbH Germany filial Scandinavia J A Wettergrens Gata 1 Box 30053 S 400 43 Göteborg Sweden Tel 031 89 34 00 DENMARK Yamaha Music Europe GmbH Tyskland filial Denmark Generatorvej 6A DK 2730 Herlev Denmark Tel 44 92 49 00 FINLAND F Musiikki Oy Kluuvikatu 6 P O Box 260 SF 00101...

Page 117: ...http www yamaha com Yamaha Downloads http download yamaha com Yamaha Manual Library http www yamaha co jp manual U R G Digital Musical Instruments Division 2012 Yamaha Corporation 211MWZC 01B0 Printed in Indonesia ZA83660 ...

Reviews: