77
CLP-685, CLP-675, CLP-645, CLP-635, CLP-665GP Owner’s Manual
Connections
Displaying the Wireless LAN Networks and
connecting to a Network
Make sure to connect the USB wireless LAN adaptor (sold separately) to the
USB [TO DEVICE] terminal, otherwise the displays for setup below will not be
shown.
1.
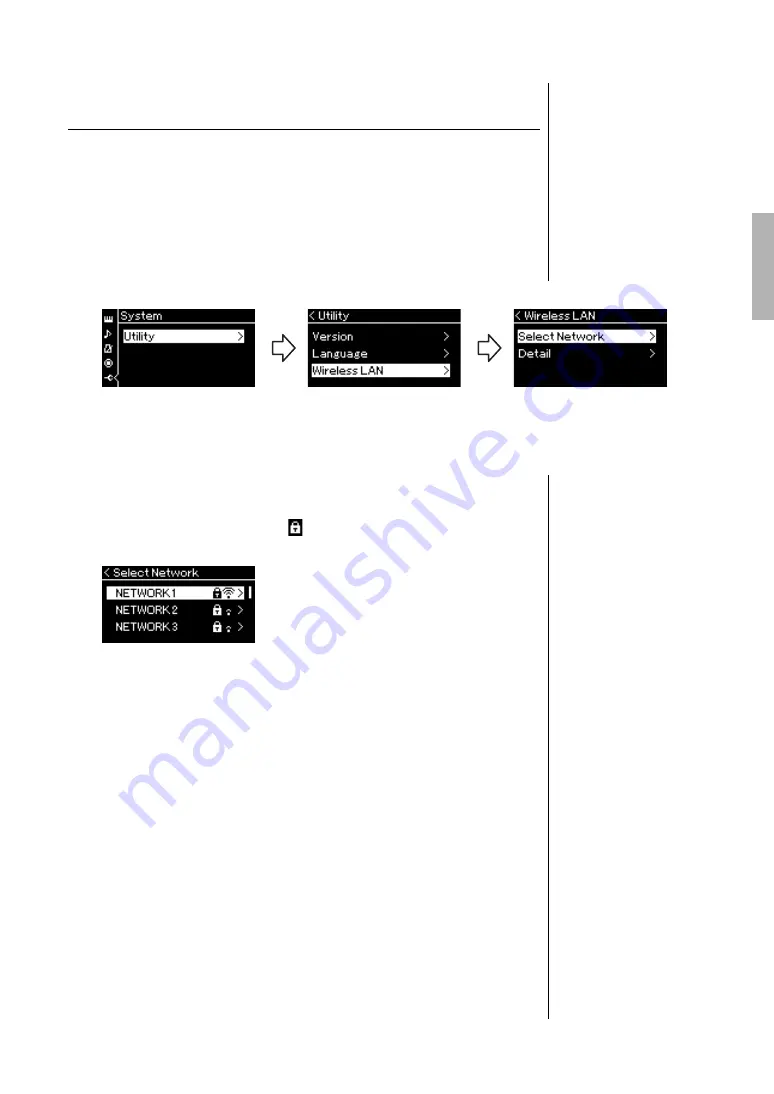
Press the [FUNCTION] button repeatedly to call up the
“System” menu display, then select the highlighted item in
each display as illustrated below.
2.
Press the [>] button to call up the network list.
For a network with a lock icon
, you need to enter the proper
password.
3.
Connect the instrument to the Network.
3-1.
Select the desired network, then press the [>] button.
The name of the selected network will be fully shown in the display,
letting you confirm this is the network you want to use.
3-2.
Press the [>] button.
• For a network without a lock icon:
Connecting starts.
• For a network with a lock icon:
You need to enter the proper password. For details on how to enter
characters, refer to the “Renaming files” on page 68. After entering the
password, press the [FUNCTION] button to finalize the setting. This
operation starts connecting automatically.
When connection is done successfully, “Completed” is shown in the
display, and returns to the “Select Network” display.
4.
Connect the iPhone/iPad to the access point.
Refer to the “iPhone/iPad Connection Manual” on the website (page 9).
“System” menu display
1-1.
Use the [
u
]/[
d
] buttons
to select “Utility.”
1-2.
Press the [>] button to
call up the next display.
1-3.
Use the [
u
]/[
d
] buttons
to select “Wireless LAN.”
1-4.
Press the [>] button to
call up the next display.
1-5.
Use the [
u
]/[
d
] buttons
to select “Select
Network.”
Utility display
Wireless LAN display
NOTE
If no signal from the access
point is received, the access
point cannot be listed. Also,
closed access points cannot
be listed.
Summary of Contents for CLAVINOVA CLP- 685
Page 133: ......


