169
Using the internal har
d disk/e
xternal stor
age de
vices
11
Operation section
6
Move the cursor to the TO DRIVE parame-
ter, and press the [ENTER] key.
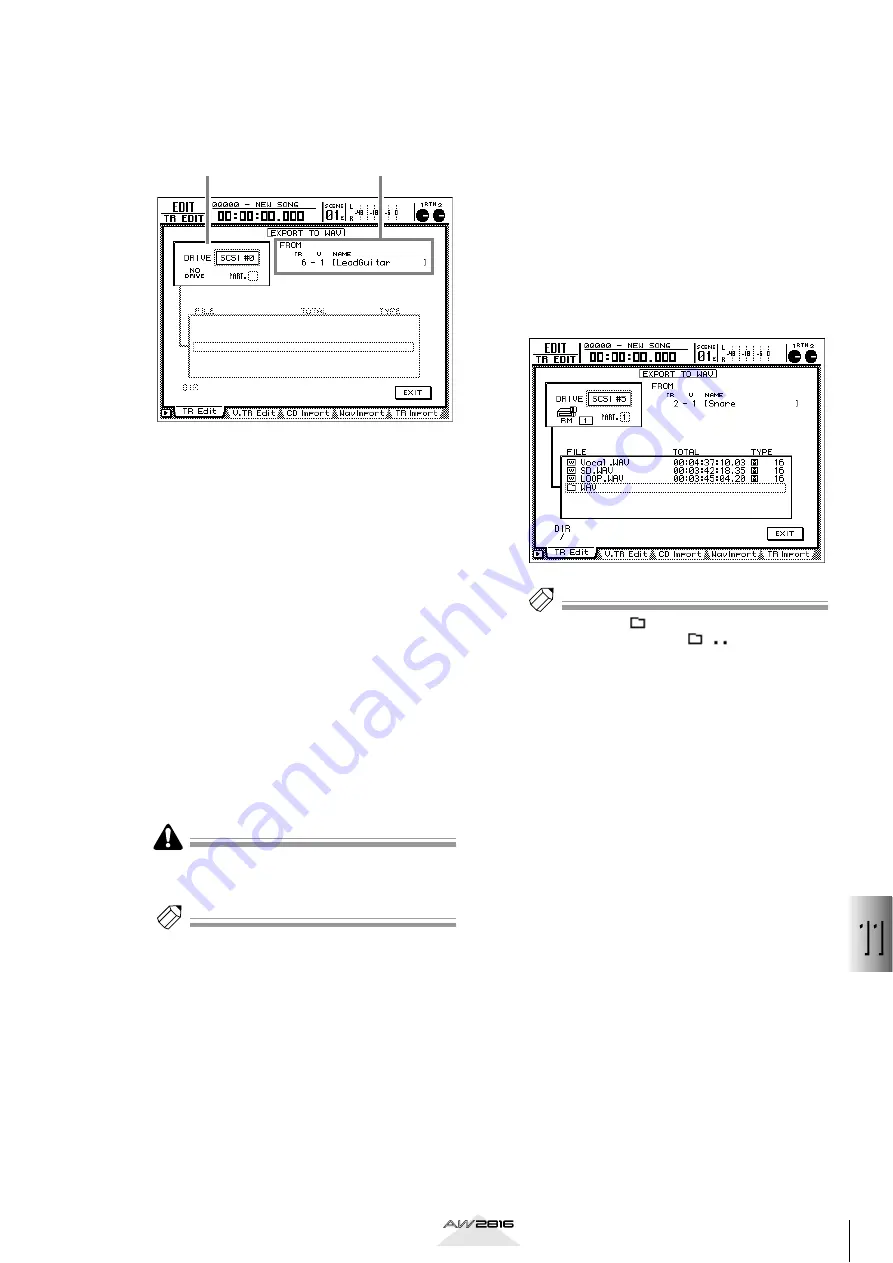
The following display will appear.
1
DRIVE
Select the internal CD-RW drive or an external
SCSI device.
B
FROM
If you selected the TRACK or PART menu in step
4, the TR area will indicate the track number, the
V area will indicate the virtual track number, and
the NAME area will indicate the track name. If
you selected the REGION menu, the region
name will be displayed.
If you selected the PART or REGION in step 4,
the selected length will be displayed below.
7
Move the cursor to the DRIVE area, turn
the [DATA/JOG] dial to select the writing
destination drive, and press the [ENTER]
key.
Select “ATAPI” if you want to select the internal
CD-RW drive, or select a SCSI ID if you want to
select an external SCSI device.
If all tracks are selected as the writing source, an
error message will be displayed if you attempt to
select the CD-RW drive as the writing destination.
Tip!
If you select the CD-RW drive as the writing destina-
tion, you may perform a data writing test before the
data is actually written, or compare the written data
with the source data to verify that it was written cor-
rectly. These settings are made in the CD BACKUP/
WAV-EXP MODE area of the UTILITY screen/Prefer.3
page. For details refer to page 268.
8
If necessary, insert media into the writing
destination drive.
If you are writing to the CD-RW drive, press the
[SHIFT] key + [F2] key to open the tray of the
CD-RW drive, and insert the CD-R/RW media.
Press the [SHIFT] key + [F1] key, and the tray of
the CD-RW drive will close.
If you are writing to an MO drive, insert media
that has been formatted in FAT16 format.
If you selected an external hard disk or MO drive
as the writing destination, the following display
will appear if that drive already contains one or
more WAV files.
Tip!
In the above list, “
xxx” indicates a lower directory
(xxx= directory name), and “
” indicates the
next higher directory. You can move between directo-
ries by moving the cursor to these symbols and press-
ing the [ENTER] key.
9
Move the cursor to the EXIT button, and
press the [ENTER] key.
The writing destination drive will be confirmed,
and you will return to the screen for selecting the
various parameters of the EXPORT command.
10
If you want to assign a name to the WAV
file, move the cursor to the TO FILE button
and press the [ENTER] key.
A popup window will appear, allowing you to
input a name for the WAV file. Input the file-
name, move the cursor to the OK button, and
press the [ENTER] key. (For details on inputting
characters, refer to page 37.)
1
2


