background image


Important manual information


EMU25105


To the owner


Thank you for choosing a Yamaha outboard
motor. This Owner’s Manual contains infor-
mation needed for proper operation, mainte-
nance and care. A thorough understanding
of these simple instructions will help you ob-
tain maximum enjoyment from your new
Yamaha. If you have any question about the
operation or maintenance of your outboard
motor, please consult a Yamaha dealer.
In this Owner’s Manual particularly important
information is distinguished in the following
ways.

: This is the safety alert symbol. It is

used to alert you to potential personal injury
hazards. Obey all safety messages that fol-
low this symbol to avoid possible injury or
death.

WARNING


EWM00781 


A WARNING indicates a hazardous situa-
tion which, if not avoided, could result in


death or serious injury.

NOTICE


ECM00701 


A NOTICE indicates special precautions
that must be taken to avoid damage to the


outboard motor or other property.

TIP:


A TIP provides key information to make pro-
cedures easier or clearer.

Yamaha continually seeks advancements in
product design and quality. Therefore, while
this manual contains the most current prod-
uct information available at the time of print-
ing, there may be minor discrepancies
between your machine and this manual. If

there is any question concerning this manu-
al, please consult your Yamaha dealer.
To ensure long product life, Yamaha recom-
mends that you use the product and perform
the specified periodic inspections and main-
tenance by correctly following the instruc-
tions in the owner’s manual. Any damage
resulting from neglect of these instructions is
not covered by warranty.
Some countries have laws or regulations re-
stricting users from taking the product out of
the country where it was purchased, and it
may be impossible to register the product in
the destination country. Additionally, the
warranty may not apply in certain regions.
When planning to take the product to another
country, consult the dealer where the prod-
uct was purchased for further information.
If the product was purchased used, please
consult your closest dealer for customer re-
registration, and to be eligible for the speci-
fied services.

TIP:


The 150FETO, 175DETO, 200FETO,
L200FETO and the standard accessories
are used as a base for the explanations and
illustrations in this manual. Therefore some
items may not apply to every model.


EMU25121


150F, 175D, 200F, L200F

OWNER’S MANUAL

©2008 by Yamaha Motor Co., Ltd.

1st Edition, April 2008

All rights reserved.

Any reprinting or unauthorized use

without the written permission of

Yamaha Motor Co., Ltd.
is expressly prohibited.

Printed in Japan

Summary of Contents for 150F

Page 1: ...q q q q Read this manual carefully before operating this outboard motor OWNER S MANUAL 150F 175D 200F L200F 64C 28199 2D E0 ...

Page 2: ...EMU25052 Read this manual carefully before operating this outboard motor Keep this manual onboard in a waterproof bag when boating This manual should stay with the outboard motor if it is sold ...

Page 3: ... may be minor discrepancies between your machine and this manual If there is any question concerning this manu al please consult your Yamaha dealer To ensure long product life Yamaha recom mends that you use the product and perform the specified periodic inspections and main tenance by correctly following the instruc tions in the owner s manual Any damage resulting from neglect of these instructio...

Page 4: ... Mounting battery 11 Multiple batteries 11 Propeller selection 11 Counter rotation models 12 Start in gear protection 12 Engine oil requirements 12 Fuel requirements 12 Gasoline 12 Muddy or acidic water 12 Anti fouling paint 13 Motor disposal requirements 13 Emergency equipment 13 Emission control information 13 U S insular areas 13 Components 15 Components diagram 15 Fuel tank 15 Fuel joint 16 Fu...

Page 5: ...fuel and engine oil 40 Filling fuel for portable tank 40 Filling fuel for models without a fuel joint 41 Filling oil for oil injection models 41 Oil level indicator operation 43 Operating engine 44 Feeding fuel portable tank 44 Feeding fuel 44 Starting engine 45 Checks after starting engine 47 Cooling water 47 Warming up engine 48 Choke start models 48 Checks after engine warm up 48 Shifting 48 St...

Page 6: ...Inspecting and replacing anode s 71 Checking battery for electric start models 72 Connecting the battery 73 Disconnecting the battery 74 Trouble Recovery 75 Troubleshooting 75 Temporary action in emergency 78 Impact damage 78 Running single engine twin engines 78 Replacing fuse 79 Power trim and tilt will not operate 79 Starter will not operate 79 Emergency starting engine 80 Engine fails to opera...

Page 7: ... mo tor and the clamp bracket when the motor is trimmed or tilted Keep body parts out of this area at all times Be sure no one is in this area before operating the power trim and tilt mechanism The power trim and tilt switches operate even when the main switch is off Keep peo ple be away from the switches whenever working around the motor Never get under the lower unit while it is tilt ed even whe...

Page 8: ...for every occupant Yamaha recommends that you must wear a PFD whenever boating At a minimum children and non swimmers should always wear PFDs and everyone should wear PFDs when there are potentially hazardous boat ing conditions EMU33730 People in the water Always watch carefully for people in the wa ter such as swimmers skiers or divers whenever the engine is running When someone is in the water ...

Page 9: ...id collisions Re member boats do not have brakes and stopping the engine or reducing throttle can reduce the ability to steer If you are not sure that you can stop in time before hitting an obstacle apply throttle and turn in another direction EMU33790 Weather Stay informed about the weather Check weather forecasts before boating Avoid boating in hazardous weather EMU33880 Passenger training Make ...

Page 10: ...is stamped on your key as shown in the illustration Record this number in the space provided for reference in case you need a new key EMU37290 EC Declaration of Conformity DoC This outboard motor conforms to certain por tions of the European Parliament directive relating to machinery Each conformed outboard motor accompa nied with EC DoC EC DoC contains the fol lowing information Name of Engine Ma...

Page 11: ...ion 5 EMU25213 C Tick label Engines affixed with this label conform to certain portion s of the Australian Radio Communications Act 1 CE marking location 1 C Tick label location 1 ZMU03900 ZMU06040 1 ZMU03552 ZMU01697 ...

Page 12: ... Read this manual Read any manuals supplied with the boat Read all labels on the outboard motor and the boat If you need any additional information contact your Yamaha dealer EMU33831 Warning labels If these labels are damaged or missing contact your Yamaha dealer for replacements 1 2 1 3 ZMU06216 ...

Page 13: ...RNING EWM01681 Keep hands hair and clothing away from rotating parts while the engine is running Do not touch or remove electrical parts when starting or during operation 3 WARNING EWM01671 Read Owner s Manuals and labels Wear an approved personal flotation device PFD Attach engine shut off cord lanyard to your PFD arm or leg so the engine stops if you accidentally leave the helm which could preve...

Page 14: ...mean as follows Notice Warning Read Owner s Manual Hazard caused by continuous rotation Electrical hazard Remote control lever gear shift lever operat ing direction dual direction Engine start Engine cranking ZMU05696 ZMU05664 ZMU05665 ZMU05666 ZMU05667 ZMU05668 ...

Page 15: ...eight SUS L 150FETO 194 0 kg 428 lb 200FETO 194 0 kg 428 lb Weight SUS X 150FETO 198 0 kg 437 lb 175DETO 198 0 kg 437 lb 200FETO 198 0 kg 437 lb L200FETO 200 0 kg 441 lb Performance Full throttle operating range 4500 5500 r min Maximum output 150FETO 110 3 kW 5000 r min 150 HP 5000 r min 175DETO 128 7 kW 5000 r min 175 HP 5000 r min 200FETO 147 1 kW 5000 r min 200 HP 5000 r min L200FETO 147 1 kW 5...

Page 16: ...ut 55 0 Nm 5 61 kgf m 40 6 ft lb Noise and vibration level Operator sound pressure level ICOMIA 39 94 and 40 94 200FETO 80 1 dB A L200FETO 80 1 dB A EMU33553 Installation requirements EMU33563 Boat horsepower rating WARNING EWM01560 Overpowering a boat can cause severe instability Before installing the outboard motor s con firm that the total horsepower of your mo tor s does not exceed the boats m...

Page 17: ...right propeller is one of the most important purchasing decisions a boater can make The type size and design of your propeller have a direct impact on acceleration top speed fuel economy and even engine life Yamaha designs and manufactures propel lers for every Yamaha outboard motor and every application Your outboard motor came with a Yamaha propeller chosen to perform well over a range of applic...

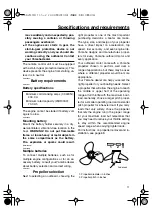
Page 18: ...another 2 stroke engine oil with an NMMA certified TC W3 rating may be used EMU36360 Fuel requirements EMU36770 Gasoline Use a good quality gasoline that meets the minimum octane rating If knocking or ping ing occurs use a different brand of gasoline or premium unleaded fuel Yamaha re comends that you use alcohol free see Gasohol gasoline whenever possible NOTICE ECM01980 Do not use leaded gasolin...

Page 19: ...cal tape Waterproof flashlight with extra batteries An extra engine shut off cord lanyard with clip Spare parts such as an extra set of spark plugs Consult your Yamaha dealer for details EMU25221 Emission control information EMU25310 U S insular areas Engines affixed with the label pictured below conform to U S Environmental Protection Agency EPA regulations for marine SI en gines See the label af...

Page 20: ...Specifications and requirements 14 1 Manufactured date label location 1 ZMU03552 ...

Page 21: ... must not 1 2 4 5 6 7 8 9 10 12 13 11 15 16 17 18 19 20 21 3 14 10 ZMU04661 1 Power trim and tilt switch 2 Flushing device 3 Tilt support lever 4 Anti cavitation plate 5 Trim tab anode 6 Propeller 7 Cooling water inlet 8 Anode 9 Clamp bracket 10 Top cowling lock lever 11 Choke knob 12 Top cowling 13 Cooling water pilot hole 14 Remote control box side mount type 15 Remote control box binnacle mount...

Page 22: ...emote control lever actuates both the shifter and the throttle The electrical switch es are mounted on the remote control box EMU26190 Remote control lever Moving the lever forward from the neutral po sition engages forward gear Pulling the le ver back from neutral engages reverse The engine will continue to run at idle until the le ver is moved about 35 a detent can be felt Moving the lever farth...

Page 23: ... will operate only when the remote control lever is in neutral The remote control lever will operate only when the neutral throttle lever is in the closed position EMU26221 Choke switch To activate the choke system press in the main switch while the key is turned to the on or start position The 1 Neutral 2 Forward 3 Reverse 4 Shift 5 Fully closed 6 Throttle 7 Fully open 1 Neutral 2 Forward 3 Rever...

Page 24: ...the remote control lever to the neutral position The free accelerator button will return au tomatically to its set position The remote control will then engage forward and re verse normally EMU25973 Throttle friction adjuster A friction device provides adjustable resis tance to movement of the throttle grip or the remote control lever and can be set accord ing to operator preference To increase re...

Page 25: ...t off cord to a secure place on your clothing or your arm or leg while operating Do not attach the cord to clothing that could tear loose Do not route the cord where it could become en tangled preventing it from functioning Avoid accidentally pulling the cord dur ing normal operation Loss of engine power means the loss of most steering control Also without engine power the boat could slow rapidly ...

Page 26: ...on remote control The power trim and tilt system adjusts the outboard motor angle in relation to the tran som Pressing the switch up trims the outboard motor up and then tilts it up Press ing the switch down tilts the outboard motor down and trims it down When the switch is released the outboard motor will stop in its current position For instructions on using the power trim and tilt switch see pa...

Page 27: ...rd motor will stop in its current position For instructions on using the power trim and tilt switches see pages 50 and 53 TIP On the dual engine control the switch on the remote control grip controls both outboard motors at the same time EMU26244 Trim tab with anode WARNING EWM00840 An improperly adjusted trim tab could cause difficult steering Always test run after the trim tab has been installed...

Page 28: ... ered in the normal running position use an additional support device to secure it in the tilt position EMU26382 Top cowling lock lever pull up type To remove the engine top cowling pull up the lock lever s and lift off the cowling When installing the cowling check to be sure it fits properly in the rubber seal Then lock the cowling by moving the lever s down ward 1 Trim tab 2 Bolt 3 Cap Bolt tigh...

Page 29: ... Flushing device This device is used to clean the cooling wa ter passages of the motor using a garden hose and tap water TIP For details on usage see page 59 1 Top cowling lock lever s 1 Flushing device ZMU03905 1 1 ZMU04011 ...

Page 30: ...conditions Adjust the trim angle to the desired using the power trim and tilt switch If the trim angle of your motor exceeds the trim operating range the top segment on the trim meter display will blink EMU26651 Hour meter This meter shows the number of hours the engine has been run It can be set to show the total number of hours or the number of hours for the current trip The display can also be ...

Page 31: ...OTICE ECM00052 Do not continue to run the engine if the overheat alert indicator is on Serious en gine damage will occur EMU26602 Digital speedometer This gauge shows the boat speed and other information All segments of the display will light momen tarily after the main switch is turned on and will return to normal thereafter EMU36061 Speedometer The speedometer displays km h mph or knots accordin...

Page 32: ...meter To change the display press the mode button repeatedly until the indicator on the face of the gauge points to trip meter clock or voltmeter EMU26691 Trip meter This gauge displays the distance the boat has traveled since the gauge was last reset The trip distance is shown in kilometers or miles depending upon the unit of measure ment selected for the speedometer To reset the trip meter to ze...

Page 33: ...rt within trolling engine speed NOTICE Running out of fuel can damage the engine ECM01770 EMU26732 Low battery voltage alert indicator If battery voltage drops the display will auto matically turn on and blink Get back to the port soon if an alert device has activated For charging the battery con sult your Yamaha dealer EMU26741 Fuel management meter The fuel management meter shows the state of th...

Page 34: ...Dual engine users the fuel flow meter can display the fuel flow of either or both engines To change the fuel flow display press the set button repeatedly until the gauge displays for fuel flow to the starboard en gine only for fuel flow to the port engine only or for total fuel flow both en gines EMU36090 Fuel consumption meter Fuel economy meter Twin engine speed synchronizer The display shows ei...

Page 35: ...r and fuel management meter calculates speed miles traveled and fuel economy by water movement at the stern of the boat This distance can vary greatly from the actual distance traveled because of water cur rents sea swells and the condition of the water speed sensor if partially plugged or damaged Individual engines may slightly vary in their fuel consumption due to manufacturing variations These ...

Page 36: ...the throttle cables EMU26793 Water separator alert indicator This indicator will blink when water has accu mulated in the water separator In such an event stop the engine and drain the water from the separator This indicator only operates when a water separator sensor is equipped 2 Port engine speed is slightly higher 3 Engine speed is synchronized evenly between port and starboard engines 4 Starb...

Page 37: ...ter inlets Check trim angle to be sure that the cool ing water inlet is submerged Check the cooling water inlet for clogging Dual engine drive users If the overheat alert system of one engine activates the engine will slow down To switch off the alert activation on the engine not affected by overheating turn off the main switch of the engine overheating If the alert system has activated stop the e...

Page 38: ... equipped on the tiller handle remote control box or main switch panel If the alert system has been activated stop the engine and check for the cause TIP The alert for oil filter clogging is similar to the alerts for low oil level and overheating To make troubleshooting easier check for en gine overheating first then oil level and fi nally oil filter clogging ZMU03942 OFF START ON OFF START ON ZMU...

Page 39: ...nted so that the boat is well balanced Otherwise the boat could be hard to steer For single en gine boats mount the outboard motor on the centerline keel line of the boat For twin en gine boats mount the outboard motors equi distant from the centerline Consult your Yamaha dealer or boat manufacturer for fur ther information on determining the proper mounting location EMU26931 Mounting height boat ...

Page 40: ... exhaust housing is low enough to prevent water entry into the power head when water rises due to waves when the outboard is not run ning Incorrect engine height or obstructions to the smooth flow of water such as the design or condition of the boat or ac cessories such as transom ladders or depth finder transducers can create airborne water spray while the boat is cruising If the motor is operate...

Page 41: ...sy plan ing boat accelerate at full throttle onto plane then immediately reduce the throttle to 3000 r min or less 3 Next two hours Accelerate at full throttle onto plane then reduce engine speed to three quar ter throttle approximately 4000 r min Vary engine speed occasionally Run at full throttle for one minute then allow about 10 minutes of operation at three quarter throttle or less to let the...

Page 42: ...RNING EWM00060 Gasoline and its vapors are highly flam mable and explosive Keep away from sparks cigarettes flames or other sources of ignition WARNING EWM00910 Leaking fuel can result in fire or explo sion Check for fuel leakage regularly If any fuel leakage is found the fuel system must be repaired by a qualified mechanic Improper repairs can make the outboard unsafe to operate EMU36450 Check fo...

Page 43: ...ure you have plenty of oil for your trip EMU27151 Engine Check the engine and engine mounting Look for loose or damaged fasteners Check the propeller for damage Check for oil leaks EMU27171 Operation after a long period of storage When operating the engine after a long peri od 12 months of storage proceed as fol lows 1 Use a 50 1 gasoline oil mixture to start the engine 2 Start the engine Leave it...

Page 44: ...uring operation ECM01800 EMU36961 Install cowling 1 Be sure that all cowling lock levers are released 2 Be sure that the rubber seal is seated all the way around the engine 3 Place the cowling on top of the seal 4 Check to be sure the rubber seal fits cor rectly all the way around the engine 5 Move the levers to lock the cowling as shown NOTICE If the cowling is not installed correctly water spray...

Page 45: ... sign of oil leaks 2 Operate each of the power trim and tilt switches on the remote control and en gine bottom cowling to check that all switches work 3 Tilt the outboard motor up and check that the tilt rod and trim rods are extend ed completely 4 Use the tilt support lever to lock the mo tor in the up position Operate the tilt down switch briefly so the motor is sup ported by the tilt support le...

Page 46: ...sk of fire and explosion Gasoline is poisonous and can cause injury or death Handle gasoline with care Never siphon gasoline by mouth If you should swallow some gasoline or inhale a lot of gasoline vapor or get some gasoline in your eyes see your doctor immediately If gasoline spills on your skin wash with soap and wa ter If gasoline spills on your clothing change your clothes 1 Stop the engine 2 ...

Page 47: ...tric discharge or other sources of ignition 5 If you use a portable container to store and dispense fuel only use a locally ap proved GASOLINE container 6 Touch the fuel nozzle to the filler open ing or funnel to help prevent electrostatic sparks 7 Fill the fuel tank but do not overfill Fuel can expand and overflow if the tempera ture increases 8 Tighten the filler cap securely 9 Wipe up any spill...

Page 48: ...1 US gal 0 8 Imp gal can be added 2 Turn on the main switch The Yamaha oil injection system will automatically feed oil from the remote oil tank to the engine oil tank 3 Operate the engine normally NOTICE ECM00570 When the engine is operated for the first time or stored for a period of time a min imum of 5 liters 5 3 US qt 4 4 Imp qt of oil should be kept in the remote oil tank Otherwise the oil f...

Page 49: ...than 300 cm3 0 32 US qt 0 26 Imp qt 1500 cm3 1 6 US qt 1 31 Imp qt or less Add oil see page 41 Red Yellow Green 300 cm3 0 32 US qt 0 26 Imp qt or less more than 1500 cm3 1 6 US qt 1 31 Imp qt Check oil filter for clog ging Check battery cable connection Buzzer will sound Engine speed is auto matically reduced to about 2000 r min Red 300 cm3 0 32 US qt 0 26 Imp qt or less 1500 cm3 1 6 US qt 1 31 Im...

Page 50: ...ness Keep cockpit and cab in areas well ventilated Avoid blocking exhaust outlets 1 If there is an air vent screw on the fuel tank cap loosen it 2 or 3 turns 2 If there is a fuel joint on the motor firmly connect the fuel line to the joint Then firmly connect the other end of the fuel line to the joint on the fuel tank 3 Squeeze the primer pump with the ar row pointing up until you feel it become ...

Page 51: ...1600 Before starting the engine make sure that the boat is tightly moored and that you can steer clear of any obstructions Be sure there are no swimmers in the wa ter near you EMU27645 Electric start remote control models WARNING EWM01840 Failure to attached engine shut off cord could result in a runaway boat if opera tor is ejected Attach the engine shut off cord to a secure place on your cloth i...

Page 52: ... switch 3 Turn the main switch to on 4 Open the throttle slightly without shifting using the neutral throttle lever or free ac celerator You may need to change the throttle opening slightly depending on engine temperature After the engine starts return the throttle to the original position TIP On remote controls equipped with a neu tral throttle lever a good starting point is to ON START OFF ON ST...

Page 53: ...tarter motor is turned continuously for more than 5 seconds the battery will be quickly discharged thus making it impossible to start the engine The starter can also be damaged If the engine will not start after 5 seconds of cranking return the main switch to on wait 10 seconds then crank the engine again ECM00192 EMU36510 Checks after starting engine EMU36520 Cooling water Check for a steady flow...

Page 54: ...the engine Confirm that removing the clip from the en gine shut off switch stops the engine Confirm that the engine cannot be started with the clip removed from the engine shut off switch EMU31730 Shifting WARNING EWM00180 Before shifting make sure there are no swimmers or obstacles in the water near you NOTICE ECM01610 Warm up the engine before shifting into gear Until the engine is warm the idle...

Page 55: ...After the engine is at idle speed in gear move the remote control lever firmly and crisply into the neutral position EMU31742 Stopping boat WARNING EWM01510 Do not use the reverse function to slow down or stop the boat as it could cause you to lose control be ejected or im pact the steering wheel or other parts of N ZMU04588 ...

Page 56: ...gine immediately after operating at high speed is not recommended EMU27845 Procedure 1 Push and hold the engine stop button or turn the main switch to off 2 After stopping the engine disconnect the fuel line if there is a fuel joint on the outboard motor 3 Tighten the air vent screw on the fuel tank cap if equipped 4 Remove the key if the boat will be left unattended TIP The engine can also be sto...

Page 57: ...ll people are clear of the out board motor when adjusting the trim angle Body parts can be crushed be tween the motor and the clamp bracket when the motor is trimmed or tilted Use caution when trying a trim position for the first time Increase speed gradu ally and watch for any signs of instabil ity or control problems Improper trim angle can cause loss of control If equipped with a power trim and...

Page 58: ...e boat is down it is easier to accelerate from a standing start onto plane Bow Up Too much trim out puts the bow of the boat too high in the water Performance and econ omy are decreased because the hull of the boat is pushing the water and there is more air drag Excessive trim out can also cause the propeller to ventilate which reduces per formance further and the boat may por poise hop in the wat...

Page 59: ...en the motor is trimmed or tilted WARNING EWM00250 Leaking fuel is a fire hazard If there is a fuel joint on the outboard motor discon nect the fuel line or close the fuel cock if the engine will be tilted for more than a few minutes Otherwise fuel may leak NOTICE ECM00241 Before tilting the outboard motor stop the engine by following the procedure on page 50 Never tilt the outboard mo tor while t...

Page 60: ...ll If the motor cannot be trailered in the normal running po sition use an additional support de vice to secure it in the tilt position For more detailed information see page 57 ECM01641 4 Models equipped with trim rods Once the outboard motor is supported with the tilt support lever press the power trim and tilt switch down to retract the trim rods NOTICE Be sure to retract the trim rods complete...

Page 61: ...m and tilt models The outboard motor can be tilted up partially to allow operation in shallow water NOTICE ECM00260 Do not tilt the outboard motor up so that the cooling water inlet on the lower unit is above the surface of the water when set ting up for and cruising in shallow water Otherwise severe damage from overheat ing can result EMU32922 Procedure for power trim and tilt models 1 Place the ...

Page 62: ... conditions Cruising in salt water After operating in salt water flush the cooling water passages with fresh water to prevent them from becoming clogged Also rinse the outside of the outboard motor with fresh wa ter and if possible rinse the power head un der the cowling Cruising in muddy turbid or acidic water Yamaha strongly recommends that you use the optional chromium plated water pump kit see...

Page 63: ...here is insufficient road clearance in this position then trailer the outboard motor in the tilt po sition using a motor support device such as a transom saver bar Consult your Yamaha dealer for further details EMU30272 Storing outboard motor When storing your Yamaha outboard motor for prolonged periods of time 2 months or longer several important procedures must be performed to prevent excessive ...

Page 64: ...he engine quick ly spray Fogging Oil alternately into each carburetor or the fogging hole of the silencer cover if equipped When properly done the engine will smoke ex cessively and almost stall 8 Remove the flushing attachment 9 Install the silencer cover cap of fogging hole and top cowling 10 If the Fogging Oil is not available run the engine at a fast idle until the fuel sys tem becomes empty a...

Page 65: ...sh through the cool ing passages for about 15 minutes Turn off the water and disconnect the garden hose adapter from the garden hose con nector 4 Reinstall the garden hose connector onto the fitting on the bottom cowling Tighten the connector securely NO TICE Do not leave the garden hose connector loose on the bottom cowl ing fitting or let the hose hang free during normal operation Water will lea...

Page 66: ...racket Be sure no one is in this area before operating the power trim and tilt mechanism Allow the engine to cool before han dling hot parts or fluids Always completely reassemble the mo tor before operation Maintenance replacement or repair of the emission control devices and sys tems on models affixed with an emission control label may be performed by any marine engine repair establishment or in...

Page 67: ...ween light and heavy cargo loads Outboard motors operating under any of these above conditions require more fre quent maintenance Yamaha recommends that you do this service twice as often as specified in the maintenance chart For ex ample if a particular service should be done at 50 hours do it instead at 25 hours This will help prevent more rapid deterioration of engine components ...

Page 68: ...e flushed with clean water after each use The symbol indicates the check ups which you may carry out yourself The symbol indicates work to be carried out by your Yamaha dealer Item Actions Initial Every 20 hours 3 months 100 hours 1 year 300 hours 3 years 500 hours 5 years Anode s external Inspection or replace ment as necessary Anode s cylinder head thermostat cover Inspection or replace ment as ...

Page 69: ...t Power trim tilt unit Operation noise and oil leakage Inspection Propeller Propeller nut Cotter pin Inspection or replace ment as necessary PCV Pressure Con trol Valve Inspection or replace ment as necessary Shift link shift cable Inspection adjustment or replacement as nec essary Spark plug s Inspection or replace ment as necessary Spark plug caps high tension cords Inspection or replace ment as...

Page 70: ...nnec tions Wire coupler con nections Inspection or replace ment as necessary Yamaha Meter gauge Inspection Yamaha Fuel tank Inspection and clean ing as necessary Item Actions Every 1000 hours Guide exhaust exhaust manifold Inspection or replace ment as necessary Item Actions Initial Every 20 hours 3 months 100 hours 1 year 300 hours 3 years 500 hours 5 years ...

Page 71: ...an important engine com ponent and is easy to inspect The condition of the spark plug can indicate something about the condition of the engine For exam ple if the center electrode porcelain is very white this could indicate an intake air leak or carburetion problem in that cylinder Do not attempt to diagnose any problems yourself Instead take the outboard motor to a Yamaha dealer You should period...

Page 72: ... may not operate properly Before fitting the spark plug measure the electrode gap with a wire thickness gauge adjust the gap to spec ification if necessary 4 When fitting the plug wipe off any dirt from the threads and then screw it in to the correct torque TIP If a torque wrench is not available when you are fitting a spark plug a good estimate of the correct torque is 1 4 to 1 2 a turn past fin ...

Page 73: ...neutral until it is running smooth ly TIP Correct idling speed inspection is only possi ble if the engine is fully warmed up If not warmed up fully the idle speed will measure higher than normal If you have difficulty ver ifying the idle speed or the idle speed re quires adjustment consult a Yamaha dealer or other qualified mechanic 2 Verify whether the idle speed is set to specification For idle ...

Page 74: ...the propeller to prevent the propeller from turning Checkpoints Check each of the propeller blades for wear erosion from cavitation or ventila tion or other damage Check the propeller shaft for damage Check the splines for wear or damage Check for fish line tangled around the pro peller shaft Check the propeller shaft oil seal for dam age EMU30661 Removing propeller EMU29197 Spline models 1 Straig...

Page 75: ...aft hole Insert a new cotter pin in the hole and bend the cotter pin ends NO TICE Do not reuse the cotter pin in stalled Otherwise the propeller can come off during operation ECM01890 TIP If the propeller nut does not align with the propeller shaft hole after tightening to the specified torque tighten the nut further to align it with the hole EMU29287 Changing gear oil WARNING EWM00800 Be sure the...

Page 76: ...ard motor in a vertical po sition Using a flexible or pressurized fill ing device inject the gear oil into the gear oil drain screw hole 6 Put a new gasket on the oil level plug When the oil begins to flow out of the oil level plug hole insert and tighten the oil level plug 7 Put a new gasket on the gear oil drain screw Insert and tighten the gear oil drain screw 1 Gear oil drain screw 2 Oil level...

Page 77: ...sembly can result in a fuel leak which could result in a fire or ex plosion hazard Dispose of old gasoline according to lo cal regulations 1 Empty the fuel tank into an approved container 2 Pour a small amount of suitable solvent into the tank Install the cap and shake the tank Drain the solvent completely 3 Remove the screws holding the fuel joint assembly Pull the assembly out of the tank 4 Clea...

Page 78: ...eries generate ex plosive hydrogen gas When working near the battery Wear protective eye gear and rubber gloves Do not smoke or bring any other source of ignition near the battery Refer to page 11 for detailed safety infor mation about batteries The procedure for checking the battery var ies for different batteries This procedure contains typical checks that apply to many batteries but you should ...

Page 79: ...the red battery cable to the POSITIVE terminal first Then con nect the black battery cable to the NEG ATIVE terminal 3 The electrical contacts of the battery and cables must be clean and properly con nected or the battery will not start the engine Connecting an accessory battery optional 1 If connecting an accessory battery con sult your Yamaha dealer about correct wiring It is recommendable to in...

Page 80: ...nnect all negative ca bles first to avoid a short circuit and damage to the electrical system ECM01940 3 Disconnect the positive cable s and re move the battery from the boat 4 Clean maintain and store the battery according to the manufacturer s instruc tions 1 Starboard side engine 2 Port side engine 3 Red cable 4 Black cable 5 Isolator lead with circuit protection 6 Fuse 7 Battery for starting 8...

Page 81: ...A Have serviced by a Yamaha dealer Q Is shift lever in gear A Shift to neutral Engine will not start starter operates Q Is fuel tank empty A Fill tank with clean fresh fuel Q Is fuel contaminated or stale A Fill tank with clean fresh fuel Q Is fuel filter clogged A Clean or replace filter Q Is starting procedure incorrect A See page 45 Q Has fuel pump malfunctioned A Have serviced by a Yamaha deal...

Page 82: ...erviced by a Yamaha dealer Q Is air vent screw on fuel tank closed A Open air vent screw Q Is choke knob pulled out A Return to home position Q Is motor angle too high A Return to normal operating position Q Is carburetor clogged A Have serviced by a Yamaha dealer Q Is fuel joint connection incorrect A Connect correctly Q Is throttle valve adjustment incorrect A Have serviced by a Yamaha dealer Q ...

Page 83: ...type A Inspect spark plug s Clean or replace with recommended type Q Are weeds or other foreign matter tangled on gear housing A Remove foreign matter and clean lower unit Q Is fuel system obstructed A Check for pinched or kinked fuel line or other obstructions in fuel system Q Is fuel filter clogged A Clean or replace filter Q Is fuel contaminated or stale A Fill tank with clean fresh fuel Q Is s...

Page 84: ...WM00870 The outboard motor can be seriously damaged by a collision while operating or trailering Damage could make the out board motor unsafe to operate If the outboard motor hits an object in the wa ter follow the procedure below 1 Stop the engine immediately 2 Inspect the control system and all com ponents for damage Also inspect the boat for damage 3 Whether damage is found or not return to the...

Page 85: ...rclockwise until it stops 2 Put the engine in the desired position then tighten the manual valve screw by turning it clockwise EMU29533 Starter will not operate If the starter mechanism does not operate the engine cannot be cranked with the start er the engine can be started with an emer gency starter rope WARNING EWM01022 Use this procedure only in an emergen cy to return to the nearest port for ...

Page 86: ...rgency starter rope only as instructed Do not touch the fly wheel or other moving parts when the engine is running Do not install the starter mechanism or top cowling after the engine is running Do not touch the ignition coil spark plug wire spark plug cap or other elec trical components when starting or op erating the motor You could get an electrical shock EMU29562 Emergency starting engine 1 Re...

Page 87: ...ition system malfunction If the battery voltage is low or in the unlikely event of an ignition system malfunction the engine speed may become erratic or the en gine may stop In such a situation follow the procedure below 1 Remove the CDI unit cover or electrical cover if equipped 2 Disconnect the yellow cord emergency circuit of the CDI unit to return to port WARNING EWM00350 When the yellow cord ...

Page 88: ...cy switch is held up too long too much oil will be pumped into the engine oil tank overflowing it Re lease the switch when oil reaches the upper level line on the engine oil tank Do not use this emergency procedure unless the oil level alert indicators are working 1 Remove the top cowling 2 Turn on the main switch 3 Lift the emergency switch to pump re serve oil into the engine oil tank from the r...

Page 89: ... 31 Imp qt The oil feed pump will not operate if the engine is tilted up more than 35 Put the engine in the upright position not tilted before using the emergency switch EMU33501 Treatment of submerged motor If the outboard motor is submerged immedi ately take it to a Yamaha dealer Otherwise some corrosion may begin almost immedi ately NOTICE Do not attempt to run the outboard motor until it has b...

Page 90: ...YAMAHA MOTOR CO LTD Printed on recycled paper Printed in Japan April 2008 0 2 1 ...

Reviews: