background image

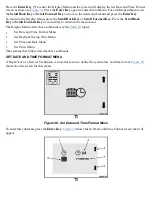
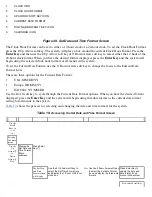
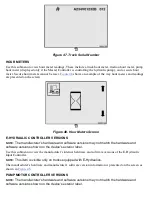
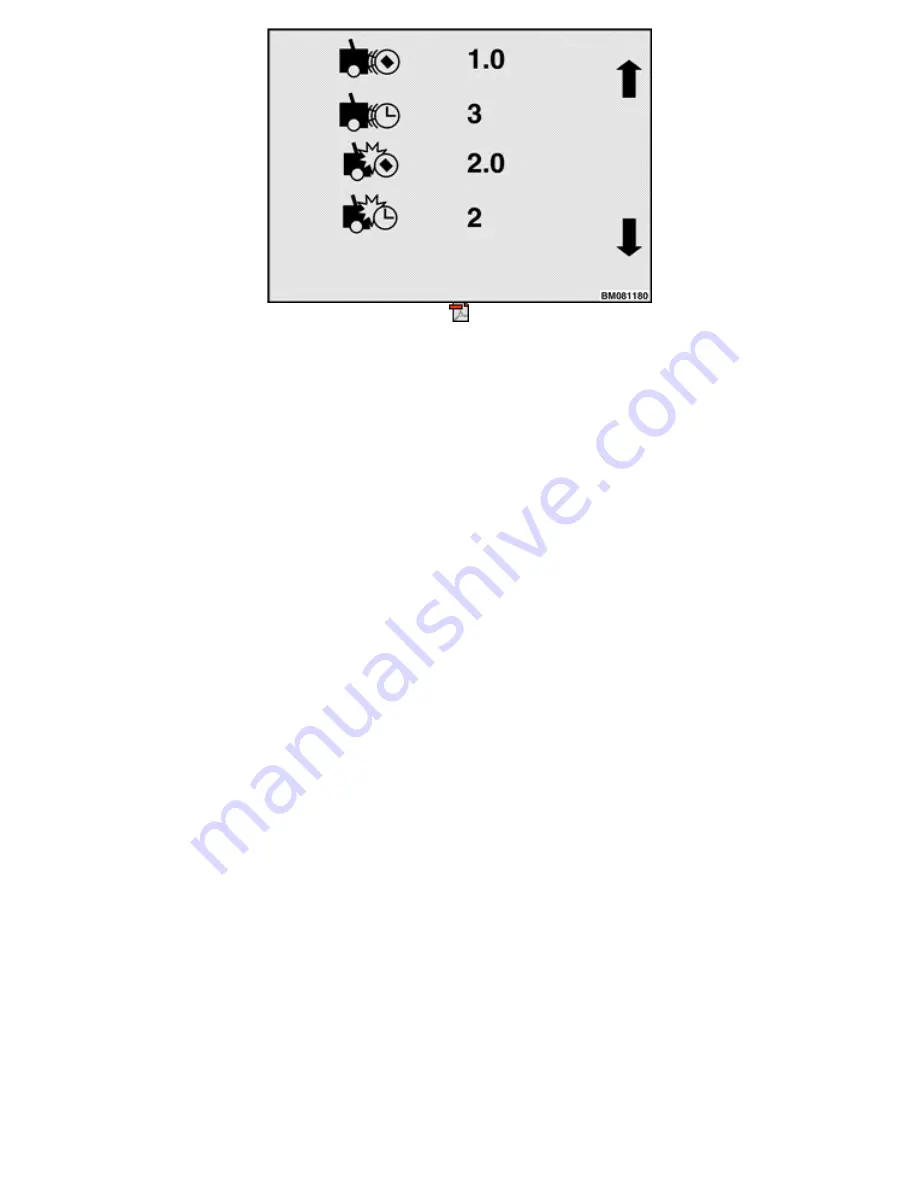
Figure 54. Impact Monitor Settings Screen

Impact Detection

The impact monitor can detect both hard and soft impacts.

An example of a hard impact is a truck colliding with a steel column in a warehouse which causes the truck to
stop suddenly. In this case the impact force is very strong but it occurs during a short time period.

An example of a soft impact is a truck rolling over and crushing a wooden pallet. In this case the impact force
is much less than experienced with a hard impact but it lasts for a significantly longer time period.

Setting Adjustments

Use the 

2

 and 

3

 soft keys to move up or down through the current values for the four settings for Impact Force

and Impact Times. When there is a box around the setting you want to change, press the 

Enter Key

, then use

the 

2

 or 

3

 soft key to step through the valid values for that setting.

The Soft Impact Force, the setting at the top of the screen, can be set to a value in the range 0.2 to 2.5 g., in
tenths of gravitational force.

The Soft Impact Time, the second setting down from the top, can be adjusted to require the impact monitor to
see an impact force greater than the Soft Impact Force for 1 to 12 samples before a soft impact event will be
reported.

The Hard Impact Force, the third setting down, can be set to a value in the range 0.5 to 3.0 g., in tenths of
gravitational force.

The Hard Impact Time, the forth setting down from the top, can be adjusted to require the impact monitor to
see an impact force greater than the Hard Impact Force for 1 or 2 samples before a hard impact event will be
reported.

The Hard Impact Force, the third setting down, can be set to a value in the range 0.5 to 3.0 g., in tenths of
gravitational force.

Initial Adjustment of Soft and Hard Impact Settings

NOTE:  

When adjusting the impact sensor settings, be sure to:

Adjust the truck to the lowest Soft Impact Force setting, the Soft Impact Time set to 6, and the highest Hard
Impact Force Setting. Drive the truck at the fastest operational speed for the environment. Apply the brakes to
bring the truck to an abrupt stop. Determine if an impact event has occurred.

Increase either the Soft Impact Force setting until the vehicle can be abruptly stopped with the service brake

Summary of Contents for ERC030VA

Page 1: ... 20VT ERP030 040VT G807 ERP16 20VF ERP30 40VF A955 ERC22 35VG ERC045 070VG A968 ERC16 20VA ERC030 040VA A969 ERP22 35VL ERP045 070VL A976 ERP40 50VM ERP50 55VM6 ERP080 120VM ERP100VML A985 ERP80VNL6 ERP80VNL9 ERP90VNL ERP170 190VNL A410 Region Language UK de en es fr it US de en es fr it PART NO 524319497 2200 YRM 1335 ...

Page 2: ...UT THE LIFT TRUCK ON BLOCKS in the Operating Manual or the Periodic Maintenance section Keep the unit clean and the working area clean and orderly Use the correct tools for the job Keep the tools clean and in good condition Always use YALE APPROVED parts when making repairs Replacement parts must meet or exceed the specifications of the original equipment manufacturer Make sure all nuts bolts snap...

Page 3: ... Main Menu Structure Screens and Title Screens Submenus Returning to the Main Menu Icons and Settings Soft Keys Entering Numbers Icon Glossary Introduction Soft Key Icons Overlay Icons Icons on System Off Screen and Alert Screens Main Menu Title Screens Submenu Icons Grouped by Menu Operating Screen Icons Password Screen Icons Activity Log Submenu Icons Calibration Submenu Icons Display Submenu Ic...

Page 4: ...d Log Activity Log Menu Introduction Operator Checklist Log Password Log Impact Events Log Calibration Menu Introduction Load Weight Calibration Return to Set Tilt Stop Point Calibration E Hydraulic and Manual Valve Threshold Calibration Steering Wheel Center Point Calibration Steer Axle Position Calibration Steer Axle Center Point Calibration Manual Hydraulics Calibration Display Menu Introductio...

Page 5: ...s Initial Adjustment of Soft and Hard Impact Settings Readjustment of Soft and Hard Impact Settings Auto Power Off Time Delay Return to Set Tilt Traction Speed Limit Scheduled Maintenance Reminder Minimum Pump Standby Flow Rate Operator Checklist Impact Monitor Shutdown Motor Braking Changing the Motor Braking Settings Steering Wheel Friction and Steering Turns Adjustment How to Adjust Settings St...

Page 6: ...roper service technician password a Service Technician can access menu items that are not visible at Operator or Supervisor password level access DISPLAY PANEL MENU ACCESS Turning the keyless start switch or key switch to the ON position activates the Display Panel Figure 1 shows the layout of the Display Panel including the location of the keyless start switch or key switch 1 2 AND 3 KEYS 2 SCROL...

Page 7: ...ding upon how the lift truck is equipped some of the functions described in this section may not be included in the on board menu structure for a particular lift truck NOTE The icons displayed on the Operating Screen vary from any one time to another depending on the current operation of the lift truck and other factors The Battery Discharge Indicator system time and direction indicator are always...

Page 8: ...Figure 3 Supervisor Flowchart Sheet 1 of 4 ...

Page 9: ...Figure 3 Supervisor Flowchart Sheet 2 of 4 ...

Page 10: ...Figure 3 Supervisor Flowchart Sheet 3 of 4 ...

Page 11: ...Figure 3 Supervisor Flowchart Sheet 4 of 4 Table 1 Supervisor Menu Flowchart A B C D E F G H ...

Page 12: ...ed Maintenance Required 21 Minimum Pump Standby 22 Operator Checklist 23 Interlock Menu Screen Impact Monitor Shutdown 24 Cycle the Key Traction Switch Direction Select in Neutral Truck Disabled Due to Right Single Traction Controller 25 Secure Battery Hydraulic Switch Hydraulic Function 1 Out of Neutral Truck Disabled Due to Left Traction Controller 26 SHEET 4 Release Park Brake Temperature Too H...

Page 13: ...unless Operator Passwords are deactivated in this case the Activity Log Title Screen appears After entering your password successfully the system displays the Operating Screen on the orange 1 5 x 2 5 inch LCD screen of the Display Panel as shown in Figure 4 When a title screen or a menu screen is displayed on the LCD screen the screen is still referred to as the screen in a generic way but the act...

Page 14: ...r the Scroll Forward Key to move from one title screen to another Press the Enter Key to enter one of these main menus 1 OPERATING SCREEN 2 PASSWORD SCREEN 3 ACTIVITY LOG TITLE SCREEN 4 CALIBRATION TITLE SCREEN 5 DIAGNOSTICS TITLE SCREEN 6 TRUCK SETUP TITLE SCREEN 7 STATUS TITLE SCREEN 8 DISPLAY TITLE SCREEN Figure 6 Main Menu Structure Screens and Title Screens ...

Page 15: ...a main menu The Activity Log Menu has only three submenus while the Truck Setup Menu has 13 submenus Each submenu is represented by a title screen When the title screen of the submenu you want is displayed on the screen press the Enter Key to enter that submenu For example if you enter the Operator Checklist Log submenu shown in Figure 7 the system displays the menu shown in Figure 8 When viewing ...

Page 16: ...only two values such as Enabled and Disabled while other settings may present a series of values you can select from by using the soft keys In some cases you need to enter a numerical value that is within an acceptable range for a setting In this case you key in the value using the number keys This is discussed in the Entering Numbers topic at the end of this section On submenus that have two or m...

Page 17: ...er a value directly These are The 1 2 3 and 4 soft keys These keys can be used as number keys only in the menus that accept numerical input These keys are programmed for use as soft keys in most menus The 5 6 7 8 9 and 0 keys These keys can be used to enter numbers in menus that allow numerical input These keys are not soft keys in any menu Passwords are a special case of entering numbers The user...

Page 18: ...s that appear on the Display Panel along with a short description of each one s purpose Table 2 Soft Key Icons Icon Description Hare Performance Mode increase Icon Press the 1 soft key or the soft key in some cases to increase performance Tortoise Performance Mode decrease Icon Press the 3 soft key to decrease performance Trash Can Icon Used to delete all entries in a log Press the 4 soft key or t...

Page 19: ...le Hazard Flashers Icon Press the key to toggle the hazard flashers on and off Select system time for Fault Log event Press the 1 key to select system time this soft key toggles between system times and hour meters Front Truck Lights Icon Only available with CAN light controller Press the 4 key to turn truck lights on Rear Truck Lights Icon Only available with CAN light controller Press the 2 key ...

Page 20: ...The System Off Screen and the various Alert Screens appear only briefly These screens also show interlocks such as Operator Not in Seat Refer to System Off Alert Screens for more information on these screens The icons used in alert screens identify either status or warning conditions Table 4 shows the icons that can appear on these screens Table 4 Alert Screen Icons Icon Description Alert Example ...

Page 21: ...Hydraulics Icon Alert Screens Cycle the Key Secure Battery Release Park Brake ...

Page 22: ...Operator Out of Seat Release Pedal Release Hydraulic Input Traction Switch ...

Page 23: ...Hydraulic Switch Temperature Too High Lift Limit Charge Battery ...

Page 24: ... you find the one you want by pressing the Scroll Back Key or Scroll Forward Key on the Display Panel Two main menu screens the Operating Screen and the Password screen have no associated submenus but the other main menus lead to submenus When you are at the main menu level pressing the Scroll Back Key takes you to the previous main menu screen Pressing the Scroll Forward Key takes you to the next...

Page 25: ...Table 5 Main Menu Title Screens Operating Screen NOTE Icons for Front and Rear Lights are shown These are optional features Password Screen Activity Log Title Screen Calibration Title Screen ...

Page 26: ...Display Title Screen Status Title Screen Truck Setup Title Screen ...

Page 27: ...such as warnings Refer to the Operating Screen topic for more information NOTE The icons displayed on the Operating Screen vary from any one time to another depending on the current operation of the lift truck and other factors The Battery Discharge Indicator system time and direction indicator are always displayed Table 6 Operating Screen Icons Icon Description Hare Performance Mode Icon Press th...

Page 28: ... Displayed only on trucks that have the Hydraulic Filter Monitoring option Service Due Soon Warning Icon Hazard Flashers Icon See Table 2 for more information Forward Direction Indicator Icon Neutral Indicator Icon Reverse Direction Indicator Icon Park Brake On Icon Steer Angle Indicator Icon Rear Work Light Icon This is an optional feature Front Work Light Icon This is an optional feature ...

Page 29: ... key switch or turn the keyless switch to the ON position See the Passwords Screen topic for more information Table 7 Password Screen Icons Icon Description Password Lock Icon A field with five blanks appears below the Password Lock Icon See Figure 2 Activity Log Submenu Icons Table 8 presents the icons that appear on the Activity Log Submenus These icons provide status information or numeric info...

Page 30: ...u Password Log Submenu Impact Events Log Submenu Empty Log Icon Checklist Failed Icon Checklist Passed Icon Password Lock Icon Hidden or no password Field Log Entry Icon Clock Icon for occurrence date Hourglass Icon for system time ...

Page 31: ...e Icon Hard Impact Type Icon Calibration Submenu Icons Table 9 presents the icons that appear on the Calibration Submenus See Calibration Menu for more information Table 9 Calibration Submenus and Icons Icon Description Load Weight Display Submenu Position Empty Forks To Load Weight Height Prompt Icon ...

Page 32: ...wn Load Weight Value kg Prompt Icon This icon points to the key the Enter soft key and is used for load weight calibration in this submenu Return to Set Tilt Stop Point Submenu Return to Set Tilt RTST Set Point Prompt Icon This icon points to the key and is used for RTST calibration in this submenu Valve Threshold Submenu ...

Page 33: ...rompt Icon Valve Threshold Function 2 B Direction Prompt Icon Valve Threshold Function 3 A Direction Prompt Icon Valve Threshold Function 3 B Direction Prompt Icon Valve Threshold Function 4 A Direction Prompt Icon Valve Threshold Function 4 B Direction Prompt Icon This icon points to the key and is used for valve calibration in this submenu ...

Page 34: ...nu Center Steering Wheel Prompt Icon This icon points to the key and is used for steering wheel center point calibration in this submenu Steer Axle Position Submenu Steering Wheel Full Left Prompt Icon Steering Wheel Full Right Prompt Icon ...

Page 35: ...mpt Icon This icon points to the key and is used for manual hydraulic end point calibration in this submenu Display Submenu Icons Table 10 presents the icons that appear on the Display Submenus Refer to Display Menu for more information Table 10 Display Submenus and Icons Icon Description Set Date and Time Format Submenu Clock Icon for setting time ...

Page 36: ...Clock Icon 12 Hour Clock Icon DD MM YY Europe Date Format Icon MM DD YY USA Date Format Icon YY MM DD ISO 8601 Date Format Icon Set Daylight Savings Submenu Daylight Savings Adjustment Enable Icon Daylight Savings Start Month Indicator Icon ...

Page 37: ...ndicator Icon Daylight Savings End Day Indicator Icon First Sunday Icon Last Sunday Icon First Friday Icon Last Friday Icon NOTE Not all icons for setting daylight savings time are shown The four icons above serve as examples of the 14 variations Set Time and Date Submenu ...

Page 38: ...Clock Icon for setting time Calendar Icon for setting date Set Units Submenu Set Units Icon Imperial Units Indicator Icon Metric Units Indicator Icon ...

Page 39: ...us See Status Menu for more information Table 11 Status Submenus and Icons Icon Description Vehicle System Manager VSM Version Submenu Hardware Version Indicator Icon Software Version Indicator Icon Display Version Menu Hardware Version Indicator Icon Software Version Indicator Icon ...

Page 40: ...Truck Serial Number Submenu Truck Serial Number Symbol Icon Hour Meters Submenu Truck Hour Meter Icon Traction Hour Meter Icon Pump Hour Meter Icon ...

Page 41: ...Indicator Icon E Hydraulic Controller Version Submenu Hardware Version Indicator Icon Software Version Indicator Icon Pump Motor Controller Version Submenu Hardware Version Indicator Icon Software Version Indicator Icon ...

Page 42: ...raction Controller 1 Version Submenu Hardware Version Indicator Icon Software Version Indicator Icon Traction Controller 2 Version Submenu Hardware Version Indicator Icon Software Version Indicator Icon ...

Page 43: ...Light Controller Version Submenu Hardware Version Indicator Icon Software Version Indicator Icon Impact Sensor Version Submenu Hardware Version Indicator Icon ...

Page 44: ...the icons that appear on the Truck Setup Submenus See Truck Setup Menu for more information Table 12 Truck Setup Submenu Icons Icon Description Add Remove Password Submenu Password Icon Null Symbol Icon Supervisor Password Type Icon Trash Can Icon Hare increase performance Icon ...

Page 45: ... icon points to the key and is used for restoring defaults in this submenu Motion Alarm Submenu Motion Alarm Indicator Icon Motion Alarm Indicator Disabled Icon The X over the icon means the motion alarm is deactivated turned off Motion Alarm Clock Icon ...

Page 46: ...Impact Monitor Settings Submenu Soft Impact Force Icon Soft Impact Time Icon Hard Impact Force Icon Hard Impact Time Icon Auto Power Off Time Delay Submenu Auto Power off Time Delay Indicator Icon ...

Page 47: ...Return to Set Tilt RTST Submenu Return To Set Tilt Delay Icon Return To Set Tilt Truck Icon Tilt Both Ways Icon Infinity Symbol Icon Traction Speed Limit Submenu Forward MPH Icon ...

Page 48: ...h Icon Scheduled Maintenance Reminder Submenu Scheduled Maintenance Reminder enabled ON Scheduled Maintenance Reminder disabled OFF Interval Month Setting Icon Interval Hourmeter Setting Icon Derated Traction Speed Icon Minimum Pump Standby Submenu ...

Page 49: ...t Submenu Note The icons displayed when using this submenu correspond to the submenu icons for the various functions Up to 30 checklist items can be enabled for the Operator Checklist Check Park Brake Icon Check Fuses Icon Check Horn Icon Check Hoses Icon ...

Page 50: ...t Icon Check Service Brake Icon Press the key Enter Key below this icon to indicate proper operation of the current checklist item Press the key below this icon to indicate improper operation of the current checklist item to indicate a problem with it Impact Monitor Shutdown Submenu Impact Shutdown Delay Icon ...

Page 51: ...mpact Shutdown Type Icon Impact Detection Icon ON Icon OFF Icon Disable Traction Icon Disable All Icon Motor Braking Submenu Regenerative Braking Indicator Icon Automatic Deceleration Rate Indicator Icon ...

Page 52: ...Icon With this setting the lift truck decelerates in proportion to how far the pedal is released in relation to the current traction speed Supervisor Icon Steering Wheel Friction and Steering Turns Adjustment Submenu Steering Wheel Friction Icon Steering Wheel Number of Turns Icon Supervisor Icon Steering Wheel Icon E Steer Setting Out of Range Icon ...

Page 53: ...uses small graphic images called icons to provide continuous feedback to the lift truck operator This feedback includes performance settings status and warning messages and essential truck operating information The Operating Screen is active at all times during normal lift truck operation NOTE Icons for the front and rear work lights are shown These are optional features The icons indicators and n...

Page 54: ...ximum performance mode allowed it may be possible for the operator to use the Performance Mode soft keys on the Display Panel to change the current performance mode MODE 4 This is the highest performance mode Other modes are a lower percentage of Mode 4 MODE 3 Top speed is the same as Mode 4 Acceleration is 80 percent of Mode 4 MODE 2 Top speed is 80 percent of Mode 4 Acceleration is 70 percent of...

Page 55: ...con Hydraulic Fluid Level Icon Hydraulic Filter Icon Fasten Seat Belt Icon When the wrench icon is continuously ON it means that scheduled maintenance is due When it is flashing it indicates that an active fault has been detected by the system The wrench icon appears in the bottom location of the status warning icon area when it is displayed It has the lowest priority of the three icons wrench hyd...

Page 56: ...Operating Screen before the ten seconds are up the fasten seat belt icon will no longer be displayed BATTERY DISCHARGE INDICATOR NOTE Because the Battery Discharge Indicator BDI algorithm determines the Battery State Of Charge BSOC based on information gathered during operation it may take several seconds for the BDI to show the correct BSOC for the battery The BDI is located in the top center of ...

Page 57: ...LS If the lift truck is equipped with CAN controlled hazard flashers and lighting controls the icons that indicate the status of the lift truck s lights and hazard flashers are displayed on the Operating Screen The soft keys the operator can use to control these lights are located near the Operating Screen The Front Work Light Icon on the lower right of the screen is always visible The operator ca...

Page 58: ...de the System Off Screen and Alert Screens The purpose of the System Off Screen is to supply brief status information as the system is powered off Alert Screens appear momentarily to attract attention The topics that follow provide more information about these types of screens SYSTEM OFF SCREEN When the lift truck power is first turned OFF the System Off Screen is displayed for five seconds The sy...

Page 59: ...r reset by a Service Technician using the procedures described in the Status Menu section ALERT SCREENS There are two types of alert screens Fault Screens failure indication screens and Interlock Notification Screens Both types of alert screens are temporary in nature because the system immediately restores the original screen after a key press or other action removes the problem When the system d...

Page 60: ...y the accelerator pedal the system will switch from the Operating Screen to an alert screen showing the seat belt icon as shown in Figure 15 Figure 15 Example Interlock Alert Screen In this example if the operator releases the accelerator pedal the system will change the screen back to the Operating Screen Alternatively the operator can press either the Scroll Back Key or the Scroll Forward Key to...

Page 61: ...en and the Add Remove Password submenu accessed through the Truck Setup menu follow PASSWORD SCREEN NOTE Operator passwords are used only on trucks equipped with a software enable option As already stated the Password Screen is the first screen to appear when the key switch or keyless switch is turned on unless Operator Passwords are deactivated The Password Screen is visible at all password acces...

Page 62: ...evel access NOTE In certain circumstances a default operator password of 11111 will be in the currently stored password list NOTE If there are no Service Technician level passwords in the currently stored password list the factory default Service Technician level password 55555 can be used to gain access to the system Use the factory default Service Technician level password 55555 when installing ...

Page 63: ...nitial Password screen will display Enter new password using keys 0 through 9 Press Enter Key First Press the Up Arrow or Down Arrow Soft Key to select password access level Operator Supervisor or Service Technician password access level Then Press Hare 4 soft key to cycle through performance modes Available performance modes are minimum 1 to maximum 4 the default Press the Enter Key to add this p...

Page 64: ...ou must have a privilege level equal to or greater than the privilege level of the password being modified This means a Service Technician can modify all passwords but a Supervisor can only modify the passwords of Operators and other Supervisors Table 15 shows the process for changing or removing an existing password for the lift truck Table 15 Change or Remove Password Scroll Keys Truck Setup mai...

Page 65: ...menu See the next section Activity Log Menu for more information This menu allows a Service Technician or a Supervisor to view the last 250 valid passwords entered into the system and the password access level i e Operator Supervisor or Service Technician associated with each password Activity Log Menu INTRODUCTION The Activity Log Menu is a main menu top level menu that is visible at Service Tech...

Page 66: ...r the Impact Events Log menu press the Scroll Back Key or Scroll Forward Key and then press the Enter Key The following sections describe the Activity Log submenus OPERATOR CHECKLIST LOG This submenu is visible at Service Technician and Supervisor password access levels This second level menu allows a Service Technician or a Supervisor to view the 60 most recent checklist events where an event is ...

Page 67: ...r Checklist Log screen and indicates the available controls 1 PASSWORD VALUE AT LOG OCCURRENCE 2 TYPE OF ENTRY PASS FAIL 3 UP ARROW SOFT KEY ICON 4 CURRENT LOG ENTRY OR EMPTY SYMBOL 5 DOWN ARROW SOFT KEY ICON 6 CHECKLIST ITEM THAT PASSED 7 TRASH CAN SOFT KEY USED TO EMPTY LOG 8 TRACTION HOURS AT LOG OCCURRENCE 9 SYSTEM DATE AT LOG OCCURRENCE Figure 22 Operator Checklist Log Screen Figure 23 shows ...

Page 68: ... CHECKLIST ITEM THAT FAILED 7 TRASH CAN SOFT KEY USED TO EMPTY LOG 8 TRACTION HOURS AT LOG OCCURRENCE 9 SYSTEM DATE AT LOG OCCURRENCE Figure 23 Failed Checklist Log Entry If there are no log entries or the final log entry has been scrolled past an empty log screen is displayed as shown in Figure 24 1 EMPTY SYMBOL 2 SYSTEM TIME ICON 3 SYSTEM DATE ICON ...

Page 69: ...assword log entry An empty log screen replaces this log screen Press either Scroll Key or to exit When a person with Supervisor password level access views the log any recorded events under Service Technician level access will show instead of the actual password number Also if there was no password logged in at the time of an event the password will show as PASSWORD LOG The Password Log Submenu is...

Page 70: ...g screen and indicates the available controls The process for viewing and removing password logs from the system is shown in Table 17 1 PASSWORD VALUE AT LOG OCCURRENCE 2 OPERATOR SUPERVISOR SERVICE TECHNICIAN ICON 3 UP ARROW SOFT KEY ICON 4 CURRENT LOG ENTRY OR EMPTY SYMBOL 5 DOWN ARROW SOFT KEY ICON 6 TRASH CAN SOFT KEY ICON 7 TRACTION HOURS AT LOG OCCURRENCE 8 SYSTEM DATE AT LOG OCCURRENCE Figu...

Page 71: ...hat a Supervisor viewing the Password Log cannot see a Service Technician s password When viewing the log entry of a person with a higher access level the password is displayed as After removing a log entry an Empty symbol replaces the former log entry number until the next entry has been scrolled into view If there are no remaining log entries an Empty log screen is displayed as shown in Figure 2...

Page 72: ...screen and indicates the available controls 1 PASSWORD VALUE AT LOG OCCURRENCE 2 TYPE OF IMPACT SOFT HARD ICON 3 UP ARROW SOFT KEY ICON 4 CURRENT LOG ENTRY OR EMPTY SYMBOL 5 DOWN ARROW SOFT KEY ICON 6 TRASH CAN SOFT KEY ICON 7 TRACTION HOURS AT LOG OCCURRENCE 8 SYSTEM DATE AT LOG OCCURRENCE Figure 28 Impact Events Log Screen If there are no log entries or the final log entry has been scrolled past...

Page 73: ... screen Press either Scroll Key or to exit When a person with Supervisor password level access views the log any recorded events under Service Technician level access are shown as instead of the actual password number Also if there was no password logged in at the time of an event the password appears as Calibration Menu INTRODUCTION The Calibration Menu is a main menu top level menu that is visib...

Page 74: ...le Position Steer Axle Center Point Manual Hydraulics The following sections describe the Calibration submenus LOAD WEIGHT CALIBRATION NOTE This measurement is not for trade This menu item shown in Figure 30 allows a Service Technician Supervisor or Operator to calibrate Load Weight To calibrate Load Weight select this submenu from the Calibration Menu and follow the prompts on the display NOTE Wh...

Page 75: ... Point Sequence 1 Starting from the Calibration Menu scroll to the Return to Set Tilt Stop Point screen and press the Enter Key 2 When prompted position the mast at the desired tilt angle 3 Press the Enter Key The system records the new setting and returns to the Calibration Menu E HYDRAULIC AND MANUAL VALVE THRESHOLD CALIBRATION NOTE This calibration must be done by a supervisor or service techni...

Page 76: ...he lever toward the rear of the truck the B direction until the forks begin to creep and press the Enter Key The system records the valve reading Steps 5 and 6 provide the hydraulic input for function 1 NOTE If a valve reading is not within the acceptable range an abort message appears Press any key to continue 7 Continue the process for functions 2 3 and 4 as prompted by the system The system rec...

Page 77: ... to the Calibration Menu STEER AXLE POSITION CALIBRATION NOTE This calibration must be done by a supervisor or service technician and is only available on trucks equipped with the Synchronized Steering function or dual traction motors Figure 34 shows the screens that appear while calibrating the Steer Axle Position To calibrate the Steer Axle Position Figure 34 Calibrating Steer Axle Position 1 St...

Page 78: ... at the straight ahead position to determine if correct 1 Starting from the Calibration Menu scroll to the Steer Axle Center Point Offset screen and press the Enter Key 2 Use the 2 up arrow soft key increase the offset by 1 3 Use the 3 down arrow soft key to decrease the offset by 1 4 Once the truck drives in a straight when the steer wheel is in the calibrated center point position press the Ente...

Page 79: ...t is move each lever as far as it will go in both directions 4 Press the Enter Key The system records the extreme locations and returns to the Calibration Menu Display Menu INTRODUCTION The Display Menu is a main menu top level menu that is visible at Supervisor and Service Technician password access levels To access this menu cycle through the main level menu screens by pressing the Scroll Back K...

Page 80: ...ck Key or Scroll Forward Key a second time to return to the main menu The Display Menu offers these submenus see the Table 10 topic Set Date and Time Format Menu Set Daylight Saving Time Menu Set Time and Date Menu Set Units Menu The sections that follow describe these submenus SET DATE AND TIME FORMAT MENU A Supervisor or a Service Technician can use this menu to define the system date and time f...

Page 81: ...ptions for the Current Date Format USA MM DD YY Europe DD MM YY ISO 8601 YY MM DD Use the 2 or 3 soft key to cycle through the Current Date Format options When you have the desired format displayed press the Enter Key and the system will begin using that date format as the current date format setting for all menus in the system Table 19 shows the process for selecting and changing the date and tim...

Page 82: ...reases by one hour at 2 00 am on the selected Start Date and decreases by one hour at the same time on the selected End Date Figure 40 shows the title screen for this menu Figure 40 Set Daylight Saving Time Menu To enable daylight saving time press the Enter Key at the menu shown in Figure 40 The system will display the screen shown in Figure 41 1 DAYLIGHT SAVINGS ENABLE 2 ENABLE INDICATOR THE ON ...

Page 83: ...nths to the desired start month and press the Enter Key 4 Set the day daylight saving time will begin a Press the 3 Down Arrow soft key to activate the Start Date indicator and press the Enter Key b Use the 2 or 3 soft key to cycle through the dates by numbers by first days of the week and by last days of the week to the desired start day This can be a date such as the 13th of the month or a day o...

Page 84: ...SCROLL SCROLL Daylight Save Start Month 01 Daylight Save Start Day 01 SCROLL Daylight Save Start Day Last Press Enter Key Daylight Save Start Last Su Select the Day of the Week from available selections and press Enter Key SCROLL Daylight Save Start Last Sa SCROLL SCROLL Daylight Save Start Day first Press Enter Key Daylight Save Start first Su Select the Day of the Week from available selections ...

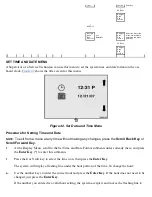
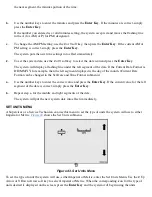
Page 85: ...tting Time and Date NOTE To exit from a menu at any time without making any changes press the Scroll Back Key or Scroll Forward Key 1 At the Display Menu scroll to the Set Time and Date Format submenu unless already there and press the Enter Key to enter this submenu 1 Press the 2 or 3 soft key to select the time icon then press the Enter Key The system will display a flashing line under the hour ...

Page 86: ...e then the left segment displayed is the day of the month Current Date Format can be changed in the Set Date and Time Format submenu a Use the number keys to enter the correct value and press the Enter Key If the current value for the left segment of the date is correct simply press the Enter Key b Repeat step a for the middle and right segments of the date The system will put the new system date ...

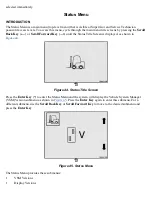
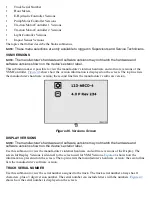
Page 87: ...e Status Title Screen is displayed as shown in Figure 44 Figure 44 Status Title Screen Press the Enter Key to enter the Status Menu and the system will display the Vehicle System Manager VSM Version submenu as shown in Figure 45 Press the Enter Key again to enter this submenu For a different submenu use the Scroll Back Key or Scroll Forward Key to move to the desired submenu and press the Enter Ke...

Page 88: ... lists the manufacturer s hardware version the second line lists the manufacturer s software version Figure 46 Versions Screen DISPLAY VERSIONS NOTE The manufacturer s hardware and software versions may not match the hardware and software versions shown on the device s exterior label Use this submenu to view the manufacturer s internal hardware and software versions of the Display The screen for D...

Page 89: ...VERSIONS NOTE The manufacturer s hardware and software versions may not match the hardware and software versions shown on the device s exterior label Use this submenu to view the manufacturer s internal hardware and software versions of the E Hydraulic Input Controller NOTE This item is visible only on trucks equipped with E Hydraulics The manufacturer s hardware and manufacturer s software versio...

Page 90: ...NOTE The Status Menu displays this item only if the CDF configuration indicates dual traction motors are present The manufacturer s hardware and manufacturer s software version information is presented on the screen as shown in Figure 46 LIGHT CONTROLLER VERSIONS NOTE The manufacturer s hardware and software versions may not match the hardware and software versions shown on the device s exterior l...

Page 91: ...n to enter this submenu For a different submenu use the Scroll Back Key or Scroll Forward Key to move to the desired submenu and press the Enter Key Figure 50 Add Remove Password Submenu The Truck Setup Menu presents these submenus to Supervisors Add Remove Password Restore Default Settings Motion Alarm Impact Monitor Settings Auto Power Off Time Delay Return to Set Tilt Traction Speed Limit Sched...

Page 92: ...ion This menu provides settings for battery type installed on the truck There are two possible battery settings lead acid and lithium ion battery See Figure 51 1 LEAD ACID BATTERY SETTING 2 LITHIUM ION BATTERY SETTING Figure 51 Battery Settings It is important that the setting match the battery type installed to allow for accurate function of the battery discharge indicator and Shutdown Warning Sy...

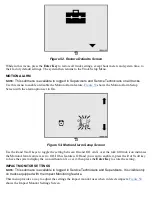
Page 93: ...otion Alarm Setup Screen Use the 2 and 3 soft keys to toggle the setting between On and Off An X over the fork lift truck icon indicates the Motion Alarm feature is set to Off If this feature is Off and you want to enable it press the 2 or 3 soft key to have the system display the icon without an X over it then press the Enter Key to store the setting IMPACT MONITOR SETTINGS NOTE This submenu is a...

Page 94: ...Time the second setting down from the top can be adjusted to require the impact monitor to see an impact force greater than the Soft Impact Force for 1 to 12 samples before a soft impact event will be reported The Hard Impact Force the third setting down can be set to a value in the range 0 5 to 3 0 g in tenths of gravitational force The Hard Impact Time the forth setting down from the top can be ...

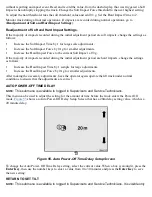
Page 95: ...l adjustment period are hard impacts change the settings as follows Increase the Hard Impact Time by 1 sample for large adjustments Increase the Hard Impact Force by 0 1g for smaller adjustments After making the necessary adjustments have the operator again operate the lift truck under normal conditions to ensure that the adjustments are correct AUTO POWER OFF TIME DELAY NOTE This submenu is avail...

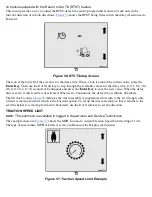
Page 96: ...nter Key to save the new value When the delay time is set to 0 this feature is deactivated When set to Continuous the delay time is infinite limitless The lift truck icon in Figure 56 indicates the mast assembly is programmed to return to the set tilt angle only when it is moving forward which is the Forward option To set up the mast assembly so that it returns to the set tilt whether it is moving...

Page 97: ...Reminder Status set to ON and Setting one or both of the reminder intervals to nonzero numbers activates the maintenance reminders feature Once a previously active interval counts down to zero the maintenance reminder becomes active To deactivate the maintenance reminder the user must either set the status to OFF or enter a new service interval The scheduled maintenance month interval is based on ...

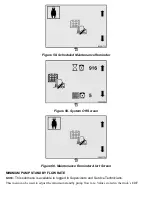
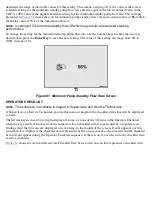
Page 98: ... Screen Figure 60 Maintenance Reminder Alert Screen MINIMUM PUMP STANDBY FLOW RATE NOTE This submenu is available to logged in Supervisors and Service Technicians This menu can be used to adjust the minimum standby pump flow rate Values stored in the truck s CDF ...

Page 99: ...e from 0 to 100 in steps of 1 Figure 61 Minimum Pump Standby Flow Rate Screen OPERATOR CHECKLIST NOTE This submenu is available to logged in Supervisors and Service Technicians A Supervisor or a Service Technician can use this menu to program the checklist items that will be displayed to users The lift truck system can be set up to display all some or none of the 30 items in the Operator Checklist...

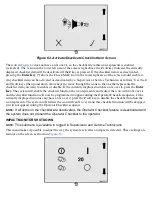
Page 100: ...con has an X over it press the Enter Key The system will enable the checklist function the icon represents and redraw the icon with no X over it and the checklist function will now be programmed to appear during the Operator Checklist sequence If the currently displayed icon does not have an X over it press the soft key to disable the checklist function the icon represents The system will redraw t...

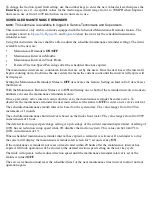
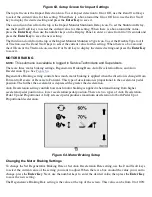
Page 101: ...echnicians and Supervisors There are three motor braking settings Regenerative Braking Rate Auto Deceleration Rate and Auto Deceleration Type See Figure 64 Regenerative Braking setting controls how much motor braking is applied when the direction is changed from Forward to Reverse or Reverse to Forward This type of deceleration is proportional to the accelerator pedal position The further the acce...

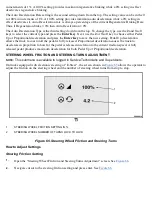
Page 102: ...eleration allows the truck to coast until the pedal is fully released Proportional deceleration causes the truck to decelerate in proportion to how far the pedal is released in relation to the current traction speed A fully released pedal produces maximum deceleration for both Pedal Up or Proportional deceleration STEERING WHEEL FRICTION AND STEERING TURNS ADJUSTMENT NOTE This submenu is available...

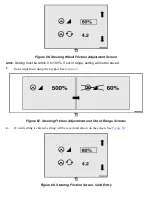
Page 103: ...f out of range setting will not be saved 3 Enter adjustment using the keypad See Figure 67 Figure 67 Steering Friction Adjustment and Out of Range Screens 4 If valid setting is entered setting will be saved and shown on the screen See Figure 68 Figure 68 Steering Friction Screen Valid Entry ...

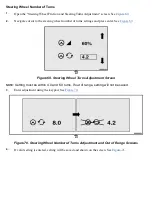
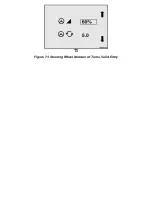
Page 104: ...and press enter See Figure 69 Figure 69 Steering Wheel Turns Adjustment Screen NOTE Setting must be within 4 0 and 6 0 turns If out of range setting will not be saved 3 Enter adjustment using the keypad See Figure 70 Figure 70 Steering Wheel Number of Turns Adjustment and Out of Range Screens 4 If valid setting is entered setting will be saved and shown on the screen See Figure 71 ...

Page 105: ...Figure 71 Steering Wheel Number of Turns Valid Entry ...

Reviews: