background image

DTMF Operation

The Microphone’s 16-button keypad allows easy DTMF dialing for Autopatch, repeater 

control, or Internet-link access purposes. Besides numerical digits [

0

] through [

9

], the 

keypad includes the [

] and [

#

] digits, plus the [

A

], [

B

], [

C

], and [

D

] tones often used for 

repeater control.

Manual DTMF Tone Generation

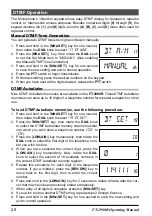
You can generate DTMF tones during transmission manually.
1.  Press and hold in the [

MHz

(

SET

)] key for one second, 

then rotate the 

DIAL

 knob to select “

17 DT A

/

M

”.

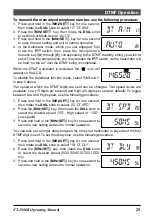
2.  Press the [

MHz

(

SET

)]  key, then rotate the 

DIAL

 knob 

to set this Set Mode Item to “

MANUAL

” (thus enabling 

the Manual DTMF Tone Generation).

3.  Press and hold in the [

MHz

(

SET

)]  key for one second 

to save the new setting and exit to normal operation.

4.  Press the 

PTT

 switch to begin transmission.

5.  While transmitting, press the desired numbers on the keypad.

6.  When you have sent all the digits desired, release the 

PTT

 switch.

DTMF Autodialer

Nine DTMF Autodialer memories are available on the 

FT-2980R

. These DTMF Autodialer 

memories can store up to 16 digits of a telephone number for repeater autopatch or other 

use.

To load DTMF Autodialer memories, use the following procedure:

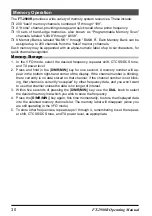
1.  Press and hold in the [

MHz

(

SET

)] key for one second, 

then rotate the

 DIAL

 knob to select “

19 DT SET

”.

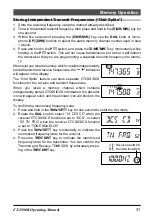
2.  Press the [

MHz

(

SET

)] key, then rotate the

 DIAL

 knob 

to select the DTMF Autodialer memory channel number 

into which you wish store a telephone number (“

C0

” to 

C9

”).

3.  Press the [

LOW

(

A/N

)] key momentarily, then rotate the 

DIAL

 knob to select the first digit of the telephone num-

ber you wish to store.

4.  When you have selected the correct digit, press the 

[

LOW

(

A/N

)] key momentarily. Now, rotate the 

DIAL


knob to select the second of 16 available numbers in 

the current DTMF Autodialer memory register.

5.  Repeat this procedure for each digit in the telephone 

number. If you a mistake, press the [

REV

(

DW

)] key to 

move back to the first digit, then re-enter the correct 

number.

6.  Press and hold in the [

LOW

(

A/N

)] key for 2 seconds to delete all data after the cur-

sor that may have been previously stored erroneously.

7.  When entry of all digits is complete, press the [

MHz

(

SET

)] key.

8.  If you wish to store another DTMF string, repeat steps 2 through 6 above.

9.  Press and hold in the [

MHz

(

SET

)] key for one second to save the new setting and 

exit to normal operation.

28

FT-2980R Operating Manual

Summary of Contents for FT-2980R

Page 1: ...FM TRANSCEIVER FT 2980R Operating Manual...

Page 2: ...27 Split Tone Operation 27 DTMF Operation 28 Manual DTMF Tone Generation 28 DTMF Autodialer 28 Memory Operation 30 Memory Storage 30 Storing Independent Transmit Frequencies Odd Splits 31 Memory Recal...

Page 3: ...ted Selects the operating Frequency Press and hold for one second Press and hold for one second to lock all key functions except the VOL SQL knobs and PTT switch SQL Knob Frequency DIAL Knob LOCK Swit...

Page 4: ...tuning chan nels in 10 channel steps Enters the Set Menu mode Reverses transmit and receive frequencies in repeater opera tion Activates the Priority Channel Scanning Dual Watch feature Selects the t...

Page 5: ...er of transceiver performance characteristics The Yaesu exclusive multi function LCD display Additional features include a transmit Time Out Timer TOT Automatic Power Off APO Automatic Repeater Shift...

Page 6: ...n injury electric shock and equipment failure Do not operate the device when flammable gas is generated Doing so may result in fire and explosion Do not transmit in crowded places in con sideration of...

Page 7: ...location exposed to direct sunlight This may result in deformation and discolor ation Do not place this device in a location where there is a lot of dust and humidity Doing so may result in fire and e...

Page 8: ...nsert ob jects inside it If not this may result in equipment failure Do not use a microphone other than those specified when connecting a microphone to the device If not this may result in equipment f...

Page 9: ...8A6J Hand Micro phone to this jack PWR Key Press and hold this key for one second to toggle the transceiver s power on and off L Key This key allows operation in conjunction with the Internet Connecti...

Page 10: ...ation of the frequency and the channel s Alpha Numeric label press and hold in this key for one second while receiv ing on that memory channel D MR MW Key Press this key momentarily to switch the freq...

Page 11: ...systems P2 button S SRCH Press this button to activate the Smart Search feature P3 button C SRCH Press this button to activate the Tone Search feature P4 button WX CH T CALL In the USA version pressin...

Page 12: ...xial Socket Connect a 144 MHz antenna to this type M SO 239 socket using 50 Ohm coaxial cable and a type M PL 259 plug Make sure the antenna is de signed specifically for use on the operating frequenc...

Page 13: ...the unit was purchased over the counter so as to get instructions regarding the prompt resolution of the damage situation Be certain to save the shipping carton especially if there are any punctures o...

Page 14: ...tenna will permit maximum performance and protect the transceiver from damage High voltages may be present on the antenna install it so it will not be easily touched when in operation About coaxial ca...

Page 15: ...RED power cable lead to the POSITIVE battery terminal and the BLACK power cable lead to the NEGATIVE terminal If you need to extend the power cable use 12 AWG or larger insulated stranded copper wire...

Page 16: ...uirements Other well regulated power supplies may be used as well if they meet the above voltage and current specifications Use the DC power cable supplied with your transceiver for making power conne...

Page 17: ...ed message up to 6 characters via Set Mode Item 31 OPN MSG see page 67 for details Adjusting the Audio Volume Level Rotate the VOL control to adjust the receiver volume Clockwise rotation increases th...

Page 18: ...annel steps are set to an incompatible value e g if you have 25 kHz steps set you cannot set a frequency of 146 520 MHz See page 18 to learn how to change the channel step size 3 Scanning From the VFO...

Page 19: ...left corner on the display Changing the Transmitter Power Level You can select from among a total of four transmit power levels on your FT 2980R To change the power level press the LOW A N key or the...

Page 20: ...WX Broadcast one touch access key Please note that if you change assign another function to the P4 key one touch access to the WX channel will be unavailable Severe Weather Alert Feature In the event...

Page 21: ...h is locked TX not possible K P Both keys and PTT switch are locked out D P Both DIAL knob and PTT switch are locked out ALL All of the above are locked out 3 Press and hold in the MHz SET key for one...

Page 22: ...o save your new setting and exit to normal operation RF Squelch A special RF Squelch feature is provided on this radio This feature allows you to set the squelch so that only signals exceeding a certa...

Page 23: ...one s programmable keys P1 P4 to allow quick access to the above procedure See page 56 for details on the setup of the programmable keys With repeater shift activated you can temporarily reverse the t...

Page 24: ...play to OFF 3 Press and hold in the MHz SET key for one second to save your new setting and exit to normal operation To enable the ARS function again select ON in step 2 above Checking the Repeater Up...

Page 25: ...l a specific call is received which may be helpful while operating in congested areas 1 You may notice a RV TN indication on the display while you rotate the DIAL knob in this step this means that the...

Page 26: ...o re program one of the Microphone s programmable keys for quick access to Menu 52 TN FRQ from which you can perform the above setup procedure See the box on page 56 for setup details of the pro gramm...

Page 27: ...you have made your selection press and hold in the MHz SET key for one second to save the new set ting and exit to normal operation 1 Remember that the DCS is an Encode Decode system so your receiver...

Page 28: ...will appear on the display 2 Press the Microphone s P3 key momentarily to start scanning for the incoming CTCSS or DCS tone code 3 When the radio detects the correct tone or code it will halt on that...

Page 29: ...4 PAG CDR for the Receiving CTCSS Tone Pair or 35 PAG CDT for the Transmitting CTCSS Tone Pair 3 Press the MHz SET key momentarily to enable ad justment of this Set Mode Item 4 Rotate the DIAL knob to...

Page 30: ...ncy display Paging Answer Back When you press the PTT switch to respond to a page call the FT 2980R transmits the Transmitting CTCSS Tone pair This tone pair will open the Code Squelch of the calling...

Page 31: ...CTCSS DCS EPCS Bell is activated the icon will appear on the display Split Tone Operation The FT 2980R can be operated in a Split Tone configuration to enable operation on repeaters using a mix of bot...

Page 32: ...topatch or other use To load DTMF Autodialer memories use the following procedure 1 Press and hold in the MHz SET key for one second then rotate the DIAL knob to select 19 DT SET 2 Press the MHz SET k...

Page 33: ...at which the DTMF digits are sent can be changed Two speed levels are available Low 10 digits per second and High 20 digits per second default To toggle between Low and High speed use the following p...

Page 34: ...hold in the D MR MW key for one second A memory number will ap pear in the bottom right hand corner of the display If the channel number is blinking there currently is no data stored on that channel i...

Page 35: ...ll appear in the display The Odd Splits feature can store separate CTCSS DCS functions for the receive and transmit frequencies When you recall a memory channel which contains independently stored CTC...

Page 36: ...through the available memories When using the microphone s buttons press the button momentarily to move one step up or down press and hold in the UP or DWN button for one second to begin memo ry scan...

Page 37: ...elect the desired number let ter or symbol then press the LOW A N key to move the next character s location Press the REV DW key if you want to backspace one slot To enter a space press the LOW A N ke...

Page 38: ...o Masking Memories There may be situations where you want to Mask memories so they are not visible during memory selection or scanning For example several memories used only in a city you visit infreq...

Page 39: ...mory channels L0 U0 through L9 U9 may not be assigned to a Memory Bank Memory Bank Recall 1 Press the D MR MW key if needed to enter the Memory mode 2 Press the Microphone s key to activate the Memory...

Page 40: ...MHz SET key for one second then rotate the DIAL knob to select 9 BNK NM 2 Press the MHz SET key momentarily then rotate the DIAL knob to recall the memory bank on which you wish to change a label 3 Pr...

Page 41: ...ou may also append an alpha numeric Tag label to a Home channel as described previously be sure to recall the Home channel first then enter the Menu selection 30 NM SET to program the label s contents...

Page 42: ...anning toward a higher or lower numbered memory channel respectively Scanning pauses when a signal opens the squelch and the decimal point on the dis play will blink You can choose one of three scan r...

Page 43: ...n memories you may wish to skip them for scanning but still have them available for manual selection To mask a memory to be skipped only during scanning use the following procedure 1 Set the radio to...

Page 44: ...sing the D MR MW key repeated ly if necessary 2 Rotate the DIAL knob to select the Memory Channel which you wish to add to the Preferential Scan List 3 Press and hold in the MHz SET key for one second...

Page 45: ...SKIP icon from the Memory Bank number indication Programmable Band Scan Limits Besides band and memory scanning this transceiver can be set to tune or scan only the frequencies between user defined l...

Page 46: ...80R for operation on another memory channel Home channel or on a VFO frequency 5 Press and hold in the REV DW key for one second The display will remain on the VFO the selected memory channel or the H...

Page 47: ...ne volume level to maximum regardless the VOL knob setting using Menu item 58 WX VOL See page 71 for details 1 When the Weather Alert Scan feature is engaged the Scan Resume mode will be fixed on HOLD...

Page 48: ...hold in the MHz SET key for one second then rotate the DIAL knob to select 45 S SRCH 2 Press the MHz SET key then rotate the DIAL knob to select the desired Smart Search mode see above 3 Press and ho...

Page 49: ...ur selection in step 2 This DTMF tone is sent at the beginning of every transmission to establish or main tain the link to the local WiRES node operating in the SRG mode 4 To disable the Internet Conn...

Page 50: ...ter 13 If you make a mistake press the REV DW key to back space the cursor then re enter the correct letter number or symbol 14 Repeat steps 11 and 12 to program the remaining let ters numbers or symb...

Page 51: ...e PTT switch momentarily to lock in the selected access number 6 Once the Internet Connection feature is activated per step 4 above you may now press the key while you are transmitting to send out the...

Page 52: ...If you move out of range for more than one minute four pollings your radio will sense that no signal has been received three beeps will sound and the display will revert to OUTRNG If you move back in...

Page 53: ...RTS operation Depending on your location and the potential annoyance associated with frequent beeps you may choose the Beep mode which best suits your needs The choices are IN RNG The beeps are issued...

Page 54: ...evious letter number s slot then re select the correct letter number 7 When you have finished entering your entire callsign and it contains less than 16 characters press the MHz SET key momentarily to...

Page 55: ...abet Numeric and characters Mixed An Send Alphabet Numeric and characters Mixed Continuously in group of five 4 Rotate the DIAL knob to select the Morse speed You may select the units of the code spee...

Page 56: ...io level from the receiver to the TNC may be adjusted by using the VOL knob as with voice operation The input level to the FT 2980R from the TNC may be adjusted via Set Mode Item 27 MCGAIN see page 57...

Page 57: ...er letter 0 9 A B C D E substitute for and F substitute for 5 Press the LOW A N key to move to the next digit 6 Repeat steps 4 and 5 to program the remaining num bers letters of the desired password 7...

Page 58: ...e will turn the radio completely off after a user defined period of PTT or key button inactivity If you do not press any front panel keys or buttons rotate the DIAL knob use the microphone s keys and...

Page 59: ...key for one second then rotate the DIAL knob to select 5 BCLO 2 Press the MHz SET key momentarily to enable ad justment of this Set Mode Item 3 Rotate the DIAL knob to set this Set Mode Item to ON thu...

Page 60: ...Scan operation T CALL Activates 1750 Hz Tone Burst Button Default P1 SQLOFF P2 S SRCH P3 C SRCH P4 WX CH USA Version T CALL Asian Version or one of the Set Menu items that has been already assigned b...

Page 61: ...4 To return to wide bandwidth and deviation repeat the above procedure selecting WIDE 5 kHz Deviation 15 kHz Bandwidth in step 2 above MIC Gain Setting At the factory a microphone gain has been progr...

Page 62: ...e above listed equipment is defective In certain amplifier configurations the output signal phase is inverted from the input Small signal or power amplifiers having an odd number 1 3 5 etc of amplific...

Page 63: ...keys while turning the radio on The ALL RESET PUSH D MR KEY notation will scroll on the display 3 Press the D MR MW key momentarily to reset all settings to their factory defaults press any other key...

Page 64: ...radios the order of switch on does not matter CLONE will appear on the displays of both radios when the Clone mode is successfully activated in this step 4 On the Destination radio press the D MR MW...

Page 65: ...tivates the Automatic Repeater Shift feature ON OFF ON 5BCLO Enables Disables the Busy Channel Lock Out fea ture ON OFF OFF 6BEEP Enables Disables the key beeper KY SCN KEY OFF KY SCN 7BELL Selects th...

Page 66: ...nced CTCSS Paging Code Squelch function ON OFF OFF 33PAG ABK Enables Disables the Answer Back function of the Enhanced CTCSS Paging Code Squelch function ON OFF OFF 34PAG CDR Setting the Receiver Page...

Page 67: ...the CTCSS Tone Frequency 50 standard CTCSS tones 100 0 Hz 53TOT Sets the Time Out Timer 1MIN 3MIN 5MIN 10MIN OFF 3MIN 54TS MUT Enables Disables the receiver audio output during the Tone Search Scanner...

Page 68: ...Function Activates Deactivates the Automatic Repeater Shift feature Available Values ON OFF Default ON 5 BCLO Function Enables Disables the Busy Channel Lock Out feature Available Values ON OFF Defaul...

Page 69: ...C VLT Function Indicates the DC Supply Voltage 14 DCS CD Function Setting of the DCS code Available Values 104 standard DCS codes Default 023 DCS CODE 023 025 026 031 032 036 043 047 051 053 054 065 0...

Page 70: ...F 22 INT CD Function Selects the Access Numbers DTMF digits for WIRES Internet linking Available Values DTMF 0 DTMF 9 DTMF A DTMF F Default DTMF 1 23 INT MD Function Selects the Internet Link Connecti...

Page 71: ...Memory Channel See page 33 for details 31 OPN MSG Function Selects the Opening Message that appears when the radio is powered on Available Values DC MSG OFF Default DC DC DC supply voltage MSG Set by...

Page 72: ...h 39 initial setting is Set mode item 13 DC VLT Default SQL OFF 37 PRG P2 Function Programming the function assigned to Microphone s P2 key Available Values ARTS SQL OFF WX CH S SRCH C SRCH SCAN T CAL...

Page 73: ...SIMP Default SIMP 44 RVRT Function Enables disables the Priority Channel Revert feature Available Values ON OFF Default OFF 45 S SRCH Function Selects the Smart Search Sweep mode Available Values SIN...

Page 74: ...er Decoder DCS Digital Coded Encoder Decoder RV TN Reverse CTCSS Decoder Mutes receiver when matching tone is received Note See also Set Mode Item 48 SPLIT regarding additional selections available du...

Page 75: ...Width Available Values 1MHz 2MHz 5MHz ALL Default ALL 1 MHz 2 MHz 5 MHz The scanner will sweep frequencies within the selected bandwidth ALL The scanner will sweep all frequencies 57 WX ALT Function...

Page 76: ...s not necessary to send a product in for service Include a brief note describing the problem along with your name return address phone number and proof of purchase Storage of packing Materials and tra...

Page 77: ...x 50 x 185 mm w o knobs Weight Approx 4 2 lb 1 9 kg Transmitter Output Power 80 W 30 W 10 W 5 W Modulation Type Variable Reactance Maximum Deviation 5 kHz Wide 2 5 kHz Narrow Spurious Radiation Bette...

Page 78: ...eriod from the date of purchase Keep the warranty certificate in a safe location When the warranty certificate is lost failures which occur during the warranty period will be treated as chargeable non...

Page 79: ...scanner and is incapable of being converted or modified to a digital scanner receiver by any user WARNING MODIFICATION OF THIS DEVICE TO RECEIVE CELLULAR RADIOTELEPHONE SERVICE SIGNALS IS PROHIBITED...

Page 80: ...e reproduced without the permission of YAESU MUSEN CO LTD YAESU MUSEN CO LTD Tennozu Parkside Building 2 5 8 Higashi Shinagawa Shinagawa ku Tokyo 140 0002 Japan YAESU USA 6125 Phyllis Drive Cypress CA...

Reviews: