background image

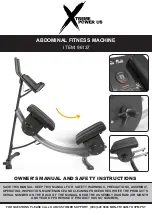
ABDOMINAL FITNESS MACHINE

SAVE THIS MANUAL: KEEP THIS MANUAL FOR  SAFETY WARNINGS, PRECAUTIONS, ASSEMBLY, 

OPERATING, INSPECTION, MAINTENANCE AND CLEANING PROCEDURES. WRITE THE PRODUCT’S 

SERIAL NUMBER ON THE BACK OF THE MANUAL NEAR THE ASSEMBLY DIAGRAM (OR MONTH 

AND YEAR OF PURCHASE IF PRODUCT HAS NO NUMBER).

OWNER’S MANUAL AND SAFETY INSTRUCTIONS

ITEM: 96137

FOR QUESTIONS PLEASE CALL OUR CUSTOMER SUPPORT:  (909) 628 0880 MON-FRI 9AM TO 3PM PST

Summary of Contents for 96137

Page 1: ...ECTION MAINTENANCE AND CLEANING PROCEDURES WRITE THE PRODUCT S SERIAL NUMBER ON THE BACK OF THE MANUAL NEAR THE ASSEMBLY DIAGRAM OR MONTH AND YEAR OF PURCHASE IF PRODUCT HAS NO NUMBER OWNER S MANUAL AND SAFETY INSTRUCTIONS ITEM 96137 FOR QUESTIONS PLEASE CALL OUR CUSTOMER SUPPORT 909 628 0880 MON FRI 9AM TO 3PM PST ...

Page 2: ...to get on this machine Place a rubber mat under the machine and keep the area free of debris and dirt Before beginning training make sure there is at least 7 feet away from other objects DO NOT use abrasive cleaners to clean the machine Use a damp wash cloth and if necessary dish washing liquid Consult a doctor before using this machine This machine is NOT suitable for therapeutic purposes and is ...

Page 3: ...ch W x 51 inch H Product Weight 51 Lbs ROLLER COASTER ABDOMINAL MACHINE XtremepowerUS present a new roller crunch coaster fitness machine provides new workout solution for strengthening your midsection of your body It designs bottom up workout function that is opposite from other abs crunch machine In this way it also works shoulders back arms and legs It integrates contoured padded cushion for su...

Page 4: ...3 PARTS DIAGRAM ...

Page 5: ...4 PARTS LIST ...

Page 6: ...ttach the front foot Step 3 Attach the front post Step 4 Attach the armrest console Step 5 Connect the wires Step 1 Attach the rear foot to the rear of the curved track Remove the 2 bolts which have been pre attached to the rear foot then re attach the bolts to connect the foot to the track Finger tighten the bolts only DO NOT tighten the bolts with a tool until the unit is fully assembled 3 ...

Page 7: ...e front post using the 2 pre attached bolts Finger tighten only Step 3 Attach the front post to the curved track The front post is attached to the track in two locations as shown using the 2 pre attached Allen head screws for each location Finger tighten only ...

Page 8: ...th black plastic caps provided 3 Step 5 Connect the counter wires in 2 locations as shown Install the wire protection covers to cover the wire connections METER The digital repetition counter helps to keep your workout on track The digital display requires one AAA battery included Press the MODE key to start the count function To reset the counter press and hold the button for 3 seconds ...

Page 9: ... pops into the hole underneath the seat at the desired setting Make sure the pin is in the locked position and the seat is secure before you use the ab machine To adjust the seat for freestyle motion pull down the pin and twist the pin to the unlocked setting Rotate the seat by hand to ensure that it is moving freely CAUTION Use caution when getting on and off the machine when the seat is in the u...

Page 10: ...HAT ALL REPAIRS AND PARTS REPLACEMENTS SHOULD BE UNDERTAKEN BY CERTIFIEDAND LICENSED TECHNICIANS AND NOT BY THE BUYER THE BUYER ASSUMES ALL RISK AND LIABILITY ARISING OUT OF HIS OR HER REPAIRS TO THE ORIGINAL PRODUCT OR REPLACEMENT PARTS THERETO OR ARISING OUT OF HIS OR HER INSTALLATION OF REPLACEMENT PARTS THERETO Record Product s Serial Number Here Note If product has no serial number record mon...

Reviews: