V1.2
Page
8
of
14
www.xeryon.com
4.
Setup
1.
Switch on the XD-S driver using the on/off button (green button at the front panel). The green LED
will blink
when the driver is powered.
2.
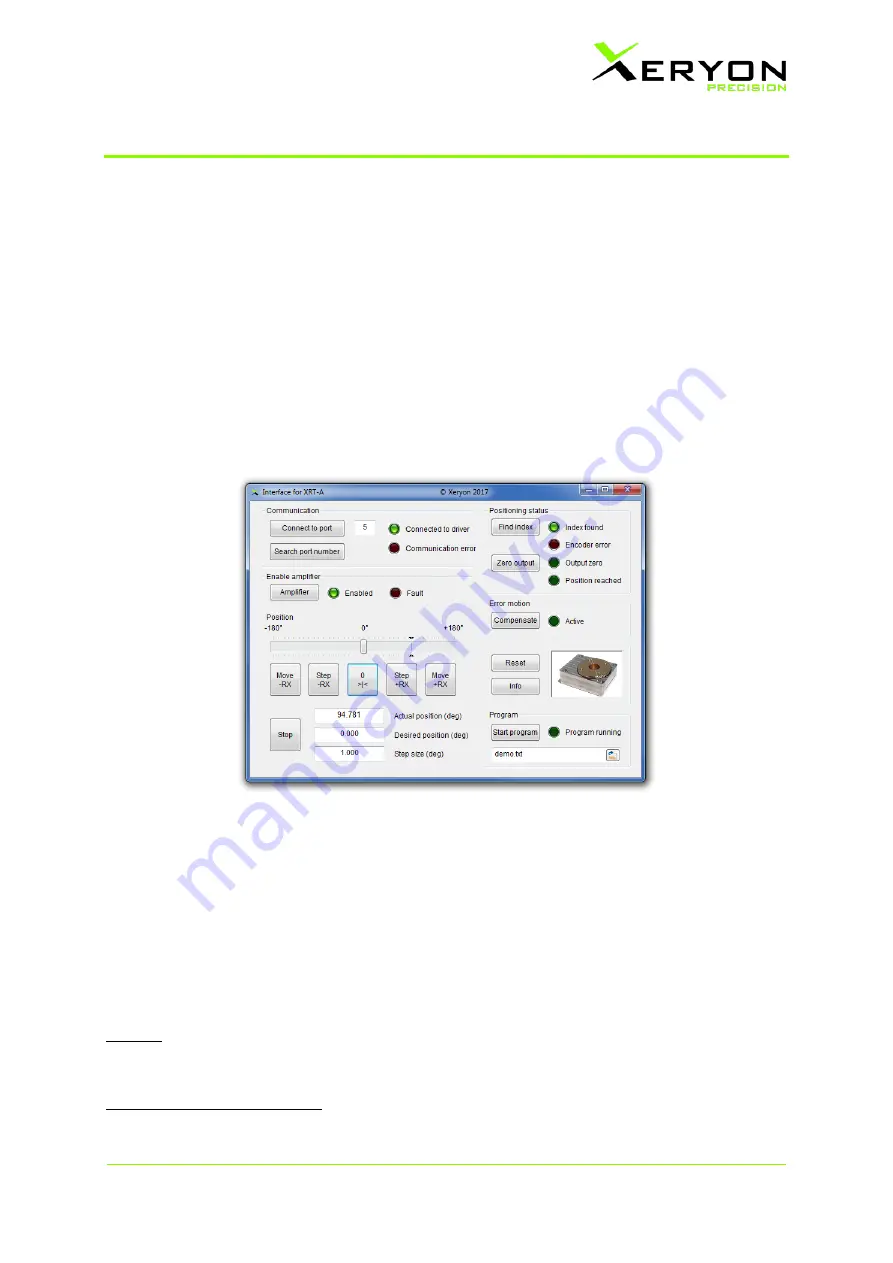
Start the windows interface “
Xeryon_Dialog
.exe”. The windows interface will look like the figure
below
1
.
3.
Select “Search port number” to find the port number that connects your compute
r with the driver.
4.
Enter the port number in the text box next to the button “Connect to port”.
5.
Click “Connect to port”. The green LED “Connected to driver” should light up now.
When the LED
does not light up it means that the computer is not connected with the driver. In this case, one
cannot go to the next step. Please reconnect the computer with the driver and repeat the steps
described above
until the green LED “Connected to driver” lights up.
6.
Click on the button “Amplifier”. The green LED “Enabled” should light up now.
7.
Click “Find index”
or “
Move -R
X” or “
Move +R
X” to find the index.
The stage will automatically
search and stop on the index position
when one clicks on the “Find index” button. The stage will
continously rotate, on the other
hand, when one clicks on “
Move -R
X” or “
Move +R
X”.
The green
LED “Index found” will light up when the index is found.
8.
The driver and stage are now configured and ready to use.
Remark: the stage is driven by a saw-tooth voltage signal. The speed can be changed by altering the
frequency between 0 and 2.5 kHz and/or the voltage of the saw-tooth signal.
1
Some of the buttons may be disabled when you start the windows interface. Please follow the next steps to
configure the driver. This will enable all buttons.


