background image

To print a border around each page, select

Page Borders

.

PPrriinnttiinngg B

Booookklleettss

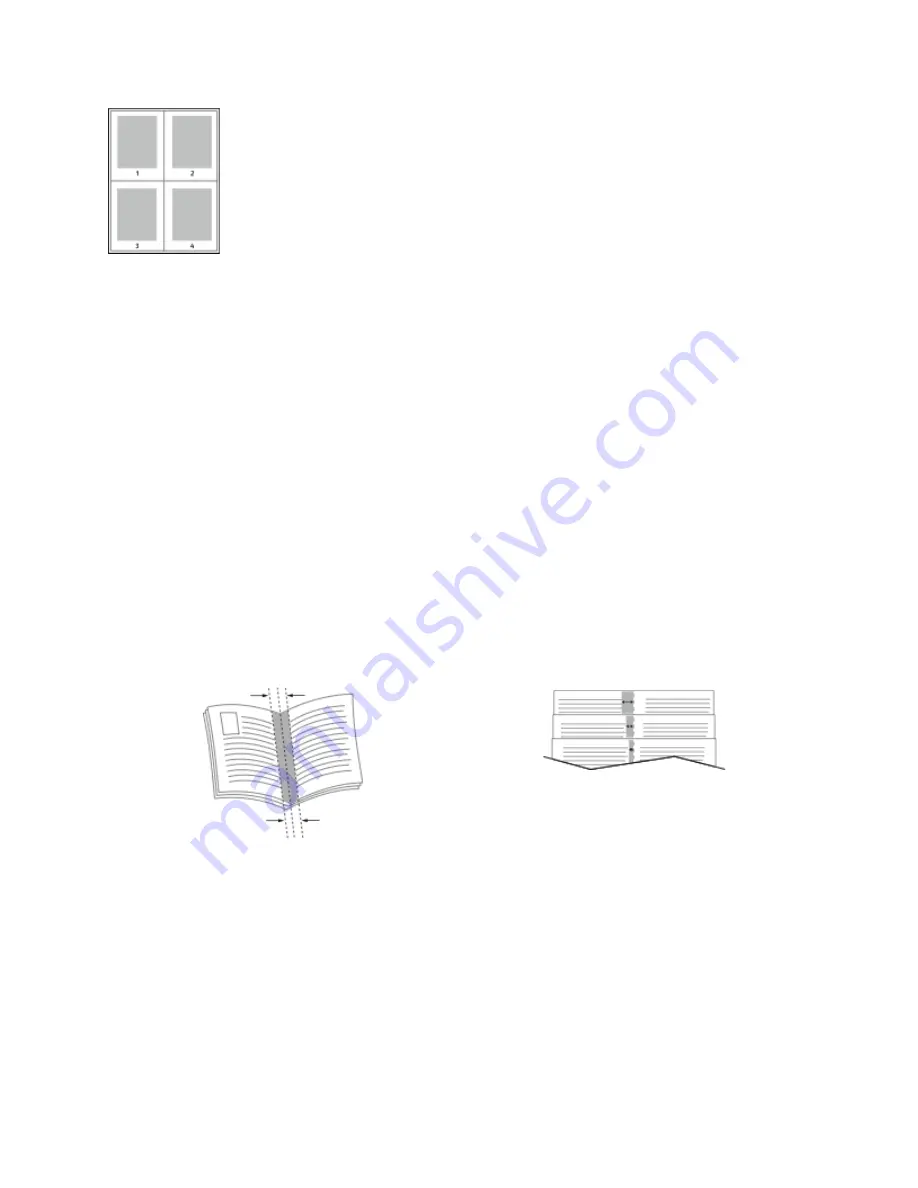
With 2-sided printing, you can print a document in the form of a small booklet. You can create
booklets from any paper size that is supported for 2-sided printing.
The print driver automatically reduces each page image and prints four page images per sheet of
paper, two page images on each side. The pages are printed in the correct order so that you can fold
and staple the pages to create the booklet.

• For Windows, Booklet Layout is on the Page Layout tab. Page Layout is on the Document Options

tab.

• For Macintosh, in the Print window, in Xerox Features, Booklet Layout is on the Paper/Output list.

When you print booklets using the Windows PostScript or Macintosh driver, you can specify the gutter
and creep.

Gutter

: Specifies the horizontal distance in points between the page images. A point is 0.35 mm

(1/72 in.).

Creep

: Specifies how much the page images shift outward in tenths of a point. Shifting

compensates for the thickness of the folded paper, which can cause the page images to shift
outward slightly when folded. You can select a value from zero to 1 point.

Gutter

Creep

SSeelleeccttiinngg FFiinniisshheerr O

Oppttiioonnss

With the optional finisher option installed on the printer, you can request stapled documents right
from your desktop computer. The stapler can staple up to 30 sheets of 105 g/m

2

.

1. From the

Printing Options

tab, locate the

Finishing

option, then select

1 Staple

.

2. Click

OK

.

The stapled prints are delivered to the finisher unit.

88

Xerox

®

VersaLink

®

C600 Color Printer

User Guide

Printing

Summary of Contents for VersaLink C600N

Page 1: ...VERSION 4 0 MARCH 2019 702P05432 Xerox VersaLink C600 Color Printer User Guide...

Page 2: ...M and AIX are registered trademarks of International Business Machines Corporation in the United States and or other countries McAfee ePolicy Orchestrator and McAfee ePO are trademarks or registered t...

Page 3: ...ow Power or Sleep Mode 24 Restarting Placing in Sleep Mode or Powering Off the Printer 25 Accessing the Printer 26 Logging In 26 Smart Card 26 Introduction to Apps 27 Information Pages 28 Printing Inf...

Page 4: ...iding or Showing an App on the Home Screen 55 Rearranging Apps on the Home Screen 55 Customizing or Personalizing the Apps 56 Customizing or Personalizing the Feature List 56 Saving Presets 56 Removin...

Page 5: ...Printing Multiple Pages to a Single Sheet 87 Printing Booklets 88 Selecting Finisher Options 88 Selecting Mailbox Options 89 Using Special Pages 89 Printing Watermarks for Windows 90 Orientation 91 Pr...

Page 6: ...tion 135 Adjusting Paper Registration 135 Transfer Voltage Adjustment 137 Adjusting the Fuser 137 Adjusting the Altitude 138 Performing a Developer and Transfer Roller Cleaning Procedure 138 Performin...

Page 7: ...172 More Information about Your Printer 173 A Specifications 175 Configurations and Options 176 Available Configurations 176 Standard Features 176 Options and Upgrades 177 Physical Specifications 178...

Page 8: ...3 Turkey RoHS Regulation 194 Regulatory Information for 2 4 GHz and 5 GHz Wireless Network Adapters 194 Material Safety Data Sheets 195 C Recycling and Disposal 197 All Countries 198 North America 199...

Page 9: ...Operational Safety 13 Maintenance Safety 15 Printer Symbols 16 Environmental Health and Safety Contact Information 18 Your printer and the recommended supplies have been designed and tested to meet st...

Page 10: ...y evaluation and certification and compliance with electromagnetic regulations and established environmental standards The safety and environment testing and performance of this product have been veri...

Page 11: ...ower cord from the electrical outlet 3 Call an authorized service representative P Po ow we er r C Co or rd d Use the power cord supplied with your printer Plug the power cord directly into a properly...

Page 12: ...ect the power cord from the electrical outlet E Em me er rg ge en nc cy y P Po ow we er r O Of ff f If any of the following conditions occur power off the printer immediately and disconnect the power...

Page 13: ...d do not push or move the device with all the paper trays extended O Oz zo on ne e R Re elle ea as se e This printer produces ozone during normal operation The amount of ozone produced is dependent on...

Page 14: ...om the reach of children Never throw toner toner cartridges drum cartridges or waste cartridges into an open flame When handling cartridges for example toner and such avoid skin or eye contact Eye con...

Page 15: ...on Xerox supplies recycling programs go to www xerox com gwa WARNING Do not use aerosol cleaners Aerosol cleaners can cause explosions or fires when used on electromechanical equipment When installin...

Page 16: ...ified time before touching the fuser Caution Indicates a mandatory action to take in order to avoid damage to the property Caution To avoid damage to the property be careful not to spill toner when ha...

Page 17: ...inkjet paper Do not use transparencies or overhead projector sheets Do not reload paper previously printed on or used For details about all the printer symbols that appear on your printer refer to the...

Page 18: ...t and supplies contact United States and Canada 1 800 ASK XEROX 1 800 275 9376 Europe EHS Europe xerox com For product safety information in the United States and Canada go to www xerox com environmen...

Page 19: ...ted This chapter contains Parts of the Printer 20 Power Options 24 Accessing the Printer 26 Introduction to Apps 27 Information Pages 28 The Embedded Web Server 30 Installation and Setup 33 Connecting...

Page 20: ...or 5 Power Wake Button 6 Control Panel 7 Output Tray 8 Output Tray Extension 9 Right Side Door I In nt te er rn na all P Pa ar rt ts s 1 Front Door 2 Toner Cartridges 3 Transfer Belt 4 Drum Cartridges...

Page 21: ...SB Port Type A 7 USB Port Type A 8 Ethernet Connection 9 FDI Port 10 Power Connector O Op pt tiio on ns s Finisher Mailbox C Co on nt tr ro oll P Pa an ne ell The control panel consists of a touch scr...

Page 22: ...1 NFC Area Near Field Communication NFC is a technology that enables devices to communicate when they are within 10 cm 4 in of each other Use the NFC area to obtain a network interface or to establish...

Page 23: ...When the light blinks fast the printer is powering down or exiting a low power mode 6 Status LED This light blinks blue or amber to indicate printer status Blue Blinks once slowly to acknowledge a su...

Page 24: ...xiit tiin ng g L Lo ow w P Po ow we er r o or r S Slle ee ep p M Mo od de e To power on the printer or to exit Low Power mode or Sleep mode press the Power Wake button Note The Power Wake button is t...

Page 25: ...rinter in Sleep Mode touch Sleep In Sleep Mode the touch screen goes dark and the Power Wake button flashes To power off the printer touch Power Off If the printer does not respond to a single press o...

Page 26: ...office VLC600docs 5 Touch OK Note To access each password protected service enter the User Name and password S Sm ma ar rt t C Ca ar rd d When a Common Access Card system is installed on your Xerox d...

Page 27: ...e screen Some Apps are installed as standard but hidden the first time you use the device When you log in the Apps configured for your personal account appear on the control panel You can download mor...

Page 28: ...t fonts that are available on the printer PCL Font List The PCL Font List provides a printout of all PCL fonts that are available on the printer Demonstration Print Demonstration Print provides a demo...

Page 29: ...setup tray information and more P Pr riin nt tiin ng g t th he e C Co on nf fiig gu ur ra at tiio on n R Re ep po or rt t 1 At the printer control panel press the Home button 2 Touch Device About Info...

Page 30: ...Configuration Report Note To view the TCP IP address on the control panel wait until the printer has been on for 2 minutes If the TCP IP address is 0 0 0 0 or begins with 169 it indicates a network c...

Page 31: ...ice VLC600docs D Do ow wn nllo oa ad diin ng g t th he e C Co on nf fiig gu ur ra at tiio on n R Re ep po or rt t f fr ro om m t th he e E Em mb be ed dd de ed d W We eb b S Se er rv ve er r From the...

Page 32: ...l panel when you are connected remotely to the device click the Lock Device Control Panel option Note If a local user attempts to access the control panel while the device control panel is locked the...

Page 33: ...ct tiin ng g a a L Lo oc ca at tiio on n f fo or r t th he e P Pr riin nt te er r 1 Select a dust free area with temperatures from 10 32 C 50 90 F and relative humidity 10 85 Note Sudden temperature f...

Page 34: ...connection through a router or network switch is required An Ethernet network can be used for one or more computers and supports many printers and systems simultaneously An Ethernet connection is typ...

Page 35: ...ut a physical connection The printer can connect to a wireless LAN that includes a wireless router or wireless access point Before connecting the printer to a wireless network the wireless router must...

Page 36: ...1 Power off the printer 2 To remove the Wireless Network Adapter Port Cover press down on the latch then pull the cover away from the printer 3 Remove the packaging from the Wireless Network Adapter 4...

Page 37: ...formation refer to Resetting Wireless Settings R Re em mo ov viin ng g t th he e W Wiir re elle es ss s N Ne et tw wo or rk k A Ad da ap pt te er r 1 Power off the printer 2 To unlatch the left side c...

Page 38: ...r away from the printer Note Do not use force to pull on the Wireless Network Adapter If the latch is released properly the adapter pulls out easily Pulling on a secured adapter can damage it 5 To rei...

Page 39: ...n slide it toward the front of the printer 7 To latch the cover swing the handle toward the front of the printer then push the handle in until it clicks into the locked position Xerox VersaLink C600 C...

Page 40: ...Touch Device Connectivity Wi Fi 4 To enable the Wi Fi feature touch the enable toggle button 5 To connect automatically to an existing Wi Fi network a In the list of available Wi Fi networks touch the...

Page 41: ...When the kit is installed and enabled the device acquires two network connections One network connection is primary and the other network connection is secondary The following features are available...

Page 42: ...on the printer After the router and printer exchange information the printer accepts the security and configuration information from the router and connects to the network The PBC is a moderately secu...

Page 43: ...uch Device Connectivity Wi Fi b To toggle Wi Fi from Off to On touch the Wi Fi toggle button c To activate your Wi Fi setting changes press the Home button d At the prompt touch Restart Now Note The f...

Page 44: ...rol panel press the Home button 2 If Wi Fi is Off turn it on a Touch Device Connectivity Wi Fi b To toggle Wi Fi from Off to On touch the Wi Fi toggle button c To activate your Wi Fi setting changes p...

Page 45: ...rect Wi Fi Direct is disabled by default Note Wireless networking is available only on printers with the optional Wireless Network Adapter installed Connecting with Wi Fi Direct from Your Mobile Devic...

Page 46: ...omputer open a Web browser In the address field type the IP address of the printer then press Enter or Return Note If you do not know the IP address for your printer refer to Finding the IP Address of...

Page 47: ...rint click the Enable toggle button 5 Click OK 6 Restart the printer then wait 2 minutes for the printer to connect 7 Refresh your Web browser then for Mobile Printing click Google Cloud Print 8 Click...

Page 48: ...r r 1 Insert the Software and Documentation disc into the appropriate drive on your computer If the installer does not start automatically navigate to the drive and double click the Setup exe installe...

Page 49: ...printer 3 To run Xerox Print Drivers 3 xx x dmg pkg double click the appropriate file name 4 When prompted click Continue 5 To accept the license agreement click I Agree 6 To accept the current instal...

Page 50: ...on the left of the window 3 Under the list of printers click the Plus icon 4 Click IP 5 From the Protocol list select the protocol 6 In the Address field enter the IP address of the printer 7 In the N...

Page 51: ...te er r W Wiiz za ar rd d t to o I In ns st ta allll a a W WS SD D P Pr riin nt te er r To install a WSD printer using the Add Printer Wizard 1 At your computer click Start then select Devices and Pr...

Page 52: ...t information for your printer including online technical support Online Support Assistant and print driver downloads www xerox com office VLC600support Information Pages Print from the control panel...

Page 53: ...nk C600 Color Printer User Guide 53 3 Customize and Personalize This chapter contains Customize and Personalize Overview 54 Customizing or Personalizing the Home Screen 55 Customizing or Personalizing...

Page 54: ...repeated use Customization enables users to work more productively When individual user accounts are configured on the device you can personalize the device to meet specific user needs You can config...

Page 55: ...panel c Touch Done 4 To hide an installed app a For the app touch X b Touch Done 5 Verify that only the selected apps appear on the Home screen R Re ea ar rr ra an ng giin ng g A Ap pp ps s o on n t...

Page 56: ...To show a feature for the required feature touch the Eye icon To signify a feature is visible the Eye icon appears with no line across it 6 To reorder the menu features touch and drag the features in...

Page 57: ...nt to delete 6 At the prompt touch Delete 7 Touch Done R Re em mo ov viin ng g A Ap pp p C Cu us st to om miiz za at tiio on n u us siin ng g t th he e C Co on nt tr ro oll P Pa an ne ell To remove th...

Page 58: ......

Page 59: ...played on the Homescreen There are also apps that are installed as standard but are hidden when your device is used for the first time For more information about customizing the Home screen and the ap...

Page 60: ...have direct access to all the available Apps for your device An App Gallery account allows you to view and acquire Apps install Apps on your device and manage your Apps and licenses You can set up an...

Page 61: ...r your User Name using the touch screen keypad then touch Enter 4 Enter your Password using the touch screen keypad then touch Enter 5 Touch Log In The Xerox App Gallery appears I In ns st ta alllliin...

Page 62: ...n A Ap pp p f fr ro om m t th he e A Ap pp p G Ga alllle er ry y 1 At the printer control panel press the Home button 2 Touch Xerox App Gallery 3 Enter your User Name using the touch screen keypad the...

Page 63: ...e Update Use this option to check for software updates and configure update settings Notifications Use the Notifications option to see details of current alerts or faults on the device A History butto...

Page 64: ...e control panel You can customize the alerts that appear on the control panel and configure email alert notifications To check the supplies status and set up alerts using the Embedded Web Server refer...

Page 65: ...ng Usage menu displays the total number of impressions that the printer generated or printed during its lifetime You cannot reset the counters A page is counted as one side of a sheet of paper For exa...

Page 66: ...o reset the printer to factory defaults 1 At the printer control panel press the Home button 2 Touch Device Resets Reset to Factory Defaults 3 At the prompt touch Reset 4 When the process is complete...

Page 67: ...er to Printing Special Job Types P Pa au us siin ng g t th he e P Pr riin nt t J Jo ob b w wiit th h t th he e O Op pt tiio on n t to o D De elle et te e I It t 1 At the printer control panel press th...

Page 68: ...esumes automatically when the required resources are available If the job does not print automatically touch Resume To delete the print job touch Delete At the prompt touch Delete 5 To return to the H...

Page 69: ...P Pr riin nt t Personal Print allows you to store a document in the printer then print it from the control panel Note The Personal Print feature is only available on a Windows computer printing to a...

Page 70: ...button 2 To view available jobs touch Jobs 3 Touch the Sample Set job Note The Sample Set file description shows the job as Held for Future Printing and shows the number of remaining copies of the jo...

Page 71: ...n ng g t th he e E Em mb be ed dd de ed d W We eb b S Se er rv ve er r 1 At your computer open a Web browser In the address field type the IP address of the printer then press Enter or Return 2 In the...

Page 72: ...are supported 1 Insert the USB Flash drive into the USB memory port on the printer 2 At the USB Drive has been detected screen touch Print from USB Note If this feature does not appear enable the fea...

Page 73: ...ministrator Guide at www xerox com office VLC600docs 3 Add files using the Browse USB screen To print a group of print ready files for the USB drive or folder touch the Select All icon Verify that you...

Page 74: ...XeroxAppGallery P Pr riin nt tiin ng g w wiit th h t th he e P Pr riin nt tB By yX Xe er ro ox x A Ap pp p 1 Send an email with an attachment containing a supported file type to Print printbyxerox co...

Page 75: ...Xerox VersaLink C600 Color Printer User Guide 75 5 Printing This chapter contains Printing Overview 76 Selecting Printing Options 77 Printing Features 83 Using Custom Paper Sizes 93...

Page 76: ...d type 3 Access the print settings in your software application For most software applications press CTRL P for Windows or CMD P for Macintosh 4 Select your printer 5 To access the print driver settin...

Page 77: ...e Help window From there you can select by topic or use the search field to enter the topic or function for which you need information W Wiin nd do ow ws s P Pr riin nt tiin ng g O Op pt tiio on ns s...

Page 78: ...W Wiin nd do ow ws s f fo or r a a S Sh ha ar re ed d N Ne et tw wo or rk k P Pr riin nt te er r 1 Navigate to the list of printers on your computer For Windows Server 2008 and later click Start Sett...

Page 79: ...t you can apply them to future print jobs To save a set of printing options 1 With the document open in your application click File Print 2 Select your printer from the Printers list 3 Select the requ...

Page 80: ...or your printer model and operating system click the print driver name 7 To begin the download read the End User License Agreement then click Accept The file automatically downloads to the default loc...

Page 81: ...ure of the location of the folder use the Find command to locate the PPD files 3 Follow the instructions that are included with the PPD file Adding the Printer 1 Verify that the CUPS Common UNIX Print...

Page 82: ...b blle ed d M Mo ob biille e D De ev viic ce e MOPRIA is a software feature that enables users to print from mobile devices without requiring a print driver You can use MOPRIA to print from your mobil...

Page 83: ...system administrator has restricted job deletion you can view the jobs but not delete them Only the user that sent the job or the system administrator can delete a Secure Print job P Pr riin nt tiin...

Page 84: ...red printing options then click OK 5 To send the job to the printer click Print P Pr riin nt tiin ng g a a S Sa am mp plle e S Se et t 1 In your software application access the print settings For most...

Page 85: ...matic 2 Sided Printing the options are specified in the print driver The print driver uses the settings for portrait or landscape orientation from the application for printing the document Note Ensure...

Page 86: ...ox Automatic Color This option applies the best color correction to text graphics and images Xerox recommends this setting Vivid RGB This setting produces brighter and more saturated colors using red...

Page 87: ...e the cyan levels the red levels decrease The Magenta to Green option allows you to adjust the color balance between magenta and green For example when you increase the magenta levels the green levels...

Page 88: ...ooklets using the Windows PostScript or Macintosh driver you can specify the gutter and creep Gutter Specifies the horizontal distance in points between the page images A point is 0 35 mm 1 72 in Cree...

Page 89: ...rce for printing cover pages Select one of these options for printing cover pages No Covers This option does not print cover pages No cover pages are added to the document Front Only This option print...

Page 90: ...es 1 6 9 10 and 11 type 1 6 9 11 Paper Displays the default size color and type of paper selected in Use Job Settings 2 Sided Printing allows you to select 2 sided printing options Click the Down arro...

Page 91: ...arrows 6 Under Layering select how to print the watermark Print in Background This option prints the watermark behind the text and graphics in the document Blend This option combines the watermark wit...

Page 92: ...VLC600docs S Se elle ec ct tiin ng g J Jo ob b C Co om mp plle et tiio on n N No ot tiif fiic ca at tiio on n f fo or r W Wiin nd do ow ws s You can select to be notified when your job finishes printi...

Page 93: ...n ng g o on n C Cu us st to om m S Siiz ze e P Pa ap pe er r f fr ro om m a a M Ma ac ciin nt to os sh h C Co om mp pu ut te er r 1 Load the custom size paper 2 In the application click File Print 3 F...

Page 94: ...the height and width of the new custom paper size 6 Click the arrow for the Non Printable Area field then select the printer from the list Or for User Defined margins set the top bottom right and lef...

Page 95: ...Xerox VersaLink C600 Color Printer User Guide 95 6 Paper and Media This chapter contains Paper and Media Overview 96 Supported Paper 97 Loading Paper 102 Printing on Special Paper 114...

Page 96: ...poor output quality increased paper jams or damage your printer Refer to Paper That Can Damage Your Printer Ensure that the paper type selected in your print driver matches the paper type on which yo...

Page 97: ...above the maximum fill line in the tray Adjust the paper guides to fit the paper size Fan paper before loading it in the paper tray If excessive jams occur use paper or other approved media from a new...

Page 98: ...ens garages or basements These spaces are more likely to collect moisture Store paper flat either on pallets cartons shelves or in cabinets Avoid food or drinks in the area where paper is stored or ha...

Page 99: ...A Au ut to om ma at tiic c 2 2 S Siid de ed d P Pr riin nt tiin ng g Paper Type Weight Recycled 60 80 g m Custom 60 90 g m Bond Hole Punched Letterhead Plain Pre Printed 75 105 g m Lightweight Cardsto...

Page 100: ...8 5 x 14 in Folio 216 x 330 mm 8 5 x 13 in High Capacity Feeder HCF A4 210 x 297 mm 8 3 x 11 7 in Letter 216 x 279 mm 8 5 x 11 in S Su up pp po or rt te ed d S St ta an nd da ar rd d P Pa ap pe er r...

Page 101: ...r size type and color when you load paper into the tray Dedicated If you select this paper setting you cannot change the paper size type and color when you load paper into the tray Bypass When paper i...

Page 102: ...paper in the Bypass Tray 1 Open the Bypass Tray If the Bypass Tray is loaded with paper already remove any paper that is a different size or type 2 Pull out the extension tray for larger sizes 3 Move...

Page 103: ...level surface This procedure separates any sheets that are stuck together and reduces the possibility of jams Note To avoid jams and misfeeds do not remove paper from its packaging until you are read...

Page 104: ...to jam Load hole punched paper with the holes to the left For 1 sided printing load letterhead or pre printed paper face up with the top edge going into the printer For 2 sided printing load letterhe...

Page 105: ...color are incorrect change the settings To select a paper type touch the current paper type then from the list select the type To select a sheet size touch the current size setting then from the list...

Page 106: ...move the tray from the printer pull out the tray until it stops Lift the front of the tray slightly then pull it out 2 Remove all paper from the tray 3 To compress the tray for shorter paper hold the...

Page 107: ...hen the tray is extended place the tray cover over the extended section of the paper tray 6 Load paper into the tray before inserting it back into the printer Xerox VersaLink C600 Color Printer User G...

Page 108: ...rinter pull out the tray until it stops Lift the front of the tray slightly and then pull out the tray completely 2 Adjust the paper length and width guides as illustrated 3 For Legal size paper to ex...

Page 109: ...to the left Load label sheets in the tray face up For 1 sided printing load letterhead paper face up with the top of the paper toward the back of the tray For 2 sided printing load letterhead and pre...

Page 110: ...touch the current paper type then from the list select the type To select a sheet size touch the current size setting then from the list select the size To select a different paper color touch the cu...

Page 111: ...r iin n t th he e H Hiig gh h C Ca ap pa ac ciit ty y F Fe ee ed de er r H HC CF F The High Capacity Feeder HCF tray accommodates 8 5 x 11 in A4 paper only and is loaded in the short edge feed SEF dir...

Page 112: ...per type size and color are correct touch OK b If the paper type size or color are incorrect change the settings To select a paper type touch the current paper type then from the list select the type...

Page 113: ...le prompts you to confirm or modify paper tray settings when paper is loaded in the Bypass Tray 6 To save the setting touch OK 7 To return to the Home screen press the Home button C Co on nf fiig gu u...

Page 114: ...nvelopes If you do not get the desired results try another envelope brand Maintain constant temperatures and relative humidity Store unused envelopes in their packaging to avoid excess moisture and dr...

Page 115: ...ng g E En nv ve ello op pe es s iin n t th he e B By yp pa as ss s T Tr ra ay y 1 Open the Bypass Tray 2 Pull out the extension tray for larger sizes Xerox VersaLink C600 Color Printer User Guide 115...

Page 116: ...nward curl at the leading edge of envelopes is not acceptable and can cause a jam or misfeed Load envelopes up to 16 5 mm 65 in in height This is approximately 10 20 envelopes depending on brand size...

Page 117: ...perform one of the following steps If the envelopes wrinkle try another option Load envelopes with the short edge going into the printer flaps down and flaps to the right Load envelopes with the print...

Page 118: ...Load envelopes with the print side up flaps closed and down and short edge going into the printer Note For envelopes to print correctly when you load envelopes with the flaps open in the print driver...

Page 119: ...E En nv ve ello op pe es s iin n T Tr ra ay y 1 1 1 To remove the tray from the printer pull out the tray until it stops Lift the front of the tray slightly then pull it out 2 Remove any paper in the...

Page 120: ...int L La ab be ells s You can print labels from the Bypass Tray or Tray 1 G Gu uiid de elliin ne es s f fo or r P Pr riin nt tiin ng g L La ab be ells s Use labels designed for laser printing Do not u...

Page 121: ...e missing curled or pulled away from the backing sheet It could damage the printer L Lo oa ad diin ng g L La ab be ells s iin n t th he e B By yp pa as ss s T Tr ra ay y 1 Open the Bypass Tray If the...

Page 122: ...lor of the label sheets a If the type size and color are correct touch OK b If the type size or color are incorrect change the settings To select the type touch the current paper type then from the li...

Page 123: ...Load the label sheets in the tray face up Note Do not load paper above the maximum fill line Overfilling can cause paper jams 4 Slide the tray back into the printer 5 Push the tray in all the way 6 If...

Page 124: ...tiin ng g o on n G Gllo os ss sy y C Ca ar rd ds st to oc ck k Do not open sealed packages of glossy cardstock until you are ready to load paper into the printer Leave glossy cardstock in the original...

Page 125: ...0 Color Printer User Guide 125 7 Maintenance This chapter contains General Precautions 126 Cleaning the Printer 127 Adjustments and Maintenance Procedures 135 Supplies 139 Managing the Printer 142 Mov...

Page 126: ...bed in the documentation supplied with your printer Caution When cleaning your printer do not use organic or strong chemical solvents or aerosol cleaners Do not pour fluids directly into any area Use...

Page 127: ...r r WARNING Never touch a labeled area on or near the heat roller in the fuser You can get burned If a sheet of paper is wrapped around the heat roller do not try to remove it immediately Power off th...

Page 128: ...y dust them off as best as you can If some toner remains on your clothes use cool water not hot to rinse off the toner If toner gets on your skin wash it off with cool water and a mild soap If you get...

Page 129: ...rom the printer To prevent toner spills keep the openings facing up Note Be careful not to spill toner when handling the waste cartridge After removing the waste cartridge do not touch the area shown...

Page 130: ...ith the openings facing up Note To avoid toner spills or malfunction do not lay the waste cartridge on its side or with the openings facing down 6 Remove the cleaning rod from inside the printer 130 X...

Page 131: ...aning holes until it stops then pull out the rod Repeat this two more times 8 Repeat the procedure for the holes in the other three slots 9 Return the cleaning rod to its original location Xerox Versa...

Page 132: ...dge lower the bottom of the cartridge into position To lock the cartridge into place push the top forward until the latch clicks into place 11 Close the right side door 132 Xerox VersaLink C600 Color...

Page 133: ...S Se en ns so or rs s If the print or color density is too light missing or the background is foggy clean the color density sensors 1 Power off the printer 2 Lift the rear door release and pull open t...

Page 134: ...3 Use a dry cotton swab to clean the color density sensors 4 Close the rear door 134 Xerox VersaLink C600 Color Printer User Guide Maintenance...

Page 135: ...me button A Ad dj ju us st tiin ng g P Pa ap pe er r R Re eg giis st tr ra at tiio on n Use Adjust Paper Registration to adjust the placement of the printed image on the page The adjustment allows you...

Page 136: ...e eg giis st tr ra at tiio on n A Ad dj ju us st tm me en nt t 1 At the control panel press the Home button 2 Log in as administrator For details refer to the System Administrator Guide at www xerox c...

Page 137: ...the printer control panel press the Home button 2 Touch Device Support Transfer Voltage Adjustment 3 To select the paper type for the adjustment touch Paper Type then touch the required paper type 4...

Page 138: ...r on prints Use the Developer and Transfer Roller Cleaning procedure to reduce background toner on prints To perform a Developer and Transfer Roller Cleaning procedure 1 At the printer control panel p...

Page 139: ...e I It te em ms s Routine maintenance items are printer parts that have a limited life and require periodic replacement Replacements can be parts or kits Routine maintenance items are typically custo...

Page 140: ...About Information Pages 3 Touch Supplies Usage Report 4 To return to the Home screen press the Home button T To on ne er r C Ca ar rt tr riid dg ge es s G Ge en ne er ra all P Pr re ec ca au ut tiio...

Page 141: ...oner cartridge Out of Toner The toner cartridge is empty Replace the toner cartridge with a new one R Re ec cy yc clliin ng g S Su up pp plliie es s For more information on the Xerox supplies recyclin...

Page 142: ...nformation refer to the System Administrator Guide at www xerox com office VLC600docs To view the billing information for your printer 1 At the printer control panel press the Home button 2 Touch Devi...

Page 143: ...rinter If the optional 550 Sheet Feeder is not fixed to the printer securely it could fall to the ground and cause injury Follow these instructions when moving the printer 1 Power off the printer then...

Page 144: ...y 4 Remove any paper or other media from the Output Tray 5 If the Output Tray Extension is extended close it 6 Remove any paper from Tray 1 then close the tray 144 Xerox VersaLink C600 Color Printer U...

Page 145: ...packing material and boxes or a Xerox Repackaging Kit Failure to repackage the printer properly for shipment can result in damage not covered by the Xerox Warranty Service Agreement or Total Satisfac...

Page 146: ......

Page 147: ...Xerox VersaLink C600 Color Printer User Guide 147 8 Troubleshooting This chapter contains General Troubleshooting 148 Paper Jams 153 Print Quality Problems 165 Getting Help 172...

Page 148: ...d to the printer Plug another electrical appliance into the outlet then check if it operates properly Try a different outlet The printer is connected to an outlet with a voltage or frequency that does...

Page 149: ...correct paper in the appropriate tray At the printer control panel specify the correct paper size type and color The paper settings for the print job do not match any paper loaded in the paper trays a...

Page 150: ...k Adapter is installed and properly configured For more information refer to Connecting to a Wireless Network P Pr riin nt tiin ng g T Ta ak ke es s T To oo o L Lo on ng g Probable Causes Solutions Th...

Page 151: ...s go to www xerox com office VLC600support Note To have the print driver select the tray set the tray used as the paper source to Auto Selection Enabled A Au ut to om ma at tiic c 2 2 S Siid de ed d P...

Page 152: ...on which it is located If the paper lift plate at the back of the tray is not locked down replace the tray C Co on nd de en ns sa at tiio on n H Ha as s F Fo or rm me ed d I In ns siid de e t th he e...

Page 153: ...This can permanently damage the printer The following illustration shows where paper jams can occur along the paper path 1 Tray 2 2 Optional Mailbox or Finisher 3 Fuser 4 Bypass Tray 5 Tray 1 M Miin...

Page 154: ...cause poor print quality misfeeds skewed prints and printer damage After loading paper in the trays at the control panel select the correct paper type and size Before printing select the correct paper...

Page 155: ...as ss s T Tr ra ay y To resolve the error displayed on the control panel you must clear all paper from the paper path 1 Remove any paper from the Bypass Tray 2 Grasp both sides of the Bypass Tray the...

Page 156: ...6 Insert the Bypass Tray completely into the printer 7 When paper trays are set to Fully Adjustable you are prompted to verify or change the paper settings a To confirm the same paper size type or col...

Page 157: ...solve the error displayed on the control panel you must clear all paper from the paper path 1 Remove any paper from the Bypass Tray 2 Grasp both sides of the Bypass Tray then pull it straight out of t...

Page 158: ...us step replace the tray cover 6 Insert the Bypass Tray completely into the printer 7 When paper trays are set to Fully Adjustable you are prompted to verify or change the paper settings a To confirm...

Page 159: ...ear all paper from the paper path 1 For the tray reported on the Touch Screen Display pull out the tray until it stops 2 To remove the tray lift the front of it slightly then pull it out of the printe...

Page 160: ...e tray protrudes when it is inserted into the printer If removed in a previous step replace the tray cover 6 When paper trays are set to Fully Adjustable you are prompted to verify or change the paper...

Page 161: ...rror displayed on the control panel clear all paper from the paper path 1 Lift the rear door release and pull open the door 2 To open the paper guide on the top of the fuser lift the paper guide tab 3...

Page 162: ...of the paper Do not load paper above the maximum fill line The edges of the paper are not even Remove the paper align the edges and then reload the paper The paper is moist from humidity Remove the p...

Page 163: ...paper The tray contains warped or wrinkled paper Remove the paper smooth it out and reload it If it still misfeeds do not use that paper The paper is moist from humidity Remove the moist paper and re...

Page 164: ...ome paper remains jammed in the printer Recheck the paper path and make sure that you have removed all of the jammed paper One of the printer doors is open Check the doors on the printer Close any doo...

Page 165: ...umables are used Composite black is the default setting on most printers C Co on nt tr ro olllliin ng g P Pr riin nt t Q Qu ua alliit ty y Various factors can affect the quality of the output of your...

Page 166: ...y For more information refer to Paper Storage Guidelines S So ollv viin ng g P Pr riin nt t Q Qu ua alliit ty y P Pr ro ob blle em ms s When the print quality is poor select the closest symptom from t...

Page 167: ...s heavier or thicker than the paper type selection Ensure that the proper paper is loaded in the paper tray Choose a heavier paper type at the control panel and in the print driver Use a lighter paper...

Page 168: ...the exposed end of the transfer belt Fingerprints can cause print quality issues The toner cartridges are not Xerox toner cartridges Ensure that the toner cartridges meet specifications Replace the c...

Page 169: ...is from the paper path Ensure that the trays are pushed in all the way Ensure that the rear cover is closed and locked Condensation inside the printer causes partial blanks or creased paper Power on t...

Page 170: ...from the printer Replace the Transfer Belt which is included in the Maintenance Kit For assistance go to the Xerox Support website at www xerox com office VLC600support Slanted printing The paper gui...

Page 171: ...components in the paper path is marking the paper 1 Print the Repeating Defects pages At the control panel touch Device Support Support Pages Repeating Defects 2 To determine the cause measure the di...

Page 172: ...e Demonstration Print page and the Error History report that can assist you in troubleshooting certain problems The Demonstration Print page prints an image to show print quality You can use this page...

Page 173: ...nf fo or rm ma at tiio on n a ab bo ou ut t Y Yo ou ur r P Pr riin nt te er r To obtain more information about your printer refer to More Information Xerox VersaLink C600 Color Printer User Guide 173...

Page 174: ......

Page 175: ...Color Printer User Guide 175 A Specifications This appendix contains Configurations and Options 176 Physical Specifications 178 Environmental Specifications 185 Electrical Specifications 186 Performan...

Page 176: ...High Capacity Feeder with Casters Option Option Option Standard Standard Standard Cabinet with Casters Option Option Option Not Applicable Not Applicable Not Applicable Productivity Kit with 250 GB h...

Page 177: ...11 n g b compliant Wireless Network Adapter Near Field Communication NFC AirPrint MOPRIA IC Card Reader support Foreign Device Interface FDI Remote Access Embedded Web Server O Op pt tiio on ns s a an...

Page 178: ...ons Width 427 4 mm 16 8 in Depth 465 5 mm 18 3 in Height 443 5 mm 17 3 in Weight 29 4 kg 64 8 lb S St ta an nd da ar rd d C Co on nf fiig gu ur ra at tiio on n C Co on nf fiig gu ur ra at tiio on n w...

Page 179: ...eeders 3 Optional Feeders 4 Optional Feeders Configuration View Height 443 4 mm 17 5 in 566 4 mm 22 3 in 689 4 mm 27 1 in 812 4 mm 32 0 in 935 4 mm 36 8 in H He eiig gh ht t C Co on nf fiig gu ur ra a...

Page 180: ...Ca ap pa ac ciit ty y F Fe ee ed de er r H HC CF F w wiit th h C Ca as st te er rs s Item No Optional Feeders 1 Optional Feeder Configuration View Height 902 4 mm 35 5 in 1025 4 mm 40 4 in H He eiig...

Page 181: ...Fe ee ed de er rs s w wiit th h C Ca ab biin ne et t C Ca as st te er rs s a an nd d F Fiin niis sh he er r o or r M Ma aiillb bo ox x Item No Optional Feeders 1 Optional Feeder 2 Optional Feeders Co...

Page 182: ...a ar ra an nc ce e R Re eq qu uiir re em me en nt ts s C Clle ea ar ra an nc ce e R Re eq qu uiir re em me en nt ts s f fo or r B Ba as se e C Co on nf fiig gu ur ra at tiio on n C Clle ea ar ra an nc...

Page 183: ...Ma aiillb bo ox x C Clle ea ar ra an nc ce e R Re eq qu uiir re em me en nt ts s f fo or r O Op pt tiio on na all 5 55 50 0 S Sh he ee et t F Fe ee ed de er r C Clle ea ar ra an nc ce e R Re eq qu uii...

Page 184: ...e R Re eq qu uiir re em me en nt ts s f fo or r O Op pt tiio on na all H Hiig gh h C Ca ap pa ac ciit ty y F Fe ee ed de er r w wiit th h C Ca as st te er rs s 184 Xerox VersaLink C600 Color Printer U...

Page 185: ...ing Humidity Range 10 85 Optimal Humidity Range 20 70 relative humidity at 28 C 82 F Note Under extreme environmental conditions such as 10 C and 85 relative humidity printing defects can occur due to...

Page 186: ...cy y Power Supply Voltage Frequency Current Required 120 VAC 10 108 132 VAC 60 Hz 3 Hz 12 A 220 240 VAC 10 198 264 VAC 50 Hz 3 Hz 8 A P Po ow we er r C Co on ns su um mp pt tiio on n Power Saver Mode...

Page 187: ...ct print speed Print mode The fastest print modes are Standard and Enhanced Paper size Letter 8 5 x 11 in size prints slightly faster than A4 210 x 297 mm size Larger sizes reduce print speeds Paper t...

Page 188: ......

Page 189: ...Xerox VersaLink C600 Color Printer User Guide 189 B Regulatory Information This appendix contains Basic Regulations 190 Material Safety Data Sheets 195...

Page 190: ...rient or relocate the receiving antenna Increase the separation between the equipment and receiver Connect the equipment into an outlet on a circuit different from that to which the receiver is connec...

Page 191: ...iio on ns s a an nd d R Re ed du uc ciin ng g C Co os st t The following information has been developed to assist users and has been issued in relation to the European Union EU Energy Related Products...

Page 192: ...tion After the last print the device transitions to Ready mode In this mode the device can print again immediately If the device is not used for a specified period the device transitions to Low Power...

Page 193: ...ers find products and services with reduced environmental impacts EcoLogo is a voluntary multi attribute and lifecycle based environmental certification This certification indicates that a product has...

Page 194: ...hat complies with the requirements specified in FCC Part 15 Industry Canada RSS 210 and European Council Directive 2014 53 EU Radio Frequency RF output power of this device will not exceed 20 dBm in e...

Page 195: ...garding your printer go to North America www xerox com msds European Union www xerox com environment_europe For the Customer Support Center phone numbers go to www xerox com office worldcontacts Xerox...

Page 196: ......

Page 197: ...Xerox VersaLink C600 Color Printer User Guide 197 C Recycling and Disposal This appendix contains All Countries 198 North America 199 European Union 200 Other Countries 202...

Page 198: ...is fully consistent with global regulations applicable at the time that the product was placed on the market For recycling and disposal information contact your local authorities Perchlorate Material...

Page 199: ...e 1 800 ASK XEROX to determine if this Xerox product is part of the program For more information about Xerox environmental programs visit www xerox com environment or for recycling and disposal inform...

Page 200: ...f life electrical and electronic equipment subject to disposal must be managed within agreed procedures Prior to disposal please contact your local reseller or Xerox representative for end of life tak...

Page 201: ...d in the European Union If you wish to discard these items please contact your local authorities or dealer and ask for the correct method of disposal B Ba at tt te er ry y S Sy ym mb bo oll N No ot te...

Page 202: ...Other Countries Please contact your local waste management authority to request disposal guidance 202 Xerox VersaLink C600 Color Printer User Guide Recycling and Disposal...

Page 203: ......

Reviews: