INSTALLATION INSTRUCTIONS
MODEL MRC44KP
MRC44 KEYPAD
Page 1: ...INSTALLATION INSTRUCTIONS MODEL MRC44KP MRC44 KEYPAD...
Page 2: ...Page 2 Model MRC44KP 2001 Xantech Corporation...
Page 3: ...RC44 Keypad Feature Descriptions 4 Installation MRC44 Keypad Physical Location and Mounting 10 MRC44 Keypad Removal 14 Connections at the Zone Location 16 For additional information on installation of...
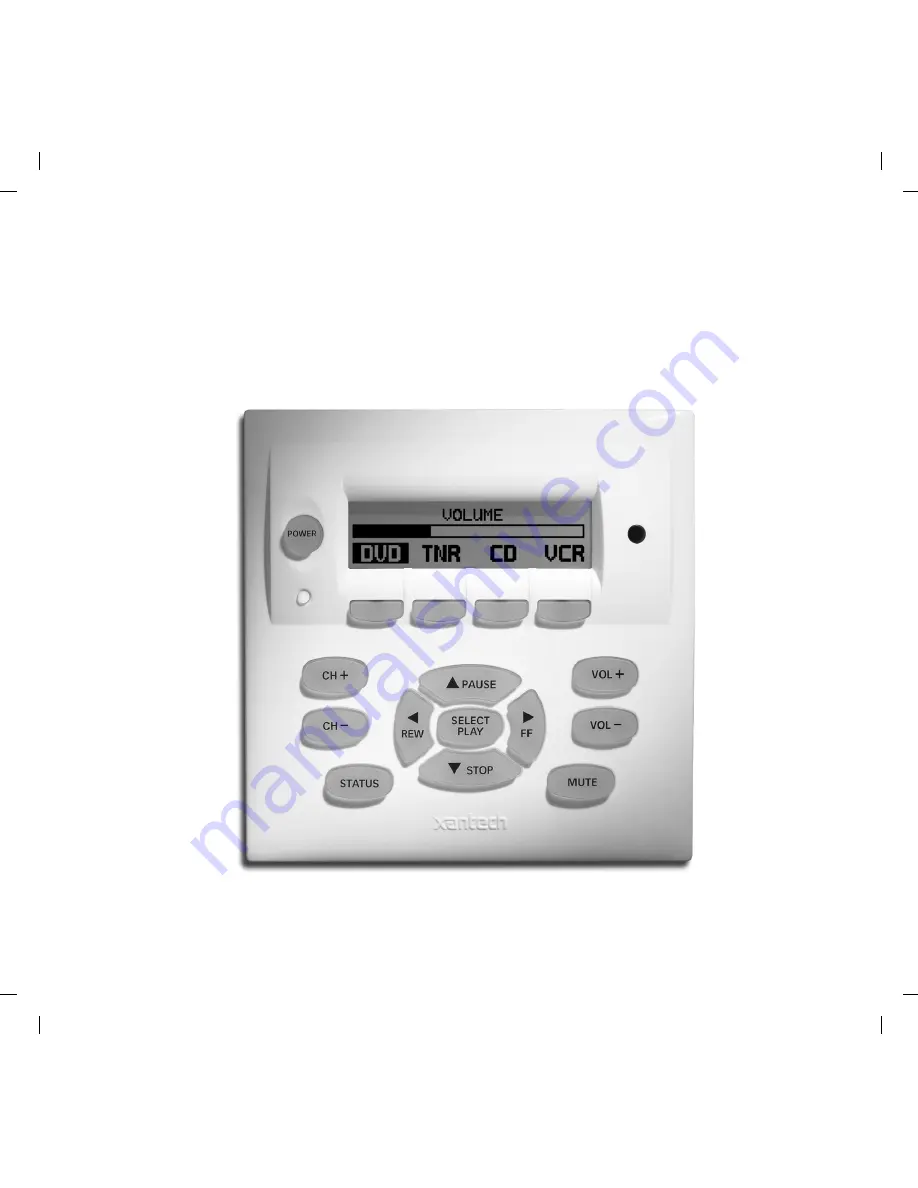
Page 4: ...1 Xantech Corporation MRC44 KEYPAD FEATURE DESCRIPTIONS POWER CH CH STATUS SELECT PLAY STOP PAUSE FF REW VOL VOL MUTE 5 3 6 7 8 10 11 12 16 13 14 15 9 4 1 2 Figure 1 The Model MRC44 Keypad Front Panel...
Page 5: ...of remote controls though some may not be programmable and will therefore only control the source components 4 Status Indicator LED Will indicate zone system status and will flash as IR is received at...
Page 6: ...Also used in Dynamic Monitor Lockout and Dynamic Zone Link Modes 8 Source 3 Selector Selects source input 3 reverses source icon on LCD Display when source is selected and sends IR commands programme...
Page 7: ...and common emitter outputs 13 CH Sends IR commands programmed to this button to the selected source and common emitter outputs 14 CH Sends IR commands programmed to this button to the selected source...
Page 8: ...Page 8 Model MRC44KP 2001 Xantech Corporation 24 18 17 22 23 20 19 21 24 Figure 2 The Model MRC44 Keypad Rear Panel Features and Functions...
Page 9: ...ne If there are two keypads in a zone remove only from the first keypad 21 Enable Sensor Jumper Enables IR sensor on Keypad Remove when using an external IR receiver 22 IR Sensitivity Adjustment Caref...
Page 10: ...10 Model MRC44KP 2001 Xantech Corporation MRC44 KEYPAD PHYSICAL LOCATION AND MOUNTING RJ45 Connector Cat 5 Cable MRC44 Keypad Ground Lug To Earth Ground Figure 3 Mounting and Installing the MRC44 Key...
Page 11: ...utton board or other surfaces covering a hollow wall Follow these simple procedures to install the provided MRC44 mounting bracket and keypad 1 Cutting the hole a Mark the desired mounting location fo...
Page 12: ...hammer the template in place so that the holding tabs pierce the wall and hold the template in place f Mark or scribe the outline of the template on the wall g Remove the template and cut a clean hole...
Page 13: ...into the wall f Center the mounting bracket in the wall and tighten the screws until the bracket is firmly held in the wall Over tightening will distort the bracket and prevent the Keypad from snappin...
Page 14: ...mly snap the MRC44 Keypad into the bracket that you have just installed see Figure 3 6 Confirm all Keypad operations MRC44 KEYPAD REMOVAL POWER CH CH STATUS SELECT PLAY STOP PAUSE FF REW VOL VOL MUTE...
Page 15: ...eypad with your fingers and pull it off the wall NOTE Since the Keypad snaps into the mounting bracket and there are a large variety of wall textures the Keypad may POP OUT or require some additional...
Page 16: ...ler on the rear of the MRC44 keypad 3 Depending on the number of MRC44 keypads and IR receivers used in a zone the jumper pins on the MRC44 keypad are to be connected as shown in Table 1 Multiple Keyp...
Page 17: ...ndary Keypad Zone Termination Sensor Enable One keypad in Zone with IR Sensor enabled OFF ON ON Two Keypads in Zone with IR Sensors enabled OFF OFF ON ON ON ON One Keypad and one separate IR Receiver...
Page 18: ...IER MRC44 1 2 3 4 POWER POWER CH CH STATUS SELECT PLAY STOP PAUSE FF REW VOL VOL MUTE POWER CH CH STATUS SELECT PLAY STOP PAUSE FF REW VOL VOL MUTE 200 feet max MRC44 Connecting Block IR Receiver PWR...
Page 19: ...ck of the primary keypad as shown in Figure 8C If your installation requires cabling beyond these limits you can use the MRC44 Connecting Block to power the keypads from a separate run of 12VDC as sho...
Page 20: ...XANTECH CORPORATION 12950 Bradley Avenue Sylmar CA 91342 3829 phone 818 362 0353 fax 818 362 9506 www xantech com Part No 08901175 Rev A 05 17 2002...