J0Z-SP38-1016/90891
AFTER-SALES SERVICE
GB 0845 872 2740
www.coreservice.co.uk
IRL 019022605
The following battery levels are displayed:
- GREEN/YELLOW/RED: Battery is fully charged
- YELLOW/RED:
Battery is partially charged
- RED:
Battery is empty and must be re-charged
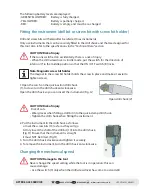
Fitting the instrument (drill bit or screw bit with screw bit holder)
Drill and screw bits will hereinafter be referred to as instruments.
Only use instruments that can be securely fitted in the drill chuck and that are designed for
this tool. Also refer to the specifications in the "Technical Data" section.
CAUTION! Risk of injury
If the tool is switched on accidentally, there is a risk of injury.
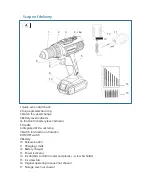
• When the drill/screwdriver is in idle mode, put the switch for the direction of
rotation (7) in the middle position so that the ON / OFF switch (8) locks.
Note: Magnetic screw bit holder
The magnet in the screw bit holder holds the screw in place and makes it easier to
tighten screws.
1.Open the catch on the quick-action drill chuck
(1), to do so turn the drill chuck anti-clockwise.
Open the drill chuck so you can insert the instrument (Fig. G)
Open drill chuck (2)
CAUTION! Risk of injury
Risk of cuts.
• Wear gloves when fitting a drill bit into the quick-clamp drill chuck.
• Tighten the drill chuck when fitting the instrument
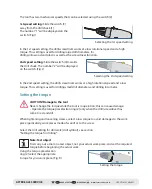
2. Put the instrument in the drill chuck as follows:
a: Inset the screw bits (15) as far as they will go
b: Only insert the shaft of the drill bit (14) into the drill chuck.
(Fig. H) Ensure that the instrument is straight.
It must NOT be tilted. (Fig. H)
3. Turn the drill chuck clockwise and tighten it securely.
4. To remove the instrument, turn the drill chuck anti-clockwise.
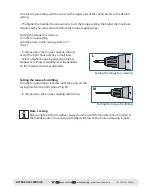
Changing the mechanical speed
CAUTION! Damage to the tool
Never change the speed setting while the tool is in operation; this can
cause damage.
• Use the switch (3) only when the drill/screwdriver has come to a standstill.
H


