Installation and Connection
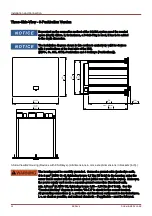
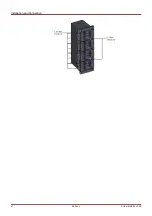
Three-Side-View - 8-Pushbutton Version
Dependent on the connection method of the SCADA system used the needed
space (depth) differs. If, for instance, a D-Sub-Plug is used, it has to be added
to the depth dimension.
The installation diagram shown in this section is exclusively valid for devices
with 8 pushbuttons at the front side of the HMI.
(INFO-, C-, OK-, CTRL-Pushbutton and 4 Softkeys (Pushbuttons)).
3-Side-View B2 Housing (Devices with 8 Softkeys). (All dimensions in mm, except dimensions in brackets [inch].)
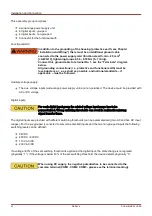
The housing must be carefully grounded. Connect a ground cable (protective earth,
4 to 6 mm
2
[AWG 11‒9], tightening torque 1.7 Nm [15 lb⋅in]) to the housing, using the
screw that is marked with the ground symbol (at the rear side of the device). Moreover,
the power supply card needs a separate ground connection (functional earth,
min. 2.5 mm
2
[≤ AWG 13], tightening torque 0,56 ‒ 0,79 Nm [5‒7 lb⋅in]). See the
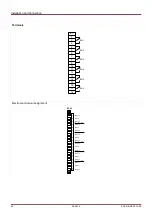
“Terminal Marking” diagram in Section “DI-4 X” to check for the correct terminal.
All grounding connections (i. e. protective and functional earth) must be low-inductance,
i. e. as short as possible, and national standards – if applicable – must be followed.
32
MCDLV4
DOK-HB-MCDLV4-2E
Summary of Contents for HighPROtec MCDLV4
Page 3: ...Order Code Order Code 3 MCDLV4 DOK HB MCDLV4 2E...
Page 47: ...Installation and Connection 47 MCDLV4 DOK HB MCDLV4 2E...
Page 164: ...Input Output and LED Settings 164 MCDLV4 DOK HB MCDLV4 2E...
Page 433: ...Parameters 433 MCDLV4 DOK HB MCDLV4 2E...
Page 457: ...Device Parameters 457 MCDLV4 DOK HB MCDLV4 2E...
Page 473: ...Blockings 473 MCDLV4 DOK HB MCDLV4 2E...
Page 988: ...Protective Elements 988 MCDLV4 DOK HB MCDLV4 2E P P Q P Q P Q Q Q P S S...
Page 989: ...Protective Elements 989 MCDLV4 DOK HB MCDLV4 2E Pr Q P Q P Qr...
Page 1023: ...Protective Elements 1023 MCDLV4 DOK HB MCDLV4 2E...

