background image


Bedienungsanleitung 

CO

2

-Datenmonitor 


Operating manual 

CO

2

 data monitor 


Instructions de service 

Indicateur de CO


Manuel de instrucciones 

Medidor de CO


Istruzione d’uso 

CO

2

-Monitor dati 


Gebruiksaanwijzing 

CO

2

- Datamonitor 


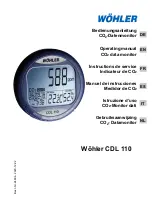
Wöhler CDL 110


.

Bes

t.-

N

r. 

24

80

4–

 20

20

-1

2-

22


IT 

NL 

FR 

ES 

EN 

DE 

Summary of Contents for CDL 110

Page 1: ...erating manual CO2 data monitor Instructions de service Indicateur de CO2 Manuel de instrucciones Medidor de CO2 Istruzione d uso CO2 Monitor dati Gebruiksaanwijzing CO2 Datamonitor W hler CDL 110 Bes...

Page 2: ...ufbau des Displays 10 5 Messung 11 5 1 Ein Ausschalten 11 5 2 Messung von CO2 Wert Temperatur und Luftfeuchtigkeit 12 5 3 Anzeige des Minimal und des Maximalwertes 12 6 Alarmfunktion 13 6 1 Alarmvorei...

Page 3: ...Werkseinstellungen 20 8 CO2 Kalibrierung 21 8 1 Automatische Kalibrierfunktion 21 8 2 Manuelle Kalibrierung 22 9 St rungen 23 10 Fehlercodes 23 10 1 CO2 Werte 23 10 2 Lufttemperatur 24 10 3 Luftfeucht...

Page 4: ...ir keine Haftung 1 2 Hinweise in der Bedienungsanlei tung ACHTUNG Kennzeichnet Hinweise auf Gefahren die Be sch digungen des Ger ts zur Folge haben k n nen WARNUNG Kennzeichnet Hinweise bei deren Nich...

Page 5: ...sen gem den geltenden Umweltvorschriften entsorgt werden Schadhafte Akkus gelten als Sonderm ll und m ssen zur Entsorgung in den vorgesehenen Sammelstellen abgegeben werden 1 6 Anschrift W hler Techni...

Page 6: ...it vom Druck 1 6 des abgele senen Wertes pro kPa Abweichung vom Normaldruck 100 kPa Messprinzip NDIR Verfahren nichtdispersive Infra rot Absorption Temperatur Beschreibung Angabe Messbereich 10 C bis...

Page 7: ...2 Gehalt Tem peratur und relativer Luftfeuchtigkeit Beurteilung des Raumklimas Good optimal Normal normal Poor kritisch Stromzufuhr AC Netzteil 5 V 0 5 A Ausgabe Abmessungen Breite x H he x Tiefe 120...

Page 8: ...W hler CDL 110 Keine weiteren Ma nahmen notwendig 1000 ppm Poor kritisch Anzeige W hler CDL 110 L ften L ftungsverhalten berpr fen und verbessern 2000 ppm Unbedingt l ften Weitergehende Ma nahmen erfo...

Page 9: ...us Speichern von Einstellungen 2 ESC Verlassen des Einstellungsmodus Beenden des Kalibriervorgangs 3 RESET L schen der Maximal und Minimalwerte 4 Auswahl des Modus Vergr ern des Wertes im Einstellungs...

Page 10: ...er million Einheit CO2 Konzentration MIN MAX Minimal Maximalwert GOOD Gute CO2 Werte NORMAL Normale CO2 Werte POOR Kritische CO2 Werte Air Temp Lufttemperatur Humidity Relative Luftfeuchtigkeit in CO2...

Page 11: ...iger Voltzahl erscheint bAT im Display und die Anzeige blinkt siehe Punkt 9 St rungen WARNUNG Lebensgefahr durch elektrischen Strom Netzstecker nie mit nassen H nden anfassen Netzteil von Feuchtigkeit...

Page 12: ...fgestellt werden 5 3 Anzeige des Mi nimal und des Maximalwertes Abb 4 Anzeige der Minimalwerte Dr cken Sie im Hauptmen die MIN MAX Taste Im Hauptdisplay werden die Minimal und Maximalwerte des CO2 Wer...

Page 13: ...er gemessene CO2 Gehalt einen vorein gestellten Wert berschreitet ert nt ein Alarmton 80 dB und ein Ventilator Icon blinkt im Display Zum Stoppen des Alarmtons dr cken Sie eine beliebige Taste Der Ven...

Page 14: ...kustischer Alarm P2 0 Temperatureinheit P3 1 Jahr P3 2 Monat P3 3 Tag P3 4 12 Stunden oder 24 Stunden Anzeige P3 5 Stunde P3 6 Minute P4 0 Reset Mit der Set Taste 3 Sekunden gedr ckt halten gelangen S...

Page 15: ...a len CO2 Gehalts zu gelangen Abb 7 Einstellung der CO2 Obergrenze f r den optimalen Bereich Der aktuell eingestellte Wert blinkt nun im Display siehe Abb 7 Dr cken Sie die Taste um den Wert zu erh he...

Page 16: ...en P1 0 Modus zu r ck 7 4 Einstellung der Alarmschwelle f r den CO2 Alarmton Abb 9 Einstellung der Alarmschwelle Im P1 3 Modus zur Einstellung der Alarmschwelle erscheint im Display das Ventilatorsymb...

Page 17: ...sst sich im P2 0 Modus ausw hlen Um vom normalen Messmodus in den P2 0 Modus zu gelangen gehen Sie folgender ma en vor Halten Sie die SET Taste im normalen Mess modus 3 Sekunden lang gedr ckt Sie befi...

Page 18: ...3 0 Modus zur Einstel lung von Uhr und Kalender zu gelangen Abb 12 Dr cken Sie die SET Taste um in den P 3 1 Modus zu gelangen Links unten blinkt die ak tuell eingestellte Jahreszahl Abb 13 Dr cken Si...

Page 19: ...P3 5 Modus zur Einstellung der Stunde vor Abb 15 Durch Druck auf die ESC Taste kehren sie in den P3 0 Modus zur ck ohne zu speichern Nach dem Speichern mit der SET Taste ge langen Sie in den P 3 6 Mo...

Page 20: ...n stellung wird kein Reset vorgenommen Dr cken Taste oder die MIN MAX Taste um auf YES zu wechseln Ist YES ausgew hlt wird ein Reset auf die unten aufgef hrten Ein stellungen vorgenommen Best tigen Si...

Page 21: ...sonst mit 400 ppm gleich was anschlie end zu falschen Messergeb nissen f hrt 8 1 Automatische Kalibrierfunktion Die automatische Kalibrierfunktion verhindert die Nullpunktabweichung des Infrarotsenso...

Page 22: ...eeignet z B Orte an denen sich viele Menschen aufhalten oder in der N he von Abluft ffnungen oder Feuerst tten Abb 18 Display w hrend der CO2 Kalibrierung Schalten Sie das Messger t ein und halten Sie...

Page 23: ...hr langsame Reaktions zeit L ftungsschlitze auf der R ckseite blockiert CDL 110 frei im Raum posi tionnieren 10 Fehlercodes 10 1 CO2 Werte Fehlercode Fehler Ma nahme E01 CO2 Sensor besch digt Schicken...

Page 24: ...lang in einen normal temperierten Raum E31 Der Temperatursensor ist besch digt Schicken Sie das Ger t zur Reparatur ein 10 3 Luftfeuchtigkeit Fehlercode Fehler Ma nahme E04 Fehler bei der Lufttempera...

Page 25: ...d die Verpackung des Ger ts im Reparaturfall werden von dieser Garantie nicht abgedeckt Diese Garantie erlischt wenn Reparaturen und Ab nderungen von dritter nicht autorisierter Stelle an dem Ger t vo...

Page 26: ...r Angleichung der Rechtsvorschriften der Mitgliedsstaaten ber die elektromagnetische Vertr glichkeit 2014 30 EU festgelegt sind Zur Beurteilung des Produkts hinsichtlich der elektromagnetischen Vertr...

Page 27: ...4 1 Keys 34 4 2 Display 35 5 Operation 36 5 1 Power on off 36 5 2 Taking Measurement CO2 temperature and humidity 37 5 3 MAX MIN 37 6 Alarm 38 6 1 Setting the alarm 38 6 2 Alarm indicator 38 7 Setup...

Page 28: ...ion 46 8 2 Manual Calibration 46 9 Trouble shooting 47 10 Error Code 47 10 1 CO2 Werte 47 10 2 Air Temperature Readings 48 10 3 Air Humidity Reading 48 11 Warranty and Service 49 11 1 Warranty 49 11 2...

Page 29: ...for any damages caused by not following this manual 1 2 Notes WARNING Not following this warning can cause injury or death ATTENTION Not following this note can cause permanent damage to the analyzer...

Page 30: ...pplicable statutory provisions You may hand in any defective batteries taken out of the unit to our company as well as to recycling places of public disposal systems or to selling points of new batter...

Page 31: ...uracy 50 ppm 5 of reading 0 2000 ppm Pressure dependence 1 6 of reading per kPa deviation from normal pressure 100 kPa Sensor Stable NDIR sensor Temperature Description Data Range 10 C to 60 C Resolut...

Page 32: ...ay Simultaneous indica tion of CO2 level tem perature and relative humidity Indoor air quality indi cation Good Normal Poor Power Supply AC Adapter 5 V 0 5 A output Dimensions L x B X D 120 mm x 100 m...

Page 33: ...ppm Normal Display W hler CDL 110 No further ventilation is needed 1000 ppm Poor Display W hler CDL 110 Ventilation is required Improve ventilation behaviour 2000 ppm Ventilation is absolutely necessa...

Page 34: ...on 1 SET Enter setup mode Save and finish settings 2 ESC Exit setup mode Terminate calibration 3 RESET Clear MAX MIN records 4 Select mode Increase value in setup mode 5 MIN MAX Activate MIN MAX funct...

Page 35: ...nification MIN MAX Minimum Maximum readings GOOD Good CO2 level NORMAL Normal CO2 level POOR Poor CO2 level Air Temp Air temperature Humidity Unit of relative humidity air CO2 alarm CO2 concentration...

Page 36: ...bAT will flash in the display Please see chapter 9 Trouble shoot ing WARNING Risk of electrical shock Never touch the jack with wet hands Protect the power supply against water and mois ture Do not un...

Page 37: ...MIN Fig 4 Minimal value In normal operation mode press MIN MAX to see the minimum or maximum of each pa rameter With each press of the MIN MAX key in sequence the display shows the MINI MUM then the...

Page 38: ...Alarm indicator Fig 5 Alarm display The CDL 110 emits beeps 80 dB and a fan icon will appear on the display when the CO2 level exceeds the upper limit Beeps can be stopped by pressing any key or it a...

Page 39: ...air quality P1 3 CO2 beep alarm P1 4 CO2 beep alarm on off P2 0 temperature scale P3 1 year P3 2 month P3 3 day P3 4 12 hour or 24 hour display P3 5 hour P3 6 minute P4 0 reset Press and hold SET for...

Page 40: ...e or MIN MAX to de crease the value Each press tunes 100 ppm NOTE The alarm range is from 0 to 700 ppm Press SET again to confirm the P 1 1 setting and to enter the P 1 2 mode for the upper limit of N...

Page 41: ...pear see Abb 9 Press to increase or MIN MAX to de crease the value Each press tunes 100 ppm NOTE The alarm range is from 1000 ppm to 5000 ppm Press SET to confirm NOTE Set up the alarm value within th...

Page 42: ...mode Fig 11 Selecting the temperature Select the temperature unit in P2 0 mode Go from normal mode to 2 0 mode by doing the fol lowing steps Press and hold SET in normal mode for three seconds to ente...

Page 43: ...ode for three seconds to enter P1 0 mode Press in P1 0 mode twice to enter P3 0 mode for setting clock and calendar Fig 12 Press SET to enter P 3 1 mode Current year will blink Fig 13 To change the mo...

Page 44: ...X Press SET to save the settings and enter P3 5 mode to set the hours Fig 15 Press Set to save and enter P 3 6 mode to set the minutes or press ESC to return to P3 0 mode without saving Repeat the ste...

Page 45: ...and return to P4 0 mode If you choose Yes the meter is reset to the fol lowing defaults Parameter Default P 1 1 700 ppm P 1 2 1000 ppm P 1 3 5000 ppm P 2 1 C P 4 1 No no reset 8 CO2 Calibration The me...

Page 46: ...manual calibration is suggested to be done outdoor e g on an exterior window ledge on a sunny day where CO2 level is around 400 ppm NOTE Do not calibrate on rainy days because the high humidity will...

Page 47: ...Use the adaptor with 5 V 10 0 5 A Slow response The air flow channels on the rear are blocked Find another position for the CDL 110 in the room 10 Error Code 10 1 CO2 Werte Error Code Problem Solution...

Page 48: ...r in regular room temperature for 30 minutes if the error message still appears send the device for repair E31 The temperature sensor or measuring circuit is dam aged Send the device for repair 10 3 A...

Page 49: ...our business That is why we are still available to you even after the guarantee period has expired An immediate repair will be carried out if you bring your meter to one of our approved ser vice cente...

Page 50: ...n et fonctionnement 57 4 1 Assignation des touches 57 4 2 Structure de l cran 58 5 Mesure 59 5 1 Mettre en marche et arr ter l appareil 59 5 2 Mesure de la valeur de CO2 de la temp rature et de l humi...

Page 51: ...ier 66 7 8 RESET 68 8 Calibrage du CO2 69 8 1 Fonction de calibrage automatique 70 8 2 Calibrage manuel 70 9 D fauts 72 10 Code d erreurs 72 10 1 Valeurs CO2 72 10 2 Temp rature de l air 73 10 3 Humid...

Page 52: ...ructions de service 1 2 Consignes conte nues dans les ins tructions de ser vice ATTENTION D signe des consignes signalant des dangers dont la non observation peut conduire des dommages de l appareil A...

Page 53: ...emises des points de collecte de l entreprise publique charg e de l limination des d chets ou cette entreprise elle m me d ch terie soit tre d pos es aux points de vente de piles ou d accumulateurs re...

Page 54: ...Influence de la pres sion 1 6 de la valeur affich e par kPa d cart par rapport la pression normale 100 kPa Principe de mesure Proc d NDIR Absorption d infrarouge non dis persive Temp rature Descripti...

Page 55: ...mp rature et de l humidit relative de l air Appr ciation de l atmosph re am biante Good optimale Normal normale Poor Critique Alimentation en lec tricit Bloc d alimentation AC 5V sortie 0 5 A Dimensio...

Page 56: ...0 ppm Normal Affichage W hler CDL 110 Aucune action requise 1000 ppm Poor critique Affichage W hler CDL 110 Ventilation n cessaire Am liorer le comportement d a ration 2000 ppm Ventilation absolument...

Page 57: ...mode de r glage Sauvegarder des r glages 2 ESC Quitter le mode de r glage Arr t de la proc dure de calibrage 3 RESET Effacement des valeurs maximales et minimales 4 S lection du mode Augmenter la val...

Page 58: ...Unit de la teneur en CO2 MIN MAX Valeur minimale maximale GOOD Bonnes valeurs de CO2 NORMAL Valeurs de CO2 normales POOR Valeurs de CO2 critiques Air Temp Temp rature de l air Humidity Humidit relati...

Page 59: ...as bAT appara t sur l cran et l affichage clignote cf Point 9 D fauts AVERTISSEMENT Danger de mort par lectrocution Ne jamais saisir la prise au secteur alors que vos mains sont mouill es Eloigner et...

Page 60: ...inimale et maximale Fig 22 Affichage des valeurs minima Dans le menu principal appuyer sur la touche MIN MAX Les valeurs minimales et maxi males de CO2 sont alors affich es dans la partie principale d...

Page 61: ...valeur pr r gl e un signal d alarme se fait en tendre 80dB et une ic ne sous la forme de Ven tilateur clignote sur l cran Appuyez sur une touche quelconque pour arr ter le signal d alarme L ic ne Ven...

Page 62: ...ante P1 3 Seuil d alarme P1 4 Activer et d sactiver l alarme P2 0 Unit de temp rature P3 1 Ann e P3 2 Mois P3 3 Jour P3 4 Affichage sur 12 heures ou 24 heures P3 5 Heure P3 6 Minute P4 0 RESET Vous ac...

Page 63: ...eur opti male de CO2 Fig 8 R glage de la valeur sup rieure de CO2 pour le domaine optimal La valeur r gl e actuellement clignote maintenant dans Appuyez sur la touche pour augmenter la valeur et sur l...

Page 64: ...au mode P1 0 7 4 R glage du seuil pour l alarme acoustique CO2 Fig 10 R glage du seuil d alarme acoustique Dans le mode P1 3 pr vu pour le r glage du seuil d alarme le symbole du ventilateur appara t...

Page 65: ...ode P2 0 partir du mode de mesure normal proc dez de la mani re suivante Dans le mode de mesure normal maintenez enfonc e la touche SET pendant 3 secondes Vous vous trouvez maintenant dans le mode P1...

Page 66: ...au mode P3 0 pour le r glage de l heure et du calendrier Appuyez encore une fois sur la touche SET pour acc der au mode P3 1 En bas gauche le chiffre de l ann e s lectionn ac tuellement clignote Appuy...

Page 67: ...X M moriser votre s lection en appuyant sur la touche SET Vous acc dez maintenant au mode P3 5 pour le r glage de l heure En ap puyant sur la toucher ESC vous revenez au mode P3 0 sans m moriser Apr s...

Page 68: ...ignote sur l cran Dans ce r glage le Reset n a pas lieu Appuyez sur la touche ou sur la touche MIN MAX pour passer sur YES Confirmez le Reset partir de la touche SET ou bien revenez au mode P4 0 en ap...

Page 69: ...re mise en marche de l appareil fin de garantir une mesure exacte Le calibrage dure peu pr s 5 minutes Si l appareil a t utilis pendant longtemps ou dans des conditions particuli res il doit tre envo...

Page 70: ...tain temps ATTENTION Le calibrage de base ne peut pas tre effectu avec succ s dans un environnement soumis con tinuellement une teneur lev e de CO2 par exemple quand il n est pas possible d a rer 8 2...

Page 71: ...pour une dur e de plus de 1 seconde afin d acc der au mode de calibrage Pendant la totalit du calibrage 400 ppm et CO2 clignotent sur l cran Le processus de calibrage est termin au bout de 5 minutes e...

Page 72: ...te Le nombre de volts est trop haut ou trop bas Utilisez un bloc d alimentation appropri de 5 V R action tr s lente Fentes d a ration l arri re bloqu es Cherchez autre position pour le W hler CDL 110...

Page 73: ...e pendant 30 minutes E31 Le capteur de temp rature est endommag Envoyez l appareil pour le faire r parer 10 3 Humidit relative de l air Code d erreurs D faut Mesure E04 Erreur lors de la mesure de la...

Page 74: ...e Cette garantie s teint lorsque des r parations et modifications ont t effectu es par un personnel non autoris 11 2 Service Pour nous le SERVICE joue un r le tr s impor tant dans nos rapports avec no...

Page 75: ...H W hler Platz 1 D 33181 Bad W nnenberg d clare que l appareil suivant Indicateur de CO2 W hler CDL 110 Est en conformit aux sp cifications suivants EN 61326 1 2006 CISPR11 IEC EN 61000 3 2 2006 IEC E...

Page 76: ...apagar el medidor 85 5 2 Medici n del nivel de CO2 la temperatura y la humedad relativa 86 5 3 Indicar el valor m nimo y m ximo 86 6 Funci n de alarma sonora 87 6 1 Ajuste de alarma sonora 87 6 2 Alar...

Page 77: ...ci n autom tica 95 8 2 Calibraci n manual 96 9 Disfunciones 97 10 C digos de errores 97 10 1 CO2 97 10 2 Temperatura del aire 98 10 3 Humedad del aire 98 11 Garant a y servicio 99 11 1 Garant a 99 11...

Page 78: ...ume ninguna responsabilidad por los da os causados por no observar este manual 1 2 Notas Aviso No observar este aviso puede causar da os al medidor Advertencia No observar esta advertencia puede causa...

Page 79: ...sino deben ser depositadas seg n la legislaci n ambiental vigente Las bater as defectuosas son residuos t xicos que se deben entregar en los puestos de colecci n correspondientes 1 6 Direcci n W hler...

Page 80: ...2000 ppm Dependencia de la presi n 1 6 del valor medido 100 kPa par kPa desviaci n de la presi n normal Principio de medici n Tecnolog a NDIR infrarrojo no dispersivo Temperatura Descripci n Escala Ra...

Page 81: ...tura y la humedad relativa Diagn stico de las condiciones clim ticas Good calidad del aire bueno Normal calidad del aire normal Poor calidad del aire cr tico Alimentaci n Bloque de alimentaci n AC 5V...

Page 82: ...1000 ppm Normal Display W hler CDL 110 No es necesario adoptar m s medidas 1000 ppm Poor cr tico Display W hler CDL 110 Ventilar Controlar et mejorar la ventilaci n 2000 ppm Ventilar absolutamente ne...

Page 83: ...ci n Guardar la configuraci n 2 ESC Salir del modo de configuraci n Terminar la calibraci n 3 RESET Borrar los valores m ximos et m nimos 4 Seleccionar el modo Aumentar el valor en el modo de configur...

Page 84: ...IN MAX Valor m nimo m ximo GOOD Nivel de CO2 bueno NORMAL Nivel de CO2 normal POOR Nivel de CO2 cr tico Air Temp Temperatura del aire Humidity Humedad relativa del aire en Alarma audible al sobrepasar...

Page 85: ...demasiado alta o baja bAT aparecer en la pantalla y el LED destellar v ase cap tulo 9 Advertencia Peligro de electrocuci n Nunca tocar el bloque de alimentaci n con manos h medas Proteger el bloque de...

Page 86: ...r el valor m nimo y m ximo Fig 23 Indicaci n de los valores m nimos En el modo normal pulse la tecla MIN MAX En la parte principal de la pantalla se indicar n el valor m nimo y m ximo de CO2 mientras...

Page 87: ...ra el l mite superior el medidor emite pitidos 80 dB y el s mbolo de un ventilador parpadea en la pantalla Pulse cualquier tecla para parar el sonido El s mbolo del ventilador sigue parpadeando en la...

Page 88: ...ca P2 0 Unidad de temperatura P3 1 A o P3 2 Mes P3 3 D a P3 4 Indicaci n de la hora en el formato 12 horas o 24 horas P3 5 Hora P3 6 Minuto P4 0 RESET Reinicio En el modo normal mantenga pulsada la te...

Page 89: ...minar le nivel ptimo de CO2 Fig 26 Fijar el l mite superior de CO2 para el nivel ptimo El valor actualmente establecido destellar en la pantalla Pulse la tecla para aumentar el valor o MIN MAX para di...

Page 90: ...ecla SET De esta forma usted volver al modo P1 0 7 4 Fijar el l mite de alarma CO2 Fig 28 Fijar el l mite de alarma En el modo 1 3 para fijar los l mites de alarma el s mbolo del ventilador aparece en...

Page 91: ...tura En el modo P2 0 se puede seleccionar la unidad de temperatura Para acceder del modo normal de medida al modo P2 0 siga los pasos que aparecen a continuaci n En el modo normal de medida mantenga p...

Page 92: ...configuraci n Entra al mo do P1 0 En el modo P1 0 pulse la tecla dos veces para acceder al modo P3 0 Pulse la tecla SET para acceder al modo P3 1 El a o destella en la parte inferior izquierda de la p...

Page 93: ...ar Usted acceder al modo P3 5 para ajustar la hora Pulse la tecla ESC para volver al modo P3 0 sin guardar la configuraci n Pulse la tecla SET para confirmar Usted acceder al modo P3 6 para ajustar lo...

Page 94: ...inicio Pulse la tecla o MIN MAX para cambiar a Yes En el caso de que se haya seleccionado YES se efectuar n los ajustes abajo indicados Pulse la tecla SET para confirmar el reinicio reset O pulse la t...

Page 95: ...entraci n de CO2 desconocida 8 1 Calibraci n autom tica La calibraci n autom tica elimina la deriva cero del sensor infrarrojo La funci n autom tica de calibraci n siempre est activada cuando el apara...

Page 96: ...pueden existir altas concentraciones de CO2 como son las salidas de ventilaci n o chimeneas Fig 37 Pantalla durante la calibraci n CO2 Encienda el aparato Mantenga presionadas las teclas SET y MIN MA...

Page 97: ...El voltaje es demasiado alto o bajo Utilice un bloque de alimentaci n 5V Reacci n lenta Las ranuras de ventilaci n en la parte trasera est n bloqueadas 10 C digos de errores 10 1 CO2 C digo de error E...

Page 98: ...ificado Ponga el aparato en una habitaci n con temperatura normal durante 30 minutos E31 Sensor de temperatura da ado Env e el aparato para su reparaci n 10 3 Humedad del aire C digo de error Error So...

Page 99: ...reparaci n los gastos de transporte no ser n incluidos en esta garant a La garant a queda nula en caso de que personas no autorizadas hayan efectuado reparaciones o modificaciones 11 2 Servicio Consid...

Page 100: ...sejo relativas a la aproximaci n de las legislaciones de los Estados Miembros relativas a la compatibilidad electromagn tica 2014 30 EU El producto ha sido evaluado de acuerdo con las siguientes norma...

Page 101: ...109 5 1 Accendere Spegnere 109 5 2 Misurazione del valore CO2 della temperatura e dell umidit d aria 110 5 3 Indicazione del valore minimo e massimo 110 6 Funzione d allarme 111 6 1 Preimpostazioni al...

Page 102: ...1 Calibratura automatica 119 8 2 Calibratura manuale 120 9 Difetti 121 10 Codici di errore 121 10 1 Valore CO2 121 10 2 Temperatura d aria 122 10 3 Umidit d aria 122 11 Garanzia e assistenza 123 11 1...

Page 103: ...abilit o garanzia per danni risultanti dall uso inappropriato dello strumento 1 2 Indicazioni nelle istruzioni d uso ATTENZIONE Segnala indicazioni che devono essere considera te per evitare il rischi...

Page 104: ...in un centro di raccolta ap posito per rifiuti pericolosi 1 6 Indirizzo W hler Italia Srl Via Coraine 21 37010 Costermano VR Tel 39 0471 402422 Fax 39 0471 406099 E Mail info woehler it 2 Dati tecnici...

Page 105: ...5 per 10 90 e 25 C 7 per tutti gli altri valori e 25 C Dati tecnici generali Descrizione Indicazione Schermo Indicazione simulta nea del valore di CO2 temperatura e umidit d aria relativa Valutazione...

Page 106: ...ssari degli interventi 1000 ppm Cattivo critico indicazione W hler CDL 110 Arieggiare Controllare il comportamento di ventilazione e miglio rarlo 2000 ppm Arieggiare assolutamente Sono necessari inter...

Page 107: ...Salvare nuove impostazioni 2 ESC Uscire dal menu d impostazione Terminare la calibratura 3 RESET Azzerare i valori massimi e minimi 4 Selezione dell impostazione Aumentare il valore nel menu d impost...

Page 108: ...ica MIN MAX Valore minimo massimo GOOD Valori buoni di CO2 NORMAL Valori normali di CO2 POOR Valori critici di CO2 Air Temp Temperatura d aria Humidity Umidit d aria relativa in Allarme CO2 Concentraz...

Page 109: ...po bassa o alta sar indicato bAT sullo schermo e il monitor lampeggia vedi sezione Fehler Verweisquelle konnte nicht gefunden werden Difetti ATTENZIONE Corrente elettrica pericolo di vita Mai toccare...

Page 110: ...n piazzare lo strumento ad altezza della testa 5 3 Indicazione del valore minimo e massimo Imm 4 Indicazione del valore minimo Premere il pulsante MIN MAX nel menu principale Sulla parte superiore del...

Page 111: ...isurato di CO2 supera un limite preimpostato suona un segnale d allarme 80 dB e sullo schermo lampeggia un icona in forma di un ventilatore Per terminare il segnale acustico basta pre mere qualsiasi p...

Page 112: ...te d allarme P1 4 Accensione e spegnimento dell allarme acustico P2 0 Unit della temperatura P3 1 Anno P3 2 Mese P3 3 Giorno P3 4 Indicazione dell ora in formato a 12 ore o 24 ore P3 5 Ora P3 6 Minuto...

Page 113: ...1 per adattare il valore otti male di CO2 Imm 8 Impostazione del limite superiore di CO2 per il campo misura ottimale Il valore impostato lampeggia sullo schermo vedi Imm 8 Per aumentare il valore lim...

Page 114: ...i ritorna all impostazione P1 0 7 4 Impostare il livello d allarme CO2 Imm 10 Impostazione del limite d allarme Nel menu P1 3 per l impostazione del limite d allarme appare il simbolo di ventilatore s...

Page 115: ...mperatura L unit della temperatura pu essere selezionata nell impostazione P2 0 Per accedere P2 0 dalla misurazione Premere per 3 secondi il pulsante SET per accedere dalla misurazione l impostazione...

Page 116: ...istra lampeggia la cifra dell anno impostato Imm 14 Premere il pulsante o MIN MAX per alterare l anno Per salvare i cambiamenti e per ritornare successivamente all impostazione P3 2 pre mere il pulsan...

Page 117: ...cazione a 24 ore o a 12 ore Imm Per cambiare l impostazione premere il pul sante o MIN MAX Con il pulsante SET si salva le impostazioni e si accede automaticamente P3 5 per la confi gurazione dell ora...

Page 118: ...n la configurazione YES Con l imposta zione YES saranno resettate le impostazioni allega te pi abbasso Premere durante la misurazione per tre se condi il pulsante SET per accedere a P1 0 Confermare il...

Page 119: ...i lo strumen to parifica questo valore di calibratura con 400 ppm generando poi risultati di misura errati 8 1 Calibratura auto matica La calibratura automatica previene la deriva del sensore infraros...

Page 120: ...tanze con molte persone oppure localit vicino a aperture di arie di scarico o impianti di combustione non sono ideali per la calibratura dello strumento Imm 21 Schermo durante la calibratura CO2 Accen...

Page 121: ...inoltre lampeggia anche la LED verde La tensione troppo bassa oppure troppo alta Usare un alimentatore adat to con 5 V 10 Codici di errore 10 1 Valore CO2 Codice di errore Errore Provvedimento E01 Se...

Page 122: ...r 30 minuti in una stanza a temperatura normale E31 Il sensore di temperatura danneggiato Spedire lo strumento in riparazione 10 3 Umidit d aria Codice di errore Errore Provvedimento E04 Errore nella...

Page 123: ...coperti dalla garanzia La garanzia decade immediatamente se lo stru mento viene aperto riparato o trasformato da ditte o persone non espressamente autorizzate dalla ditta W hler 11 2 Assistenza L assi...

Page 124: ...ettive del consiglio per l assimilazione delle norme giuridiche degli stati membri sulla compatibilit elettromagnetica 2014 30 EU Per la valutazione della compatibilit elettromagnetica del prodotto so...

Page 125: ...waarde temperatuur en luchtvochtigheid 134 4 3 Weergave van de minimum en de maximumwaarde 134 4 4 Dataoptekening Datalogging 135 5 Alarmfunctie 137 5 1 Alarminstelling vooraf 137 5 2 Alarmtoon en me...

Page 126: ...kalibrering 145 8 Storingen 146 9 Foutcodes 146 9 1 CO2 waarden 146 9 2 Luchttemperatuur 147 9 3 Luchtvochtigheid 147 9 4 Generale 147 9 5 Allgemein 148 10 Garantie en dienst na verkoop 149 10 1 Gara...

Page 127: ...ansprakelijkheid 1 2 Opmerkingen WAARSCHUWING Het niet volgen van deze waarschuwing kan tot letsel of de dood leiden AANDACHT Het niet volgen van dit voorschrift kan blijvende schade aan het meetinstr...

Page 128: ...al maar moeten worden afgevoerd volgens de geldende milieuregels Defecte accu s worden beschouwd als gevaarlijk afval en moeten worden ingeleverd bij de desbetreffende inzamelpunten 1 6 Adres W hler T...

Page 129: ...an de druk 1 6 van de afgelezen waarde per kPa afwijking van de normale druk 100 kPa Meetprincipe NDIR proced niet dispersieve infrarood absorptie Temperatuur Beschrijving Gegevens Meetbereik 10 C t m...

Page 130: ...e gegevens Beschrijving Gegevens Display Gelijktijdige weergave van CO2 gehalte temperatuur en relatieve luchtvochtigheid Beoordeling van het kamerklimaat Good optimaal Normal normaal Poor kritisch St...

Page 131: ...odus Opslaan van instellingen 2 ESC Verlaten van de instellingsmodus Be indigen van het kalibreren 3 RESET Wissen van de maximum en minimumwaarden 4 Keuze van de modus Vergroten van de waarde in de in...

Page 132: ...nis MIN MAX Minimum Maximumwaarde GOOD Goede CO2 waarden NORMAL Normale CO2 waarden POOR Kritische CO2 waarden Air Temp Luchttemperatuur Humidity Relatieve luchtvochtigheid in CO2 alarm CO2 concentrat...

Page 133: ...elding knippert zie punt Feh ler Verweisquelle konnte nicht gefunden wer den Storingen WAARSCHUWING Levensgevaar door elektrische stroom Netstekker nooit met natte handen beetpakken Adapter uit de buu...

Page 134: ...te worden geplaatst 4 3 Weergave van de minimum en de maximumwaarde Afb 4 Weergave van de minimumwaarden Druk in het hoofdmenu op de MIN MAX toets In het hoofddisplay worden de minimum en maximumwaard...

Page 135: ...worden verder de actuele temperatuur de vochtigheid en de tijd aangegeven Voor het be indigen van de dataoptekening houdt u de ESC toets twee seconden lang ingedrukt Het groene LED lampje houdt op te...

Page 136: ...WENK Tijdens stroomuitval worden geen meetwaarden opgeslagen De data opslag wordt na afloop van de stroomuitval weer opgepakt Omdat de klok bij stroomuitval nog een aantal uren doorloopt zie par 6 6...

Page 137: ...ten CO2 gehalte een vooraf ingestelde waarde overschrijdt klinkt er een alarmtoon 80 dB en er knippert een ventilator icoon in het display Om de alarmtoon te stoppen drukt u op een willekeurige toets...

Page 138: ...t P1 3 Alarmdrempel P1 4 In en uitschakelen van de akoestische alarmgrenzen P2 0 Temperatuureenheid P3 1 Jaar P3 2 Maand P3 3 Dag P3 4 12 uurs of 24 uursweergave P3 5 Uur P3 6 Minuut P4 0 Reset Met de...

Page 139: ...ehalte te komen Afb 7 Instelling van de CO2 bovengrens voor het optimale bereik De actueel ingestelde waarde knippert nu in het display zie Imm 8 Druk op de toets om de waarde te verhogen en de MIN MA...

Page 140: ...terug 6 4 Instelling van de alarmdrempel voor de CO2 alarmtoon Afb 9 Instelling van de alarmdrempel In de P1 3 modus voor instelling van de alarmdrempel verschijnt in het display het ventilatorsymbool...

Page 141: ...volgt te werk Houd de SET toets in de normale meetmodus 3 seconden lang ingedrukt U bevindt zich nu in de P1 0 modus Druk in de P1 0 modus tweemaal op de toets om in de P3 0 modus voor het instellen v...

Page 142: ...modus voor het instellen van de uren Imm Door te drukken op de ESC toets keert u terug in de P3 0 modus zonder op te slaan Na het opslaan met de SET toets komt u in de P 3 6 modus voor het instellen v...

Page 143: ...een reset uitgevoerd Druk op de toets of de MIN MAX toets om op YES over te gaan Als YES gekozen is wordt er een reset verricht op de onderaan vermelde instellingen Bevestig de reset met de SET toets...

Page 144: ...eerwaarde anders gelijk met 400 ppm wat dan leidt tot verkeerde meetresultaten 7 1 Automatische kalibreerfunctie De automatische kalibreerfunctie voorkomt de nulpuntafwijking van de infraroodsensor Na...

Page 145: ...hikt voor kalibrering b v plaatsen waar veel mensen verblijven of in de buurt van ventilatieopeningen of stookplaatsen Afb 16 Display gedurende de CO2 kalibrering Schakel het meetapparaat in en houd d...

Page 146: ...bovendien knippert het groene LED lampje Het voltage is te hoog of te laag Gebruik een geschikte adapter met 5 V 9 Foutcodes 9 1 CO2 waarden Foutcode Fout Actie E01 CO2 sensor beschadigd Stuur het ap...

Page 147: ...naar de gegevens voor de betreffende temperatuurfoutcode E11 De luchtvochtigheids kalibrering is misgegaan Stuur het apparaat op naar de fabriek voor luchtvochtigheidskalibrering E34 De luchtvochtighe...

Page 148: ...met 230 V 50 Hz Stroomuitval Deze foutmelding ver schijnt indien sprake is geweest van stroomuitval Geen verdere acties noodzakelijk De dataoptekening gaat gewoon verder nadat de stroomvoorzi ening he...

Page 149: ...tie zijn accu s en schade aan de druksensor die door overbelasting worden veroorzaakt De kosten voor het transport en de verpakking van het apparaat in geval van reparatie worden door deze garantie ni...

Page 150: ...e de onderlinge aanpassing van de wetgevingen van de lidstaten inzake elektromagnetische compatibiliteit 2014 30 EU Ter beoordeling van het product ten aanzien van de elektromagnetische compatibilitei...

Page 151: ...Main Street Middleton MA 01949 Tel 1 978 750 9876 Fax 1 978 750 9799 www wohlerusa com Italy W hler Italia srl Via Coraine 21 37010 Costermano VR Tel 39 045 6200080 Fax 39 045 6201508 info woehler it...

Reviews: