1.
Read these instructions.
2.
Keep these instructions.
3.
Heed all warnings.
4.
Follow all instructions.
5.
Do not use this apparatus near water.
6.
Clean the contaminated area on the product surface with a soft, dry cloth or a damp
cloth.
(Do not use a detergent or cosmetic products that contain alcohol, solvents or
surfactants or oil constituents as they may deform or cause damage to the product.)
7.
Do not block any ventilation openings, Install in accordance with the manufacturer’s
instructions.
8.
Do not install near any heat sources such as radiators, heat registers, stoves, or other
apparatus (including amplifiers) that produce heat.
9.
Do not defeat the safety purpose of the polarized or grounding-type plug. A polarized
plug has two blades with one wider than the other. A grounding type plug has two
blades and a third grounding prong. The wide blade or the third prong are provided for
your safety. If the provided plug does not fit into your outlet, consult an electrician for
replacement of the obsolete outlet.
10.
Protect the power cord from being walked on or pinched particularly at plugs,
convenience receptacles, and the point where they exit from the apparatus.
11.
Only use attachments/ accessories specified by the manufacturer.
12.
Use only with the cart, stand, tripod, bracket, or table specified by
the manufacturer, or sold with the apparatus. When a cart is used,
use caution when moving the cart/apparatus combination to avoid
injury from tip-over.
Summary of Contents for SLA-T1080FA
Page 1: ...SLA T1080FA T2480A T2480VA T4680A T4680VA NETWORK CAMERA Quick Guide ...
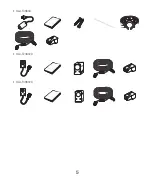
Page 4: ...4 COMPONENT As for each sales country accessories are not the same SLA T1080FA SLA T2480A ...
Page 5: ...5 SLA T4680A SLA T2480VA SLA T4680VA ...
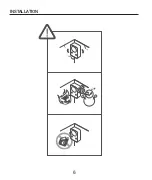
Page 6: ...INSTALLATION 6 ...
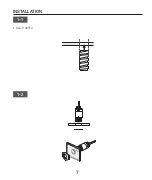
Page 7: ...INSTALLATION 7 1 1 SLA T1080FA 1 2 ...
Page 8: ...INSTALLATION 8 1 3 1 4 ...
Page 9: ...INSTALLATION 9 1 5 ...
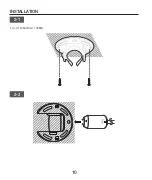
Page 10: ...INSTALLATION 10 2 2 2 1 SLA T2480A SLA T4680A ...
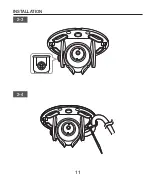
Page 11: ...INSTALLATION 11 2 3 2 4 ...
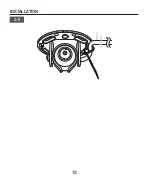
Page 12: ...INSTALLATION 12 2 5 ...
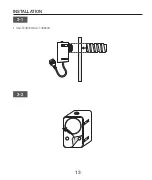
Page 13: ...INSTALLATION 13 3 2 3 1 SLA T2480VA SLA T4680VA ...
Page 14: ...INSTALLATION 14 3 3 3 4 This only applies to the SLA T2480VA ...
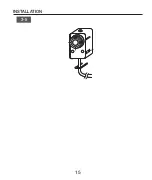
Page 15: ...INSTALLATION 15 3 5 ...
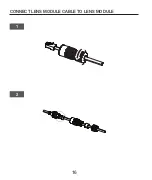
Page 16: ...CONNECT LENS MODULE CABLE TO LENS MODULE 16 1 2 ...
Page 17: ...CONNECT LENS MODULE CABLE TO LENS MODULE 17 4 3 ...
Page 18: ...18 ADJUST THE LENGTH OF THE CABLE FOR CONNECTING THE LENS MODULE 1 2 ...
Page 20: ...20 ADJUST THE LENGTH OF THE CABLE FOR CONNECTING THE LENS MODULE 5 6 ...


