background image

09

5

6

3

4

2

1

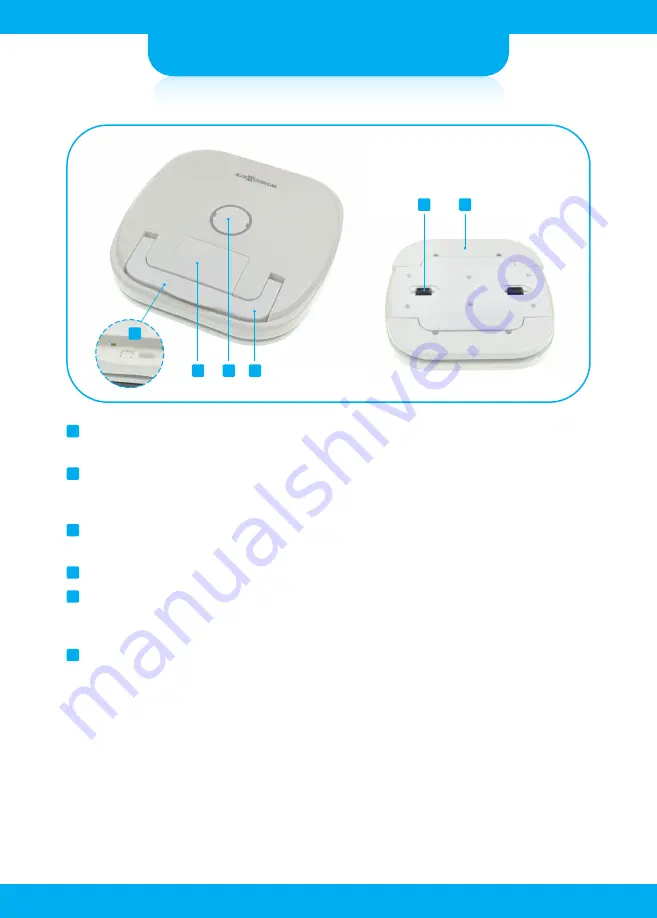
Power Switch (only for WM1000-CT series)

- Turn on the switch before the installation of the A/D kit.

Socket of the A/D kit (only for WM1000-CT series)

- Install the A/D kit into the socket. Make sure the key on the kitcorresponds exactly with the key 
  slot on the socket.

Battery Cover (only for WM1000-CT series) 

- Remove the bettery cover and Insert the battery before installing the A/D kit. 

Handle

Wheels

- Keep robot wheels clean. Wipe any debris on the wheels with a clean cloth if they became dirty 
  before every use.

Mop plate

- Attach a mop to the plate.

1

2

3

4

5

6

Product Name

Summary of Contents for WM1000-CT Series

Page 1: ...WINDOWMATE Window Cleaning Robot Authentication number MSIP REM RNK WM1000 CT30P 702 164 Obong ro Buk gu Daegu Ref of Korea T 02 521 3157 www mywindowmate com...

Page 2: ...Window Cleaning Robot WINDOWMATE How to use the WINDOWMATE Authentication number MSIP REM RNK WM1000 CT30P...

Page 3: ......

Page 4: ...ctions How to use the safety strap Certificate Power Before each use When the robot is in operation After each use 05 05 06 06 Product design and specifications may be changed without notice Pictures...

Page 5: ...trong wind or heavy rain The robot may fall off from the window Safety Instructions These instructions are written to ensure the safety of your body and property Please read carefully before use This...

Page 6: ...the Windowmate to the wall using the safety provided with the package before each use Keep children or pets away from the robot during operation and storage If your windows are dirty wipe the windows...

Page 7: ...ng solutions on them Do not directly apply water to or wipe the robot with volatile agents such as benzene paint thinner or alcohol Do not attempt to disassemble the robot Check for foreign substances...

Page 8: ...Product Description...

Page 9: ...strength level Green fully charged Blue needs to be charged Red low battery The LED lamp continues to blink if the thickness of your windows is out of coverage area that robot supports Battery Cover...

Page 10: ...ocket Make sure the key on the kitcorresponds exactly with the key slot on the socket Battery Cover only for WM1000 CT series Remove the bettery cover and Insert the battery before installing the A D...

Page 11: ...ons Press this button to move Windowmate manually The robot will stop moving when it faces an obstacle in a manual mode Make sure that the robot is placed at least 20cm away from the window frame when...

Page 12: ...in the pictures above Note that the cleaning pads should be aligned with the positions to attach them on the units Do not presoak cleaning pads before attaching them to the robot To prevent the robot...

Page 13: ...to the glass The magnet will automatically fix the unit to the window If you putting both unit to the window simultaneously may break the window Put the robot at least 20cm away from the window frame...

Page 14: ...dle as shown in the picture Tighten the straps as shown in the picuture and close the handle Make sure that the strap is placed to the groove of the handle as shown in the picture Hook the strings to...

Page 15: ...ery chargers EMC Directive 2014 30 EU EN 55014 1 2006 A2 2011 Electromagnetic compatibility Requirements for household appliances electirc tools and similar apparatus Part 1 Emission EN 55014 2 1997 A...

Page 16: ...re is any foreign material blocking window frame Recharge the batteries in your robot since the battery is low Check if the main power switch is turned on The robot must be powered on before using the...

Reviews: