Weight: 1.3 oz
Dimensions (L x W x H):
3.0”
x
1.5”
x
0.3”
Materials: Anodized 6061 Aluminum, 3M Anti
-
Slip Tape,
Stainless Steel Fasteners
Package Contents:
•
Arca
-
Swiss Style Plate:
P
-
5 Camera Body Plate (Qty 1)
•
Mounting Screw:
SW
-
105
—
1/4”
-
20
x
3/8”
(Qty 1)
•
Safety Stop Screws:
M3 x 6mm Socket Head Cap (Qty 2)
•
Hex Key:
5/32”
(Qty 1)
•
Hex Key:
2.5mm (Qty 1)
Camera Body with
Offset Mounting Hole
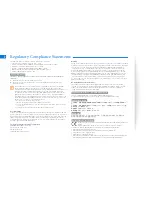
Uses of offset mounting hole:
Some cameras have a mounting hole that is offset from the lens axis. If this is the case and you would like the plate to be more centered, you
can remove the center screw by sliding it to the
threaded end of the center slot
(Figure 3) and reinstall it in the offset hole. This will allow you to
mount the plate closer to the lens axis.
Le
ns
A
xis
Wimberley, Inc.
Phone:
1
-
434
-
529
-
8385
1750 Broadway St
Toll Free:
1
-
888
-
665
-
2746
(USA & Canada)
Charlottesville, VA
22902 USA
www.tripodhead.com
*If your camera has a
3/8”
mounting hole, you will need to install a
reducer bushing (part# BS
-
100) in the hole to attach the plate.
4. Install safety stop screws.
See Fig. 6, page 2.
Instructions continued on back >>
Wimberley, Inc.
Phone:
1
-
434
-
529
-
8385
1750 Broadway St
Toll Free:
1
-
888
-
665
-
2746
(USA & Canada)
Charlottesville, VA
22902 USA
www.tripodhead.com
5 Year Warranty –
See www.tripodhead.com/warranty.cfm for complete details
P
-
5
Universal Camera Body Plate
Made in USA
Installation Instructions
Additional Threaded Hole
Off
-
center mounting hole
(threaded)
Figure 1
Safety Stops
-
See Reverse
Offset Hole
Remove screw from the
threaded end of the slot.
Figure 3
The offset hole may also be useful for obtaining the optimal plate position
when mounting the P
-
5 to a collared lens or medium format camera.
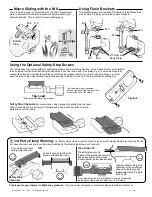
1. Position the P
-
5 lengthwise
as shown in Fig. 1
2. Mount the P
-
5 to the bottom of your camera
with the
mounting screw using the enclosed
5/32”
hex key. Rotate
the screw until you feel resistance, then rotate the screw a
little more so that the plate is snug.
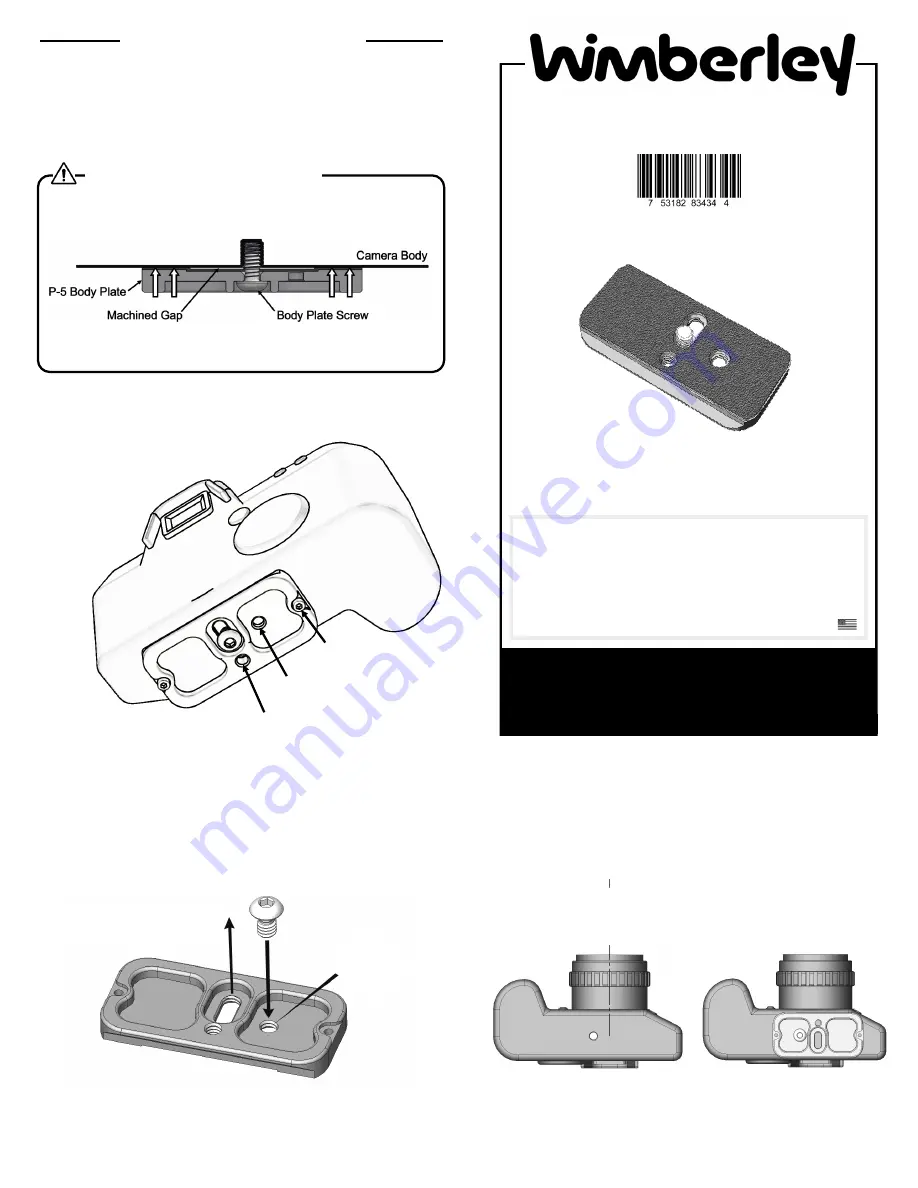
WARNING! Do Not Over
-
tighten!
Please exercise caution when mounting on camera bodies with
plastic threads or those that do not have a metal skeleton.
The P
-
5 requires that you tighten the plate snugly to your camera
body to ensure that it does not twist. The P
-
5 rubber surface resists
twisting on the body with
minimal
clamping force.


