


Configuration and setup
Wieland Electric GmbH | BA000870 | 06/2020 (Rev. A)
27
5.8
Log settings
Under the
Log Settings
menu of the web interface for
wienet
, you can configure various data logging
for the device. Figure 22 lists the sub-menu under the
Log Settings
. It consists of
System Log Set-
tings
,
COM Log Settings
,
System Log
, and
COM log
. Each sub-menu will be described in the follow-
ing subsections.
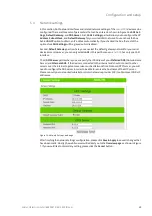
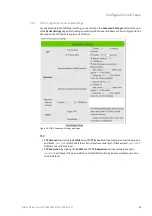
Figure 22: Log Settings menu
5.8.1
System log settings
The Syslog function is turned on by default and cannot be turned off for
wienet SDS
. It is used to
keep log for system events and report to an external Syslog server if necessary. Figure 23 shows the
System Log Settings
page under the
Log Settings
menu. Description of each option is provided as
follows.
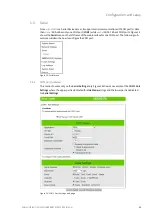
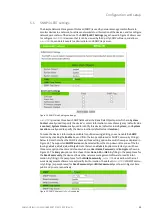
Figure 23: System Log Settings web page under Log Settings
•
Enable Log Event to Flash:
When the check box is enabled,
wienet SDS
will write log events to
the local flash. Otherwise the log events would be cleared when the device restarts because
they are stored in the RAM by default.
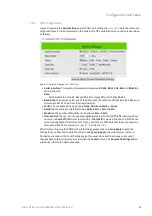
•
Enable Syslog Server:
When the check box is enabled, it will allow
wienet SDS
to send Syslog
events to the remote Syslog server with the specified IP address (next option). All the data
sent/received from serial interface will be logged and sent to the Syslog Server.
•
Syslog Server IP Address:
The user must specify the IP address of a remote Syslog Server in this
field.
•
Syslog Server Service Port:
This option allows the user to specify the remote Syslog Server Port
number between 1 and 65535. Note that the default port number is 514.
After finishing the configuration of the
Log Settings
, please click on
Save & Apply
to keep the
change that you have made and to apply your setting. When the saving and applying are finished,
the web browser will remain on the
Log Settings
page. If you want to cancel the change and reset all
changes back to their original values, just click the
Cancel
button.