background image

2

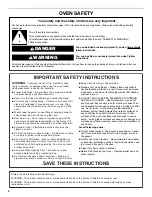
OVEN SAFETY

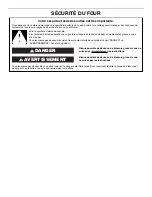
You can be killed or seriously injured if you don't immediately 
 

You


can be killed or seriously injured if you don't follow 

All safety messages will tell you what the potential hazard is, tell you how to reduce the chance of injury, and tell you what can
happen if the instructions are not followed.

Your safety and the safety of others are very important.

We have provided many important safety messages in this manual and on your appliance. Always read and obey all safety 
messages.

This is the safety alert symbol.

This symbol alerts you to potential hazards that can kill or hurt you and others.

All safety messages will follow the safety alert symbol and either the word “DANGER” or “WARNING.”

These words mean:

follow instructions.

instructions.

DANGER

WARNING

SAVE THESE INSTRUCTIONS

IMPORTANT SAFETY INSTRUCTIONS

WARNING: 

To reduce the risk of fire, electrical shock, 

injury to persons, or damage when using the oven, follow 
basic precautions, including the following:

■  

Proper Installation – Be sure the oven is properly installed 
and grounded by a qualified technician.

■  

Never Use the Oven for Warming or Heating the Room.

■  

Do Not Leave Children Alone – Children should not be left 
alone or unattended in area where oven is in use. They 
should never be allowed to sit or stand on any part of the 
oven.

■  

Wear Proper Apparel – Loose-fitting or hanging garments 
should never be worn while using the oven.

■  

User Servicing – Do not repair or replace any part of the 
oven unless specifically recommended in the manual. All 
other servicing should be referred to a qualified technician.

■  

Storage in Oven – Flammable materials should not be 
stored in an oven.

■  

Do Not Use Water on Grease Fires – Smother fire or flame 
or use dry chemical or foam-type extinguisher.

■  

Use Only Dry Potholders – Moist or damp potholders on 
hot surfaces may result in burns from steam. Do not let 
potholder touch hot heating elements. Do not use a towel 
or other bulky cloth. 

■  

Use Care When Opening Door – Let hot air or steam 
escape before removing or replacing food.

■  

Do Not Heat Unopened Food Containers – Build-up of 
pressure may cause container to burst and result in injury.

■  

Keep Oven Vent Ducts Unobstructed.

■  

Placement of Oven Racks – Always place oven racks in 
desired location while oven is cool. If rack must be moved 
while oven is hot, do not let potholder contact hot heating 
element in oven.

■  

DO NOT TOUCH HEATING ELEMENTS OR INTERIOR 
SURFACES OF OVEN – Heating elements may be hot 
even though they are dark in color. Interior surfaces of an 
oven become hot enough to cause burns. During and after 
use, do not touch, or let clothing or other flammable 
materials contact heating elements or interior surfaces of 
oven until they have had sufficient time to cool. Other 
surfaces of the oven may become hot enough to cause 
burns – among these surfaces are oven vent openings and 
surfaces near these openings, oven doors, and windows of 
oven doors.

For self-cleaning ovens:

■  

Do Not Clean Gasket – The gasket is essential for a good 
seal. Care should be taken not to rub, damage, or move 
the gasket.

■  

Do Not Use Oven Cleaners – No commercial oven cleaner 
or oven liner protective coating of any kind should be used 
in or around any part of the oven. 

■  

Clean Only Parts Listed in Manual.

■  

Before Self-Cleaning the Oven – Remove broiler pan and 
other utensils. 

State of California Proposition 65 Warnings:

WARNING: This product contains one or more chemicals known to the State of California to cause cancer.

WARNING: This product contains one or more chemicals known to the State of California to cause birth defects or other 
reproductive harm.

Summary of Contents for WOD51ES4ES

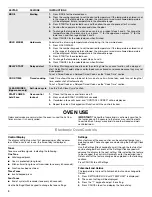
Page 1: ...______________ Para una versión de estas instrucciones en español visite www whirlpool com Deberá tener los números de modelo y serie Se encuentran en el lado inferior derecho del marco del horno dentro de la puerta BUILT IN ELECTRIC DOUBLE OVEN USER INSTRUCTIONS Table of Contents OVEN SAFETY 2 FEATURE GUIDE 3 OVEN USE 4 Electronic Oven Controls 4 Hold Warm 6 Sabbath Mode 6 Aluminum Foil 6 Positio...

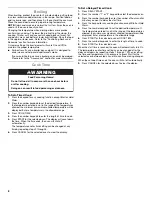
Page 2: ... fire or flame or use dry chemical or foam type extinguisher Use Only Dry Potholders Moist or damp potholders on hot surfaces may result in burns from steam Do not let potholder touch hot heating elements Do not use a towel or other bulky cloth Use Care When Opening Door Let hot air or steam escape before removing or replacing food Do Not Heat Unopened Food Containers Build up of pressure may caus...

Page 3: ...tes enter 2 3 Press TIMER SET OFF to begin the countdown If enabled timer tone s will sound at the end of countdown 4 Press TIMER SET OFF to cancel the Timer and return to the time of day Do not press the Cancel keypad because the oven will turn off START Cooking start The Start keypad begins any oven function If Start is not pressed within 2 minutes after pressing a keypad the function is cancele...

Page 4: ...entered is not in the range of the temperatures allowed the minimum or maximum allowed temperature will be displayed Enter a temperature in the allowable range 3 Press START for the selected oven and then allow the oven to preheat for 2 minutes 4 Position the cookware in the oven and close the door 5 To change the temperature when one oven is in use repeat steps 2 and 3 To change the temperature w...

Page 5: ...he current setting will be displayed 3 Press the 1 keypad to adjust the setting 4 Press CANCEL to exit and display the time of day 12 Hour Shutoff The oven control is set to automatically shut off the oven 12 hours after the oven initiates a cook or clean function This will not interfere with any timed or delay cook functions 1 Press SETTINGS CLOCK until 12 HR AUTO OFF is displayed 2 The current s...

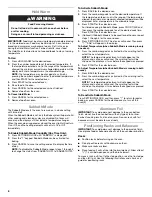
Page 6: ... Press START for the selected oven For timed cooking in Sabbath Mode press COOK TIME and then press the number keypads to set the desired cook time Press START for the selected oven 4 Optional If Sabbath Mode is to be used for both ovens repeat steps 1 through 3 for the second oven 5 Press SETTINGS CLOCK Three tones will sound Then press 7 SAb will appear in the display To Adjust Temperature when ...

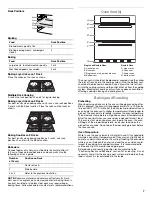
Page 7: ...177 C with all of the oven racks provided with your oven inside the oven cavity Higher temperatures will take longer to preheat The preheat cycle rapidly increases the oven temperature The actual oven temperature will go above your set temperature to offset the heat lost when your oven door is opened to insert food This ensures that when you place your food in the oven the oven will begin at the p...

Page 8: ...4 Press the number keypads to enter the length of time to cook 5 Press START for the selected oven The display will count down the time When the time ends the oven will shut off automatically The temperature and or time setting can be changed at any time by repeating steps 2 through 5 6 Press CANCEL for the selected oven to clear the display To Set a Delayed Timed Cook 1 Press DELAY START 2 Press ...

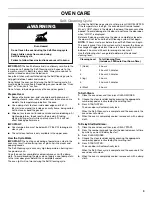
Page 9: ... anytime press CANCEL UPPER If the temperature is too high the oven door will remain locked When LOCK shows in the display the door of the oven cannot be opened To avoid damage to the door do not force the door open when LOCK is displayed Before self cleaning make sure the door is completely closed or the door will not lock and the Self Cleaning cycle will not begin NOTE 12 hours must pass before ...

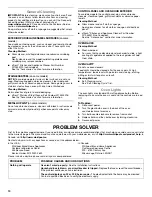
Page 10: ...r Part Number W10355010 not included See the Accessories section for more information OVEN RACKS Cleaning Method Steel wool pad For racks that have discolored and are harder to slide a light coating of vegetable oil applied to the rack guides will help them slide OVEN CAVITY Do not use oven cleaners Food spills should be cleaned after the oven cools At high temperatures foods react with porcelain ...

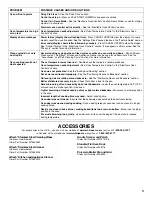
Page 11: ...set temperature was incorrect Double check the recipe in a reliable cookbook Oven temperature needs adjustment See Oven Temperature Control in the Electronic Oven Controls section Oven was not preheated See the Baking and Roasting section Racks were positioned improperly See the Positioning Racks and Bakeware section Not enough air circulation around bakeware See the Positioning Racks and Bakeware...

Page 12: ... water filters preservation solutions etc 5 Defects or damage caused by the use of non genuine Whirlpool parts or accessories 6 Conversion of products from natural gas or L P gas 7 Damage from accident misuse abuse fire floods acts of God or use with products not approved by Whirlpool 8 Repairs to parts or systems to correct product damage or defects caused by unauthorized service alteration or mo...

Page 13: ...___________________________________ INSTRUCTIONS D UTILISATION DU FOUR ÉLECTRIQUE ENCASTRÉ DOUBLE Table des matières SÉCURITÉ DU FOUR 14 GUIDE DES CARACTÉRISTIQUES 16 UTILISATION DU FOUR 18 Commandes électroniques du four 18 Maintien au chaud 19 Mode Sabbat 20 Papier d aluminium 20 Positionnement des grilles et des ustensiles de cuisson au four 20 Évent s du four 21 Cuisson au four et rôtissage 21...

Page 14: ...espect des instructions Votre sécurité et celle des autres est très importante Nous donnons de nombreux messages de sécurité importants dans ce manuel et sur votre appareil ménager Assurez vous de toujours lire tous les messages de sécurité et de vous y conformer AVERTISSEMENT DANGER Voici le symbole d alerte de sécurité Ce symbole d alerte de sécurité vous signale les dangers potentiels de décès ...

Page 15: ...es des évents Placement des grilles du four Toujours placer les grilles du four à l endroit désiré lorsque le four est froid Si la grille doit être déplacée lorsque le four est chaud ne pas laisser des mitaines de four toucher l élément chauffant dans le four Remisage dans le four Des matériaux inflammables ne doivent pas être remisés dans un four NE PAS TOUCHER LES ÉLÉMENTS CHAUFFANTS OU LES SURF...

Page 16: ...t être réglée en heures ou en minutes jusqu à concurrence de 9 heures et 59 minutes 1 Appuyer sur TIMER SET OFF minuterie réglage arrêt 2 Appuyer sur les touches numériques pour régler la durée en hr min Les zéros de gauche peuvent ne pas être entrés Entrer 2 pour 2 minutes par exemple 3 Appuyer sur TIMER SET OFF minuterie réglage arrêt pour commencer le compte à rebours Si activés le les signal s...

Page 17: ...r sur HOLD WARM maintien au chaud 2 Utiliser les touches numériques pour régler la température souhaitée Si la température entrée ne se trouve pas dans la fourchette des températures autorisées la température minimale ou maximale autorisée s affiche Entrer une température dans la fourchette autorisée 3 Appuyer sur START mise en marche pour le four désiré 4 Pour changer la température répéter les é...

Page 18: ...UNIT unité de température s affiche 2 Le réglage utilisé à ce moment là s affiche 3 Appuyer sur la touche 1 pour modifier le réglage 4 Appuyer sur CANCEL annulation pour quitter ce mode et afficher l heure Désactivation des signaux sonores Désactive tous les signaux sonores y compris le signal sonore de fin de programme et les signaux sonores d appui sur une touche 1 Appuyer sur SETTINGS CLOCK rég...

Page 19: ...précédent c est pourquoi la température peut être ajustée à vos besoins de cuisson Elle peut être modifiée en degrés Fahrenheit ou Celsius Ajustement de la température du four 1 Appuyer sur SETTINGS CLOCK réglages horloge jusqu à ce que TEMP CALIB calibrage de la température s affiche 2 Le réglage utilisé à ce moment là s affiche Appuyer sur la touche 1 pour passer du four supérieur au four inféri...

Page 20: ...iche tel qu il était avant que l on n appuie sur la touche 2 Appuyer sur START mise en marche pour le four désiré Réglage de la température lorsque le mode Sabbat fonctionne sur les deux fours 1 Appuyer sur la touche BAKE cuisson au four du four souhaité 2 Appuyer sur les touches numériques comme indiqué par le texte déroulant afin de sélectionner la nouvelle température REMARQUE Le changement de ...

Page 21: ... Au début d un programme de cuisson au four le four commence par un préchauffage une fois la touche Start mise en marche enfoncée Le four atteint 350 F 177 C en 13 à 19 minutes environ lorsque toutes les grilles fournies avec le four sont à l intérieur Pour atteindre une température plus élevée le préchauffage est plus long Le programme de préchauffage augmente rapidement la température du four La...

Page 22: ...arche pour le four désiré L affichage présente le compte à rebours de la durée Lorsque la durée est écoulée le four s éteint automatiquement La température et ou la durée peut peuvent être ajustée s en tout temps en répétant les étapes 2 à 5 6 Appuyer sur le bouton CANCEL annulation pour le four désiré pour effacer l affichage du four Réglage d une cuisson minutée différée 1 Appuyer sur DELAY STAR...

Page 23: ... refroidi retirer la cendre avec un chiffon humide Pour éviter de briser le verre ne pas appliquer de chiffon humide froid sur le verre intérieur de la porte avant que le four n ait complètement refroidi La lampe du four ne fonctionne pas durant le programme d autonettoyage Pour arrêter le programme d autonettoyage à tout moment appuyer sur CANCEL UPPER annulation four supérieur Si la température ...

Page 24: ...une seule utilisation ou en cas d utilisation limitée Méthode de nettoyage Frotter dans la direction du grain pour éviter les dommages Nettoyant pour acier inoxydable affresh pièce n W10355016 Voir la section Accessoires pour plus de renseignements PEINTURE MÉTALLIQUE sur certains modèles Ne pas utiliser de nettoyants abrasifs de nettoyants avec agent de blanchiment de produits antirouille d ammon...

Page 25: ... 3 secondes pour les déverrouiller Commandes en mode de démonstration Voir la section Commandes électroniques du four Le mode de démonstration est utilisé sur les modèles présentés dans les salles d exposition Réglage incorrect des commandes électroniques du four Voir la section Commandes électroniques du four La température du four est trop élevée ou trop basse La température du four doit être aj...

Page 26: ...ts causé par un plat à four brillant ou clair Placer la grille plus bas dans le four Durée de cuisson incorrecte Revoir la durée de cuisson Porte du four non fermée Vérifier que le plat à four n empêche pas la fermeture de la porte La porte du four a été ouverte durant la cuisson L ouverture de la porte pour vérifier la cuisson laisse échapper la chaleur du four et peut allonger la durée de cuisso...

Page 27: ...ommage résultant de l utilisation de pièces ou accessoires Whirlpool non authentiques 6 Conversion de votre produit du gaz naturel ou du gaz de pétrole liquéfié 7 Dommages causés par accident mésusage abus incendie inondations catastrophe naturelle ou l utilisation de produits non approuvés par Whirlpool 8 Réparations aux pièces ou systèmes dans le but de rectifier un dommage ou des défauts résult...

Page 28: ...W10692590B SP PN W10758344 2015 Whirlpool Used under license in Canada All rights reserved Utilisé sous licence au Canada Tous droits réservés 3 15 Printed in U S A Imprimé aux É U ...

Reviews: