10
3.
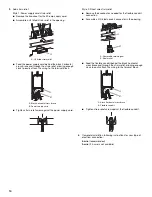
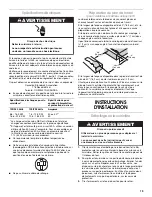
Add strain relief.
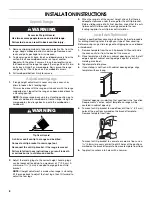
Style 1: Power supply cord strain relief
■
Remove the knockout for the 40-amp supply cord.
■
Assemble a UL listed strain relief in the opening.
■
Feed the power supply cord behind the black horizontal
cross brace and through the strain relief, allowing enough
slack to easily attach the wiring to the terminal block.
■
Tighten strain relief screw against the power supply cord.
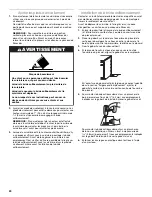
Style 2: Direct wire strain relief
■
Remove the knockout as needed for the flexible conduit
connection.
■
Assemble a UL listed conduit connector in the opening.
■
Feed the flexible conduit behind the black horizontal
cross brace and through the strain relief, allowing enough
slack to easily attach the wiring to the terminal block.
■
Tighten strain relief screw against the flexible conduit.
4.
Complete installation following instructions for your type of
electrical connection:
4-wire
(recommended)
3-wire
(if 4-wire is not available)
A. UL listed strain relief
A. Black horizontal cross brace
B. Power supply cord
A
B
A
A. Removable retaining nut
B. Strain relief
A. Black horizontal cross brace
B. Flexible conduit
A
B
B
A


