CONNECTING THE NETCENTER – 7
NETCENTER
USER MANUAL
Connecting the NetCenter
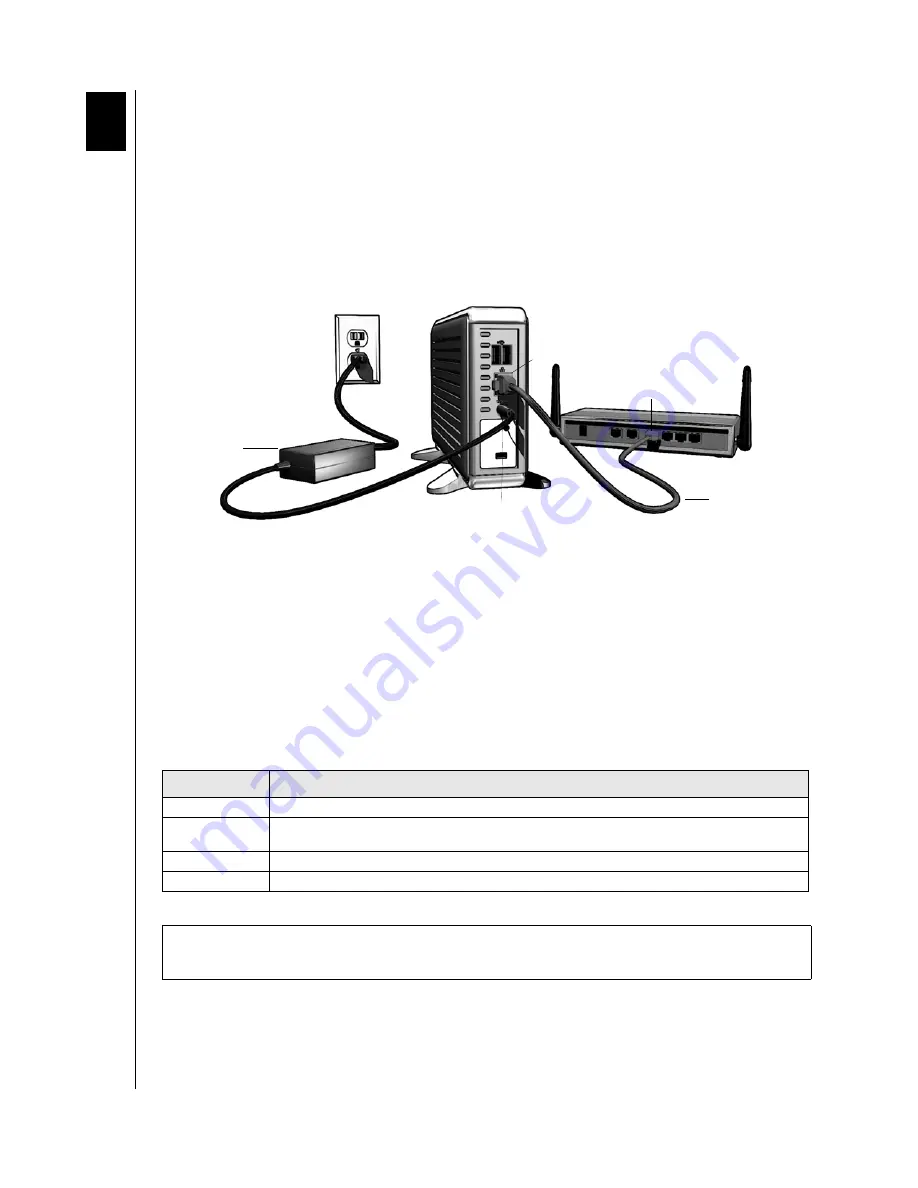
1. Plug the AC adapter into an electrical outlet.
2. Connect the other end of the adapter into the DC power supply socket located on the
back of the unit.
3. Connect one end of an Ethernet cable into the Ethernet port located on the back of the
unit.
4. Connect the other end of the Ethernet cable directly into a router or network switch port.
Powering up the Drive
Note:
Connection to power source (electrical outlet) is not immediately detected by the
power adapter. You must wait 5 seconds after the power cord is connected before pressing
the power button.
Press the power button to turn on the unit. The light encircling the power button will
illuminate and flash amber for up to two minutes (or longer if USB devices are attached)
before illuminating blue. Once the drive illuminates a steady blue, it is ready for use. Proceed
to follow the steps under “NetCenter Initial Setup” on page 10.
Color
Indicates
Amber (steady)
Wait. NetCenter boots up.
Amber (flashing) NetCenter problem detected. See “Troubleshooting” on page 50 or contact Technical Support at
support.wdc.com
.
Blue (flashing)
Drive Activity. NetCenter is being accessed.
Blue (steady)
NetCenter is ready for setup or use.
Important:
Do not use the NetCenter after power-up until after the light encircling the
power button glows a steady blue.
4
NetCenter Ethernet port
AC adapter
Router port
Power supply socket
Ethernet cable
Summary of Contents for NETCENTER
Page 1: ......


