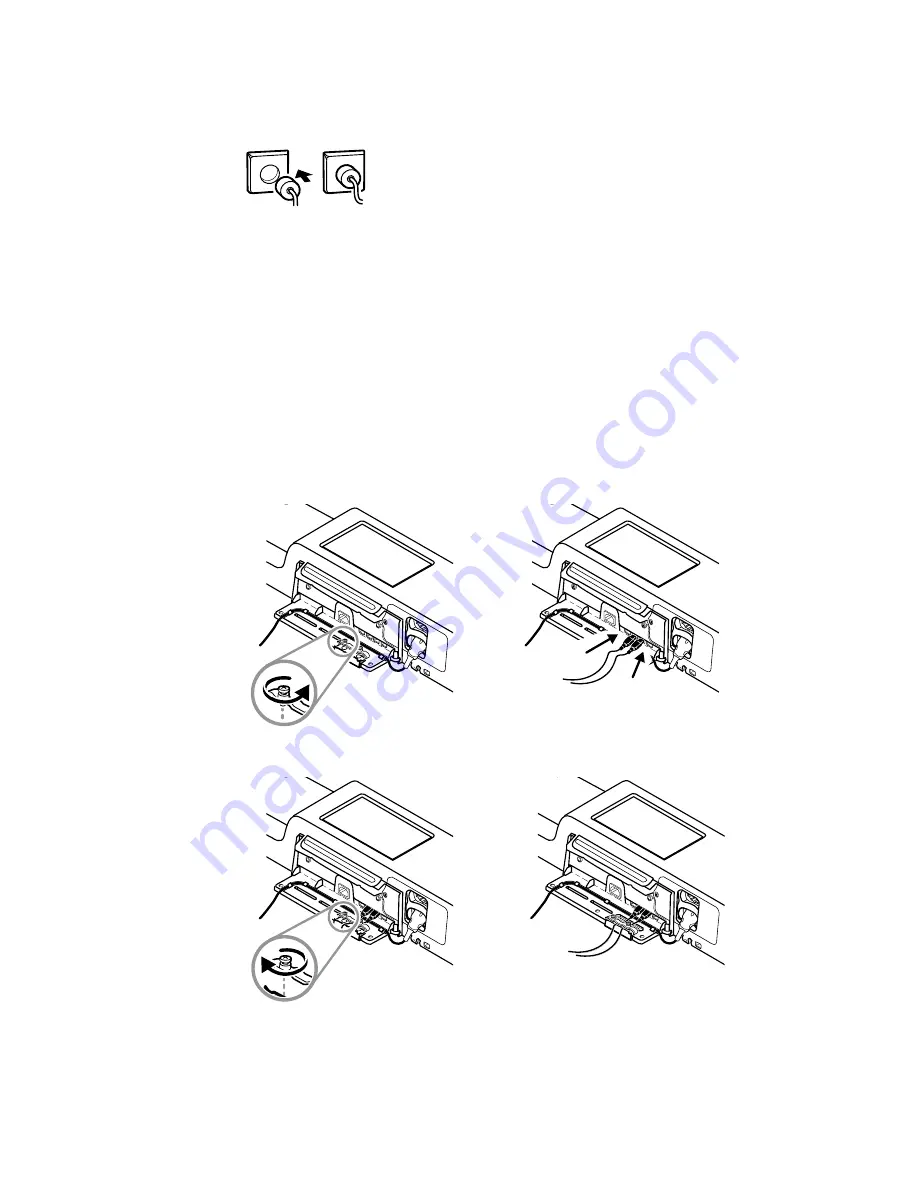
1. Insert the power plug into an outlet to power the monitor and to charge the battery.
Note
New batteries are only 30 percent charged. You must plug
the wall system into AC power to fully charge the battery.
Do not plug in the power cord until completing all preliminary
steps.
2. Proceed to Startup.
Attach an accessory
1. Shut down the wall system and detach the power cord. Then remove the cover from
the wall system by loosening the captive retention screws.
2. Loosen the two screws on the cable retention clamp and remove it. Then connect
the USB cable(s) to an available connector and thread the cable(s) through the cable
guide(s).
3. Replace the cable retention clamp and tighten the two screws.
4. Re-attach the cover.
a. Thread the SpO2 (or SpHb) cable through the cutouts on the top right and
bottom left of the cover.
Directions for use
Setup 53
Summary of Contents for Connex IWS
Page 1: ...Welch Allyn Connex Devices Directions for use Software version 2 3X...
Page 10: ...4 Introduction Welch Allyn Connex Devices...
Page 14: ...8 Symbols Welch Allyn Connex Devices...
Page 20: ...14 Screen elements Welch Allyn Connex Devices...
Page 28: ...22 About warnings and cautions Welch Allyn Connex Devices...
Page 72: ...66 Navigation Welch Allyn Connex Devices...
Page 96: ...90 Profiles Welch Allyn Connex Devices...
Page 106: ...100 Patient data management Welch Allyn Connex Devices...
Page 120: ...114 Alarms Welch Allyn Connex Devices...
Page 184: ...178 Patient monitoring Welch Allyn Connex Devices...
Page 212: ...206 Advanced settings Welch Allyn Connex Devices...
Page 244: ...238 Specifications Welch Allyn Connex Devices...
Page 250: ...244 Standards and compliance Welch Allyn Connex Devices...
Page 252: ...246 Guidance and manufacturer s declaration Welch Allyn Connex Devices...
Page 266: ......


