


WBSn-2450 User Guide
Page - 14 -
8.
Close and firmly tighten the plastic cap, to ensure perfect sealing and IP-68 compliance. Connect the
network cable to the IN port of the PoE injector.
Note: The above procedure must be conducted after every disconnection of the Ethernet cable from
either ETH port on the WBSn-2450 unit or from the OUT port of the POE injector.
POE port RJ45 Pin Descriptions
Pin
Signal
Color
Description
1
BI_DA+
Orange-White
Bi-directional pair A +, POE GND
2
BI_DA-
Orange
Bi-directional pair A -, POE GND
3
BI_DB+
Green-White
Bi-directional pair B +, POE +55V
4
BI_DC+
Blue
Bi-directional pair C +, POE +55V
5
BI_DC-
Blue-White
Bi-directional pair C -, POE +55V
6
BI_DB-
Green
Bi-directional pair B -, POE +55V
7
BI_DD+
Brown-White
Bi-directional pair D +, POE GND
8
BI_DD-
Brown
Bi-directional pair D -, POE GND
2.3 Accessing the Wavion Management Interface
The following procedure describes how to log in to the WBSn-2450 Wavion Management Interface, and
from there enter the Set-up Wizard, and further configuration information.
1.
In an internet browser, enter the Management IP address of the WBSn unit in the URL navigation
field.
Note: The default IP address of the unit is IP:
. Currently, Microsoft Internet
Explorer, Chrome and Mozilla Firefox browsers are supported.
2.
A log-in screen is displayed.
•
Enter admin in the User Name field.
•
Enter admin in the password field.
•
Specify the language in which you wish to work. (
This field will be functional in a future release.)
3.
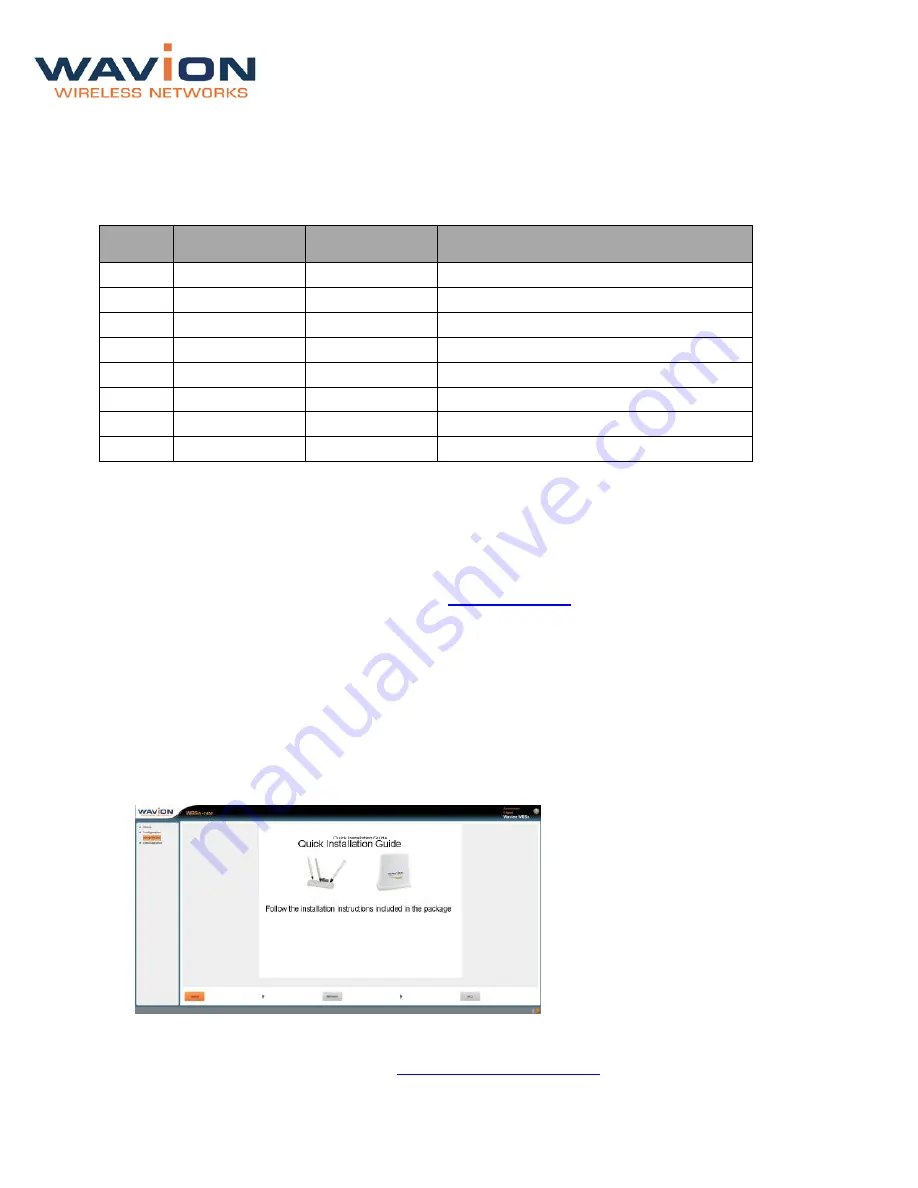
Click Connect. The Wavion EMS screen is displayed.
4.
Select the Setup Wizard option.
5.
The Installation screen is displayed. Click the arrow in the bottom right corner of the screen to
proceed to the Network Configuration screen.
6.
Complete the parameters, to set up your initial networking configuration.
Note: Further configuration parameters are available, and should be specified in order to complete
your set-up. For more information, see
Further Configuration Features
.


