Pairing Wasp’s Bluetooth scanner models: WWS100i, WWS150i, WWS250i, WWS550i
Page 1 of 2
Read the following instructions completely
before attempting to pair the scanner.
Start the Bluetooth pairing process for your PC or
device. Steps for some versions of Windows
are shown below (adaptable to other OSes).
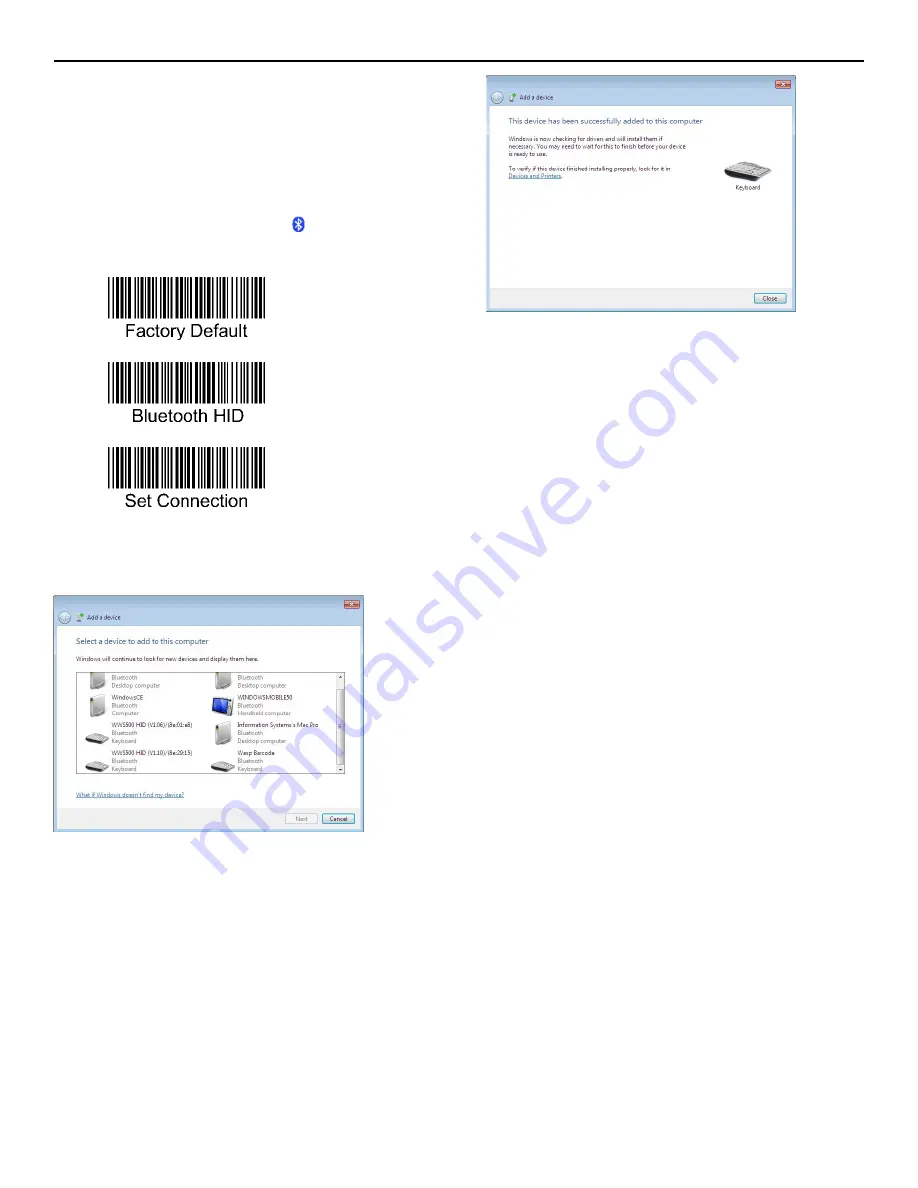
1. Right-click the Bluetooth icon in the system
tray near the clock, then click “Add a Device”.
2. Scan
3. Scan
4. Scan
5. When it appears in the pairing list, click Wasp
Barcode (or “Wasp Bar”) Bluetooth Keyboard,
then Next (or double-click it).
6. If you get a prompt about entering a pairing
code or Pin, go to Step 9 on the next page.
(Note: Scanners with newer firmware versions may
pair without prompting for a Pin.
This is normal.
)
7. Windows should say “This device has been
successfully added to this computer” or similar.
Click the Close button.
Keep reading!
Important Note: Despite what the message above
says, Windows may still require more time
(possibly 2-3 minutes) to completely install the
device driver for the scanner. Watch for another
notification about the driver installation being
complete. Do not attempt to scan barcodes while
this driver installation is in progress; this can
prevent the scanner from pairing properly.
8. Test:
Launch Notepad, MS Word, or some other
application that accepts text input from a
keyboard, then scan a data barcode (e.g. Test
Symbols in Appendix A of the full user manual, or a
UPC barcode from a product). The application
should show the data from the barcode.
If the device repeatedly fails to pair, it may be in a
partially installed state. Go to Start menu, Devices
and Printers. In the Devices section, look for a
Wasp Barcode Keyboard (or similar name). If you
find one, right-click it, then Remove Device. When
that completes, go back to the beginning of this
procedure and try again.
If you entered a Pin, but the scanner beeps 5 times
when scanning a barcode, scan Stop Pin, then try
scanning again.
version 20180831


