Support Email/ Skype: [email protected]
13
2.2.2 Wi-Fi Set Up Via Network Cable
Connect the IP camera and router via a network cable as shown in Figure 2.1.2. Log into the camera and access the system
configuration page following the steps in section 5. Web Access. Complete the set up and unplug the network cable referring to
section 5.3.2.3 to connect the camera via Wi-Fi.
2.2.3 WPS/QSS One Key Wi-Fi Set Up
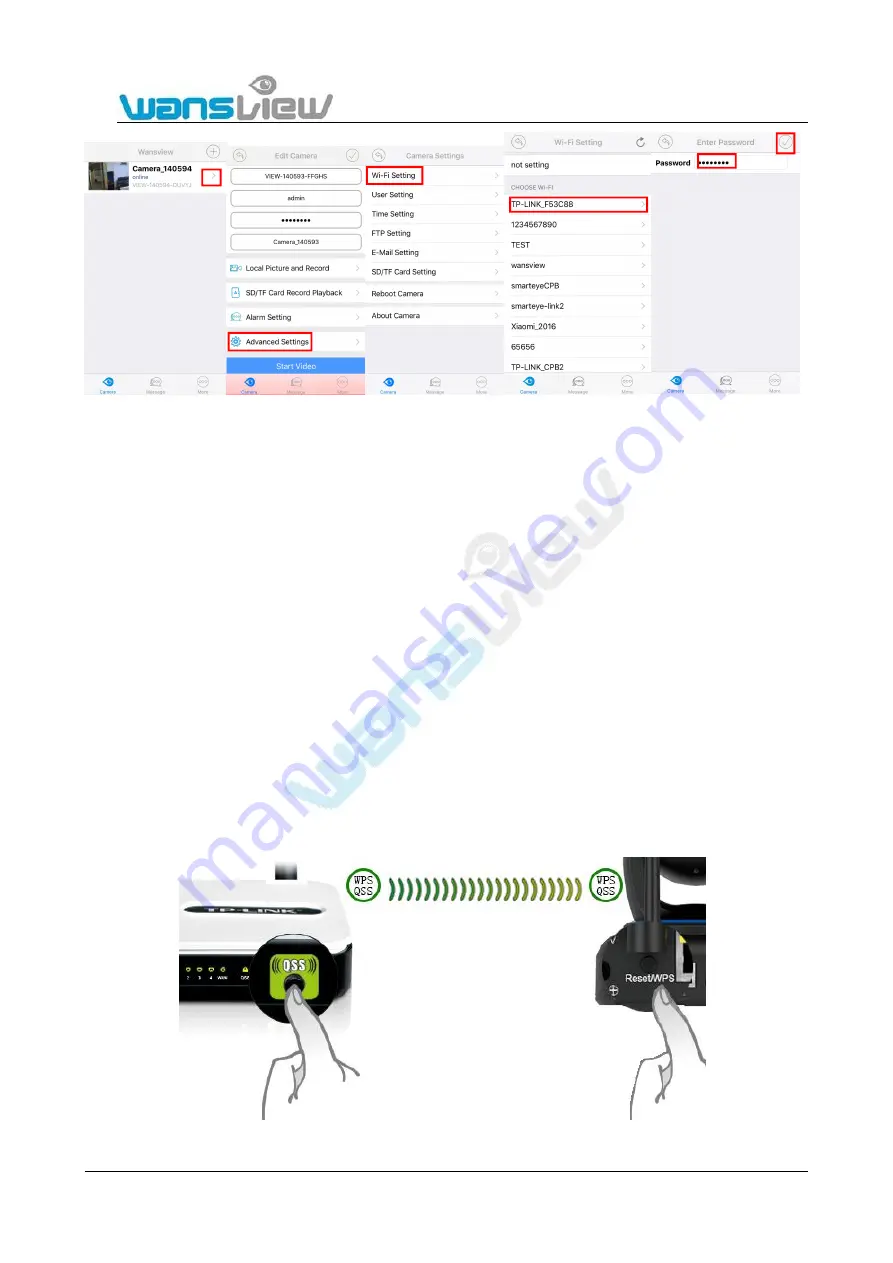
Since the camera supports WPS/QSS function, Wi-Fi connection set up can be done in a simple way:
1) Please confirm whether the wireless router that the camera will be connected to supports WPS/QSS function (by reviewing the
router manual or getting support from the manufacturer of the router) and make make sure the WPS function is enabled before
performing the WiFi connection.
2) Connect to the power supply of the camera, and wait for 1 minute. After the camera starts-up, hold the "WPS" button of the
camera for 3s. Then click the “WPS/QSS” button of the Router. The camera and router will perform Wi-Fi configuration based on
the WPS/QSS protocol. Please wait for 1-2 minutes or log on to router to check whether it is connected. After successful
configuration, the blue Wi-Fi indicator light of the camera will flash quickly several times and two "beeps" will be heard. It will
connect to the router automatically. Simultaneously, the blue indicator light will remain on (The indicator light displays the status
without plugging the network cable in. After plugging the cable in, the blue indicator light will shut off).
Attention: The configuration method is not applicable to some routers since they do not support WPS/QSS.


