12
TERZO STADIO, GEL DI SILICE:
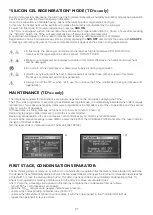
Questo stadio permette la rimozione della gran parte delle impurità gassose. La rigenerazione permette di ripristinare
il gel di silice allo strato originale.
Dopo 12 mesi, come verrà segnalato dal display, sostituire il gel di silice per poter garantire sempre le prestazioni
ottimali del vostro TD
3
PRO
.
Per sostituire il gel di silice leggere attentamente le istruzioni allegate nella confezione ThermoKit (Ref. 60134).
QUARTO STADIO, FILTRO A CARBONI ATTIVI:
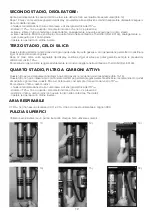
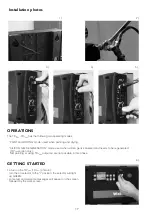
Questo filtro serve a depurare l’aria dagli inquinanti gassosi e renderla quindi respirabile (foto 15-16).
Questo filtro non può intasarsi ma con l’andare del tempo perderà progressivamente efficacia; raccomandiamo quindi
di sostituire ogni sei mesi questo filtro per poter avere così sempre il massimo dal vostro TD
3
PRO
.
Per sostituire il filtro a carboni attivi:
- chiudere l’alimentazione di aria compressa e di energia elettrica del TD
3
PRO
;
- sfiatare il TD
3
PRO
fino a quando i manometri indicano che non c’è pressione;
- sostituire il filtro a carboni attivi con quello fornito nella confezione ThermoKit;
- ripetere le operazioni in ordine inverso.
PULIZIA SUPERFICI
Utilizzare esclusivamente un panno inumidito d’acqua. Non utilizzare solventi.
ARIA RESPIRABILE
Il TD
3
PRO
non ha nessun rilevatore di CO e CO
2
. Il tipo di innesto utilizzabile è mignon X90.
SECONDO STADIO, DISOLEATORE:
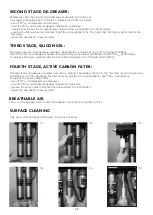
Aprire periodicamente lo scarico dell’olio e lasciare defluire l’olio eventualmente accumulato (foto 14).
Dopo 12 mesi, come verrà segnalato dal display, provvedere alla sostituzione del filtro separatore disoleatore seguen-
do le modalità indicate:
- chiudere l’alimentazione di aria compressa e di energia elettrica del TD
3
PRO
;
- sfiatare il TD
3
PRO
fino a quando i manometri indicano che non c’è pressione;
- svitare e sfilare il tubo contenitore corrispondente, analogamente a quanto eseguito per il primo stadio;
- svitare l’elemento filtrante e sostituirlo con quello fornito nella confezione ThermoKit (Ref. 60134), analogamente a
quanto eseguito per il primo stadio;
- ripetere le operazioni in ordine inverso.
11)
14)
12)
15)
13)
16)
13
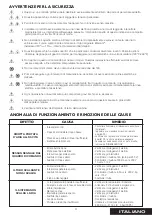
SAFETY WARNINGS
ENGLISH
• This is a professional product exclusively intended for use by trained personnel.
• This equipment contains parts subject to hazardous voltages.
• Fire hazard, never leave the equipment on unattended.
• Only install the product on mains protected according to law by a magnetothermic breaker and differential
circuit breaker. Failure to observe these instructions may lead to serious health hazards. Hazard of death.
• Do not install the switchboard in potentially explosive environments such as the spraybooths.
The only admitted part is the original Walcom
®
tube. Install the TD
3
PRO
-TD
1
PRO
away from flammable materials.
• This equipment has surfaces which become hot in particular conditions. Burn hazard. Wear specific protective
gloves to handle heated metallic parts (120°C-248°F).
• Do not open the control panel for any reason. Any operation on it must be performed with the electricity mains
completely cut off.
• Do not attempt to dismantle any part except for filters.
• Before any maintenance operations make sure the electrical and air mains have been cut off.
• Do not damage the connection wires between the control panel, heater and solenoid valve in any way.
In the event of damaged electrical parts, immediately cut off the electrical mains and contact the manufacturer.
• Any unauthorised repairs may cause serious safety hazards.
• Instruct involved personnel and always keep a copy of this manual near the equipment.
• Check booth grounding system efficiency.
FAILURES AND REMOVAL OF THEIR CAUSES
FAULT
CAUSE
SOLUTION
REDUCED AIR
OUTPUT
NO SIGNAL FROM THE
CONTROL PANEL
HEATING TUBE
DOES NOT HEAT
THE SYSTEM DOES
NOT HEAT AIR
- Filters clogged
- Pressure set too low
- Insufficient mains pressure
- Solenoid valve blocked
- Incorrect installation
- Main switch off
- Tube fuse blown
- The tube is damaged
- The set temperature is insufficient
- The system is still heating
- Incorrect installation
- No power
- Main switch off
- Line fuse blown
- Internal malfunctions
- Insufficient flow and pressure
- Check set temperature
- Wait 5 minutes without supplying air
- Check electrical connections
- Check electrical connections
- Check switches
- Check the fuse
- Contact customer service
- Use a compressor with at least 600 lt/ min-
21,18 cfm 5 bar/73 PSI
- Check clog indicators and replace clogged
filters
- Set at least 4 bar/58PSI working pressure
- Make sure mains pressure is at least 6
bar/87PSI and that flow is adequate
- Switch to “REGENERATION” mode for
several seconds, several times
- Incorrect installation
- No power
- Main switch off
- Line fuse blown
- Line fuse blown
- Check electrical connections
- Check electrical connections
- Check switches
- Check the fuse 16A (230 V only)
- Check the fuse 500 mA vers. 230 V,
1A vers.115 V
- Check electrical connections
- Check switches
- Check the fuse 6.3A vers. 230 V- 8A vers.115 V.
- Replace the tube
Summary of Contents for TD1 PRO
Page 66: ...66 Note ...

