


BX36S
3PH Self-feed Chipper
Service and Maintenance
43
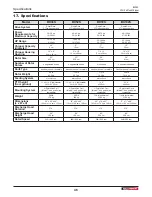
15.9 Ledger Blades
Ledger blades shear material as it passes the moving
rotor blades.
Ledger blades are located on the lower rotor housing,
mounted on slotted holes for adjustment. There are
four usable corners on the blade. When the corner
facing the rotor blade rounds over, remove the blade
and re-install so a different corner is facing the rotor
blade.
Place machine in
Safe Condition
).
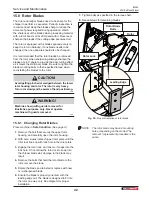
Ledger Blade
Ledger Blade
Bolts
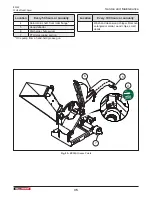
Fig. 31 –
Cut away view to show ledger blade assembly
1.
Remove the four bolts that hold the ledger blade to
the ledger mount.
2.
Carefully remove the blade, pull it down and
slightly to the side to clear the axle.
3.
Rotate the blade and reinstall, or replace with new
or re-sharpened blade.
4.
Hand tighten the bolts.
5.
Set the clearance between the ledger and rotor
blades using the ledger adjuster.
6.
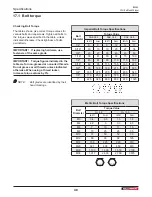
Loosen the nuts on the adjuster and move the
ledger to the correct clearance at
1/32–1/16"
(.76–1.52 mm)
to obtain the best performance.
7.
Make sure both adjusters are moved evenly.
NOTE: For fast and easy setting, use the chipper
clearance setting gauge, included with
your BX chipper.
8.
Tighten adjuster nuts, then tighten ledger blade
bolts. Tighten as specified in the torque chart.
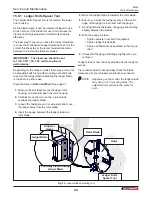
Ledger Blade
Ledger Blade
Bolts
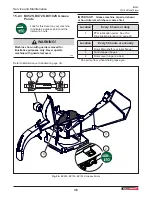
Fig. 32 –
Cut away view to show ledger blade assembly
NOTE: The ledger blade may have three
mounting holes, depending on the model.
The removal / replacement / adjustment
procedure is the same for both.
Summary of Contents for BX36S
Page 1: ...OPERATOR S MANUAL 3PHSelf feedChipper BX36S BX52S BX72S BX102S...
Page 51: ......
Page 52: ...www wallensteinequipment com...


