background image


UNPACKING INSTRUCTION 


CAUTION!

 Immediately upon receiving the product, carefully unpack the carton, check the contents to ensure that all parts are 

present, and have been received in good condition. Notify the shipper immediately and retain packing material for inspection if 
any parts appear damage from shipping or the package itself shows signs of mishandling. Save the package and all packing 
materials. In the event that the product must be returned to the factory, it is important that the product be returned in the original 
factory box and packing. 
 
If the device has been exposed to drastic temperature fluctuation (e.g. after transportation), do not switch it on immediately. The 
arising condensation water might damage your device. Leave the device switched off until it has reached room temperature. 


POWERSUPPLY 

On the label on the backside of the product is indicated on this type of power supply must be connected. Check that the mains 
voltage corresponds to this, all other voltages than specified, the light effect can be irreparably damaged. The product must also 
be directly connected to the mains and may be used. No dimmer or adjustable power supply. 

 
Always connect the device to a protected circuit (circuit breaker or fuse). Make sure the device has an appropriate 
electrical ground to avoid the risk of electrocution or fire. 
 

CONTROLS AND CONNECTIONS 


1.  Display 

The display shows multiple forms of information, for example current 
MODE, elapsed time, etc.


2.  Button Cluster 

Mode - 

Press to change mode.


Previous Track - 

Skip to previous track. 

Play / Pause - 

Start/resume or pause play by pressing this button. 

Next - 

Skip to next track. 

Repeat - 

Press to select repeat single track or repeat full folder. 

Mute/Stand-by - 

Press to mute the device. Hold to enter stand-by mode. 

3.  SD Card Slot 

Insert an SD card in this slot.


4.  USB Port 

USB entry port.


5.  Mic Output Level Control 

Adjust the volume of the microphone channel.


6.  Mic Echo Level Control 

Adjust the echo level. 

7.  Treble Control 

High tone control. 


8.  Bass 

Low tone control.


9.  Master Volume 

Adjust the overall output level of the sound set.


10. XLR Microphone Input  

XLR input for connecting a microphone. 

11. Jack Microphone Input 

6.3mm ¼” input jack for connecting a microphone.  

12. Line Inputs 

RCA input for connecting audio units with line level output  
(e.g. mixer, CD player).


13. Line Outputs 

RCA output for connecting another active speaker unit. 

14. Power Switch 

Switch to turn the device ON or OFF. 

15. AC In And Fuse Holder 

Socket for plugging in the supplied power cord.


CONNECTING WITH BT-DEVICE 

1.  Activate the BT-function on your device (Mobile phone, tablet etc.) from which you want to play the 

music. See the operating instructions of that device for instructions. 

2. 

Press the “MODE” button and activate BT-function.  

3.  Select 

VONYX

” on your BT-device and make the BT-connection 

 
If password is required, you can enter "0000". 
 

Attention:

 The BT distance is approx. 10meter without any barrier.


Summary of Contents for 178.490

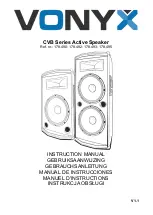
Page 1: ...CVB Series Active Speaker Ref nr 178 490 178 492 178 493 178 495 INSTRUCTION MANUAL GEBRUIKSAANWIJZING GEBRAUCHSANLEITUNG MANUAL DE INSTRUCCIONES MANUEL D INSTRUCTIONS INSTRUKCJA OBS UGI V1 1...

Page 2: ...seek advice from a specialist Do not force the controls If this product is with speaker inside which can cause magnetic field Keep the product at least 60cm away from computer or TV If this product h...

Page 3: ...NS 1 Display The display shows multiple forms of information for example current MODE elapsed time etc 2 Button Cluster Mode Press to change mode Previous Track Skip to previous track Play Pause Start...

Page 4: ...chuwingen worden gevolgd Het apparaat buiten bereik van kinderen houden Bovendien mag het apparaat nooit onbeheerd gelaten worden Gebruik geen schoonmaakspray om de schakelaars te reinigen Restanten v...

Page 5: ...eken tijd etc 2 Knoppencluster Mode Drukken om van modus te wisselen Vorige Nummer Ga naar het vorige muzieknummer Play Pause Starten hervatten of pauzeren van het afspelen Volgende Nummer Ga naar het...

Page 6: ...ichweite von Kindern halten Das Ger t niemals unbeaufsichtigt lassen Die Regler nicht mit Reinigungssprays reinigen Diese hinterlassen R ckst nde die zu Staub und Fettansammlungen f hren Bei St rungen...

Page 7: ...r Titel Zum vorherigen Titel wechseln Play Pause Zum Starten Weiterf hren oder Anhalten der Wiedergabe N chster Titel Zum n chster Titel wechseln Repeat Dr cken Sie diese Taste um einen einzelnen Trac...

Page 8: ...tiempo de vida Mantenga el aparato fuera del alcance de los ni os No deje el aparato sin vigilancia No utilice sprays limpiadores para limpiar los interruptores Los residuos de estos sprays producen d...

Page 9: ...lla muestra m ltiples formas de informaci n por ejemplo MODO actual tiempo transcurrido etc 2 Grupo De Botones Bot n Mode Pulse para cambiar el modo Canci n Anterior Saltar a la canci n anterior Play...

Page 10: ...areil contient un haut parleur pouvant engendrer des champs magn tiques Tenez cet appareil 60 cm au moins d un t l viseur ou ordinateur Si le produit comprend un accumulateur int gr plomb acide rechar...

Page 11: ...mettez en pause la lecture en appuyant sur ce bouton Chanson Suivante Passer la chanson suivante Repeat Appuyez sur cette touche pour s lectionner r p ter une seule piste ou r p ter un dossier comple...

Page 12: ...m wolnej przestrzeni z ka dej strony aby zapewni odpowiednie ch odzenie Urz dzenie posiada diody LED wysokiej mocy Nie patrz bezpo rednio na diody aby nie uszkodzi wzroku Nie w czaj i wy czaj urz dzen...

Page 13: ...tworu Play Pause Naci ni cie tego przycisku spowoduje prze czenie mi dzy trybem PLAY i trybem PAUSE Nast pny Utw r Naci ni cie tego przycisku powoduje przej cie do nast pnego utworu Repeat Naci nij ab...

Page 14: ...er type Piezo Amount of tweeters 1 1 1 1 Diameter woofer 12 15 12 15 Amount of woofers 1 1 2 2 SPL max 110dB 111dB 113dB 114dB Dimensions 375 400 630mm 400 465 725mm 375 400 960mm 400 465 1125mm Weigh...

Page 15: ...15...

Page 16: ...Specifications and design are subject to change without prior notice www tronios com Copyright 2019 by TRONIOS the Netherlands...

Reviews: