background image


VIVOTEK - Built with Reliability

 
162 - User's Manual

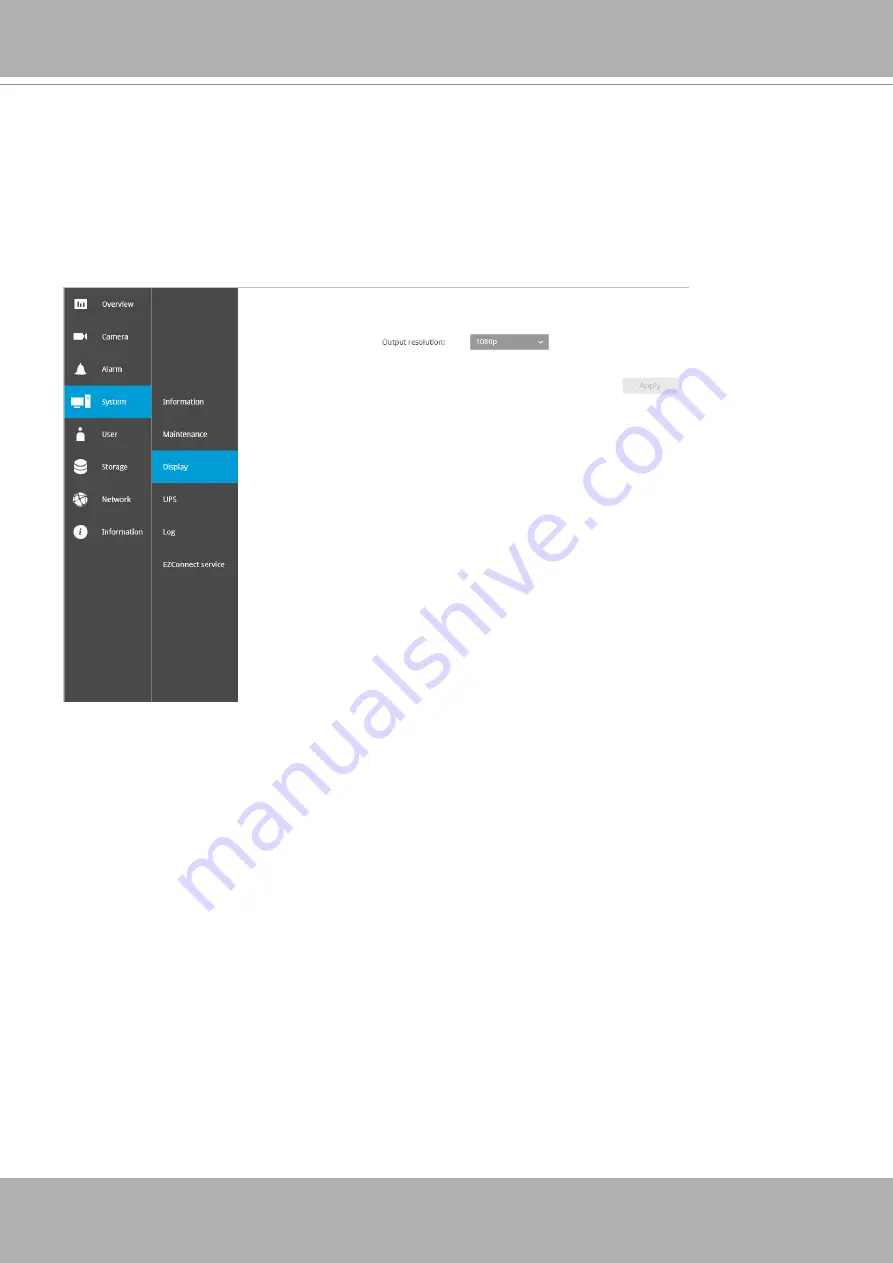
On this page, you can configure the system to consecutively display (rotate) cameras' view cells 

on the Liveview window. For example, if you have 8 cameras in 2 2x2 layouts, the rotation can 

let you see the live views of all cameras by every few seconds.  

You can also enable or disable the Alarm notification. 

5-3-3. Settings - System - Display

Summary of Contents for TN9441

Page 1: ...liability User s Manual 1 Rev 1 6 1 11 Rev 1 0 User s Manual TN9441 Network Video Recorder H 265 32 CH 16 CH 4 HDDs ONVIF Dual LAN Fisheye Dewarp HDMI VGA Monitor Display Storyboard Search Mobile EZCo...

Page 2: ...nel 42 2 2 4 DI DO 43 2 2 5 Others 43 2 2 6 Right click Commands 44 Chapter Three Configuation Using the Local Console 45 The Main Control Portal 45 3 1 Layout 45 3 2 DI DO 45 3 3 Search recording cli...

Page 3: ...ing Cameras to View Cells 111 4 2 6 PTZ panel 120 4 2 7 Alarm panel 122 4 3 Graphical Layout and Screen Elements Search recording clips 126 4 3 1 Camera List Panel 127 4 3 2 Search Recording Clips Lay...

Page 4: ...Six Operation 176 6 1 Liveview 176 6 1 1 Placing Cameras into the Layout 176 6 1 2 PTZ and Other Screen Controls 180 6 1 3 Audio 183 6 1 4 Camera Properties and Controls 184 6 1 5 Alarm Panel 185 6 1...

Page 5: ...complete according to the Package Contents listed below Take note of the warnings in the Quick Installation Guide before the Network Camera is installed then carefully read and follow the instruction...

Page 6: ...alarm input output and RS485 giving users great flexibility with appli cations Together with VAST CMS and ST7501 VMS users can set up an easy to use IP surveillance system with ease VIVOTEK also prov...

Page 7: ...ns must be complied with at all times during installation Ensure that all maintenance and repair work is handled by qualified personnel such as electrical engineers or network specialists Read this ma...

Page 8: ...VIVOTEK Built with Reliability 8 User s Manual Chassis Dimensions 430 400 44 5 18 120...

Page 9: ...8 10 11 1 System status LED 2 Recording activity LED 3 HDD activity LED 1 4 4 USB 2 0 ports 5 Network status activity LED 1 Net 1 RJ45 port GbE uplink 7 Audio IN 2 Net 2 RJ45 port GbE uplink 8 DI DO...

Page 10: ...most of the off the shelf SATA hard drives Hardware Installation 2 To ensure normal operation maintain ambient airflow Do not block the airflow around chassis such as placing the system in a closed ca...

Page 11: ...iability User s Manual 11 2 Secure the HDD brackets to the hard drives 2 Label side 3 Connect SATA data cables to the connectors on the main board 3 1 2 3 4 1 3 4 2 1 2 3 4 HDD connectors SATA Power S...

Page 12: ...VIVOTEK Built with Reliability 12 User s Manual SATA Data SATA Power 4 Connect SATA data and power cables to the hard drives 4...

Page 13: ...ty User s Manual 13 5 6 When done install the top cover 5 Secure the hard disks to the mounting positions in the chassis with its label side facing up and the connectors facing the inside of the chass...

Page 14: ...ge and detach the inner rails from the rail assembly Detach the inner rail by pressing on the release tab Inner rail Release tab If you have either a round holed or square holed rack install cage nuts...

Page 15: ...ng the M4 screws M4 x6 Locking Clip to the rear 4 Secure the L shape brackets to the front and rear ends of outer rails using the black round head screws and washers Do not completely tighten the scre...

Page 16: ...VIVOTEK Built with Reliability 16 User s Manual The side w a locking clip to the front Adjust the length of rails to match the rack posts 5 Secure the slide rails to rack posts using the 10 screws...

Page 17: ...ssis using both hands on the sides of the chassis Align the tips of inner rails on the chassis with the open portion of the slide rail assemblies Push the system into the assemblies until the system s...

Page 18: ...uilt with Reliability 18 User s Manual Release tab 8 The inner rails and the rail assemblies should be locked on the way into the rack cabinet Press the release tabs on the sides to slide the chassis...

Page 19: ...ted via an Ethernet switch or PoE switches 3 Connect USB devices such as mouse keyboard USB optical drive or USB thumb drive for matted in FAT format or UPS 4 Connect external devices such as sensors...

Page 20: ...inding the system should be able to detect VIVOTEK s cameras within the network regardless of the presence of a DHCP server Ideally cameras and the NVR should reside in the same subnet If a camera s I...

Page 21: ...omatically trigger a DO on the occurrence of system events See Alarm settings on page 75 Normally Closed Normally Open COMMON The pins are listed and described from left to right as shown in the drawi...

Page 22: ...a PoE port of the AW FED series PoE switch make sure you turn off the PoE output on that specific port using the onboard DIP switch Otherwise the high power output can damage the LAN port on NVR WARNI...

Page 23: ...A monitor is connected via an HDMI or VGA cable 2 A mouse and or a keyboard are connected to the system 3 It is presumed that the system has not been configured yet Except in the initial setup changin...

Page 24: ...560x1920 30 fps 1 CH 1920x1080 120 fps 4 CH 1280x720 240 fps 8 CH 1280x720 480 fps 16 CH 720x480 960 fps 32 CH When cameras are recruited into the configuration their stream 1 is used as the recording...

Page 25: ...the Internet The prerequisites for using the EZConnect are as follows 1 Download and install the EZConnect utility to your cell phone 2 Both the NVR and your cell phone have access to the Internet Wit...

Page 26: ...will be generated 5 3 Open the utility from your cell phone If you already registered an account tap LOG IN If not tap SIGN UP to register an account from a VIVOTEK server User 5 4 You can be defaulte...

Page 27: ...ser s Manual 27 5 5 Tap the ADD DEVICES MANUALLY button 5 6 You can then point your cell phone lens at the NVR screen Step 5 3 and use the SCAN QR CODES function to establish the connection You may al...

Page 28: ...ck the Done button The LiveClient screen will display and by default the recording from the selected cameras will immediately take place 5 7 The process will take several seconds to complete 5 8 The N...

Page 29: ...turned off LED will return normal 2 Record LED 1 Flashing Red Camera streams are recorded to the system storage 2 OFF No recording 3 HDD activity LED 1 Constant Green H D D is connected and ready 2 C...

Page 30: ...pletely fail safe Damage to data might occur due to file system corruption operating system malfunction virus infection HDD component failures and so on Therefore it is highly recommended to regularly...

Page 31: ...Reliability User s Manual 31 Section One Management over a Local Console Chapter Two Introduction to the Local Console Interface Camera 01 Camera 02 Camera 03 Camera 04 Camera 06 Camera 05 Camera 07 C...

Page 32: ...Maintenance Display UPS Logs User Storage Network IP DDNS Services Overview camera connection storage Stop buzzer Play recording clip Digital zoom PTZ DI DO Snapshot Manual recording Deselect camera C...

Page 33: ...mera Portal will appear The system automatically detects the characteristics of an individual camera when you select a view cell This portal appears with a camera that supports mechanical PTZ This por...

Page 34: ...retrieve and access recorded videos 3 1 One is to access the video clips taken within 2 hours Left click to select a view cell and then click on the Recording clips button Select a time value by a si...

Page 35: ...y to access past videos is to open the Search recording clips window Move your mouse cursor to display the Configuration Portal without selecting any view cell Click on the Search recording clips butt...

Page 36: ...alarm message will prompt on the screen Use the arrow button to browse through the alarm messages 10 32 56 2015 09 22 1x If the alarm is configured with video recording as the responding action you c...

Page 37: ...lable The default live view receives a camera s stream 1 If a camera s stream 1 is configured using MPEG 4 as the video codec the following message will prompt You can go to the Settings Camera Media...

Page 38: ...em comes with idle modes Below are the applicable conditions 1 Live view if no management activities occur for 5 seconds the tool bars disappear from screen When in the idle mode mouse cursor and tool...

Page 39: ...e to 2 Focus Click on the Focus near and Focus far buttons to adjust camera focus 3 Home Click to move the camera lens towards the default home position 4 Zoom Use the Zoom in and Zoom out buttons to...

Page 40: ...resets If you configured preset positions a list of preset positions will appear 5 Speed Adjusts the speed when moving across the field of view 6 Patrol If you configured preset positions into a patro...

Page 41: ...ick and drag on the ROI window you can instantly move to other areas within the video frame Use the zoom ratio pull bar at the bottom to change the zoom ratio You may also move the ROI around by click...

Page 42: ...stem You can select 30 secs 1 min 3 mins 10 mins and 60 mins for an immediate playback For security reasons using this function requires users to enter his her credentials 10 32 56 2015 09 22 1x The P...

Page 43: ...sable the DO Otherwise the DO signal will be continuously triggered As the result if the DO is configured as an alarm trigger many alarm messages will be generated WARNING 2 2 5 Others 1 Snapshot is u...

Page 44: ...ell 2 Fit screen with ratio The NVR server automatically optimizes the display of camera view cells However you can still select this option to display the camera s original aspect ratio for example t...

Page 45: ...ill appear Click the rotation button below to let the system swap the display of different cameras by every 10 seconds The rotation speed is configurable via Settings System Display Move your mouse cu...

Page 46: ...7 15 41 2014 03 14 1x The search and calendar view will appear Select a day on the calendar when the the recordings took place the days with recorded clips will be highlighted in blue and green Double...

Page 47: ...s Play This button is available after you paused a playback Pause Each click on it speeds down by 1 2 The slowest speed is 1 16 Each click on it speeds up by 2x The fastest speed is 16 times The curre...

Page 48: ...ns will be available on screen You can click to select the 1O 1P Panoramic 1R Regional or 1O3R 1 Original and 3 Regional modes If 1P 1R or 1O3R mode is selected you can exert the mouse control on scre...

Page 49: ...nually enter the From time and the To time 4 Click on the From time tab using a single click 5 Repeat steps 3 and 4 to configure the To time 6 Click on the Export button 1 2 The export process is indi...

Page 50: ...ser s Manual 3 3 2 Advanced Search Click on the Advanced search button on the upper left of the screen to enter the Advanced Search mode You can specify the search criteria by selecting the devices to...

Page 51: ...OTEK Built with Reliability User s Manual 51 You can then specify the start time and end time to configure a span of time to be searched You can also determine what alarms will be included in the sear...

Page 52: ...conds of post alarm footage When the Search window is left unattended for 10 minutes the NVR will return to the live view display To enter the Search window you will have to enter the user credentials...

Page 53: ...a glimpse of past recordings over a timeline It looks like doing the film editing after a film was shot To enter the Storyboard window click on the Storyboard shortcut on the upper left of screen Belo...

Page 54: ...and then moving in to a 4 hour 1 hour 10 minutes and 2 minutes span When the screen displays a 24 hour span each snapshot represents a 3 hour time span Each click on a snapshot brings you deeper into...

Page 55: ...time span of your current position For example if you are in a 4 hour time span the Back to previous state button will bring you back to the 24 hour time span Back to previous state Previous hours mi...

Page 56: ...15 41 2014 03 14 1x The playback window will appear Please refer to page 47 for the operation details To return to the Live View window click on the Back to Search recording clips button and the Back...

Page 57: ...or multiple cameras select a period of time in which the recording took place and then click export The max length of recording export is 24 hours To export recordings 1 Attach a USB thumb drive form...

Page 58: ...VIVOTEK Built with Reliability 58 User s Manual 6 The Export progress will be shown 7 When the Export process is done select to resume another export or go back to the live view...

Page 59: ...lt to the overview page displaying the camera connection and storage statuses An empty position will be left in blank and a disconnected camera will be indicated as The storage volume usage is display...

Page 60: ...configuration 4 Change the Network settings 5 Change the cameras positions on the layout screen 3 5 2 Settings Camera Management The Camera menu provides access to Management Recording Media Image Mo...

Page 61: ...the Add button the camera will be placed at an unoccupied position You may also expand the menu on the side of the Add button to select a position number 3 When a camera is added it should appear on...

Page 62: ...list of cameras will appear 2 The Remove button will turn yellow Mouse over to the camera you want to remove and its entry will display the Remove message 3 Click on the Remove message The camera sho...

Page 63: ...manually configure static IPs for a single or all cameras Using static IPs is recommended Although the NVR can remember the MAC addresses of cameras if IPs are changed under the DHCP configuration yo...

Page 64: ...ition Note that you cannot swap the positions of two cameras by dragging a camera onto a position already populated by the other Also the camera index number on the management list is not affected by...

Page 65: ...at you can not assign the recording task to other video stream 4 Enable the Activity Adaptive Streaming feature This feature records the I frames only when there are no activities detected When activi...

Page 66: ...elect the the Clear checkbox and move the cursor across the time table The minimum unit on the table is half an hour 3 You may also use the scheduler tool on the right to facilitate the process You ca...

Page 67: ...ting Configuration Default Medium resolution full frame rate High Quality Guaranteed video quality set as Good full frame rate Economical Medium to low resolution frame rate at 5fps High quality w eco...

Page 68: ...he 1920x1920 resolution 3 Maximum frame rate the highest frame rate 4 Intra frame period How often an I frame will be inserted into the video stream 5 Video quality You may either select Constant bit...

Page 69: ...69 Audio The Audio window allows you to configure all audio codec sampling rate and Microphone input gains Depending on design of the camera models some codecs may not be available Also there are cam...

Page 70: ...ault is enabled If enabled the video name and time is displayed on the view cell 3 Power line frequency Depending on power line frequency of your country select a matching option NTSC 60Hz or PAL 50Hz...

Page 71: ...gh TV line Gamma curve low light compensation etc The rest of the options depend on the lens and image sensor type of each individual camera Therefore the options here can vary For unique options comi...

Page 72: ...4 Pull the detection area level up to a preferred position An object must be larger than the detection area to trigger an alarm 5 Select a Sensitivity level using the slide bar 6 Click the Apply butt...

Page 73: ...ield of view where you want to designate as a preset position 3 Click the add button and enter a name for the position Press Enter to proceed Repeat the configuration to create more positions 4 Click...

Page 74: ...ange its position on the patrolling order 2 Click the up and down buttons to change the position on the order or click the remove button to disband a position from the order You can also change the in...

Page 75: ...e camera s for its lens to move to a preset position 4 Triggering the cameras digital output You can create up to 10 instances of alarm Hardware connections to DIs or DOs e g window sensors should be...

Page 76: ...e a square To create an alarm 1 Click on the Add button You can manually enter a name for the current setting You can enter up to 16 numeric or alphabetic characters for the name including symbols suc...

Page 77: ...atically detected and displayed through individual checkboxes The Motion detection function if there are many detection windows configured on a camera is all triggered by one checkbox Note that the tr...

Page 78: ...tage of the length defined by the pre post event setting to the NVR system 4 2 Email The Email action sends an Email to the administrator along with a snapshot of the event To configure Email notifica...

Page 79: ...a duration of 1 second while a short tone 0 5 second A very short tone lasts only for 0 1 second Select how many times the buzzer tones will be repeated on the occurrence of an event If events of dif...

Page 80: ...ou can enter a directory name you prefer on the FTP site The server port default is 21 a different number between 1025 and 65535 can also be assigned The snapshot thus delivered has a size of 320x240...

Page 81: ...PTZ capable camera can move its lens to the preset position in case of a triggered alarm For example a triggered sensor may indicate an area of interest has been intruded and a camera s field of view...

Page 82: ...VIVOTEK Built with Reliability 82 User s Manual 4 7 System DO A triggered alarm can be used to toggle the NVR s digital output e g to sound an alarm siren...

Page 83: ...roughout a specific timeline For example in some situations you can disable the alarm triggers during the office hours and choose to enable the triggers only during the off office hours 6 Click Finish...

Page 84: ...e connection to a Mail server Via the Mail server the system can deliver Emails containing system alarm messages to multiple receivers A reachable Mail server and Email accounts must be provided befor...

Page 85: ...thin your network 4 Click the Apply button for the configuration to take effect Note that if NTP time server configuration Auto is preferred the system will automatically configure all cameras to be l...

Page 86: ...an be integrated into your NVR configuration The information in the device pack is related to some tunable parameters Note that the backup action does not involve the following 1 Recorded videos and d...

Page 87: ...ecutively display rotate cameras view cells on the Liveview window For example if you have 8 cameras in 2 2x2 layouts the rotation can let you see the live views of all cameras by every few seconds Yo...

Page 88: ...8 User s Manual 3 5 13 Settings System UPS On this page you can configure the system to gracefully shut down when UPS battery is lower than a certain level You may also let it shut down when the estim...

Page 89: ...r s Manual 89 3 5 14 Settings System Log System logs are categorized as System Recording User and Error To display system logs select a range of time and click on the Search button You can search for...

Page 90: ...VIVOTEK Built with Reliability 90 User s Manual...

Page 91: ...eliability User s Manual 91 3 5 15 Settings System EZConnect service This window provides access to the EZConnect configuration Please refer to page 25 for how to configure system access using the EZC...

Page 92: ...ings When users try to access the Settings window the login window prohibits regular users to log in There is simply no regular user s name on the login window 3 The administrator users can access all...

Page 93: ...roup by unfolding its pull down menu Select either an Administrator or regular user as the user group 2 Enter the User name and password The max number of characters for a user name is 64 with alphabe...

Page 94: ...Since each volume contains only 1 hard drive details information about the hard drive is also displayed on this page You can format an existing storage volume in situations such as when you need to r...

Page 95: ...ough this button Bad block check Performs read write test to drive sectors to locate bad blocks This action may take several hours to complete Fast S M A R T test Tests the electronic and mechanical p...

Page 96: ...ing to a PoE switch and then to IP cameras 3 Do not connect IP cameras that come with virtual IPs cameras default 169 254 x x to NET1 Eth0 The DRM search will not be able to find cameras that come wit...

Page 97: ...IP address assigned by the DHCP server each time the system is connected to the LAN Manual setup Select this option to manually assign a static IP address to the Network Camera Enter the Static IP Su...

Page 98: ...et access Click the Register button The terms of service agreement window is selected from a checkbox at the bottom Click to read the license agreement terms When completed a confirm message will prom...

Page 99: ...by default Instead of a web console you can also access the NVR and the subordinate cameras using the iViewer and VIVOTEK s VAST software The NVR can be managed as one of the sub stations in a hierarc...

Page 100: ...VIVOTEK Built with Reliability 100 User s Manual 3 6 Information This window shows the revision number of the firmware running on this machine...

Page 101: ...on the system 1 One is connecting mouse and keyboard and an HDMI cable to a TV screen or monitor The local management thus made is described in Section One of this manual 2 The other is accessed throu...

Page 102: ...e in the browser press F12 to check its status It is highly recommended that you should change the default password Please refer to Settings Security User account page to see how to prevent unauthoriz...

Page 103: ...he selected language Login errors below are the login errors that might occur A Login failure can result from the incorrect user name and passwords The No permission error occurs when a user logs in u...

Page 104: ...en enter the Liveview Playback or Settings window Liveview Search recording clips Settings The NVR system features a simple UI structure which consists of a Liveview window a Playback utility and a sy...

Page 105: ...our PC runs a default 64 bit IE browser and you manually enter the NVR s address on the browser your browser session may malfunction Instead if you double click on the discovered NVR on the IW2 utilit...

Page 106: ...Provides access to various layouts 3 Layout contents Provides functions to extend rotate and redo the layout System DI DOs are also shown in here 4 Logo Menu Provides access to the Playback and Syste...

Page 107: ...of 8 cameras are displayed in this panel If a user logged in using a credential of a limited access he may only see cameras that he can access instead of all of the cameras To arrange a view cell layo...

Page 108: ...al input is triggered Connected and recording video to system storage Connected with live streaming Disconnected or trying to establish a connection Sorting criteria Use the sorting buttons to re arra...

Page 109: ...reserve a custom layout and every user can designate a specific layout to be displayed when he she logs in The default layout for each user is stored in a browser s cookies Whenever changes are made t...

Page 110: ...ndex number of the current page will be shown between the arrow buttons When your current layout is displayed in a full view move your cursor to the left center of the screen to return to the default...

Page 111: ...zed view back into the focused mode Although the system automatically selects the video stream to display on the view cell you can still manually select a different video stream from the Stream tab be...

Page 112: ...s multiple layout pages e g on the second page of the 1M 12 layout Placing a camera in the 17th to 18th view cells will bring out the following message A view cell attempting to connect to a network c...

Page 113: ...l not be able to use the Manual Recording function on the Liveview A mouse hover over the status icon will produce the following messages 1 Connecting or Cannot connect Connecting to a camera or conne...

Page 114: ...from the view cell Mutes if there is audio input from the camera Unmutes Stream selector Restores the view cell s original position on the Liveview panel Maximize the size of current view cell Activat...

Page 115: ...ve view window The bookmark is preserved as a one minute footage along with a short description of a particular incident The precondition of using this function is that the video stream while you are...

Page 116: ...video 3 Snapshot This button produces a snapshot prompt You may then right click on the snapshot image to save it to a preferred location Bookmarks will be erased if the user system erases the video...

Page 117: ...gital zoom into a live video When activated a Global view window will appear at the lower right of the view cell as shown below You can display only a portion of the complete video frame as an area of...

Page 118: ...efault The actual sound level is also dependent on the system volume of the PC having a web console with the NVR The sound volume configuration will not be preserved when a camera is removed from a vi...

Page 119: ...ly and vertically 1R View Single Regional View Zoom in out all directional navigation control Zoom In Zoom Out Note that if your fisheye mounting type is set to the Wall Mount type your screen control...

Page 120: ...ule such as PD8136 and PT8133 Pan Tilt controller Preset location selector Zoom controller Auto pan patrol controller Focus controller Model series Pan tilt controller Preset location Zoom controller...

Page 121: ...has no preset locations Pan Tilt controller A mouse hover over the arrow buttons activates the arrow button Use the buttons to navigate to a preferred location Zoom controller The zoom controller but...

Page 122: ...motion detection can all be used to detect conditions in external environments When the alarms are triggered you can configure certain kind of actions to take place in response to the alarms such as...

Page 123: ...ead alarms The number of unread alarms will be listed on the title bar The alarm playback window will begin playback of a footage taken 10 seconds before the occurrence of an alarm The playback of an...

Page 124: ...w streaming instead of the alarm recording Resumes the alarm playback Begins the alarm playback Pauses the current playback Mute or unmute the audio with the current playback Drag the controller to ch...

Page 125: ...TEK Built with Reliability User s Manual 125 Incoming Alarms New alarms will be indicated by the messages in bold letters the alarm bell icons and the increasing number of unread messages on the title...

Page 126: ...g with a screenshot 2 Layout contents Provides functions to extend rotate redo the layout and the synchronous playback 3 Logo Menu Provides access to the Playback and System Settings utilities as well...

Page 127: ...panel To begin playback and search for past recordings 1 Double click on a camera 2 The Calendar panel will display the days video recording actually took place And those days will be highlighted by a...

Page 128: ...current layout Starts or stops the Synchronous playback Full view extends the view cells on the current layout to the full of the screen When your current layout is displayed in a full view move your...

Page 129: ...n of the video into a 3GP or Windows exe file The length of exported video is configurable to 1 3 5 or 10 minutes Adds a Bookmark that saves a short description and a one minute footage from the curre...

Page 130: ...use this button to browse video frame by frame Speeds down by 1 2 The slowest speed is 1 8 Speeds up Increases the playback speed to 2x 4x 8x 16x and then to a maximum of 32x Displays the current pla...

Page 131: ...e time line represents 15 minutes of recording The total time span of a timeline starts from the minimal of 4 minutes 20 minutes 40 minutes 1 hour and up to a maximum of 24 hours In the Synchronous pl...

Page 132: ...in a day Use the page selector to display different pages of alarm entries Up to 200 entries can appear on one page Note that the new alarms that occurred seconds or minutes ago may not be instantane...

Page 133: ...ecordings taken in the days of the following month will be shown stead 4 3 6 Calendar Panel Double click on any of the existing cameras to display the Calendar panel Days with recorded videos will be...

Page 134: ...the overview page displaying the camera connection and storage statuses An empty position will be left in blank and a disconnected camera will be indicated as The storage volume usage is displayed as...

Page 135: ...page you can configure the following 1 Recruit or disband cameras 2 Create a camera name 3 Assign User name and Password or apply the credentials to all cameras in your configuration 4 Change the Net...

Page 136: ...k the Add button the camera will be placed at an unoccupied position You may also expand the menu on the side of the Add button to select a position number 3 When a camera is added it should appear on...

Page 137: ...A list of cameras will appear 2 The Remove button will turn yellow Mouse over to the camera you want to remove and its entry will display the Remove message 3 Click on the Remove message The camera sh...

Page 138: ...n manually configure static IPs for a single or all cameras Using static IPs is recommended Although the NVR can remember the MAC addresses of cameras if IPs are changed under the DHCP configuration y...

Page 139: ...hat you can not assign the recording task to other video stream 4 Enable the Activity Adaptive Streaming feature This feature records the I frames only when there are no activities detected When activ...

Page 140: ...select the the Clear checkbox and move the cursor across the time table The minimum unit on the table is half an hour 3 You may also use the scheduler tool on the right to facilitate the process You c...

Page 141: ...this window Recommended setting Configuration Default Medium resolution full frame rate High Quality Guaranteed video quality set as Good full frame rate Economical Medium to low resolution frame rat...

Page 142: ...the 1920x1920 resolution 3 Maximum frame rate the highest frame rate 4 Intra frame period How often an I frame will be inserted into the video stream 5 Video quality You may either select Constant bit...

Page 143: ...143 Audio The Audio window allows you to configure all audio codec sampling rate and Microphone input gains Depending on design of the camera models some codecs may not be available Also there are cam...

Page 144: ...fault is enabled If enabled the video name and time is displayed on the view cell 3 Power line frequency Depending on power line frequency of your country select a matching option NTSC 60Hz or PAL 50H...

Page 145: ...igh TV line Gamma curve low light compensation etc The rest of the options depend on the lens and image sensor type of each individual camera Therefore the options here can vary For unique options com...

Page 146: ...4 Pull the detection area level up to a preferred position An object must be larger than the detection area to trigger an alarm 5 Select a Sensitivity level using the slide bar 6 Click the Apply butt...

Page 147: ...2 Use the PTZ panel to move to a field of view where you want to designate as a preset position 3 Click the add button and enter a name for the position Press Enter to proceed Repeat the configuratio...

Page 148: ...hange its position on the patrolling order 2 Click the up and down buttons to change the position on the order or click the remove button to disband a position from the order You can also change the i...

Page 149: ...e camera s for its lens to move to a preset position 4 Triggering the cameras digital output You can create up to 10 instances of alarm Hardware connections to DIs or DOs e g window sensors should be...

Page 150: ...ser s Manual LAN WAN VIVOTEK Network Cameras Email Alarms Digital input output Motion detection Event triggered recording Web Console Events triggered FTP Buzzer Preset positions 1 2 3 4 5 6 PIR Tampe...

Page 151: ...be a square To create an alarm 1 Click on the Add button You can manually enter a name for the current setting You can enter up to 16 numeric or alphabetic characters for the name including symbols su...

Page 152: ...atically detected and displayed through individual checkboxes The Motion detection function if there are many detection windows configured on a camera is all triggered by one checkbox Note that the tr...

Page 153: ...tage of the length defined by the pre post event setting to the NVR system 4 2 Email The Email action sends an Email to the administrator along with a snapshot of the event To configure Email notifica...

Page 154: ...s a duration of 1 second while a short tone 0 5 second A very short tone lasts only for 0 1 second Select how many times the buzzer tones will be repeated on the occurrence of an event If events of di...

Page 155: ...You can enter a directory name you prefer on the FTP site The server port default is 21 a different number between 1025 and 65535 can also be assigned The snapshot thus delivered has a size of 320x240...

Page 156: ...PTZ capable camera can move its lens to the preset position in case of a triggered alarm For example a triggered sensor may indicate an area of interest has been intruded and a camera s field of view...

Page 157: ...VIVOTEK Built with Reliability User s Manual 157 4 7 System DO A triggered alarm can be used to toggle the NVR s digital output e g to sound an alarm siren...

Page 158: ...hroughout a specific timeline For example in some situations you can disable the alarm triggers during the office hours and choose to enable the triggers only during the off office hours 6 Click Finis...

Page 159: ...e connection to a Mail server Via the Mail server the system can deliver Emails containing system alarm messages to multiple receivers A reachable Mail server and Email accounts must be provided befor...

Page 160: ...ithin your network 4 Click the Apply button for the configuration to take effect Note that if NTP time server configuration Auto is preferred the system will automatically configure all cameras to be...

Page 161: ...figuration The information in the device pack is related to some tunable parameters Note that the backup action does not involve the following 1 Recorded videos and database 2 Alarm records bookmarks...

Page 162: ...to consecutively display rotate cameras view cells on the Liveview window For example if you have 8 cameras in 2 2x2 layouts the rotation can let you see the live views of all cameras by every few se...

Page 163: ...ser s Manual 163 On this page you can configure the system to gracefully shut down when UPS battery is lower than a certain level You may also let it shut down when the estimated sustainable time is r...

Page 164: ...User s Manual System logs are categorized as System Recording User and Error To display system logs select a range of time and click on the Search button You can search for past logs in each category...

Page 165: ...VIVOTEK Built with Reliability User s Manual 165...

Page 166: ...eliability 166 User s Manual This window provides access to the EZConnect configuration Please refer to page 25 for how to configure system access using the EZConnect functionality 5 3 6 Settings Syst...

Page 167: ...to access the Settings window the login window prohibits regular users to log in There is simply no regular user s name on the login window 3 The administrator users can access all cameras recruited...

Page 168: ...roup by unfolding its pull down menu Select either an Administrator or regular user as the user group 2 Enter the User name and password The max number of characters for a user name is 64 with alphabe...

Page 169: ...tains only 1 hard drive details information about the hard drive is also displayed on this page You can format an existing storage volume in situations such as when you need to re deploy the system el...

Page 170: ...ough this button Bad block check Performs read write test to drive sectors to locate bad blocks This action may take several hours to complete Fast S M A R T test Tests the electronic and mechanical p...

Page 171: ...ng to a PoE switch and then to IP cameras 3 Do not connect IP cameras that come with virtual IPs cameras default 169 254 x x to NET1 Eth0 The DRM search will not be able to find cameras that come with...

Page 172: ...IP address assigned by the DHCP server each time the system is connected to the LAN Manual setup Select this option to manually assign a static IP address to the Network Camera Enter the Static IP Su...

Page 173: ...et access Click the Register button The terms of service agreement window is selected from a checkbox at the bottom Click to read the license agreement terms When completed a confirm message will prom...

Page 174: ...ult In addition to a web console you can also access the NVR and the subordinate cameras using the iViewer and VIVOTEK s VAST management software The NVR can be managed as one of the sub stations in a...

Page 175: ...VIVOTEK Built with Reliability User s Manual 175 5 7 Information This window shows the revision number of the firmware running on this machine...

Page 176: ...t Layout contents 1 Before operating the NVR make sure you have properly installed hard drives and configured the storage volumes Otherwise you will not be able to operate most of the system s functio...

Page 177: ...fill it into the first unoccupied view cell To begin the design of your layout 1 3 1 Select a layout pattern by a single click The options are 1x1 2x2 3x3 4x4 1P 3 1M 5 1M 12 and 1M 31 where 4x4 and...

Page 178: ...gional View Placing different regional views of a fisheye camera into view cells will look like this In addition to fisheye cameras if a camera has a wide field of view you may also display its differ...

Page 179: ...overing the user layout button You may create more user layouts for different purposes such as for the use of different users or playing different views of a camera on multiple view cells If users wer...

Page 180: ...zoom module and may not be applicable to every PTZ camera The preset positions and the patrol functions require the associated configuration on the cameras via a web console Before you make use of th...

Page 181: ...ct a view cell you can click on another view cell in the display area or click on the Restore button A selected focused view cell If you have concerns with the display quality and frame rate per secon...

Page 182: ...ame time To add a bookmark 1 Click on the button 2 Enter a short description that can be as long as 120 characters 3 Click on the button or simply press Enter on your keyboard 1 2 3 To place bookmarks...

Page 183: ...e video frame Global view Zoom In Zoom Out 160 ROI Shrink Expand Note that not every camera supports the PiP function For example PTZ cameras do not support the PiP feature You can resize the ROI wind...

Page 184: ...le the scheduled or continuous recording set for the camera Click on their associated icons to change their recording status For a camera that is not performing a continuous recording you can click on...

Page 185: ...n external environments You can configure certain kind of actions to take place in response to the alarms such as 1 recording the immediate image 2 sending an Email notification 3 sounding the onboard...

Page 186: ...a user layout by the intervals of 10 seconds The layout page that does not contain camera views will be skipped A Rotate action will stop when you 1 move to another page in the user layout 2 move to a...

Page 187: ...l will display the days video recording actually took place And those days will be highlighted by a blue background as the 25th and 28th in the screen below x2 2 3 However on a Search recording clips...

Page 188: ...Liveview window which only plays back the related video for only one minute the alarm playback will continue throughout the recording of that day 6 2 2 Past Alarms and Bookmarks If you set up multiple...

Page 189: ...c point in time To perform synchronous playback 1 Select a layout from the Layout panel e g a 2x2 layout 2 Click on the Synchronous playback button 3 Double click to select a camera from the camera li...

Page 190: ...ble by an embedded Media Player The 3GP format is a multimedia container format for 3G UMTS services These files can be played on QuickTime RealPlayer and VLC The file name will look like this MAC _ D...

Page 191: ...VIVOTEK Built with Reliability User s Manual 191 7 The exported media file should be saved to the default download folder 8 A self executable EXE file should look like this...

Page 192: ...more precise skimming Timeline slider thumb Click and drag this thumb button to move along and reach a specific point in time Details of the control bar in the Playback window can be found on page 13...

Page 193: ...Each section 3 hrs Total time span If recordings take place by an event triggered recording the intervals between recordings can be down to 1 minute and the individual recordings will not be easily di...

Page 194: ...nsions 430 W x 400 D x 44 5 H mm Weight 3 87 kg without HDD Operating Temperature 0 C 40 C 32 F 104 F Humidity 0 95 General Safety Certifications CE LVD FCC VCCI UL Warranty 24 months Client PC Requir...

Page 195: ...amera Connection Abnormal Storage Abnormal Storage Full Camera Network Loss DI DO Action Record Email Text Email Snapshot FTP Buzzer ePTZ Control Go to Preset NVR DO Camera DO Recording Time sec Pre R...

Page 196: ...er Countries outside the European Union This symbol is only valid in the European Union If you wish to discard this product please contact your local authorities or dealer and ask for the correct meth...

Page 197: ...iability User s Manual 197 Japan VCCI Class A statement ACA Australian Communications Authority CAUTION RISK OF EXPLOSION IF BATTERY IS REPLACED BY AN INCORRECT TYPE DISPOSE OF USED BATTERIES ACCORDIN...

Reviews: