0
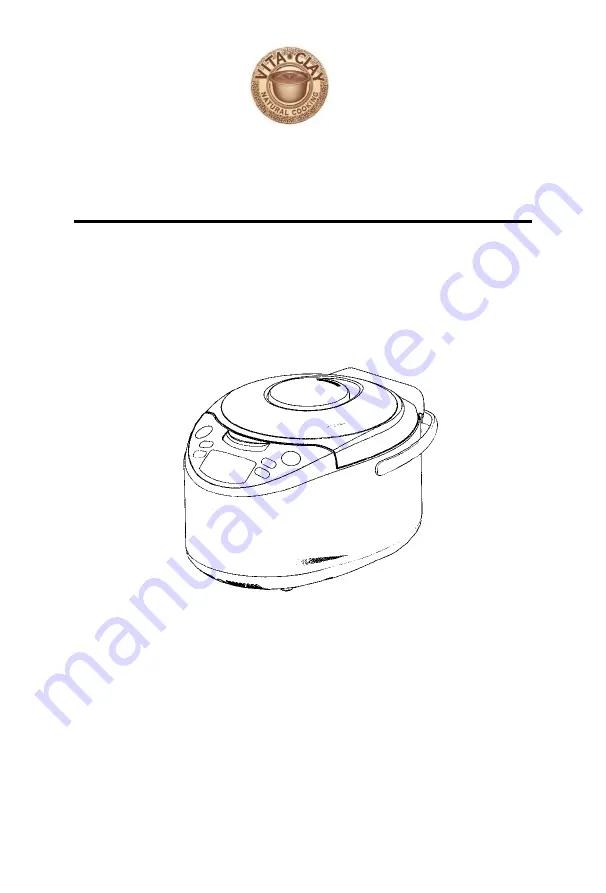
VitaClay
®
Smart Organic Multi-Cooker
Operating and Care Instructions
For models VM7900-6 & VM7900-8
READ ALL INSTRUCTIONS BEFORE INITIAL USE
HOUSEHOLD USE ONLY
© 2008 Essenergy, Inc. All rights reserved
Page 1: ...0 VitaClay Smart Organic Multi Cooker Operating and Care Instructions For models VM7900 6 VM7900 8 READ ALL INSTRUCTIONS BEFORE INITIAL USE HOUSEHOLD USE ONLY 2008 Essenergy Inc All rights reserved ...
Page 2: ...button We have sourced the world s purest clay to create our clay pots so you can rest assured that no impurities heavy metals toxins or chemicals will ever be leached into your food Not only will your food be clean and healthy it will taste great and have an unparalleled texture Our clays are tested to ensure they are free of the common contaminants in modern cookware including lead aluminum cadm...
Page 3: ... water ratios 16 Rinsing the rice 18 Basic Rice Cooking Directions 18 Basic Grain Cooking Directions 20 How to use the Reheat mode 20 A general guide to Flavoring Rice and Grains 21 One Pot rice or Grain Meal 22 Slow Cooking Modes 22 Basic Soup or Stew Cooking Directions 23 How to Delay Start for Slow Cooking 24 A general guide to Soups Broths and Porridge 25 Cooking Dry Beans and Lentils 25 Cooki...
Page 4: ... oven or broiler WARNING Spilled food can cause serious burns Keep appliance and cord away from children CAUTION To ensure continued protection against risk of electric shock connect to properly grounded outlet only Always attach plug to appliance first then plug cord into the wall outlet When you plug in the power cord please ensure a solid connection with the cord and both Cooker and the electri...
Page 5: ... After cooking use extreme care when moving your Cooker or the clay pot insert if it is filled with hot liquid Spilled food can cause serious burns Keep appliance and cord away from children Always unplug the Cooker when not in use or before cleaning Allow the Cooker to cool before cleaning or removing parts Do NOT use this Cooker for anything other than its intended use The use of accessory attac...
Page 6: ...d Use a dry cloth to pick up the clay pot and lid Do NOT use bare hands When lifting the lid on a heated Cooker carefully lift and tilt lid away from you to avoid scalding and to allow condensed water to drip into pot Steam and condensation will be very hot be very careful not to burn yourself Do NOT touch hot surfaces Use the handles or knobs provided Do NOT operate any appliances that have damag...
Page 7: ...o defeat this safety feature by modifying the plug The short power cord is provided to reduce the hazards resulting from entanglement or tripping over a long cord If it is necessary to use an extension cord the cord should be positioned so that it does not drape over the counter or tabletop where it can be pulled on by children or tripped over and Use only 3 wire extension cord with 3 blade ground...
Page 8: ...rature before adding very hot or very cold items DO use your Smart Organic Multi Cooker with adequate water based liquids Be sure that water based liquids are always present in the clay pot during cooking to prevent the pot from becoming too dry and overheated ALWAYS cook with liquid present at a minimum of 2 cups US cup in the pot but the recipe may need more o For first time cooking use that is ...
Page 9: ...cloth DO NOT put hot pot on any cold surface such as countertop or in the sink When your meal has just finished cooking the Cooker will still be hot DO NOT place clay parts in water or on cold surface This can SHOCK the pot to the pot and may cause it to crack The clay pot is fragile Be careful when carrying or storing Do NOT start cooking function while the clay pot is empty Dry heat can cause th...
Page 10: ... Key to Parts 1 Cooker Cover 2 Steam Cap 3 Clay Lid 4 Clay Pot 5 Control Panel see below 6 Handle 7 Main Housing 8 Power Cord 9 Measuring Cup 10 Rice Spoon 11 Stainless Metal Hook not shown for lifting the hot clay lid off the clay pot ...
Page 11: ...ter and via the black arrows around the parameter indicates rice cooking modes along top edge slow stew yogurt cooking modes along left edge and delay time left warm time along right edge 4 Start Cancel Key Function key to start or cancel any mode Cooker is on and cooking when Indicator Light glows red 5 Rice Cooking Key Function key to select Rice Cooking modes regular brown sweet rice reheat 6 S...
Page 12: ... it is ok to gently wipe it with damp cloth Plug the power cord into the unit first and then plug into the wall outlet When the cooker is ready for operation you will hear a long beep A slight odor and or smoke smell may be noticed during the initial use of this appliance This is normal with many heating appliances and will not occur after the first few uses Smart Organic Multi Cooker Basics Impor...
Page 13: ...ancel Indicator Light will blink Reset as needed The 3 Slow cooking modes default to a cooking time within 7 seconds of selecting a mode You must use the Hour Minute Timer Keys to adjust a custom cooking time If there is a power outage during cooking you may have to start the cooking cycle again During the cooking process the steam cap should always be in place for safety and performance The clay ...
Page 14: ...s is not necessary every time but in the beginning it gives you a quicker learning curve Note All recipes in this booklet are based on U S measurements standard U S measuring cups and spoons Plastic cup included with the Cooker is not U S measurement if using adjust accordingly See Tips Shortcuts FAQ section for additional guidance Use the VitaClay Cooking Charts for VM7900 VF7700 for first time c...
Page 15: ...ooking minutes in 10 minute increments Yogurt only allows 30 minutes These keys also allow you to set the Delay Start Time see below Delay indicator arrow indicates the delay start function is on Time Left indicator arrow indicates the time displayed on the clock is the remaining time left for the cooking cycle cooking timer counts down to zero from original time set Warm Time indicator arrow indi...
Page 16: ...play clock will show the delay start time and the Delay Start indicator light will be illuminated indicating the cooker will begin cooking at the desired time How to choose a Cooking Mode There are 7 cooking modes a keep warm mode The Rice Cooking mode offers regular brown sweet rice or reheat and the Slow Cooking mode offers stew soup or yogurt Regular Rice mode is for cooking white rice such as ...
Page 17: ...regular brown and sweet rice modes utilize a micro computerized cooking mode that enables the Cooker to automatically determine the cooking time needed You will not be able to set the length of cooking time however you may cancel the program at any time if the rice is cooked to your liking Quinoa may successfully be cooked with the regular mode function whereas mixed whole grains are best cooked i...
Page 18: ...ce Brown or wild rice 1 1 5 1 cup 1 1 2 cups brown Quinoa 1 1 5 or 1 2 1 cup 1 1 2 cups to 2 cups regular Mixed whole grains 1 1 5 1 cup 1 1 2 cups brown If rice is not rinsed add an extra cup liquid to pot Assumes sushi jasmine etc Arborio risotto style rice can be made in the regular or stew mode NOTES 1 If you prefer to use more water such as a 1 2 ratio use the stew mode for 30 40 minutes 2 if...
Page 19: ... of the pot is clean and dry Place covered clay pot into the Cooker on the heating element Close the Cooker cover You will hear a click when it snaps shut Plug cord into a 120 volt AC 60Hz outlet The Cooker will beep and Start Cancel indicator light will start blinking Use the Rice Cooking key to select a rice cooking mode suitable for your rice or grain as noted in the above chart The black indic...
Page 20: ...rger amounts A few minutes before cooking is complete the Cooker will beep and once done will automatically switch to the Warm mode The Start Cancel Light will still glow red the LCD display will show 0 00 and the indicator arrow will now point to warm time o The Cooker will stay in the Warm mode for up to 12 hours The timer will show the elapsed time in 10 minute intervals For example 30 minutes ...
Page 21: ...e for one hour set clock to read 1 00 or to delay for 3 hours and 30 minutes set clock to read 3 30 Press the Start Cancel key The LCD Display clock will show the Delay Start time the Delay indicator light will be illuminated indicating the cooker will begin cooking at the desired time NOTE You cannot change the cooking time once the Cooker enters a cooking mode Simply press the Start Cancel key a...
Page 22: ...rd into a 120 volt AC 60Hz outlet The Cooker will beep and Start Cancel indicator light will start blinking Use the Rice Cooking key to select the reheat mode The black indicator arrow on the LCD display will show this mode is active Press the Start Cancel key to start the cooking mode At this point the Start Cancel indicator light will no longer blink and will glow red The LCD display will read 0...
Page 23: ...sh then place it on top of rice grain Let simmer until cooking cycle completes You may let your food continue to simmer in the Warm mode for additional 10 20 minutes or until your fish is cooked through Note See the VitaClay Cooking Charts for VM7900 VF7700 for additional guidance Slow Cooking Modes VitaClay Cookers preserves nutrients allowing food to cook in its natural juices It brings food to ...
Page 24: ...ime Basic Soup or Stew Cooking Directions Place your soup ingredients including water broth or stock into the clay pot stir and cover with the clay pot lid Ensure the exterior of the pot is clean and dry Place covered clay pot into the Cooker on the heating element Close the Cooker cover You will hear a click when it snaps shut Plug cord into a 120 volt AC 60Hz outlet The Cooker will beep and Star...
Page 25: ... mode The Start Cancel Light will still glow red the LCD display will show 0 00 and the indicator arrow will now point to warm time o The Cooker will stay in the Warm mode for up to 12 hours The timer will show the elapsed time in 10 minute intervals For example 30 minutes would be shown as 0 30 on the LCD display To end the Warm mode and turn the Cooker off press the Start Cancel and unplug the C...
Page 26: ...me basic guidelines Vegetable stocks cook in about 1 to 1 1 2 hours Meaty bone broths will cook in about 3 to 4 5 hours Whole chicken soup cooks in 2 hours Congee jook or whole grain porridge cook at least 1 hours o Cooking ratio for porridge is 1 cup of dry rice grain to 6 8 cups of water o Never cook more than 2 cups dry rice grain o Do NOT add milk until serving time as it may cause overflow or...
Page 27: ... 4 cups 1 2 hours 1 hour Brown green red lentils 1 cup 2 3 cups 1 hour 30 min 1 hour Petite French lentils 1 cup 3 cups 1 hour 30 min 1 hour Place the drained pre soaked beans or lentil into clay pot and cover with fresh water as noted above Ensure beans are covered by about 1 of water Add 1 to 2 Tablespoons oil to prevent boiling over and seasonings as desired Press the Slow Cooking key to select...
Page 28: ... Press the Slow Cooking key to select the stew mode on the control panel then use the Timer keys to set cooking for 30 minutes You may leave cooked steel cut oats in Warm mode for additional 30 minutes for a softer texture A general guide to Steaming Vegetables Add 2 3 cups water to the clay pot and place a bowl or steamer basket on top ensuring that the water does not come above the base of the s...
Page 29: ...r keys to set cooking time for 30 minutes or longer Check at 20 minutes and continue cooking until fish is cooked through A general guide to One Pot Pasta Meal To the clay pot add 4 oz dry pasta any type 2 cups water or broth and 1 cup marinara or pesto sauce and stir If desired add 1 2 pound cooked meatballs sausage or chicken plus vegetables small pieces of bell peppers and onions or peas for ex...
Page 30: ...t well before it boils Remove the saucepan from heat and allow the milk to cool to 110º F 43º C If not using a thermometer wait until the pot is just cool enough to touch with your bare hands still very warm but not hot It is very important that the temperature is not too hot or you will kill the active cultures When the temperature reaches 110º F 43º C add about a cup of milk to your yogurt cultu...
Page 31: ...rt cooking mode At this point the Start Cancel indicator light will no longer blink and will glow red The LCD display will the time selected on the clock and the indicator arrow on the right side will be positioned at time left This means your Cooker will cook for the selected time in the yogurt mode A few minutes before cooking is complete the Cooker will beep and once done will automatically swi...
Page 32: ...he flavor will become tarter Water may condense on the clay lid of the Cooker When you remove the lid take care not to drip any accumulated water into the finished yogurt Chill the yogurt in the refrigerator for a minimum of 4 hours before eating If the whey yellow watery substance pools at the top you can simply mix it back in or strain it off so the yogurt becomes thicker If you strain it off SA...
Page 33: ... whey there must be live active cultures in the yogurt add 1 tablespoon yogurt per cup of milk To learn more check out the New England Cheesemaking Supply Company at cheesemaking com or Cultures for Health at culturesforhealth com Which milk to use for yogurt The following types of milk may be used raw or pasteurized cow sheep or goat s milk of any fat content powdered milk long life UHT sterilize...
Page 34: ...flavored yogurt or active culture as recommended on package 4 cups milk Gently heat the jam or jelly until barely warm Add this to the milk when adding the culture and as per the basic yogurt instruction Yogurt flavored with fresh fruit Ingredients cup chopped fresh fruit of choice 4 tablespoons of sugar or to taste 1 2 cups water 4 tablespoons of unflavored yogurt or active culture as recommended...
Page 35: ...ub pads can be used as needed o Use hot water if you wash the clay pot right after cooking Do NOT use cold water if the pot is hot After washing dry thoroughly and store the pot with the lid inverted upside down in the Cooker ideally with a towel between the layers Avoid storing the Cooker with the lid sealed because it may become moldy if not carefully dried o If the Cooker should become moldy ma...
Page 36: ... Panel Display or any electrical mechanisms within the unit get wet The Inside of the Cooker Housing Use a damp soft cloth to clean and dry the steam cap and the large silicone ring around the edge of the Housing lid being careful not to remove it If an object becomes stuck to the heat element lightly rub it off using a fine grade sandpaper 600 grit Magic Eraser sponge or steel wool Then wipe with...
Page 37: ...ooking on Low for 8 hours or High for 4 hours use the stew mode for 2 hours or until food is cooked o For a pot that is full small amount of food and liquid Use the stew mode for 30 minutes or until food is cooked How long does it take to cook chicken in this Cooker Approximately 2 hours for a 3 4 pound whole chicken with 1 cup of liquid in the stew mode and 30 to 40 minutes for 1 pound of boneles...
Page 38: ...microwave safe Yes Is the clay pot stove top safe No How do I cook Porridge in my Cooker For rice or grain based porridge use the soup mode to cook for at least 1 5 hours Do NOT add milk until serving time as it may cause overflow or food burning See the Slow Cooking section of this booklet for more details Do I have account for high elevations Yes if you live at an altitude greater than 5 000 fee...
Page 39: ...proper operation improper maintenance or connection to an improper voltage supply 7 damage due to attempted repair of the Product by anyone not authorized by Essenergy to service the Product 8 normal wear of parts 9 Damage or defects caused by shipping faulty packaging or mishandling in transit 10 any non electric mechanical attachments and accessories and disposable parts including measuring cup ...
Page 40: ...e the box is sealed If the unit arrives with damage from shipment the warranty will be invalidated Please attach your name address telephone number and a description of the problem along with return postage A warranty form should be completed and included with the package The product must be sent carefully packed and properly cushioned to prevent damage in transit Your failure to abide by these pr...
Page 41: ...ntial damages or allow limitations on how long an implied warranty lasts so the above limitations or exclusions may not apply to you This warranty gives you specific legal rights and you may have other rights which vary from state to state Visit vitaclaychef com for recipes cooking charts more Check us out on YouTube at VitaClayChef Instagram at vitaclay Or join our Facebook family at VitaClay Che...