


12.4.
Installation
When the bootable usbstick is created and the system is usb stick bootable, as described
above, the Automation PC can be installed with Red Hat Enterprise Linux. As explained
above, the installation will be done over the
a217
’s machines sub-network. Therefore
connect the Automation PC to the
a217
’s machines sub-network from device “ETH2” with
a CAT6 network cable.
Note: The Automation PC has two network devices: “ETH1” and “ETH2”. The usbstick is
configured for downloading the kickstart configuration file and the Red Hat Linux
installation files from “ETH2”. Thus when the network cable is plugged into “ETH1”
the installation will NOT work.
4) Be sure the DVD is mounted in the drive of the MCC-computer.
5) Be sure the prepared USB-stick is in a free USB-port of the Automation PC.
6) Be sure the subnet of the EBPG5200 is setup well; including the power of the
HUB is turned on.
7) Turn on or reset the Automation PC
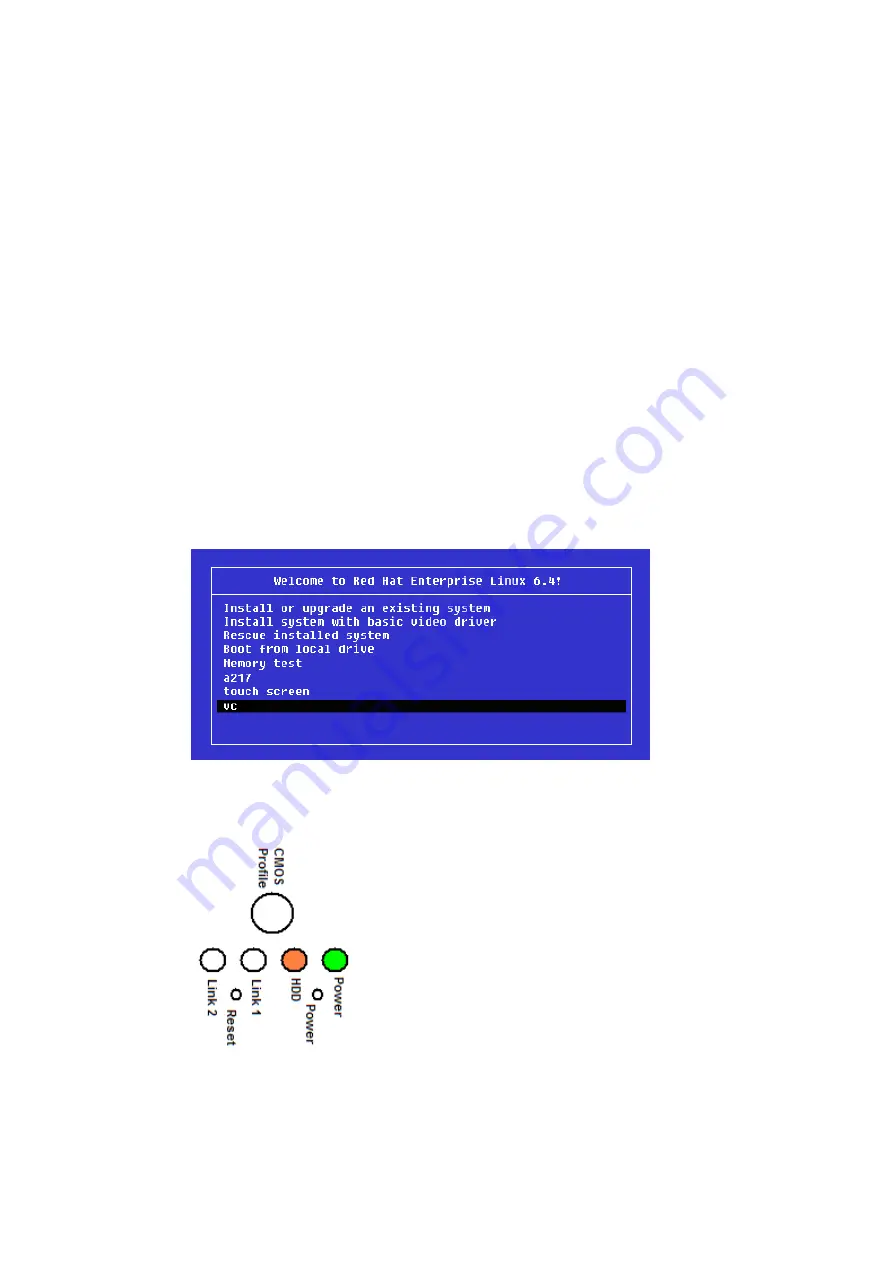
Everything will now be installed automatically. When a monitor and a mouse+keyboard
are connected to the Automation PC, after a while next menu appears on the screen.
Whe
n no action is done, the “vc” option is taken after 60 seconds (600 tenths of
seconds). This option is the one which has to be chosen
After about 00:20 h the system is ready. If no monitor is connected to the system, this can
NOT be noticed from the screen. However the led
’s at the front of the Automation PC can
tell something about the installation process:
When the power is turned on, then the leds will be as follows
8)
0 min: Turn on AutomationPC, The “Power” led will be green.
9) 2 min: HDD Flickers
10) 3 min: HDD is ON