background image

BASIC FEATURES


27


Note: 0000 is the master password and can always be 
used.


Channel Lock


Use the button to select channel lock then press the 

OK button. Scroll through the list of available channels 

using the 

buttons.


When you have highlighted the channel you wish to lock 

press GREEN button along the bottom of remote control. 

Green button at the top of the remote is the MUTE 

button.


Noted: The locked channels do still appear but are 

unselectable in EPG menu.


Parental Guidance


Use the button to select Parental Guidance then press 

the OK button. Parental guidance is used to set an age 

rating for programmes on the TV before the password is 

required to watch the program.


Scroll through the list of available ages using the 

buttons.


Choose the age rating you want and press theOK button 

to confirm.


Key lock


Use to lock the remote control, you must enter the 

password before the remote control will function. 

Turn key lock on and off by pressing the OK button.
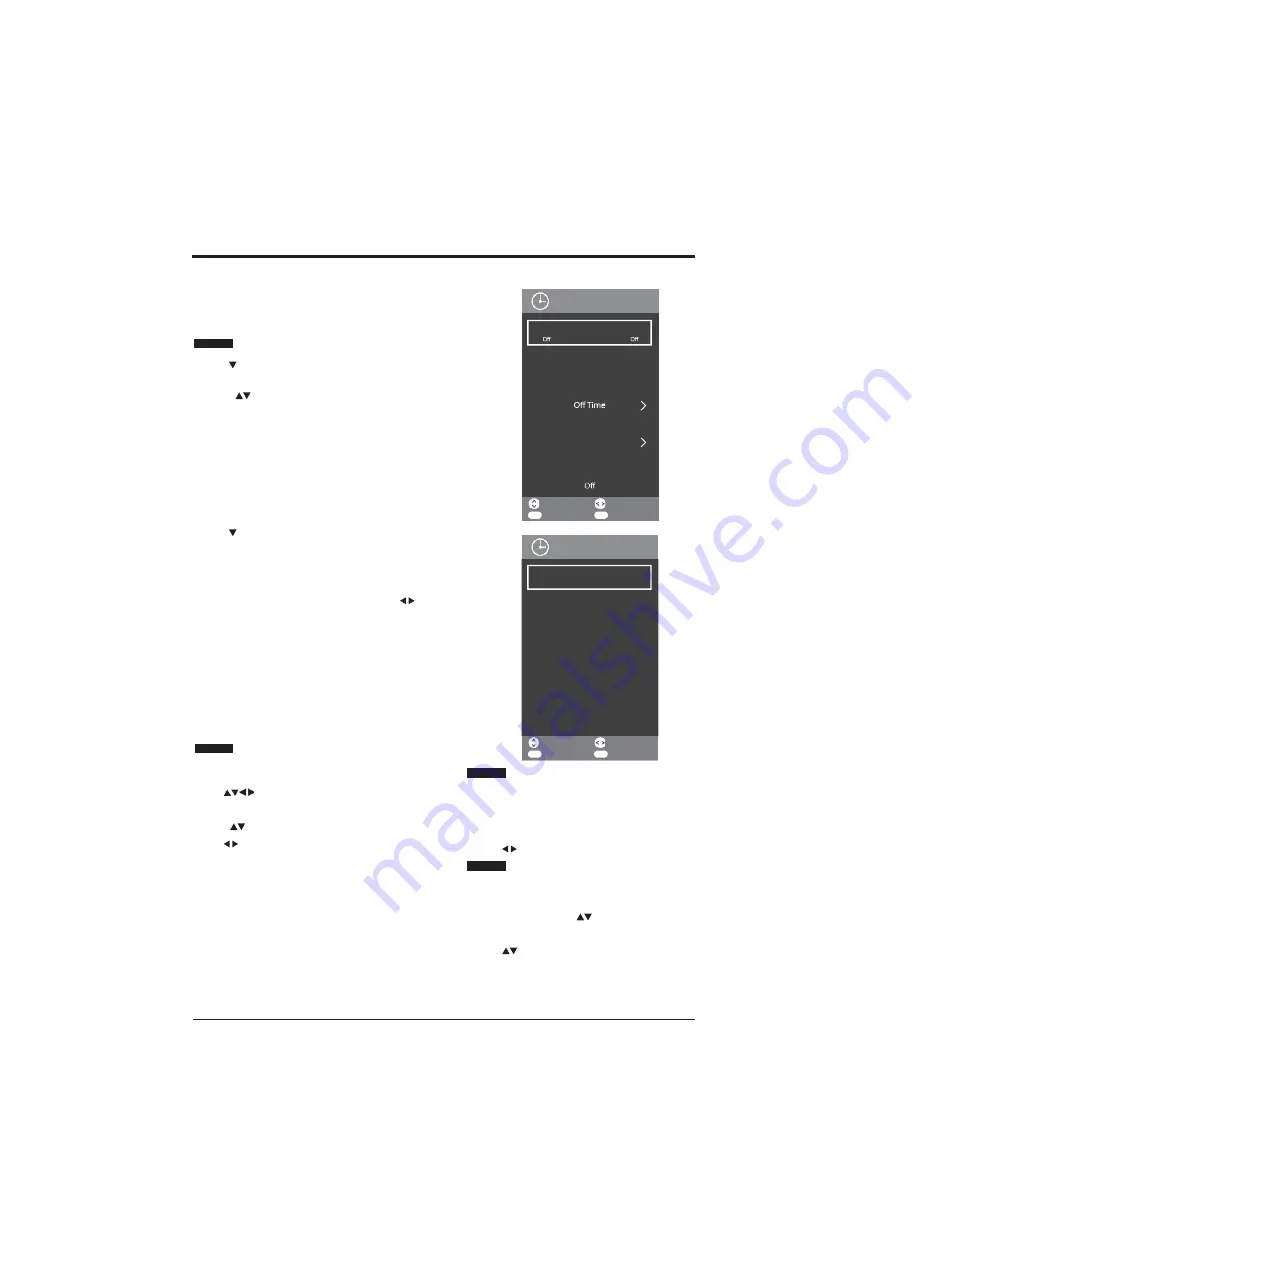


TIME MENU


1. 

Press MENU button to display the main interface, then


Auto Sync


use  


buttons to navigate and select TIME menu 

and press OK button to enter.


2. 

Press buttons to select the following options and


use buttons to adjust each option’s setting.


When Auto Sync is switched on, the TV will take the time 

from signals received by the TV through the broadcast 

signals.


Use the 

buttons to switch the Auto Sync On or Off.


Clock


You can only use the clock feature if Auto Sync is set to


Off.


Highlight Clock using the 

buttons then press the OK 

button. You will now enter the Clock  submenu.


Use the 

buttons to navigate through the menu.


Adjust


EXIT 

Exit


Move


OK     

Select


Sleep Timer


On Time


Clock 

20

:

44


Auto Sync


On


1

/

8


TIME


Adjust


EXIT 

Exit


Move


OK    

Select


Auto Standby


4 H


Time Zone


London GMT


30 S


OSD Timer


15 S


5 S


1

/

8


TIME


Summary of Contents for Infinite Vision 24SOLO1

Page 1: ......

Page 2: ...levision T236K2A4BHN The terms HDMI and HDMI High Definition Multimedia Interface and the HDMI Logo are trademarks or registered trademarks of HDMI Licensing Administrator Inc in the United States and...

Page 3: ...NCTION 16 Using the remote control with 17 RECORDING DTV PROGRAMMES 17 WATCHING RECORDED PROGRAMMES 18 PICTURE MENU 20 SOUND MENU 21 CHANNELMENU 22 Auto Tuning 22 Analogue Manual Tuning 23 Digital Man...

Page 4: ...oid injury from tip over Unplug this aopara tus during lightning storms or when unused for long oeriods of time Refer all servicing to qualified service personnel Servicing is required when the appara...

Page 5: ...for long period or when the batteries are exhausted Do not break open or throw exhausted batteries into afire For best results use type AAA example alkaline carbon zinc etc batteries Install only new...

Page 6: ...PREPARATION 4 What is Included TV Set Remote Control with Batteries MINI AV cable Base Stand MINI YPBPR cable User Manual Quick Start Guide User Manual Quick Start Guide...

Page 7: ...iew 1 POWER button Illuminate blue when the TV is turned on Illuminate red when the TV is in standby mode 2 IR Infrared Receiver Receive IR signals from the remote control 3 STANDBY button Switch the...

Page 8: ...ct to a USB storage device to play compatible video audio photo and text files USB mode 9 DTV TV Input Connect to the antenna 75 VHF UHF socket with the RF coaxial cable 10 MINIYPBPR Connect to AV dev...

Page 9: ...l Mounting 1 Lay the TV face down on a surface to avoid damaging or scratching 2 Pull the 2 legs straight out of the base without screws 3 Attach the wall mouting bracket to the TV using the mounting...

Page 10: ...PREPARATION 8 Remote Control 6 10 11 12 13 14 16 15 17 18 20 21 22 27 28 29 19 23 24 25 26 30 31 32...

Page 11: ...9 PREPARATION Remote Control...

Page 12: ...10 CONNECTING EXTERNAL DEVICES...

Page 13: ...V will turn blue then you will go to the First Time Installation menu 5 Language is preset to English 6 Press buttons to select country and use buttons to set the desired country 7 Press buttons to se...

Page 14: ...depending on the particular broadcast This function can only be used when the information is broadcast by the broadcasting companies The EPG displays the programme details for the next 7 days 1 Press...

Page 15: ...menu will open use the buttons to select your secondary region then press the OK button Select Secondary region Yorkshire OK Select 12 After pressing the OK button the Channel Tuning menu will be dis...

Page 16: ...e Mode Everyday Mode Every Week GREEN button Prev Day Press the green button to scroll through the previous 7 days of programmes Note This only works if the broadcaster supports this function YELLOW b...

Page 17: ...red Teletext logo is shown on the TVscreen 4 Press the TTX button again to exit the Teletext menu How to select a page of text 1 Find the number of the page you wish to view and enter it in the search...

Page 18: ...ntrol to display the PVR Time Shift progress barand then use the buttons to select II on the bar then press the OK button to start playback Note There may be a slight delay with the video and the soun...

Page 19: ...s approximately 30s of the recording time Press to stop the Time Shift recording RECORDING DTV PROGRAMMES Digital DTV channels only You can record digital TV programs onto a USB drive using either dir...

Page 20: ...connected to the TV you need to firstly select one of them and then press OK to confirm and select MOVIE to enter 3 Use the buttons to select _MSTPVR andpress OK button to confirm 4 Use the buttons to...

Page 21: ...8 x16 x32 speeds Repeat Press to select the repeat function you want Choose form NONE ONE SEQUENCE RANDOM TimePlay Allows you to select a time to start watching the programme from Enlarge Allows you t...

Page 22: ...etween light and dark levels in the picture Brightness Increases or decreases the amount of white in the picture Colour Adjust the value of colour Sharpness Adjust the level of crispness in the edges...

Page 23: ...between PCM Auto Off Audio Description Turn On or Off the audio description AD Volume Use the to set the volume of the audio description Audio Language Select audio language Note If you want to change...

Page 24: ...onfirm your selections by pressing the OK button Once you have completed all of the settings the menu will close automatically Note The menu shown in the diagram has been extended to show all availabl...

Page 25: ...s until you find the program you want Fine Tune select FINE TUNE to do small adjustments to improve the signal IMPORTANT If the number about to save is the same as a channel that is already being used...

Page 26: ...ove in the EPGmenu and press the YELLOW button on the remote control Move the channel to the position you want it in and press the yellow button again Skip Use the buttons to highlight the channel you...

Page 27: ...show press the EXIT button on the remote control to close the Recorded List menu Schedule List Use the button to select Scheduled List from the menu and press the OK button to display the menu You ca...

Page 28: ...isplay the main interface then use buttons to navigate and select LOCK menu and press OK button toenter 2 Press buttons to select the following options and use buttons to adjust each option s setting...

Page 29: ...to confirm Key lock Use to lock the remote control you must enter the password before the remote control will function Turn key lock on and off by pressing the OK button TIME MENU 1 Press MENU button...

Page 30: ...on Sat Sat Sun Sun Press the button and set the hour minute using the buttons Press the button and select the input source using the buttons Choose between DBVT digitalTV Analogue TV DBVT Radio DBVT D...

Page 31: ...ress OK button to enter 2 Press use buttons to select the following options and buttons to adjust each option s setting Adjust EXIT Exit Move O K Select Restore Factory Default Software Update USB Fir...

Page 32: ...TTINGS menu Subtitle Language Subtitle Language 2 Subtitle Language is the language certain items are played in depending on availability Press the button to select the Audio Language Use the buttons...

Page 33: ...S or NO to reset the TV or not HDMI CEC Turn on Consumer Electronics Control CEC so that you can control up to 15 CEC enabled devices that are connected through HDMI directly from one remote control P...

Page 34: ...s please upgrade your USB storage device the buttons to select USB MEDIA from menu then press the OK button to open PICTURE SOUND CHANNEL LOCK TIME NETWORK SETTINGS USB MEDIA IMPORTANT Some portable U...

Page 35: ...us programme in the playlist Next Press to watch the next programme in the play list Play Pause Press to play pause the programme Stop Press to play back of the programme FB Press repeatedly to rewind...

Page 36: ...ns available on the function bar press the OK buttonto select the function Previous Press to skip to previous track Next Press to move to next track Play Pause Press to play pause the programme Stop P...

Page 37: ...he next photo Play Pause Press to play pause the programme Stop Press to go back to the menu Rotate Press to rotate clockwise Rotate Press to rotate anti clockwise Enlarge Press to shrink the image Sh...

Page 38: ...than one device is connected to your TV then press theOK button Use the buttons to navigate through the folders and press the OK button to open the folder When you find the text file you want to see t...

Page 39: ...y maybe interrupted Check if the sleep timer is set Check whether the Auto Standby is activated The video function does not work No picture No Sound Check whether the TV is switchedon Try another chan...

Page 40: ...o enter a new password There is a problem in PC mode The signal is out of range invalid format Adjust the resolution horizontal frequency or vertical frequency Vertical bar or stripe on background and...

Page 41: ...39...

Page 42: ......

Page 43: ...If you want to dispose of the product or battery please consider the collection systems or facilities for appropriate recycling The cold cathode uorescent lamp in LCD PANEL contains a small amount of...

Reviews: