Virtulive VOJAS Installation Manual Download Page 18

VOJAS Installation Manual                                                                                                                          


7.


Slide  the  up  tube  into  the  down  tube  and 
secure it with the locking bolt at the desired 
position


8.


Adjust the device to position it parallel to the ground or up to a 
downward angle of up to 15 degrees to align it to the screen, use 
the spirit level to confirm.


Note: The recommended screen height is that the top of the image should 

be at 6’ 6” from ground to enable the educators to use the IR pen to write 

on the surface


4.7


Connecting the Power


This section details the procedure to connect the 
device to a power source:
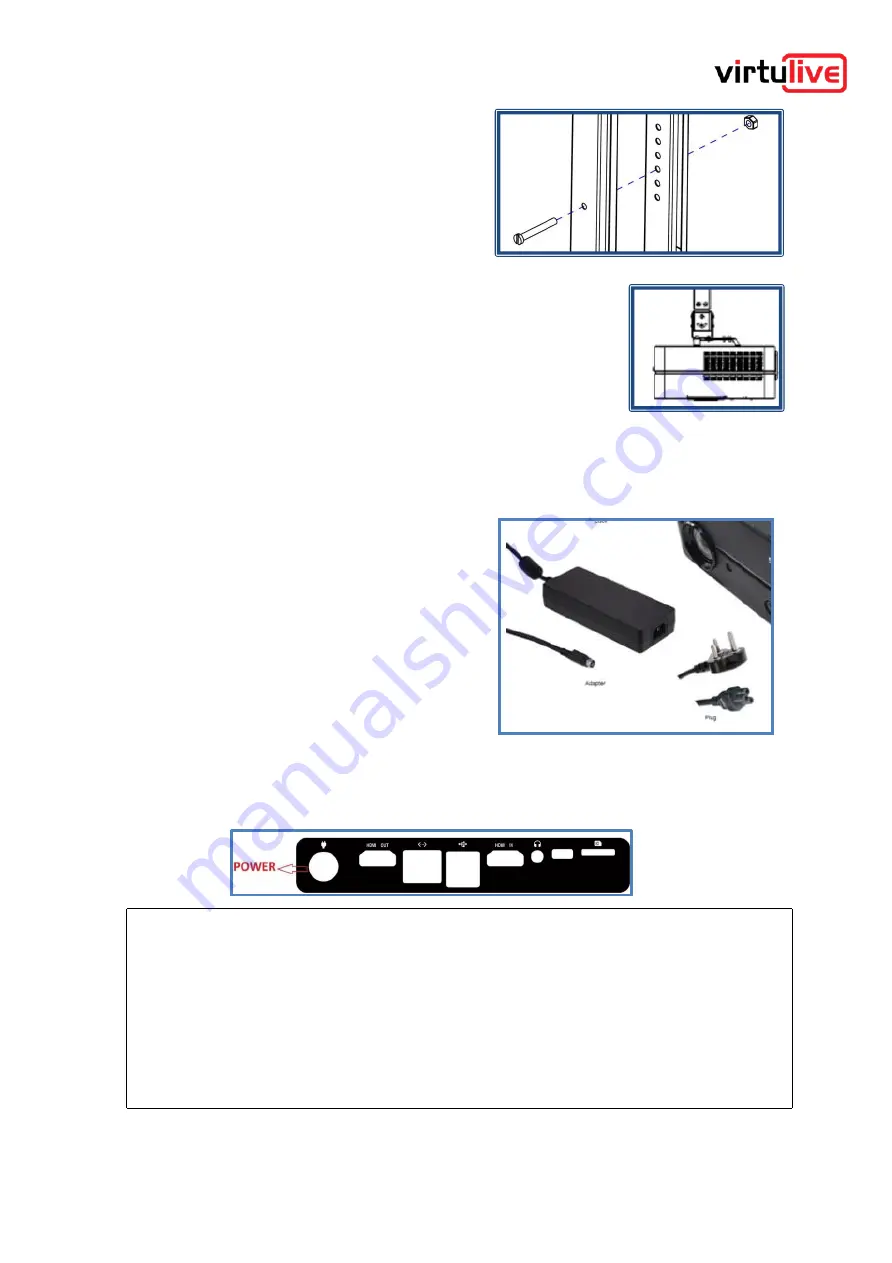
 

1.


Connect  the  Power  Adaptor  to  the  Power 
Cord


2.


Connect the 4-pin connector to the receptible 
in the Connectivity Panel on the device


3.


Plug  in  the  mains  plug  (will  come  with  a 
suitable plug for your region) into a UPS wall 
socket with an earth


4.


Place the Power Adaptor in a well-ventilated 
area and secure it with cable ties


Note: 

Please make sure that the power outlet is accessible and switched as it is the only way to 

isolate the power supply to the device.


Sudden power outages can damage the electronics and cause software problems.


Caution:


the equipment.


Connecting to power supplies outside the operating range can result in damage to


Operating without earthing can result in serious injury to users and damage to


Warning:


equipment.


Caution:


even injury to users. Please ensure that your power supply has adequate protection.


The device is not protected against power spikes and result in equipment failure or


Warning:


Summary of Contents for VOJAS

Page 1: ...VOJAS Installation Manual Version1 0 September 2019 Virtulive Technologies Pvt Ltd VOJAS Installation Manual...

Page 2: ...3 3 6 Remote Commander 12 4 1 Ceiling Mount Kit 13 4 2 Additional Tools and equipment 14 4 3 Placement 15 4 6 Mounting the Device 16 4 7 Connecting the Power 18 4 8 Other Connections 19 4 9 Securing...

Page 3: ...Virtulive and the above named suppliers disclaim all warranties expressed or implied including without limitation those of merchantability fitness for a particular purpose and noninfringement or aris...

Page 4: ...e requirements of the education sector It provides a simple and cost effective way to take the traditional classroom into the digital domain and reach out to students anywhere in the world VOJAS uses...

Page 5: ...Figure 1 In The Box 1 VOJAS 2 Power Adapter 3 Power Cord 4 Remote Commander 2 cells 5 IR Pen Charging Cable 2 number 6 Quick Set up guide 7 Kensington Cable Lock Keys Note Please contact Virtulive Cus...

Page 6: ...rojection Surface VOJAS needs an external projection surface for permanent installation a fixed or retractable screen designed for a wide aspect ratio 16 9 projector is recommended 3 2 3 Internet Conn...

Page 7: ...is most effective if used in an area with controlled ambient lighting like most projectors very bright environments can affect the on screen visibility 3 3 Getting to know your VOJAS 3 3 1 Identifying...

Page 8: ...VOJAS Installation Manual 3 3 2 Top Panel Controls Figure 3 Top Panel...

Page 9: ...lation Manual 3 3 3 Front Right View Figure 4 Front Right View The diagram shows a Front Right view of the device 1 Lens 2 Auto Focus Sensor 3 Front Camera 4 Interactivity Sensor 5 Microphone 6 Coolin...

Page 10: ...VOJAS Installation Manual 3 3 4 Rear Left View Figure 5 Rear Left View 7 Speakers 8 Rear Camera 9 Infrared Sensor 10 Kensington lock slot 11 Connectivity Panel...

Page 11: ...Installation Manual 3 3 5 Connectivity Panel Figure 6 Connectivity Panel a Power receptible b HDMI output c Ethernet connector RJ45 d USB connector e HDMI input f Audio Jack 3 5mm g USB OTG h 4G SIM...

Page 12: ...function Remote Commander that can also act as a Keyboard Mouse and a Laser pointer This unit needs 2nos AA size batteries not supplied to operate Please install the batteries before installation as...

Page 13: ...Kit to install the VOJAS permanently We recommend that the installation is carried out by trained and authorized personnel However any person with a reasonable mechanical ability aptitude and the req...

Page 14: ...ts 4 nos 5 Hex Key for M6 bolts 1 no 6 Cable Ties 10 nos 4 2 Additional Tools and equipment You will require additional tools and equipment listed below to install the ceiling mount kit 1 Powered impa...

Page 15: ...s space Please follow the below guidelines to mount the projector 1 The projector lens is positioned at a level that you wish the top of the projected image to be at 2 The projector is placed at the c...

Page 16: ...enter punch and hammer to mark the drill points 4 Drill the required holes to accommodate the anchor bolts or screws depending the ceiling material 5 Insert the anchor bolts and secure them 6 Install...

Page 17: ...VOJAS Installation Manual 4 Tighten the adjuster screws with a screw driver to lock the arms in place 5 Secure the tilt adjuster to the projector bracket 6 Mount the up tube to the tilt adjuster...

Page 18: ...eptible in the Connectivity Panel on the device 3 Plug in the mains plug will come with a suitable plug for your region into a UPS wall socket with an earth 4 Place the Power Adaptor in a well ventila...

Page 19: ...ther devices through the USB port Display extension dongle Screen Cast device or any other input through the HDMI in port Connect an external PA system through the audio jack Insert a SIM card in the...

Page 20: ...VOJAS can be put into a sleep mode like any other Windows 10 PC using Start sleep or through power settings Alternately pressing the Power button when the device is running will put it in Sleep mode...

Page 21: ...to Focus feature that runs during Bootup to give an optimum focus The Autofocus can also be run on demand using the following procedure 1 Press the Auto Focus Button on the Top Panel 2 Use the Arrow b...

Page 22: ...It can be charged when connected to the supplied USB charger or a USB port It typically charges in less that 5 minutes and is good for about 10 hours of use 5 9 Calibrating the Interactivity The IR pe...

Page 23: ...ge to theequipment Caution Exposingthedevicetoverydustyorsmokyenvironmentscanreducetheperformance and or cause permanent damage to the equipment Caution Obstructing the ventilation ducts may cause the...

Page 24: ...ill also fulfill the requirements of enterprises that prefer video in all their communication thereby leveraging the advantages of immediacy and better interactivity 2019 Virtulive Technologies Pvt Lt...

Reviews: