_______________________________________________________________________________________________________
_______________________________________________________________________________________________________
© Virtual Access 2018
GW2020 Series User Manual
Issue: 2.1
Page 9 of 423
1
Introduction
This user manual describes the features and how to configure the range of Virtual Access
routers in the GW2020 Series.
The Virtual Access GW2020 Series routers are arrange of versatile 3G/LTE/CDMA450
wireless routers suitable for a variety of business and industrial deployments. The
compact and rugged structure makes a suitable product for deployments in M2M
applications such as CCTV, ATM, telemetry, SCADA, retail (POS), digital signage, and
intelligent traffic systems. The product line supports the following radio access
technologies: HSPA+, HSPA, UMTS, EDGE, CDMA450, GPRS and GSM.
3G is the third generation of mobile phone standards and technology. It is based on the
International Telecommunication Union (ITU) family of standards under the International
Mobile Telecommunications programme, IMT-2000.
4G is a mobile communications standard intended to replace 3G, allowing wireless
internet access at a much higher speed.
3G and 4G technologies enable network operators to offer users a wider range of more
advanced services, while achieving greater network capacity through improved spectral
efficiency. Services include wide-area wireless voice telephony, video calls, and
broadband wireless data, all in a mobile environment.
1.1
Document scope
This document covers the following models in the GW2020 Series.
GW2021:
1 x Ethernet and 3G, 4G/LTE
GW2022:
2 x Ethernet and 3G, 4G/LTE
GW2023:
2 x Ethernet, 3G, 4G/LTE and dual RS232
GW2024:
2 x Ethernet, 3G, 4G/LTE, single RS232 and single RS485
1.2
Using this documentation
You can configure your router using either the router’s web interface or via the command
line using UCI commands. Each chapter explains first the web interface settings,
followed by how to configure the router using UCI. The web interface screens are shown
along with a path to the screen for example, ‘In the top menu, select Service ->
SNMP.’ followed by a screen grab.
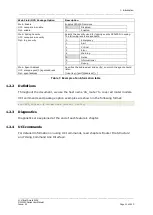
After the screen grab there is an information table that describes each of the screen’s
fields.

