background image

Manual VIPA CPU 21x 

Chapter 1


Principles


HB103E - Rev. 05/45 


1-5 

Overview System 200V 


The System 200V is a modular automation system for low and middle 
range of performance that you may use either centralized or decentralized. 
The single modules are directly clipped to a 35mm DIN rail and are 
connected together with the help of special bus clips. 

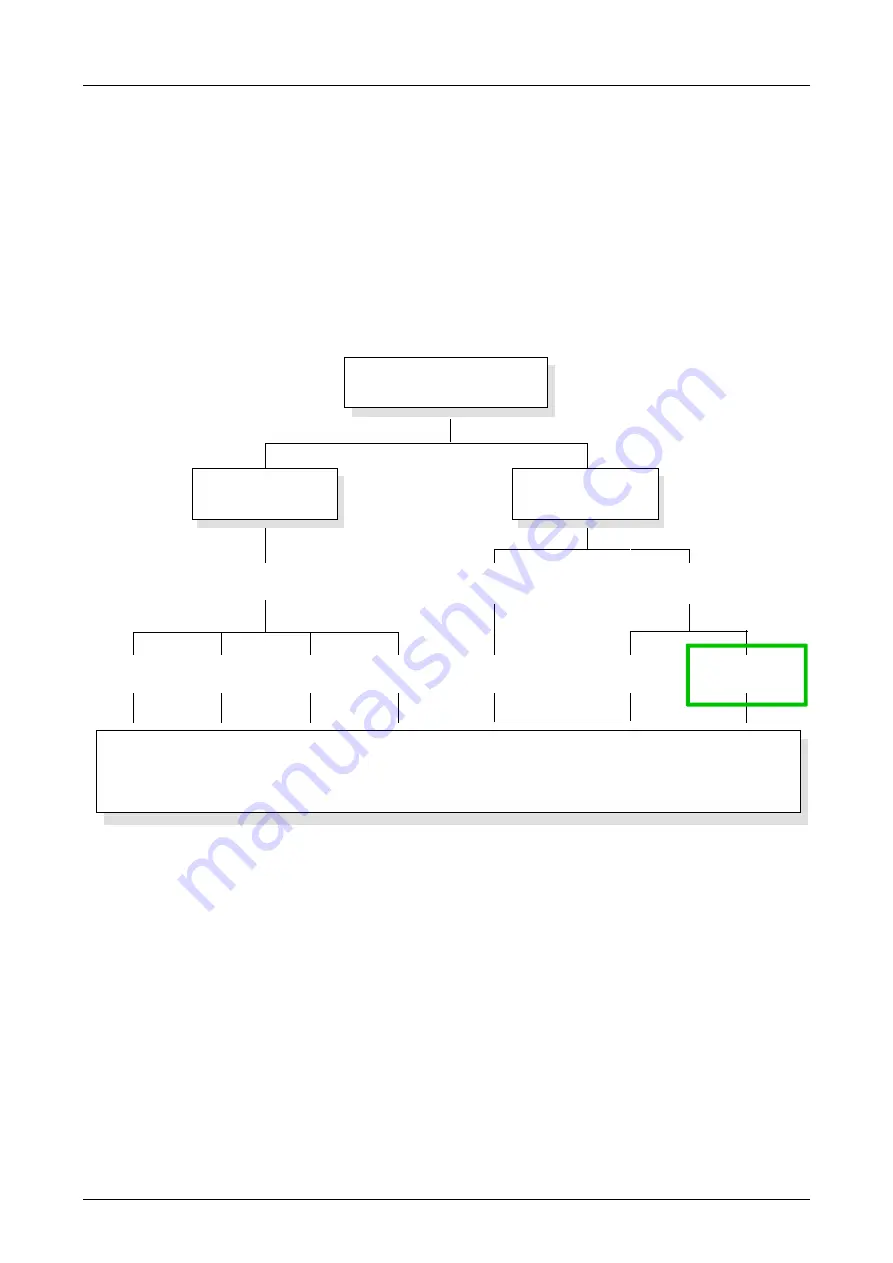
The following picture shows the range of performance of the System 200V: 


System 200V

decentral

peripheral

Profibus    DeviceNet     CAN        Interbus        PC-CPU            PLC-CPU        PLC-CPU

Dig. IN / Dig. OUT / Anal. IN / Anal. OUT / FM / CP 

DP 200V

PC 200V

PLC 200V

for STEP

®

5 of Siemens

for STEP

®

7 of Siemens

central


The current manual describes the PLC-CPU family CPU 21x compatible to 
STEP

7 by Siemens.  

The description of the PLC-CPU-family CPU 24x compatible to STEP

5 by 

Siemens is available in the manual No. HB99. 

The peripheral modules, PCs and decentralized peripheral equipment are 
to find in the manual HB97 "System 200V". This manual also contains hints 
for installation and commissioning of the System 200V. 


The System 200V 

Overview  
Manuals 

Summary of Contents for CPU 21 Series

Page 1: ...Manual VIPA CPU 21x Order No VIPA HB103E Rev 05 45 ...

Page 2: ...Lerrzeichen ...

Page 3: ...rved The contents of this manual was carefully examined to ensure that it conforms with the described hardware and software However discrepancies can not be avoided The specifications in this manual are examined regularly and corrections will be included in subsequent editions We gratefully accept suggestions for improvement VIPA is a registered trademark of VIPA Gesellschaft für Visualisierung un...

Page 4: ...the CPU 21x 2BT10 under TCP IP This chapter describes applications of the CPU 21x 2BT10 and the communication of the CP using TCP IP The CP is parameterizable with NetPro from Siemens Chapter 5 Deployment of the CPU 21x 2BT02 under H1 TCP IP This chapter describes applications of the CPU 21x 2BT02 and the H1 resp TCP IP communication procedure of the CP The CP is parameterizable with WinNCS Chapte...

Page 5: ...S232C RS485 interface Chapter 10 Deployment of the CPU 21xSER 2 Content of this chapter is the deployment of the CPU 21x 2BS02 with two RS232C interfaces Chapter 11 Integrated OBs SFBs SFCs Here you find the description of the integrated VIPA specific SFCs like e g the SFCs for the CP communication Chapter 12 Command list This chapter lists all available commands of the CPU in alphabetical order ...

Page 6: ...About this Manual Manual VIPA CPU 21x Subject to change to cater for technical progress ...

Page 7: ... data 2 23 Chapter 3 Deployment CPU 21x 3 1 Assembly 3 2 Start up behavior 3 3 Address allocation 3 4 Project engineering 3 6 Configuration of the CPU parameters 3 9 Project transfer 3 11 Operating modes 3 14 Overall Reset 3 15 Firmware update 3 17 Using test functions for the control and monitoring of variables 3 20 Chapter 4 Deployment of the CPU 21x 2BT10 with TCP IP 4 1 Industrial Ethernet in ...

Page 8: ...les 7 2 CPU 21xDP configuration 7 7 DP slave parameters 7 12 Diagnostic functions 7 15 Internal status messages to CPU 7 18 Profibus Installation guidelines 7 20 Commissioning 7 26 Example 7 28 Chapter 8 Deployment CPU 21xCAN 8 1 Principles CAN Bus 8 2 Project engineering of the CPU 21xCAN 8 4 Modes 8 13 Process image of the CPU 21xCAN 8 14 CANopen Messages 8 16 Object directory 8 21 Chapter 9 Dep...

Page 9: ...n Parameterization error PAFE 11 43 SFC 230 SEND 11 44 SFC 231 RECEIVE 11 45 SFC 232 FETCH 11 46 SFC 233 CONTROL 11 47 SFC 234 RESET 11 48 SFC 235 SYNCHRON 11 49 SFC 236 SEND_ALL 11 50 SFC 237 RECEIVE_ALL 11 51 SFC 238 CTRL1 11 52 Chapter 12 Instruction list 12 1 Alphabetical instruction list 12 2 Abbreviations 12 5 Registers 12 7 Addressing examples 12 8 Math instructions 12 11 Block instructions...

Page 10: ...Contents Manual VIPA CPU 21x iv HB103E Rev 05 45 ...

Page 11: ... description of one specific topic This manual provides the following guides An overall table of contents at the beginning of the manual An overview of the topics for every chapter An index at the end of the manual The manual is available in printed form on paper in electronic form as PDF file Adobe Acrobat Reader Important passages in the text are highlighted by following icons and headings Dange...

Page 12: ...zone The manual must be available to all personnel in the project design department installation department commissioning operation The following conditions must be met before using or commissioning the components described in this manual Modification to the process control system should only be carried out when the system has been disconnected from power Installation and modifications only by pro...

Page 13: ...s a description of Safety information for users Construction and operation of the CPU 21x Programming principles Topic Page Chapter 1 Principles 1 1 Safety information for users 1 2 Hints for the deployment of the MPI interface 1 3 Hints for the Green Cable from VIPA 1 4 Overview System 200V 1 5 Function security of the VIPA CPUs 1 6 General description of the System 200V 1 7 Overview CPU 21x 1 8 ...

Page 14: ...c discharge are usually not detected immediately The respective failure may become apparent after a period of operation Components damaged by electrostatic discharges can fail after a temperature change mechanical shock or changes in the electrical load Only the consistent implementation of protective devices and meticulous attention to the applicable rules and regulations for handling the respect...

Page 15: ...you have to make sure that Pin 1 is not connected This may cause transfer problems and in some cases damage the CPU Especially Profibus cables from Siemens like e g the 6XV1 830 1CH30 must not be deployed at MP 2 I jack For damages caused by nonobservance of these notes and at improper deployment VIPA does not take liability For the serial data transfer from your PC you normally need a MPI transdu...

Page 16: ...d application you may update the firmware of all recent VIPA CPUs with MP 2 I jack and certain fieldbus masters see Note Important notes for the deployment of the Green Cable Nonobservance of the following notes may cause damages on system components For damages caused by nonobservance of the following notes and at improper deployment VIPA does not take liability Note to the application area The G...

Page 17: ...200V decentral peripheral Profibus DeviceNet CAN Interbus PC CPU PLC CPU PLC CPU Dig IN Dig OUT Anal IN Anal OUT FM CP DP 200V PC 200V PLC 200V for STEP 5 of Siemens for STEP 7 of Siemens central The current manual describes the PLC CPU family CPU 21x compatible to STEP 7 by Siemens The description of the PLC CPU family CPU 24x compatible to STEP 5 by Siemens is available in the manual No HB99 The...

Page 18: ...V central analog outputs The voltage supply for the output channels is switched off decentral outputs The outputs are set to 0V decentral inputs The inputs are read constantly from the slave and the recent values are put at disposal STOP RUN res Power on general First the PII is deleted the call of the OB100 follows After the execution of the OB the BASP is set back and the cycle starts with Delet...

Page 19: ...6 7 8 9 I0 DI 8xDC24V SM 221 0 1 2 3 4 5 6 7 VIPA 221 1BF00 X 2 3 4 1 2 3 4 5 6 7 8 9 I0 DI 8xDC24V SM 221 0 1 2 3 4 5 6 7 VIPA 221 1BF00 X 2 3 4 1 2 3 4 5 6 7 8 9 I0 DI 8xDC24V SM 221 0 1 2 3 4 5 6 7 VIPA 221 1BF00 X 2 3 4 1 2 3 4 5 6 7 8 9 I0 PW SF FC MC CPU 216 DC 24V 1 2 RN ST MR X1 MMC R S X 2 3 4 VIPA 216 2BA01 M P I 2 PW SF FC MC CPU 216DP DC 24V 1 2 RN ST MR X1 MMC R S X 2 3 4 VIPA 216 2BP...

Page 20: ...cess to the peripheral modules of the System 200V You may query sensors and control actuators by means of standardized commands and programs The unit can address a maximum of 32 modules You may parameterize the CPU via the integrated MPI interface The VIPA CPUs 21x are available in three different performance categories with 8 versions each CPU 21x PLC CPU CPU 21x 2BT02 PLC CPU with Ethernet inter...

Page 21: ...PC resp PG The GSD file for the System 200V is included to the hardware configurator Actual GSD files can be found at ftp ftp vipa de support serial connection to the CPU e g via Green Cable from VIPA Note The configuration of the CPU requires a thorough knowledge of the Siemens SIMATIC manager and the hardware configurator The project engineering of a CPU 21x takes place via the SIMATIC mana ger ...

Page 22: ...cognize the system as central periphery system Add your modules to the slave system in the same order you have assembled them Start with the CPU at the 1st slot Include then your System 200V modules CPU 21x PB Addr 1 PB Addr 2 DP200V 315 2DP 2AF03 0AB0 centralized periphery centralized periphery CPU 21x xxxx Module When projecting a CPU 21xDPM you include the central modules like described above S...

Page 23: ...eering in the DP master Configure the CPU with DP master system address 2 Add Profibus slave VIPA_CPU2xxDP of VIPA04d5 gsd Assign Profibus input and output area starting with plug in location 0 Slave VIPA_CPU21x of VIPA_21x gsd PB Adr 1 PB Adr 2 DP200V CPU21x Master VIPA_CPU21xDP of VIPA04d5 gsd 315 2DP 2AF03 0AB0 315 2DP 2AF03 0AB0 PB Adr 5 OUT IN centralized periphery centralized periphery CPU 2...

Page 24: ...cation on the respective protocols is controlled by connection commands which have to be programmed in the user application At this the VIPA SFCs 230 238 are used The parameter transfer to the communication processor CP is done at runtime using a SEND SFC 230 with order number 201 The parameters have to be stored in a DB whose set up depends on the desired protocol To activate the parameters a RES...

Page 25: ... actuators One single CPU may address a maximum of central 32 modules Compact centralized configuration C PU AI4 AO4 D IO8 D O16 C PU21x D O8 C ount Decentralized configuration using Profibus 3 Input output periphery CPU 21x DP 5 Input output periphery CPU 21x DP CPU IM 208 5 CPU IM 208 1 3 IM 253 1 Input output periphery IM 253 2 Input output periphery CPU IM 208 2 4 IM 253 4 Input output periphe...

Page 26: ...m executor They support the input output modules and process the data from the function modules Quick programming due to the compatibility with STEP 7 from Siemens The compact construction requires less space Enhanced flexibility provided by up to 32 function modules DIG I O ANA I O SSI pulse counter communication modules etc Additional function modules can be added quickly and easily by means of ...

Page 27: ...cal sequences of operations are repeated in a never ending cycle Where a process requires control signals at constant intervals you can initiate certain operations based upon a timer e g not critical monitoring functions at one second intervals If a process signal requires a quick response you would allocate this signal to an alarm controlled procedure An alarm may activate a procedure in your pro...

Page 28: ...ting modules provide the interfaces to the system routines CPU 21x operands The following operands are available for programming the CPU 21x Process image and periphery Bit memory marker Timers and counters Data blocks The user program can quickly access the process image of the inputs and outputs PII PIO You may manipulate the following types of data individual bits bytes words double words You m...

Page 29: ...value between 10ms and 9990s As soon as the user program executes a start operation the value of this timer is decremented by the interval that you have specified until it reaches zero You may load counter cells with an initial value max 999 and increment or decrement this when required A data block contains constants or variables in form of bytes words or double words You may always access the cu...

Page 30: ...Chapter 1 Principles Manual VIPA CPU 21x 1 18 HB103E Rev 05 45 ...

Page 31: ... contains installation and commissioning instructions and applications for the memory modules The technical data conclude the chapter The following section contains descriptions of the components of the CPUs along with controls and displays the modules integrated into the CPU technical data Topic Page Chapter 2 Hardware description 2 1 System overview 2 2 Structure 2 11 Components 2 13 Block diagr...

Page 32: ... All CPUs 21x are available as CPU 214 215 and 216 The CPUs 214 215 and 216 are functionally identical and their only difference is the memory size Note The remainder of this description refers to all CPUs of the CPU 21x family Instruction set compatible to Siemens STEP 7 Configuration by means of the Siemens SIMATIC manager Integrated 24V power supply Total address range 1024Byte inputs 1024Byte ...

Page 33: ...F FC MC R S RN ST MR MMC 2 1 2 DC 24V X1 VIPA 214 1BA02 X 2 3 4 CPU 215 M P I PW SF FC MC R S RN ST MR MMC 2 1 2 DC 24V X1 VIPA 215 1BA02 X 2 3 4 CPU 216 M P I PW SF FC MC R S RN ST MR MMC 2 1 2 DC 24V X1 VIPA 216 1BA02 X 2 3 4 Type Order number Description CPU 214C VIPA 214 1BC02 PLC CPU 214 with 32 40KB of work load memory CPU 214 VIPA 214 1BA02 PLC CPU 214 with 48 80KB of work load memory CPU 2...

Page 34: ... 4 VIPA 214 2BT10 M P I 2 10 100 TP RN ST IF L A S PW SF FC MC CPU 215NET DC 24V 1 2 RN ST MR X1 MMC R S X 2 3 4 VIPA 215 2BT10 M P I 2 10 100 TP RN ST IF L A S PW SF FC MC CPU 216NET DC 24V 1 2 RN ST MR X1 MMC R S X 2 3 4 VIPA 216 2BT10 M P I 2 10 100 TP RN ST IF L A S Type Order number Description CPU 214NET VIPA 214 2BT10 PLC CPU 214 with Ethernet and 48 80KB of work load memory CPU 215NET VIPA...

Page 35: ... I 2 IX Data TP PW Tx Rx PW SF FC MC CPU 215NET DC 24V 1 2 RN ST MR X1 MMC R S X 2 3 4 VIPA 215 2BT02 M P I 2 IX Data TP PW Tx Rx PW SF FC MC CPU 216NET DC 24V 1 2 RN ST MR X1 MMC R S X 2 3 4 VIPA 216 2BT02 M P I 2 IX Data TP PW Tx Rx Type Order number Description CPU 214NET VIPA 214 2BT02 PLC CPU 214 with Ethernet and 48 80KB of work load memory CPU 215NET VIPA 215 2BT02 PLC CPU 215 with Ethernet...

Page 36: ... 1 2 RN ST MR X1 MMC R S X 2 3 4 VIPA 215 2BM02 M P I 2 RN IF DE ER D P PW SF FC MC CPU 216DPM DC 24V 1 2 RN ST MR X1 MMC R S X 2 3 4 VIPA 216 2BM02 M P I 2 RN IF DE ER D P Type Order number Description CPU 214DPM VIPA 214 2BM02 PLC CPU 214 with Profibus DP master and 48 80KB of work load memory CPU 215DPM VIPA 215 2BM02 PLC CPU 215 with Profibus DP master and 96 144KB of work load memory CPU 216D...

Page 37: ...P DC 24V 1 2 RN ST MR X1 MMC R S X 2 3 4 VIPA 215 2BP02 ER RD DE D P M P I 2 PW SF FC MC CPU 216DP DC 24V 1 2 RN ST MR X1 MMC R S X 2 3 4 VIPA 216 2BP02 ER RD DE D P M P I 2 Type Order number Description CPU 214DP VIPA 214 2BP02 SPS CPU 214 with Profibus slave and 48 80KB of work load memory CPU 215DP VIPA 215 2BP02 SPS CPU 215 with Profibus slave and 96 144KB of work load memory CPU 216DP VIPA 21...

Page 38: ...C 24V 1 2 RN ST MR X1 MMC R S X 2 3 4 VIPA 215 2CM02 M P I 2 RN IF DE ER C A N PW SF FC MC CPU 216CAN DC 24V 1 2 RN ST MR X1 MMC R S X 2 3 4 VIPA 216 2CM02 M P I 2 RN IF DE ER C A N Type Order number Description CPU 214CAN VIPA 214 2CM02 PLC CPU 214 with CAN master and 48 80KB of work load memory CPU 215CAN VIPA 215 2CM02 PLC CPU 215 with CAN master and 96 144KB of work load memory CPU 216CAN VIPA...

Page 39: ... 2 RN ST MR X1 MMC R S X 2 3 4 VIPA 215 2BS32 C O M M P I 2 Rx Tx PW SF FC MC CPU 216SER DC 24V 1 2 RN ST MR X1 MMC R S X 2 3 4 VIPA 216 2BS32 C O M M P I 2 Rx Tx Type Order number Description CPU 214SER VIPA 214 2BS12 SPS CPU 214 with 1xRS232C interface and 48 80kByte of work load memory CPU 215SER VIPA 215 2BS12 SPS CPU 215 with 1xRS232C interface and 96 144kByte of work load memory CPU 216SER V...

Page 40: ...PA 215 2BS02 M P I 2 RN ER1 Rx1 Tx1 C O M 2 ER2 Rx2 Tx2 C O M 1 CPU 215SER PW SF FC MC DC 24V 1 2 RN ST MR X1 MMC R S X 2 3 4 VIPA 216 2BS02 M P I 2 RN ER1 Rx1 Tx1 C O M 2 ER2 Rx2 Tx2 C O M 1 CPU 216SER Type Order number Description CPU 214SER VIPA 214 2BS02 SPS CPU 214 with 2xRS232C interface and 48 80kByte of work load memory CPU 215SER VIPA 215 2BS02 SPS CPU 215 with 2xRS232C interface and 96 1...

Page 41: ...VIPA 216 2BT10 M P I 2 10 100 TP RN ST IF L A S 4 5 3 2 1 6 7 7 RJ45 jack for twisted pair Ethernet 1 RUN STOP OVERALL RESET function selector 2 Status indicator LEDs CPU 3 Slot for MMC memory card 4 MP 2 I interface 5 Connector for 24V DC power supply 6 Status indicator LEDs Ethernet Front view CPU 21x 2BT02 PW SF FC MC CPU 216NET DC 24V 1 2 RN ST MR X1 MMC 4 5 3 2 1 R S X 2 3 4 VIPA 216 2BT02 6 ...

Page 42: ...4V 1 2 RN ST MR X1 MMC 4 5 3 1 R S X 2 3 4 VIPA 216 2CM02 6 7 M P I 2 RN IF DE ER C A N 2 1 RUN STOP OVERALL RESET function selector 2 Status indicator LEDs CPU 3 Slot for MMC memory card 4 MP 2 I interface 5 Connector for 24V DC power supply 6 LED status indicator communication Front view CPU 21xSER 1 PW SF FC MC CPU 216SER DC 24V 1 2 RN ST MR X1 MMC 4 5 3 2 1 R S X 2 3 4 VIPA 216 2BS12 C O M 7 M...

Page 43: ...the function selector The CPU automatically executes the operating mode START UP when the mode changes from STOP to RUN You may issue an overall reset by placing the switch in the Memory Reset MR position You may install a VIPA MMC memory card in this slot as external storage device Order No VIPA 953 0KX00 The access to the MMC takes always place after an overall reset The CPU has an internal powe...

Page 44: ...he link for the data transfer between the CPU and the PC Via bus communication you are able to exchange programs and data between different CPUs that are linked over MPI For a serial exchange between the partners you normally need a special MPI converter But now you are also able to use the VIPA Green Cable Order No VIPA 950 0KB00 which allows you to establish a serial peer to peer connection over...

Page 45: ... CP project is loaded Off CP is reset no project ST yellow CP STOP On CP status is reset Off CP Project is transferred IF red On Internal CP error L A green Link Activity On physically connected to Ethernet Off no physical connection to Ethernet Blinks Ethernet activity S green Transfer speed On 100MBit Off 10MBit An RJ45 jack provides the interface to the twisted pair cable required for Ethernet ...

Page 46: ...the meaning of these LEDs Name Color Description PW green Indicates CPU power on TxD green Transmit data RxD green Receive data An RJ45 jack provides the interface to the twisted pair cable required for Ethernet The pin assignment of this jack is as follows 8pin RJ45 jack Pin Assignment 1 Transmit 2 Transmit 3 Receive 4 5 6 Receive 7 8 Star topology A twisted pair network can only have a star topo...

Page 47: ...ing accessed and the outputs are 0 clear state On with DE Master status is operate and is communicating with the slaves IF red Initialization error On Error in Profibus configuration DE yellow DE Data exchange On Indicates Profibus communication activity ER red Error On Slave has failed The CPU 21xDPM is connected to the Profibus system by means of a 9pin jack The pin assignment of this interface ...

Page 48: ...0Hz Supply voltage DC18V Flashing alternately with RD Configuration error error at Master configuration Flashing simultaneously with RD Error in parameterization RD green Ready On Data transfer via back plane bus Flashing Self test result is positive READY and successful initialization DE green DE Data exchange On Indicates an active Profibus communication The CPU 21xDP is connected to the Profibu...

Page 49: ...ate operational BA yellow BA Bus active On CAN bus communication respectively state operational Blinking 1Hz State pre operational IF red Initialization ON Initialization error at wrong parameterization Off Initialization is OK Note If all LEDs are blinking with 1Hz the CAN master awaits valid parameters from the CPU If the CAN master is not supplied with parameters by the CPU his LEDs get off aft...

Page 50: ... Color Description Rx green Interface receive data Tx green Interface transmit data Via 9pin jack you may establish a serial RS232C point to point connection The pin assignment of this interface is as shown 9pin plug CPU 21x 2BS12 Pin Assignment 1 CD 2 RxD 3 TxD 4 DTR 5 GND 6 DSR 7 RTS 8 CTS 9 RI Via 9pin slot you may establish a serial RS485 bus connection The pin assignment of this interface is ...

Page 51: ...lor and the significance of these LEDs Name Color Description RN green Communication processor runs ER1 red Error Interface 1 Rx1 green Interface 1 receive data Tx1 green Interface 1 transmit data ER2 red Error Interface 2 Rx2 green Interface 2 receive data Tx2 green Interface 2 transmit data The CPU 21xSER 2 has got a communication processor with 2 RS232C interfaces The pin assignment of the inte...

Page 52: ...ev 05 45 Block diagram The following block diagram shows the basic hardware construction of the CPU 21x modules Processor System 200V interface circuitry System 200V backplane bus Memory Card Pulse Clock PU AG Voltage monitor DC 24V PW Power supply RESET RUN STOP MR ...

Page 53: ...B FC DB 1024 FB0 FB1023 1024 FC0 FC1023 2047 DB1 DB2047 Total addressing space input output 1024 1024Byte each 128 Byte for process image PA Process image Inputs 1024Bit I0 0 I127 7 Process image Outputs 1024Bit O0 0 O127 7 Combination with peripheral modules max no of modules 32 max digital I O 32 max analog I O 16 Addressable inputs outputs 1024 digital 128 128 analog Dimensions and weight Dimen...

Page 54: ...channel 8 32 with CP firmware version 1 7 4 and up Configurable connections 16 Dimensions and weight Dimensions WxHxD in mm 50 8x76x80 Weight 150g Electrical data VIPA 214 2BT02 VIPA 216 2BT02 Power supply DC 24V 20 4 28 8V Current consumption max 1 5A Dissipation power max 6W Potential separation 500V AC to Ethernet Status indicator LEDs like CPU 21x additionally with LEDs for the Ethernet sectio...

Page 55: ...mbination with peripheral modules max number of slaves 125 max number of input bytes 1024 max number of output bytes 1024 Dimensions and Weight Dimensions WxHxD in mm 50 8x76x80 Weight 150g Electrical data VIPA 214 2BP02 VIPA 216 2BP02 Power supply DC 24V 20 4 28 8V Current consumption max 1 5A Dissipation power max 5W Potential separation 500V AC to fieldbus Status indicator LEDs like CPU 21x add...

Page 56: ...D type jack CAN CAN interface Connector 9pin D type jack Network topology Linear bus active bus termination at both ends Medium Screened and drilled twisted pair cable Depending on environment screening may be omitted Transfer rate 10kBaud up to 1MBaud Overall length without repeater 1000m at 50kBaud max no of stations 126 stations Combination with peripheral modules max number of slaves 125 max n...

Page 57: ...integrated yes Dimensions and weight Dimensions WxHxD in mm 50 8x76x80 Weight 150g Electrical data VIPA 214 2BS02 VIPA 216 2BS02 Power supply DC 24V 20 4 28 8V Current consumption max 1 5A Dissipation power max 5W Potential separation Status indicator LEDs like CPU 21x additionally with LEDs for serial communication Adapters interfaces like CPU 21x additionally with 2x 9pin D type jack serial comm...

Page 58: ...Chapter 2 Hardware description Manual VIPA CPU 21x 2 28 HB103E Rev 05 45 ...

Page 59: ...embly and commissioning Principle of address allocation Project engineering and parameterization Deployment of MPI and MMC Operating modes and overall reset and firmware update Usage of test functions Topic Page Chapter 3 Deployment CPU 21x 3 1 Assembly 3 2 Start up behavior 3 3 Address allocation 3 4 Project engineering 3 6 Configuration of the CPU parameters 3 9 Project transfer 3 11 Operating m...

Page 60: ...nto plug in location 1 or 2 see figure below 1 2 4 3 PW SF FC MC CPU 216 DC 24V 1 2 RN ST MR X1 MMC R S X 2 3 4 VIPA 216 2BA01 M P I 2 PW SF FC MC CPU 216DP DC 24V 1 2 RN ST MR X1 MMC R S X 2 3 4 VIPA 216 2BP02 ER RD DE D P M P I 2 Clack For details on the assembly of System 200V modules please refer to the System 200V manual Order No VIPA HB97 1 CPU double width 2 CPU single width 3 Peripheral mo...

Page 61: ...r delivery the CPU is totally clear After a STOP RUN transition the CPU switches to RUN without application The CPU switches to RUN with the application located in the battery buffered RAM The battery is loaded directly via the integrated power supply and provides a buffer for up to 30 days If this time is exceeded the battery may be totally discharged and the battery buffered RAM is erased In thi...

Page 62: ...e additionally saved in a special memory area called the process image The process image is divided into two parts process image of the inputs PII process image of the outputs PIQ Peripheral area 0 127 128 1023 Process image 0 127 0 127 Inputs PII Outputs PIQ Digital modules Analog modules The process image is updated automatically when a cycle has been completed You may access the modules by mean...

Page 63: ...ut byte 1 Output byte 2 Output byte 3 Output byte 127 Output byte 0 Output byte 7 Output byte 8 Output byte 9 Output byte 1023 0 1 2 3 127 128 135 136 137 1023 analog digital PIQ 0 1 2 3 127 PII Plug in location 1 2 3 4 5 6 You may change the allocated addresses at any time by means of the Siemens SIMATIC Manager In this way you may also change the addres ses of analog modules to the range covered...

Page 64: ...the System 200V via the vipa GSD file in the hardware catalog is required To be compatible with the Siemens SIMATIC Manager you have to execute the following steps Start the hardware configurator from Siemens and include vipa_21x gsd from VIPA Configure CPU 315 2DP 315 2AF03 0AB00 V1 2 from Siemens and create a new Profibus subnet Attach the System VIPA_CPU21x to the subnet with Profibus Address 1...

Page 65: ...ith a new project and insert a profil rail from the hardware catalog Place at the 1st possible slot the CPU 315 2DP 6ES7 315 2AF03 V1 2 from Siemens If your CPU 21x provides a DP master you may now connect it to Profibus and include your DP slaves The System 200V modules have to be configured after project engineering of the CPU 21x as described below Create a Profibus subnet if not yet available ...

Page 66: ...y use the VIPA Green Cable to send the data serial by a peer to peer connection The VIPA Green Cable has the OrderNo VIPA 950 0KB00 and may only be used at MP 2 I interfaces of VIPA CPUs Please regard the notes about the Green Cable in chapter 1 Connect your PG to the CPU Transfer the project into the CPU by means of PLC Load into module in your project configuration tool Install an MMC and transf...

Page 67: ...erization of the Profibus section of the CPU 21xDP takes place via the parameterization dialog of the CPU 21xDP Per double click on the CPU 315 2DP you reach the parameterization win dow of your CPU 21x Via the different registers you may access all parameters of the CPU 315 2DP The parameters are those of the CPU 21x from VIPA Please regard that at this time not all the parameters are supported O...

Page 68: ...with T0 Number of S7Counters starting with C0 Protection Level of protection removable with password Time of Day Interrupts OB10 active execution start date time of day Cyclic Interrupts OB35 execution Cycle Clock Memory Scan Cycle monitoring time Scan Cycle load from communication OB85 Call up at I O access error Clock bit memory with memory byte no You may reach the parameterization window for t...

Page 69: ...or at the first and the last participant of a network or a segment Please take care that those participants with the terminating resistor are supplied with power during start up and operation Connect your PG resp PC with your CPU via MPI If your PG doesn t support MPI you may use the VIPA Green Cable to establish a point to point connection The Green Cable has the order number VIPA 950 0KB00 and m...

Page 70: ...at you may use the Green Cable exclusively at VIPA CPUs with MP 2 I interface Please regard the hints for deploying the Green Cable and the MP2 I jack in chapter Principles Start the SIMATIC Manager from Siemens Choose Options Configure PU PC interface The following dialog window appears where you may configure the used MPI interface Choose PC Adapter MPI possibly you have to add this first Click ...

Page 71: ...d stores the application program of the battery buffered RAM at the MMC The write command is controlled by means of the Siemens hardware configurator via PLC Copy RAM to ROM During the write operation the yellow MC LED of the CPU is blinking The transfer of the user application from the MMC to the CPU always takes place after an OVERALL_RESET The blinking of the yellow MC LED indicates the active ...

Page 72: ...RUN LED off STOP LED on During the transition from STOP to RUN a call is issued to the start up organization block OB 100 The length of this OB is not limited The processing time for this OB is not monitored The start up OB may issue calls to other blocks All digital outputs are disabled during the start up i e outputs are inhibited RUN LED blinks STOP LED off When the CPU has completed the start ...

Page 73: ...ndition The operating mode of the CPU is STOP Place the function selector on the CPU in position ST the S LED is on Overall reset Place the function selector in the position MR and hold it in this position for app 3 seconds The S LED changes from blinking to permanently on Place the function selector in the position ST and switch it to MR and quickly back to ST within a period of less than 3 secon...

Page 74: ...n completed At this point the CPU attempts to reload the parameters and the program from the memory card The lower LED without label blinks When the reload has been completed the LED is extinguished The operating mode of the CPU will be STOP or RUN depending on the position of the function selector The following approach deletes the internal RAM of the CPU completely and sets it back to the delive...

Page 75: ...e module indicates the firmware version You may display the current firmware version of your CPU via the SIMATIC Manager from Siemens To display the firmware version you go online with the CPU via your PG or PC and start the SIMATIC Manager from Siemens Via PLC Module status register General the current firmware version is evaluated and displayed Note The server stores always the latest two firmwa...

Page 76: ...to the corresponding reserved file name of the table Get the RUN STOP lever of your CPU in position STOP Turn off the power supply Plug the MMC with the firmware into the CPU Please take care of the correct plug in direction of the MMC Turn on the power supply After a short boot up time the alternate blinking of the LEDs SF and FC shows that the firmware file has been found on the MMC You start th...

Page 77: ...Power On Switch Stop LED SF and FRCE are blinking alternately Power Off Switch MR Update Config file s on MMC File s OK Product name ready with error All LEDs are on All LEDs are blinking CPU goes in STOP CPU goes in RUN FW Update Config SF FRCE MMC are blinking alternately 10 seconds passed n n n n n n y y y y y y Power Off Flowchart for firmware update ...

Page 78: ...r corrections to the program Note When using the test function Monitoring the PLC has to be in RUN mode The processing of states may be interrupted by means of jump commands or by timer and process related alarms At the breakpoint the CPU stops collecting data for the status display and instead of the required data it only provides the PG with data containing the value 0 For this reason jumps or t...

Page 79: ...to check the wiring and proper operation of output modules You may set outputs to any desired status with or without a control program The process image is not modified but outputs are no longer inhibited Control of variables The following variables may be modified E A M T Z and D The process image of binary and digital operands is modified independen tly of the operating mode of the CPU 21x When ...

Page 80: ...Chapter 3 Deployment CPU 21x Manual VIPA CPU 21x 3 22 HB103E Rev 05 45 ...

Page 81: ...bes Basics about a Twisted Pair network Project engineering of a CP communication ORG format for the communication with a foreign system Example Topic Page Chapter 4 Deployment of the CPU 21x 2BT10 with TCP IP 4 1 Industrial Ethernet in automation 4 2 ISO OSI reference model 4 3 Principles 4 6 Protocols 4 7 IP address and subnet 4 10 Network planning 4 12 Communication possibilities of the CP 4 15...

Page 82: ...net Plant computer PPS CAD Plant oriented control computer manufacturing stock production data PPS CAD Machine and control computer Peripheral systems machines CNC NC controllers PLC measuring systems Peripheral components sensor actuator regulator multiplexer operating consoles Industrial Ethernet is an electrical net based on shielded twisted pair cabeling or optical net based on optical fibre I...

Page 83: ...t layers The model simply specifies the tasks that the different layers must perform All current communication systems are based on the ISO OSI reference model which is defined by the ISO 7498 standard The reference model structures communication systems into 7 layers that cover different communication tasks In this manner the complexity of the communication between different systems is divided am...

Page 84: ...nning and at the end of every frame The security layer often also incorporates flow control and error detection functions The data security layer is devided into two sub levels the LLC and the MAC level The MAC Media Access Control is the lower level and controls how senders are sharing a single transmit channel The LLC Logical Link Control is the upper level that establishes the connection for tr...

Page 85: ...ntation layer This layer manages the presentation of the messages when different network systems are using different representations of data Layer 6 converts the data into a format that is acceptable for both communication partners Here compression decompression and encrypting decrypting tasks are processed This layer is also called interpreter A typical use of this layer is the terminal emulation...

Page 86: ...air network is based on a point to point scheme The network that may be established by means of this cable has a star topology Every station is connected to the star coupler hub switch by means of a separate cable The hub switch provides the interface to the Ethernet The hub is the central element that is required to implement a twisted pair Ethernet network It is the job of the hub to regenerate ...

Page 87: ... are available on all major systems At the bottom end this applies to simple PCs through to the typical mini computer up to mainframes For the wide spread of internet accesses and connections TCP IP is often used to assemble heterogeneous system pools TCP IP standing for Transmission Control Protocol and Internet Protocol collects a various range of protocols and functions TCP and IP are only two ...

Page 88: ... the network Then the network can use any IP address The TCP Transmission Control Protocol bases directly on the IP and thus covers the transport layer layer 4 of the OSI layer model TCP is a connection orientated end to end protocol and serves the logic connection between two partners TCP guarantees the correct sequence and reliability of the data transfer Therefore you need a relatively large pr...

Page 89: ...eives them as 20Byte package But for most of the applications the correct packaging is important Due to this you need another protocol above TCP This purpose is defined in the protocol RFC1006 The protocol definition describes the function of an ISO transport interface ISO 8072 basing upon the transport interface TCP RFC793 The basic protocol of RFC1006 is nearly identical to TP0 Transport Protoco...

Page 90: ...s Net ID Host ID Subnet mask and IPv4 address Net ID Subnet ID new Host ID A TCP based communication via point to point hub or switch connection is only possible between stations with identical Network ID and Subnet ID Different area must be connected with a router The subnet mask allows you to sort the resources following your needs This means e g that every department gets an own subnet and thus...

Page 91: ...he internet RFC1597 1918 reserves the following address areas Network class Start IP End IP Standard subnet mask A 10 0 0 0 10 255 255 255 255 0 0 0 B 172 16 0 0 172 31 255 255 255 255 0 0 C 192 168 0 0 192 168 255 255 255 255 255 0 The Host ID is underlined These addresses can be used as net ID by several organizations without causing conflicts for these IP addresses are neither assigned in the i...

Page 92: ...Telephone et Telegraph Amongst others this advisory committee has produced the provisions for the connection of industrial networks MAP to office networks TOP on Wide Area Networks WAN ECMA European Computer Manufacturers Association Has produced various MAP and TOP standards EIA Electrical Industries Association USA This committee has issued standard definitions like RS 232 V 24 and RS 511 IEC In...

Page 93: ...ble which at least corresponds to the category 5 What is the size of the area that must be served by the network How many network segments provide the best solution for the physical space interference related conditions encountered on site How many network stations SPS IPC PC transceiver bridges if required must be connected to the cable What is the distance between the different stations on the n...

Page 94: ... the same project refer to this object when they are configured as net knots They may then be selected directly Foreign devices are listed in this subnet as Other station during project engineering Due to different tasks of the stations or due to the expansion of your plant it may be necessary to create several nets Here you may create several subnets in one project and configure the stations easi...

Page 95: ...Siemens SIMATIC Manager or via a minimum project where the IP parameters are defined This project can be transferred to the CPU via MMC or MPI CP CPU Connections configured with NetPro Ethernet Application program SEND RECEIVE System 200V CPU 21xNET Frames CPU 21xNET Ethernet Additional interfaces Daten HTBs Frames Frames System 300S CPU 31xSN NET Switch The CP supports the following communication...

Page 96: ...cast group SEND RECEIVE Connection partner are stations at the counter side Specified connection partner Every station configured in the Siemens SIMATIC Manager is entered in the list of connection partners By setting an IP address and a subnet mask these stations are uniquely specified Unspecified connection partner You may also set an unspecified connection partner Here the connection partner ma...

Page 97: ... is also an option for part specified connections The part specifications happens via the setting of the port An IP address is not required Depending on the connection the following operating modes are available SEND RECEIVE The SEND RECEIVE interface allows the program controlled com munication to any partner station via a configured connection Here the data transfer happens by call from your use...

Page 98: ...tive and passive supports unspecified connection partner UDP connections SEND and RECEIVE The transfer of the telegrams is not acknowledged i e the loss of messages is not recognized by the send block UDP Broadcast connection SEND UDP Multicast connection SEND and RECEIVE Data block length max 64kByte max 2KByte at UDP VIPA handling blocks For connection commands at the PLC AG_SEND FC5 AG_RECEIVE ...

Page 99: ...0 V1 2 The CP of the CPU 21xNET is always configured virtually as 4 th module at the standard bus as CP343 1 343 1EX11 from Siemens To be able to address the modules they have to be projected in the hardware configurator from Siemens in form of a virtual Profibus system The full functionality of the System 200V modules is provided by inclusion of a GSD file from VIPA Install your System 200V with ...

Page 100: ... parameters by means of a DHCP server Depending of the chosen option the DHCP server is to be supplied with MAC address equipment name or client ID The client ID is a numerical order of max 63 characters The following characters are allowed hyphen 0 9 a z A Z Confirm with Assign Directly after the assignment the CP is online reachable using the set IP parameters Start Siemens SIMATIC Manager with ...

Page 101: ...quence starting from slot 1 Save your project The link up between the stations happens with the graphical interface NetPro Start NetPro by clicking on a network in your project res on connections in the CPU directory Connections 5 CPU 315 2 For the project engineering of connections connected stations are presumed To link up stations point on the colored net mark of the according CP with the mouse...

Page 102: ... For this exclusively the VIPA handling blocks AG_SEND FC5 and AG_RECV FC6 are used The blocks are part of the VIPA library that is included in the consignment as CD SW830 Specify the according CP via the parameters ID and LADDR by calling FC5 res FC6 There are 3 possibilities to transfer your project into the CPU Transfer via MPI Transfer via MMC using a card reader Transfer via CP Minimal projec...

Page 103: ...ager and the hardware configurator from Siemens is required Copy the delivered VIPA GSD file VIPA_21x gsd into your GSD directory siemens step7 s7data gsd Start the hardware configurator from Siemens Close all projects Choose Options Install new GSD file Type VIPA_21x gsd The modules of the System 200V from VIPA are now integrated in the hardware catalog and may be configured To be compatible to S...

Page 104: ...00V Module CPU 21xNET DI DO DIO AI AO FM DP Mastersystem Profibus Adr 1 Slot 0 1 2 3 4 5 6 7 8 9 10 11 3 2 Start the SIMATIC manager from Siemens and create a new project Insert a new System 300 station via Insert Station SIMATIC 300 station Activate the station SIMATIC 300 and open the hardware configurator by clicking on Hardware Configure a rack Simatic300 Rack 300 Rail For all CPUs 21x from VI...

Page 105: ...ress and Subnet mask and choose your Subnet if wished parameterize the CPU 315 2DP Now you have to create a new Profibus subnet with Profibus address 1 Attach the System VIPA_CPU21x to the subnet The respective entries are located in the hardware catalog at PROFIBUS DP Additional Field Devices IO VIPA_System_200V Assign Profibus address 1 to this slave Place the VIPA CPU 21xNET that you want to de...

Page 106: ...ns or Siemens SIMATIC S5 Station The following properties are characterizing a communication connection Bi directional data transfer Send and receive on one connection Both participant have equal rights i e every participant may initialize the send res receive process event controlled Except of the UDP connection at a communication connection the address of the communication partner is set via the...

Page 107: ...king on a net in the Siemens SIMATIC Manager or on connections within the CPU The environment of NetPro has the following structure 1 Graphic net view All stations and networks are displayed in a graphic view By clicking on the according component you may access and alter the concerning properties 2 Net objects This area displays all available net objects in a directory view By dragging a wanted o...

Page 108: ...munication components This displays the communication components that are available in your CPU For the 21xNET CPUs are configured as CPU 315 2DP the internal components do not show the CP Due to this the CP that is included in the 21xNET CPU must be configured as external CP at slot 4 The CP is then also shown in NetPro as external CP in the station 4 CP The CP must always be configured as Siemen...

Page 109: ...ion opens This dialog window is the link to your PLC program Here you may adjust the Local ID and evaluate the LADDR Both are parameters that must be given to your PLC application when using the FC 5 and 6 AG_SEND AG_RECEIVE Please do always use the VIPA FCs that are delivered with the SW830 as a library Note Please regard that a CP depending ID is assigned to the connections of the SEND RECEIVE i...

Page 110: ... Broadcast stations UDP specified Port Broadcast addr SEND All Multicast stations UDP specified Port Multicast group SEND RECEIVE A connection is specified by the local and partner connection end point At the project engineering of connections ports TSAPs must be congruent crosswise Depending on the protocol the following parameters define a connection end point IP address Station A IP address Sta...

Page 111: ...o be send to all available broadcast participants Please regard that the CP may exclusively receive broadcast telegrams The reception of user data via broadcast is not possible Per default broadcasts that are only serving the Ethernet communication like e g ARP Requests Search MAC IP address are received and accordingly processed For the identification of the broadcast participants within the net ...

Page 112: ...SEND FC5 This block transfers the user data from the data area given in SEND to the CP specified via ID and LADDR As data area you may set a PA bit memory or data block area When the data area has been transferred without errors order ready without error is returned AG_RECV FC6 The block transfers the user data from the CP into a data area defined via RECV As data area you may set a PA bit memory ...

Page 113: ...ed the receive data completely The following illustration shows a possible sequence for the FC blocks together with the organizations and program blocks in the CPU cycle OB Communication connection Communication connection Communication connection PIO write PII read User program AG_SEND AG_RECV AG_RECV AG_SEND AG_SEND AG_RECV CPU cycle The FC blocks with concerning communication connection are sum...

Page 114: ... ready without error at DONE 1 1 Order ready with error STATUS Output WORD Status message returned with DONE and ERROR More details are to be found in the following table By means of AG_RECV the data received from the CP are transferred to the CPU Parameter Declaration Type Description ID Input INT Connection number 1 16 identical with ID of NetPro LADDR Input WORD Logical basic address of the CP ...

Page 115: ...to process received data fast enough res has no receive resources reserved 0 1 8304h The connection is not established The send command shouldn t be send again before a delay time of 100 ms 0 1 8304h The connection is not established The receive command shouldn t be send again after a delay time of 100 ms 0 1 8311h Destination station not available with the defined Ethernet address 0 1 8312h Ether...

Page 116: ...91h Module start address not within double word grid 0 0 1 8092h ANY reference contains type setting unequal BYTE 0 1 80A0h Negative acknowledgement at reading the module 0 0 1 80A4h reserved 0 0 1 80B0h Module doesn t recognize record set 0 0 1 80B1h The length setting in parameter LEN is invalid 0 0 1 80B2h reserved 0 0 1 80C0h Record set not readable 0 0 1 80C1h The set record set is still in p...

Page 117: ...abled RS485 plug for the MP2 I jack of the CPU and a RS232 res USB plug for the PC Per default your CPU has the MPI address 2 Choose Options Set PG PC interface in the menu adjust MPI transfer parameter and address Set the PC COM port and the transfer rate 38400Baud at Local port MPI programming cable STEP7 from Siemens MPI net Termination Termination Transfer via Green Cable serial communication ...

Page 118: ...uires that the CP is available online i e you assigned an IP address and subnet mask via a hardware configuration and the project engineering PC is in the same IP number circle Establish a connection between project PC and CPU via Ethernet using the twisted pair slot Adjust the following setting in the SIMATIC Manager at Options PG PC interface TCP IP Network card Protocol RFC 1006 Now you may acc...

Page 119: ...write Check source and destination areas Check if the right CP is selected in the route Enlarge the receive res send buffer defined via the ANY pointer Is the complete data block send at ISO on TCP Check the LEN parameter at AG_SEND Set the receive res send buffer defined via the ANY pointer to the required size The CP supports the Siemens NCM diagnostic tool The NCM diagnostic tool is part of the...

Page 120: ...connections there is an adjusted object structure in the navigation area The information area at the right side always shows the result of the navigation function you chose in the navigation area Navigation area Information area 4 A diagnostic always requires a online connection to the CP you want to control For this click on at the symbol bar The following dialog window appears Set the following ...

Page 121: ...ailable via the menu and the symbol bar Note Please always control the preconditions for an operative communication using the check at the beginning of this chapter For the aimed diagnostic deployment the following approach is convenient Start diagnostic Open the dialog for the online connection with enter connection parameters and establish the online connection with OK Identify the CP and check ...

Page 122: ...fier BYTE 1 x ERW identifier BYTE 1 255 Start address HILOWORD 0 y Length HILOWORD 1 z The following table contains a list of available ORG formats The length must not be entered as 1 FFFFh ORG identifier 01h 04h CPU area DB MB EB AB ORG identifier 01h 02h 03h 04h Description Source destination data from into data Block in main memory Source destination data from into flag memory area Source desti...

Page 123: ...where it is saved Length Significance Length of the source destination data block in bytes Length of the source destination data block in words counter cell 1 word Length of the source destination data block in words counter cell 1 word ORG identifier 81h FFh To transfer data blocks of the number range 256 32768 you may use the ORG identifier 81h FFh For the setting of a DB No 255 needs a length o...

Page 124: ...te only if error no 0 Request telegram Remote Station Acknowledgement telegram CP System ID S5 Word System ID S5 Word Length Header 10h Byte Length Header 10h Byte ID OP Code 01h Byte ID OP Code 01h Byte Length OP Code 03h Byte Length OP Code 03h Byte OP Code 05h Byte OP Code 06h Byte ORG block 03h Byte Ackn block 0Fh Byte Length ORG block 08h Byte Length Ackn block 03h Byte ORG identifier Byte Er...

Page 125: ... required to utilize the communication functions in the programs of the PLCs The minimum technical equipment required for the example is as follows Hardware 2 CPUs 21x 2BT10 from VIPA 1 PC or PG with Twisted Pair Ethernet connection Communication line 3 bus cables 1 Swich Hub Addresses 2 IP Addresses and subnet masks for 2 CPs Software package SIMATIC Manager from Siemens V 5 1 or higher SIMATIC N...

Page 126: ...ata byte DBB 0 in DB 11 is used as message counter It is only incremented if the preceding transmit command was processed correctly completed without error The remaining data words DBB 2 to DBB 32 can be used for the transfer of user data The receiving station stores the data in DB12 DBB 0 to DBB 31 Using NetPro an active SEND RECEIVE connection with ID 1 is to be configured for the CP This Connec...

Page 127: ...ns CPU 315 2DP with the order no 6ES7 315 2AF03 0AB0 V1 2 which is to be found at SIMATIC 300 CPU 300 CPU 315 2 DP 6ES7 315 2AF03 0AB0 If needed parameterize the CPU 315 2DP Configure in deputy of your CP the CP 343 1 343 1EX11 from Siemens at slot 4 to be found at SIMATIC 300 CP 300 Industrial Ethernet CP 343 1 Set IP address subnet mask and gateway at CP properties Here it is not necessary to co...

Page 128: ...315 2 DP MPI CP 343 1 Station 1 Insert new connection A dialog window appears where you can select the connection partner and the type of the connection Configure the following connection New connection Connection TCP connection Connection partner Station 2 CPU 315 2 Properties TCP connection ID 1 ID and LADDR are parameters that you have to define in your PLC program if using FC5 AG_SEND and FC6 ...

Page 129: ... bit memory ID 1 Connection number LADDR W 16 110 Module address SEND P DB11 DBX0 0 BYTE 100 Send buffer area DB11 LEN 32 send 32 Byte 16 Words from DB11 DONE M10 1 ERROR Senderror Temporary error bit memory STATUS MW12 Order res connection state U M 10 1 Send ready SPBN nDon U M 10 1 Send ready R M 10 0 Set back init U Senderror At send error SPB nDon Don t raise send counter L DB11 DBW 0 Send co...

Page 130: ...anager and execute the following steps to monitor the transmit job PLC Monitor Modify Variables In the column Operand you have to enter the respective data block number and the data word DB11 DBB 0 31 Establish a connection and click monitor You may enter user data starting with DBB2 Place the cursor on modify value and enter the value you wish to transfer e g W 16 1111 The button transfers the mo...

Page 131: ...ld example The chapter contains a description of the principles of the twisted pair network configuration by means of WinNCS along with an example a test program for TCP IP connections Topic Page Chapter 5 Deployment CPU 21x 2BT02 with H1 TCP IP 5 1 Principles 5 2 Network planning 5 7 Ethernet and IP addresses 5 9 Project Engineering of the CPU 21x 2BT02 5 11 Configuration example CPU 21x 2BT02 5 ...

Page 132: ...network that may be established by means of this cable has a star topology Every station is connected to the star coupler hub switch by means of a separate cable The hub switch provides the interface to the Ethernet The hub is the central element that is required to implement a twisted pair Ethernet network It is the job of the hub to regenerate and to amplify the signals in both directions At the...

Page 133: ... delay time has expired The internal CP of the CPU 21x 2BT02 is directly connected to the CPU 21xNET by means of a Dual Port RAM The Dual Port RAM is divided into 4 equal segments called page frames These 4 page frames are available at the CPU as standard CP interface Data is exchanged by means of standard handler blocks SEND and RECEIVE H1 and TCP IP communication is controlled by means of connec...

Page 134: ...d transfers the data into the data buffer by means of the background communication function SEND_ALL Then the CP creates an H1 frame and transfers this to the partner station as soon as this has enabled reception When the partner station has received the H1 frames the CP receives an acknowledgment receipt Next it uses the background communication function RECEIVE_ALL to transfer the status of the ...

Page 135: ...using the standard handler blocks These application programs exchange data by means of the TCP or UDP protocols of the transportation layer These themselves communicate with the IP protocol of the Internet layer IP The main purpose of IP is to provide the addressing of data packets This means that IP has the same function as an envelope has for a letter The address is used by the network to determ...

Page 136: ... 6 HB103E Rev 05 45 Deployment under TCP IP or H1 TCP IP H1 CP 143 H1 TCP IP Visualization and shop floor data collection via DDE server VIPA Rack 135U System 200V CPU 21x NET System 200V CPU 21x NET Hub VIPA Rack 135U CP 143 H1 TCP IP Example for H1 or TCP IP application ...

Page 137: ...lephone et Telegraph Amongst others this advisory committee has produced the provisions for the connection of industrial networks MAP to office networks TOP on Wide Area Networks WAN ECMA European Computer Manufacturers Association Has produced various MAP and TOP standards EIA Electrical Industries Association USA This committee has issued standard definitions like RS 232 V 24 and RS 511 IEC Inte...

Page 138: ...o 0 6mm What is the size of the area that must be served by the network How many network segments provide the best solution for the physical space interference related conditions encountered on site How many network stations SPS IPC PC transceiver bridges if required must be connected to the cable What is the distance between the different stations on the network What is the expected growth rate a...

Page 139: ...gned by the IEEE Committee The last 3Byte may be defined as required The network administrator determines the Ethernet address The broadcast address to transmit messages to all stations on the network always is FFFFFFFFFFFFh The IP address is a 32Bit address that must be unique within the network The IP address consists of 4 numbers that are separated by a dot The structure of an IP address is as ...

Page 140: ...le is first turned on to calculate a unique IP address according to the following formula 00 20 D5 80 2D 7D Ethernet address hex dec 213 128 45 125 IP address VIPA specific Note A relationship between the Ethernet address and the IP address only exists when the module is turned on for the first time You may always use the function CP Init in WinNCS to assign a different address Attention The origi...

Page 141: ... CPs are listed by their IP address If your target CP is inside your IP circle the CP can online be projected Otherwise you have to change the IP address by using Change IP After that click to Search stations Please regard If you change the IP Address of the CP by using Change IP the configuration inside the CP is cleared Via double click on the wanted station the according project is imported and...

Page 142: ...ivery address Establish a connection via Set the CP into software STOP via and start the transfer into the CP using If a request for a NCS file appears you forgot to choose the CP in the network window Return to the last step choose the correct setting and start the transfer again Since the data are stored unsecured in the RAM you have to store these durable in the Flash ROM using With each furthe...

Page 143: ...rameterize the CPU res the modules The parameter window is opened at double click on the depending module Attach the System VIPA_CPU21x to the subnet The respective entries are located in the hardware catalog under PROFIBUS DP Additional Field Devices IO VIPA_System_200V Assign Profibus address 1 to this slave Place the VIPA CPU 21x 2BT02 that you want to deploy at the 1st slot of the configurator...

Page 144: ...ansfer your project into the CPU to b Transfer via MMC Read access at the MMC always happens after an OVERALL_RESET To write onto the MMC you either use PLC Copy RAM to ROM or a MMC reading device from VIPA Order no VIPA 950 0AD00 Please take care that your recent project engineering is stored in the root directory and has the file name S7PROG WLD During the write process the yellow MMC LED of the...

Page 145: ...n configuration of connection modules transfer configuration data into the CP This is where the address and other identification parameters of a station are defined Under Ethernet you insert a new station into the network window and enter the configuration data for your station into the parameter window The basic CP configuration determines the behavior of your station on the network CP configurat...

Page 146: ...ol you may configure H1 or TCP IP con nections by selecting the symbol of the station and inserting configuring the respective connection H1 Connection TCP IP Connection When all the required connections have been configured you have to transfer the parameters to the CP This operation is available from the Module transfer functions of WinNCS For transferring the configuration data please activate ...

Page 147: ...ddress following this rules 00 20 D5 80 2D 7D Ethernet address hex dec 213 128 45 125 IP address VIPA specific Choose IP protocol in the Protocol window and type the determined IP address Confirm your entry with OK Now switch to the window network and click the according station Use the right mouse button and choose Download Your project will now be directly transferred into the RAM of the CP Sinc...

Page 148: ...the CPU21x 2BT02 requires app 15s for the boot procedure If the PLC should issue a request for synchronization during this time an error is returned in the configuration error byte PAFE This message is removed when the CP module has completed the boot process The timer in this block is initially set to 20s Processing will be stopped if the synchronization is not completed properly within this peri...

Page 149: ...he CP SFC 237 Recv_All Initialization of the data reception from the CP to the CPU SFC 238 Control1 Control for page frame communication with type ANZW Pointer and parameter IND For the transfer of your user application and the hardware configuration you have the following possibilities a Transfer via MPI b Transfer via MMC Connect your PU res PC via MPI with your CPU If your programming device ha...

Page 150: ... you may deploy the Green Cable exclusively with the MP 2 I interfaces of VIPA CPUs Approach Start the SIMATIC manager from Siemens Choose Options Set PG PC Interface The following dialog window appears where you may configure the MPI interface you want to use Choose the PC Adapter MPI from the list possibly you may have to add it first Click on Properties The following two sub dialogs you may con...

Page 151: ...he MMC and use a write command to transfer the content of the battery buffered RAM to the MMC Start the write command in the hardware configurator from Siemens via PLC Copy RAM to ROM During the write process the yellow MC LED of the CPU is blinking Simultaneously a write process into the internal Flash of the CPU is executed Control of the transfer process After a write process on MMC an accordin...

Page 152: ...IC manager from Siemens Via the register Memory you reach the window that shows the current memory expansion of the CPU Access to the internal flash Like shown further above the content of the battery buffered RAM is transferred to the MMC and into the internal flash via a write command The write command is started in the hardware configurator from Siemens via PLC Copy RAM to ROM A read access to ...

Page 153: ...ish a connection via Now you communicate via the IP address given under CP Init The CP has to be in RUN Ensure this via If the CP is in Idle Mode the synchronization with the CPU has failed Please control the SYNCHRON block in OB 100 For control you may monitor the summary status of the TCP connections via Now the project engineering of the CPU and the CP is finished Control project engineering ...

Page 154: ...cation functions in the applications of the programmable logic controllers The minimum technical equipment required for the examples is as follows Hardware 2 CPU 21x 2BT02 from VIPA 1 PC or PG with twisted pair Ethernet connection Communication line 3 bus cables 1 Mini Switch CM 240 Software package Configuration software WinNCS from VIPA Programming package WinPLC7 from VIPA or Siemens SIMATIC Ma...

Page 155: ...s only incremented if the preceding send command was processed correctly completed without error The remaining data words DW1 to DW15 may be used for the transfer of user data The receiving station stores the data in DB12 DW 0 to DW 15 SEND is configured with job number A No 1 and with a page frame offset SSNR 0 RECEIVE is configured with job number A No 11 and a page frame offset SSNR 0 The sourc...

Page 156: ...meters that have to be defined and is divided into the following 3 parts Basic CP configuration Configuration of connection blocks Transfer of configuration data into the CP Insert two stations and select the following settings Station 1 Station 2 Request the required station addresses from your system administrator If necessary you may enter additional settings into the configuration windows Deta...

Page 157: ...1 connection by inserting an H1 transport connection below the stations by means of and entering the following parameters for the stations Station 1 Send to Adr 0020D5000002 Station 2 Receive from Station 1 Station 1 Receive from Station 2 Station 2 Send to Adr 0020D5000001 Connection configuration H1 connections ...

Page 158: ...figure your TCP IP connection by inserting a TCP connection below the stations by means of and entering the following parameters for the stations Station 1 Send to IP 172 16 129 149 Station 2 Receive from Station 1 Receive from Station 1 Send to IP 172 16 129 148 Save your project TCP IP connections ...

Page 159: ...onfiguration online via the network into the respective CPUs Create the system structure as shown above and start both CPUs For the data transfer please activate the online functions and click on the button INIT Now choose IP protocol in the Protocol window and type the according IP address Confirm with OK Network window Transferring the configuration data into the CPUs ...

Page 160: ...ject into the CPU RAM you should save the project additionally in the Flash ROM Otherwise the data will get lost at power off Therefore you are searching the according station in the network window Click on the right mouse button and choose Flash The RAM data are now transferred to the Flash ROM Repeat this procedure above for station 2 and don t forget to save the project to Flash ROM This conclu...

Page 161: ...C program is used in both CPUs Synchronization of the interfaces In the start up OB OB100 of the CPU the interface used on the CP has to be synchronized by means of the handler block SYNCHRON OB100 verifies that the synchronization procedure was completed without errors If an error is detected the error number is entered into MB200 Operation block OB100 PLC programs for the CPUs OB100 Interface Sy...

Page 162: ...eiving of the data The initiation of transmission in station 1 is issued by a SEND handler block called in FC1 The partner station answers with RECEIVE FC2 By means of SEND_ALL the data will be send and received by the partner with the command RECEIVE_ALL Cycle operation block OB1 FC1 SEND FC2 RECEIVE OB1 Cycle FC 1 SEND FC 2 RECEIVE ...

Page 163: ...DB12 are identical in design The data transfer is realized via MPI If your programming device has no MP interface you may also use the Green Cable VIPA 950 0KB00 from VIPA The Green Cable may only be used at the VIPA CPUs of the Systems 100V 200V 300V and 500V Please regard the notes about the Green Cable in chapter 1 Connect your PG with the CPU With PLC Load to module in your configuration tool ...

Page 164: ...odules is established This is indicated by the COMM LEDs Start the Siemens SIMATIC manager and execute the following steps to monitor the transmitting job PLC Monitor Modify Value In the Operand column you enter the respective data block number and the data word DB11 DW0 15 Establish a connection and click Monitor You may enter user data starting with DW1 Place the cursor on Modify value and enter...

Page 165: ... of the CPU 21x 2BT02 including the CP amounts to app 18s With every status change from STOP to RUN as well as from RUN to STOP back to RUN the CPU 21x 2BT02 performs a cold warm reset All connections are cleared and reestablished after the CP has rebooted Three different reasons can cause these status change requests Resynchronization of a CP by the SYNCHRON HTBs of the CPU warm start after it ha...

Page 166: ... of 512Byte per job for a block size of 255 refer also to block size RECEIVE jobs that are mapped to the communication type broadcast cannot receive all data messages from a fast cyclic transmitter Messa ges that have not been received are discarded The default length 1 0xFFFF is not permitted for the ORG format length i e the user has to define the exact length of the data that will be received J...

Page 167: ...s place a load on a CP When resource bottlenecks are encountered the CP can also initiate the termination of connections A station transmits two or more messages and the receiver did not have a chance to accept them Then the reception of the unknown data type would cause collisions in the receiver However the CP prevents this The PLC application requires a defined size for the reception of data an...

Page 168: ...AB ORG identifier 01h 02h 03h 04h Description Source destination data from into data block in main memory source destination data from into flag area Source destination data from into process image of the inputs PAE source destination data from into process image of the outputs PAA ERW identifier DBNR valid range DB from where the source data is retrieved or to where the destination data is trans ...

Page 169: ...est message System identifier S 5 Header length 16d Ident OP code 01 OP code length 03 OP Code 03 ORG block 03 ORG block length 08 ORG identifier ERW identifier Start address H L Length H L Dummy block FFh Dummy block length 02 64K data only if error no 0 Acknowledgment message System identifier S 5 Header length 16d Ident OP code 01 OP Code length 03 OP Code 06 Ack block 0Fh Ack Block length 03 E...

Page 170: ...on data With wildcard lengths the actual length of the data is retrieved from the respective TRADA header With the TRADA functionality the following header will precede a SEND job and it is analyzed by the RECEIVE function Length of the user data The length file contains the number of bytes in a data block If you are synchronizing with a block size of 6 512Byte the length is entered in words SEND ...

Page 171: ...n to the test program For this purpose please start TCPTEST EXE The test program is executed and displays the following window The menu has the appearance of tab sheets The respective dialog window can be displayed by left clicking with the mouse Tab sheets Connect Window containing the status of the connections and the local IP address ReadA Configuration window for READ AKTIV connections FETCH W...

Page 172: ...spective connection Save Conn5 Save Win Pos Saves the current window position Show Hints When you place the cursor on an input field or on a button a hint is displayed if you have selected Show Hints This window displays the status of all the connections that can be configured in this program Here you can recognize in one screen which connections are stable and which are unstable When a status cha...

Page 173: ... for remote and local Time 10mSec Definable interval for cyclic read operations OrgKennung Type of the source block DBNr Number of the source block AnfAdr Start address of the source block Len Word length of the source block Tick box UDP This tick mark selects unsecured communications No vir tual connections are used by unsecured communication links In this manner you can only display UDP messages...

Page 174: ...cyclic write operations The minimum timer value for cyclic writes is 5 OrgKennung Type of destination block DBNr Number of the destination block AnfAdr Start address of destination block Len Word length of destination block Tick box UDP This tick mark selects unsecured communications No virtual connections are used by unsecured communi cation links In this manner you can only display UDP messages ...

Page 175: ...can only display UDP messages AutoListen If you select AutoListen the program goes to receive mode Every message received from the remote CP is displayed in the list Interruptions of the connection are detected and displayed however the program remains ready to receive data As soon as the connection is reestablished messages will again be listed Buttons Listen Any received messages are entered int...

Page 176: ...erations The minimum timer value for cyclic writes is 5 Tick box UDP This tick mark selects unsecured communications No virtual connections are used by unsecured communi cation links In this manner you can only display UDP messages Buttons Connect The connection is established and prepared for the write operation Send this Data entered into the ASCII field is transferred to the CP via the connecti...

Page 177: ...status window Monitored may be Hardware Stop Run Stop switch at the CP is in stop position The CP must not be remoted via the test program Hardware Run Run Stop switch at the CP is in run position The CP may be remoted via the test program Software Stop Run Stop switch at the CP has to be in run position The CP has been set to stop by means of SetStop Software Run Run Stop switch at the CP has to ...

Page 178: ...Chapter 5 Deployment CPU 21x 2BT02 with H1 TCP IP Manual VIPA CPU 21x 5 48 HB103E Rev 05 45 ...

Page 179: ...apter ends with information to the operating modes of the DP master and to the commissioning The following text describes Principles of Profibus DP Proyect engineering of a CPU 21xDPM Deployment of the MPI interface and MMC Operating modes of the DP master Commissioning Topic Page Chapter 6 Deployment of the CPU 21xDPM 6 1 Principles 6 2 Project engineering CPU with integrated Profibus DP master 6...

Page 180: ...m the various slaves and writes new output information into the slaves Profibus distinguishes between active stations masters and passive stations slaves Master equipment Master equipment controls the data traffic on the bus There may be also several masters at one Profibus This is referred to as multi master ope ration The bus protocol establishes a logical token ring between the intelli gent dev...

Page 181: ...master slave data transfer is divided into parameterization configura tion and data transfer phases Before a DP slave is included into the data transfer phase the master verifies during the parameterization and confi guration phase whether the specified configuration agrees with the effec tive configuration This verification process checks the device type format and length as well as the number of...

Page 182: ...aveguide system uses monochromatical light impulses The optical waveguide is totally independent from disturbing voltage from other machines An optical waveguide system is built up linear Every module has to be connected with two links one input link and one back You don t need to terminate the last module For the structure is a linear one connecting and disconnecting stations is not free of conse...

Page 183: ... your disposal by including the GSD file into the SIMATIC manager To be compatible with the SIMATIC manager from Siemens you have to execute the following steps for the System 200V Project the CPU 315 2DP with the DP master system address 2 Add the Profibus slave VIPA_CPU21x with address 1 Insert the CPU type 21xDPM at the 1 st slot of the slave system Include directly plugged in peripheral module...

Page 184: ...ent of the Profibus DP slaves of the Systems 100V 200V and 300V from VIPA you have to include the modules into the hardware catalog by means of the GSD file from VIPA The following section describes the single steps of the project engineering Create a new project System 300V Add a profile rail from the hardware catalog In the hardware catalog the CPU with Profibus master is listed as Simatic300 CP...

Page 185: ...0V Assign the Profibus address 1 to this slave Place the CPU 21x 2BM02 from VIPA at the 1st slot in your configurator Choose it in the hardware catalog under VIPA CPU21x Now the project engineering of your Profibus DP master and your CPU is finished The following shows how to include the directly plugged in System 200V modules To include the modules plugged in at the VIPA bus you drag the accordin...

Page 186: ... concerning module For the project engineering of Profibus DP slaves coupled at the DP master of the CPU 21xDPM you approach analog to the DP200V system Search the concerning Profibus DP slave in the hardware catalog and drag drop it in the subnet of your master Assign a valid Profibus address to the DP slave 3 CPU 21xDPM central DP Slaves decentral PB Addr 1 PB Addr 3 125 PB Addr 2 DP200V 315 2DP...

Page 187: ...ivated terminating resistors are always supplied with voltage during start up and operation Connect your PU or your PC via MPI with the CPU If your programming device has no MPI interface you may use the VIPA Green Cable to establish a serial point to point connection from your PC to MPI The Green Cable has the order no VIPA 950 0KB00 and may only be used with the VIPA CPUs with MP 2 I interface P...

Page 188: ... The Green Cable is a green connection cable manufactured exclusively for the deployment at VIPA CPUs with MP 2 I interface Please regard the notes about the Green Cable in chapter 1 Start the SIMATIC manager from Siemens Choose Options Set PG PC interface The following dialog window appears where you may configure the wanted MPI interface Choose PC Adapter MPI from the list if necessary you have ...

Page 189: ...ry buffered RAM is transferred to the MMC by means of a WRITE command The write command is started from the hardware configurator from Siemens via PLC Copy RAM to ROM During the writing process the yellow MC LED of the CPU is blinking The transfer of the user application from the MMC into the CPU always takes place after an OVERALL_RESET The blinking of the yellow LED MC on the CPU marks the trans...

Page 190: ...hes to RUN and monitors a parameterization error via the IF LED Now the DP master is linked up at the bus with the following default bus parameters Default Bus Parameter Address 1 Transfer rate 1 5MBaud In the RUN mode the RUN and the DE LEDs are blinking Now data may be exchanged If an error occurs like e g DP slave failure this is shown at the DP master via the ERR LED and an alarm is initialize...

Page 191: ...ehavior is following The following picture shows the approach once more 3 Sec R S PW SF FC MC RN ST MR 3Sec RN ST MR RN ST MR RN ST MR R S PW SF FC MC R S PW SF FC MC R S PW SF FC MC When the CPU is delivered it has been reset After a STOP RUN transition the CPU switches to RUN without program After NETZ_EIN power on the DP master tries to get parameters from the CPU For the master doesn t get val...

Page 192: ...fer of max 30 days Is this time exceeded there may be a total discharge of the battery and the battery buffered RAM is erased Now the CPU proceeds an overall_reset If a MMC is plugged in the application on it is transferred into the RAM and the DP master is supported with parameters If these are valid the DP master links up to the bus with those parameters If they are not valid the master starts w...

Page 193: ... CPU 21xDPM concludes the chapter This chapter contains a description of the principles of Profibus DP configuration and parameterization of a CPU 21xDP diagnostic and status messages assembly and commissioning communication example Topic Page Chapter 7 Deployment of the CPU 21xDP 7 1 Principles 7 2 CPU 21xDP configuration 7 7 DP slave parameters 7 12 Diagnostic functions 7 15 Internal status mess...

Page 194: ... reads the input values from the various slaves and writes new output information into the slaves Profibus distinguishes between active stations masters and passive stations slaves Master equipment Master equipment controls the data traffic on the bus There may be also several masters at one Profibus This is referred to as multi master operation The bus protocol establishes a logical token ring be...

Page 195: ...e master and the slaves assigned to the respective master When you configure the system you define which slaves are assigned to a certain master You may also specify which DP slave is included in the cyclic exchange of application data and which ones are excluded The master slave data transfer is divided into parameterization con figuration and data transfer phases Before a DP slave is included in...

Page 196: ...ut data from the PO are transferred to the output modules After the data exchange is completed the PI is transferred to the sending buffer buffer send and the content of the input buffer buffer receive is transferred to PO In one Profibus cycle the master contacts all its slaves with a data ex change There the memory areas assigned to the Profibus are written resp read Afterwards the DP master tra...

Page 197: ...quired together and they are transmitted together Byte wise consistency is sufficient for the processing of digital signals Where the length of the data exceeds a single byte e g analog values the data consistency must be expanded Profibus guarantees consistency for the required length of data Please ensure that you use the correct method to read consistent data from the Profibus master into your ...

Page 198: ...eguide system uses monochromatically light impulses The optical waveguide is totally independent from disturbing voltage from other machines An optical waveguide system is built up linear Every module has to be connected with two links one input link and one back You don t need to terminate the last module For the structure is a linear one connecting and disconnecting stations is not free of conse...

Page 199: ...rization of the directly plugged in System 200V modules takes place via the SIMATIC manager from Siemens in form of a virtual Profibus system For the Profibus interface is software standardized VIPA is able to guarantee the availability of the complete functions of the System 200V modules by including the GSD file vipa_21x gsd in the manager To be compatible with the SIMATIC manager from Siemens y...

Page 200: ...ansfer between PG and CPU The hardware configurator is part of the SIMATIC manager from Siemens for project engineering The modules parameterizable via this tool are in the hardware catalog of this tool For the deployment of the Profibus DP slaves from VIPA you have to include the modules via an GSD file from VIPA in the hardware catalog The installation of a GSD file requires the unzipped version...

Page 201: ...he SIMATIC manager from Siemens you have to include the CPU 21xDP explicitly like mentioned above Add the System VIPA_CPU21x to your subnet The module is to find under PROFIBUS DP Additional Field devices I O VIPA_System_200V Assign the Profibus address 1 to the DP slave Place the CPU 21x 2BP02 from VIPA at the 1 st slot of the hardware configurator You may fix the data areas of the Profibus secti...

Page 202: ... areas for the Profibus slave Details are to find in the chapter DP slave parameters Attention Please regard that the lengths of the data areas are identical at the master and the slave project engineering Due to the restrictions imposed by the system the memory areas of the CPU that are used for the Profibus section may only be displayed in the CPU configuration window In the following all releva...

Page 203: ...in form of modules Please regard that a slave output area relates to a master input area and vice versa Save your project and transfer it into the CPU of your master system In the following the relevant dialog windows for the master configuration are shown Note If your DP master system is a System 200V module from VIPA you may parameterize the directly plugged in modules by including a DP200V slav...

Page 204: ... Adr 2 DP200V CPU21x Master VIPA_CPU21xDP of VIPA04d5 gsd 315 2DP 2AF03 0AB0 315 2DP 2AF03 0AB0 PB Adr 5 OUT IN centralized periphery centralized periphery CPU 21x 2BP02 Module Input m Bytes Output Bytes Module As soon as you set a length value to 0 the concerning data does not occupy any memory space in the CPU By assigning 255 memory limit at the parameters PRN DIAG and STAT you may also release...

Page 205: ...no CPU memory space for the input area The parameter data are an extract of the parameter telegram The parameter telegram is created during the master configuration and is send to the slave when the CPU 21xDP is in start up the connection between CPU 21xDP and master has been interrupted like e g short time release of the bus connector A parameter telegram exists of Profibus specific data bus para...

Page 206: ...nostics by controlled access to this area Note More detailed information about the structure and the control possibilities on diagnostic messages are to find under Diagnostic functions The recent state of the Profibus communication is readable from a 2Byte status area in the periphery address area of the CPU starting from the status address Note More detailed information about the structure of a s...

Page 207: ...you may start the diagnostics and modify the diagnostic data Diagnostic data consists of standard diagnostic data Byte 0 5 equipment related diagnostic data Byte 6 15 The structure of the diagnostic data is as follows Standard diagnostic data Byte 0 Station status 1 Byte 1 Station status 2 Byte 2 Station status 3 Byte 3 Master address Byte 4 Ident number low Byte 5 Ident number high Device related...

Page 208: ...fer Bit 2 configuration data is not identical Bit 3 slave got extern diagnostic data Bit 4 slave does not provide this function Bit 5 fixed at 0 Bit 6 wrong parameterization Bit 7 fixed at 0 1 Bit 0 slave needs new parameterization Bit 1 statistical diagnosis Bit 2 fixed at 1 Bit 3 response control active Bit 4 freeze command received Bit 5 sync command received Bit 6 reserved Bit 7 fixed at 0 2 B...

Page 209: ... the process picture of the CPU This data may be overwritten and forwarded to the master In case of a diagnostic action the contents of Byte 11 15 of the equipment related diagnostic data will be transferred to the process image of the CPU and get a status byte in front Where this diagnostic block with a length of 6Byte is located in the process image is definable via the CPU parameters You start ...

Page 210: ...ound Response control active 0 Response control not active 1 Response control activated by DP master Status Profibus data transfer 0 Data transfer error 1 Data transfer via Profibus active reserved 7 0 Bit No Status Byte 1 Parameterization 0 valid parameterization 1 invalid parameter telegram from DP master Configuration 0 valid configuration data 1 no congruence with DB1 parameters Response contr...

Page 211: ...ata and the number of parameter bytes is analyzed The configuration is only accepted as being correct if these are equal and if no more than 31Byte of parameter data is transferred Status indicator of the configuration data that are received from the Profibus master You define the configuration by means of the master configuration tool Indicates the status of the response monitor in the Profibus m...

Page 212: ...d at both ends Masters and slaves may be installed in any sequence Note When using optical participants you should place a cover over the socket for the next station at the end of the bus to avoid eye damage and to eliminate the chance of disturbance by external radiation Use the rubber inserts for this purpose by inserting them into the two remaining openings of the FO connector Assemble your Pro...

Page 213: ...as a slave by means of this connector Every segment supports a maximum of 32 stations Different segments are connected by means of repeaters That maximum length of a segment depends on the data communication rate The rate of data transfer of a Profibus DP link is set to a value between 9 6kBaud and 12MBaud Slaves are configured automatically All the stations on the network communicate at the same ...

Page 214: ...that is used to activate a terminating resistor Attention The terminating resistor is only effective if the connector is installed at a slave and the slave is connected to a power supply Note A complete description of installation and deployment of the terminating resistors is delivered with the connector The following picture illustrates the terminating resistors of the respective start and end s...

Page 215: ... 15 8 15 8 all in mm Note To connect this plug please use the standard Profibus cable type A with solid wire core according to EN50170 Under the order no 905 6AA00 VIPA offers the EasyStrip de isolating tool that makes the connection of the EasyConn much easier Connecting the profibus cable Loosen the screw Lift contact cover Insert both wires into the ducts provided watch for the correct line col...

Page 216: ...ly viable if the slower line at the left is connected to slaves that do not require up to date data This portion of the line should also not be connected to modules that issue alarms 3 Input output periphery CPU 21x DP IM 253 1 Input output periphery IM 253 2 Input output periphery IM 253 4 Input output periphery 5 Input output periphery CPU IM 208 1 2 3 4 IM 208 5 CPU 21x DP Profibus Master Input...

Page 217: ...em More than one master and multiple slaves connected to one bus 3 Input output periphery CPU 21x DP 5 Input output periphery CPU 21x DP CPU IM 208 5 CPU IM 208 1 3 IM 253 1 Input output periphery IM 253 2 Input output periphery CPU IM 208 2 4 IM 253 4 Input output periphery Input output periphery ...

Page 218: ...ge for this purpose To configure the System 200V Profibus slave modules from VIPA you need to include the according GSD file The System 200V peripheral modules that are connected with the CPU 21xDP directly via the backplane bus are automatically mapped into the CPU address area You may alter the address allocation in the hardware configurator from Siemens at any time The CPU 21xDP has an integrat...

Page 219: ...ED on the CPU blinks Due to the system the successful writing is signalized too soon The write command has only been completed when the LED extinguishes Attention Please regard the hints for deploying the Green Cable and the MP2 I jack in chapter 1 The Profibus coupler executes a self test routine after it is powered on On this occasion it checks the internal operations the backplane bus communica...

Page 220: ...ckplane bus On the other hand the CPU 214DP should count from 00h to FFh This count shall also be saved in the output area of the CPU slave and be transferred to the master via Profibus This value shall be monitored at the output module address 0 of the CPU 214DPM CPU 21x DPM DO 8 C1 C2 Counter C1 FFh 00h Adr 4 C1 C2 CPU 21x DP DO 8 C2 C1 Counter C2 00h FFh Adr 3 Master Slave CPU 21xDPM Counter MB...

Page 221: ...e the output module 222 1BF00 For linking up the CPU 21xDP you have to execute the following steps after including the GSD file VIPA04d5 gsd Add the Profibus slave VIPA_CPU2xxDP address 3 The DP slave is in the hardware catalog under Profibus DP Additional field devices I O VIPA_System_200V VIPA_CPU2xxDP Assign memory areas of the CPU to the in and output of the Profibus DP master section in form ...

Page 222: ...m 200V Start the hardware configurator from Siemens Configure a CPU 315 2DP with DP master system address 2 Add a Profibus slave VIPA_CPU21x at address 1 Include the CPU 214 2BP02 at the 1st slot of the slave system Include at the next slot the output module 222 1BF00 Choose the following parameters in the parameter window of the CPU 214 2BP02 Save your project Configuration CPU 21xDP ...

Page 223: ...rred I correctly from the slave CPU BEB No End Data exchange via Profibus L EB 11 Load input byte 11 output data of the CPU214DP and T AB 0 transfer to output byte 0 BE Read counter value from MB 0 decrement save in MB0 and put it out to CPU 214DP via Profibus OB 35 timer OB L MB 0 Counter from 0xFF to 0x00 L 1 I T MB 0 T AB 21 Transfer into output byte 21 input data of CPU214DP BE At this point t...

Page 224: ...eceive data BEB No End L B 16 FF Load control value and compare L PEB 30 to control byte I 1st input byte BEB Received data does not contain valid values L B 16 FE Control byte for master CPU T PAB 40 Data exchange via Profibus L PEB 31 Load peripheral byte 31 input data from Profibus slave and T AB 0 transfer into output byte 0 BE Read counter value from MB 0 increment save into MB0 and put it ou...

Page 225: ...description of CAN Bus principles Project engineering CAN master and CPU Course diagram after POWER ON Process image for RPDOs and TPDOs Telegram structure and overview over the supported objects Device model with description of PDOs and SDOs Objects directory Topic Page Chapter 8 Deployment CPU 21xCAN 8 1 Principles CAN Bus 8 2 Project engineering of the CPU 21xCAN 8 4 Modes 8 13 Process image of...

Page 226: ... under the heading of DS 301 by the CAN in Automation association CIA The communication specifications DS 301 define standards for CAN devices These specifications mean that the equipment supplied by different manufacturers is interchangeable The compatibility of the equipment is further enhanced by the equipment specification DS 401 that defines standards for the technical data and process data o...

Page 227: ...ossible to connect or disconnect any station without interruption to the system It is therefore also possible to commission a system in various stages Extensions to the system do not affect the operational stations Defective stations or new stations are recognized automatically Bus access methods are commonly divided into controlled deterministic and uncontrolled random bus access systems CAN empl...

Page 228: ...firm your entry Set parameters like diagnosis behavior and CPU address ranges with Set PLC Parameters Create a slave group with and add your CANopen slaves via Add modules to your slaves via Modules and parameterize them if needed Set your process data connections in the matrix via Connections and proof your entries if needed in the process image of the master Save the project and export it as wld...

Page 229: ...mens Close all projects Choose Options Install new GSD file Select VIPA_21x GSD Now the modules of the System 200V from VIPA are integrated in the hardware catalog and can be projected To be compatible to the SIMATIC manager from Siemens the System 200V CPUs from VIPA have to be projected as CPU 315 2DP 6ES7 315 2AF03 0AB0 V1 2 To be able to directly address the modules you have to include them in...

Page 230: ... controls and engineer connections The selection of the devices happens via a list that can be extended for your needs with an EDS file Electronic Data Sheet at any time A right click onto a device opens a context menu consisting partly of static and partly of dynamic components For the configuration of the process data exchange all process data are monitored in a matrix with the device inputs as ...

Page 231: ...s 0 For the addressing of the CAN master integrated in the CPU 1 32 For the addressing of CAN master at the standard bus Fix at 0x195 Here you can define the reaction of the output channels if the CPU switches to STOP The following values are available Switch substitute value 0 Sets all outputs to 0 Keep last value Keeps the recent state of the outputs Here you set the reaction for the slave input...

Page 232: ... CPU that are occupied from 0x6000 CAN input data For input blocks max 16 64Byte can be entered Output addr 6000 Output blocks PO basic address in the CPU that are occupied from 0x6000 CAN output data For output blocks max 16 64Byte can be entered Input addr A000 Input blocks PI basic address in the CPU that are occupied from 0xA000 CAN input network variables For input blocks max 80 320Byte can b...

Page 233: ...clude the System 200V modules with the GSD file VIPA_21x gsd from VIPA into the hardware catalog Copy the required EDS files into the EDS directory and start WinCoCT Create a master group via and insert a CANopen master via VIPA_21x_2CM02 eds Create a slave group with and add your CANopen slaves via Right click on the according slave and add the needed modules via Modules Parameterize the modules ...

Page 234: ...ow and column in the matrix and click on it The cell is marked with a You can control the connection by changing into Devices click on the master and monitor the process image of the master via Device Access Save your project Via File Export your CANopen project is exported into a wld file The name is the combination of project name node address ID Master Slave Now your CANopen project engineering...

Page 235: ...devices IO VIPA_System_200V Assign the Profibus address 1 to this module Place the CPU 21xCAN at the 1 st slot from the hardware catalog in your configurator Include your System 200V modules in the plugged sequence If needed parameterize the CPU res the modules The parameter window opens with a double click on the according module Save your project Hardware strukture Module CPU 315 2DP DP MPI DP S...

Page 236: ... the engineering steps Hardware structure Module CPU 315 2DP DP MPI DP System 300 Slot 1 2 X2 X1 3 4 5 6 7 8 9 10 11 3 System 200V DI DO DIO AI AO FM CPU 21xCAN Project engineering vipa_21x DP master system Profibus Adr 1 5 4 wld file WinCoCT Export Import 1 2 System 200V Module CPU 21xCAN DI DO DIO AI AO FM Conclusion ...

Page 237: ... operational n STOP RUN automatically After POWER ON and at valid project data in the CPU the master switches automatically into RUN The master has no operating mode lever After POWER ON the project data is automatically send from the CPU to the CAN master This establishes a communication to the CAN slaves At active communication and valid bus parameters the CAN master switches into the state oper...

Page 238: ...ut network variables Object 0xA040 16 Bit input network variables Object 0xA100 32 Bit input network variables Object 0xA200 64 Bit input network variables Object 0xA440 Like to see in the following illustration the objects of the digital input data use the same memory area of the CPU For example an access to Index 0x6000 with Subindex 2 corresponds an access to Index 0x6100 with Subindex 1 Both o...

Page 239: ...t network variables Object 0xA680 64 Bit output network variables Object 0xA8C0 Like to see in the following illustration the objects of the digital output data use the same memory area of the CPU For example an access to Index 0x6200 with Subindex 2 corresponds an access to Index 0x6300 with Subindex 1 Both objects occupy the same memory cell in the CPU Please regard that the output network varia...

Page 240: ...on portion and a module ID gives the difference between this and a level 2 message The function determines the type of message object and the module ID addresses the receiver CANopen devices exchange data in the form of objects The CANopen communication profile defines two different object types as well as a number of special objects The VIPA CAN master supports the following objects 40 Transmit P...

Page 241: ...uence the behavior of communication application and status machines In many fieldbus systems the whole process image is transferred mostly more or less cyclically CANopen is not limited to this communication principle for CAN supports more possibilities through multi master bus access coordination CANopen divides the process data into segments of max 8Byte These segments are called process data ob...

Page 242: ...sages are described that may occur at a wrong parameter communication Every CPU has the SFC 219 integrated This allows you to start a SDO read or write access from your PLC program to the CAN master You address your master via the plug in location and the destination slave via its CAN address The process data is defined by index and subindex Via SDO every access transfers max one data word process...

Page 243: ...l parameter incompatibility reason 0x06040047 General internal incompatibility in the device 0x06060000 Access failed due to an hardware error 0x06070010 Data type does not match length of service parameter does not match 0x06070012 Data type does not match length of service parameter too high 0x06070013 Data type does not match length of service parameter too low 0x06090011 Sub index does not exi...

Page 244: ...24h The SFC is not supported F025h Write buffer in the CANopen master full service can not be processed at this time F026h Read buffer in the CANopen master full service can not be processed at this time F027h The SDO read or write access returned wrong answer see CANopen Error Codes F028h SDO Timeout no CANopen participant with this Node Id has been found Busy 1 The read write job is not yet comp...

Page 245: ...rameters e g device name 0x1400 0x1427 Communication parameters e g identifier of the receive PDOs 0x1600 0x1627 Mapping parameters of the receive PDOs The mapping parameters contain the cross references to the application objects that are mapped into the PDOs and the data width of the depending object 0x1800 0x1827 0x1A00 0x1A27 Communication and mapping parameters of the transmit PDOs Here you f...

Page 246: ...it PDO Communication Parameter 1A00h to 1A27h Transmit PDO Mapping Parameter 1F22h Concise DCF 1F25h Post Configuration 1F80h NMT StartUp 1F81h Slave Assignment 1F82h Request NMT 1F83h Request Guarding 6000h Digital Input 8 Bit Array see DS 401 6100h Digital Input 16 Bit Array see DS 401 6120h Digital Input 32Bit Array see DS 401 6200h Digital Output 8 Bit Array see DS 401 6300h Digital Output 16 ...

Page 247: ...Error Register Unsigned8 ro Y 0x00 Error register Bit 7 Bit 0 ManSpec reserved reserved Comm reserved reserved reserved Generic ManSpec Manufacturer specific error specified in object 0x1003 Comm Communication error overrun CAN Generic A not more precisely specified error occurred flag is set at every error message Index Sub Index Name Type Attr Map Default value Meaning 0x1005 0 COB Id sync messa...

Page 248: ...dow length Unsigned32 rw N 0x00000000 Contains the length of time window for synchronous PDOs in µs Index Sub index Name Type Attr Map Default value Meaning 0x1008 0 Manufacturer device name Visible string ro N Device name of the bus coupler VIPA 21x 2CM02 Since the returned value is longer than 4Byte the segmented SDO protocol is used for transmission Index Sub index Name Type Attr Map Default va...

Page 249: ...time life time watchdog for life guarding If a guarding telegram is not received within the life time the node enters the error state If the life time factor and or guard time 0 the node does not carry out any life guarding but can itself be monitored by the master node guarding Index Sub index Name Type Attr Map Default value Meaning 0x1016 0 Consumer heartbeat time Unsigned8 ro N 0x05 Number of ...

Page 250: ... ro N Revision Number 4 Serial Number Unsigned32 ro N Serial Number Index Sub index Name Type Attr Map Default value Meaning 0x1400 0x1427 0 Number of Elements Unsigned8 ro N 0x02 Communication parameter for the first receive PDOs Subindex 0 number of following parameters 1 COB ID Unsigned32 rw N 0xC0000200 NODE_ID COB ID RxPDO1 2 Transmis sion type Unsigned8 rw N 0xFF Transmission type of the PDO...

Page 251: ...1827 0 Number of Elements Unsigned8 ro N 0x05 Communication parameter of the first transmit PDO subindex 0 number of following parameters 1 COB ID Unsigned32 rw N 0x80000180 NODE_ID COB ID TxPDO1 2 Transmission type Unsigned8 rw N 0xFF Transmission type of the PDO 3 Inhibit time Unsigned16 rw N 0x0000 Repetition delay value x 100 µs 5 Event time Unsigned16 rw N 0x0000 Event timer value x 1 ms Sub ...

Page 252: ...e Type Attr Map Default value Meaning 0x1F22 Array Concise DCF Domain rw N This object is required for the Configuration Manager The Concise DCF is the short form of the DCF Device Configuration File Index Sub index Name Type Attr Map Default value Meaning 0x1F25 Array ConfigureSlave Unsigned32 rw N 0x00000000 Via this entry the Configuration Manager can be forced to transfer a stored configuratio...

Page 253: ...signed node you need one entry Subindex 0 has the value 127 Every other Subindex corresponds with the Node ID of the node Byte Bit Description Byte 0 Bit 0 0 Node with this ID is not a slave 1 Node with this ID is a slave After configuration with Configuration Manager the Node will be set to state Operational Bit 1 0 On Error Control Event or other detection of a booting slave inform the applicati...

Page 254: ...82h in the local object directory Subindex 0 has the value 128 Subindex x with x 1 127 Initiates the NMT service for nodes with Node ID x Subindex 128 Initiates NMT service for all nodes At write access the wanted state is given as value State Value Prepared 4 Operational 5 ResetNode 6 ResetCommunication 7 PreOperational 127 Index Sub index Name Type Attr Map Default value Meaning 0x1F83 0x00 Requ...

Page 255: ...16bit digital input block Unsigned8 ro N depending on the fitted components Number of available digital 16 bit input blocks 0x01 1 st input block Unsigned16 ro N 1 st digital input block 0x20 32 nd input block Unsigned16 ro N 32 nd digital input block Index Sub index Name Type Attr Map Default value Meaning 0x6120 0x00 32bit digital input block Unsigned8 ro N depending on the compo nents fitted Nu...

Page 256: ...t digital input block Unsigned8 ro N Depending on the compo nents fitted Number of available digital 16 bit output blocks 0x01 1 st output block Unsigned16 rw N 1 st digital output block 0x20 32 nd output block Unsigned16 rw N 32 nd digital output block Index Sub index Name Type Attr Map Default value Meaning 0x6320 0x00 32bit digital input block Unsigned8 ro N Depending on the compo nents fitted ...

Page 257: ...xA0 160 th input block Unsigned16 ro N 160 nd digital input block Index Sub index Name Type Attr Map Default value Meaning 0xA200 0x00 32bit digital input block Unsigned8 ro N depending on the compo nents fitted Number of available digital 32 bit input blocks 0x01 1 st input block Unsigned32 ro N 1st digital input block 0x50 80 th input block Unsigned32 ro N 80 digital input block Index Sub index ...

Page 258: ... 160 th output block Unsigned16 rw N 160 th digital output block Index Sub index Name Type Attr Map Default value Meaning 0xA680 0x00 32bit digital input block Unsigned8 ro N Depending on the compo nents fitted Number of available digital 32 bit output blocks 0x01 1 st output block Unsigned32 rw N 1st digital output block 0x50 80 th output block Unsigned32 rw N 80 digital output block Index Sub in...

Page 259: ...e following description includes Principles of the serial communication Usage of the protocols ASCII STX ETX 3964R USS and Modbus Deployment of the serial RS232C RS485 interface Example Modbus communication Topic Page Chapter 9 Deployment CPU 21xSER 1 9 1 Fast introduction 9 2 Protocols and procedures 9 3 Deployment of the serial interface 9 7 Principles of data transfer 9 8 Parameterization 9 10 ...

Page 260: ... you control the communication The sending is executed with the SFC 217 SER_SND and the reception via SFC 218 SER_RCV Another call of the SFC 217 SER_SND 3964R USS and Modbus provides you via RetVal with a return value which contains among others recent information about the acknowledgement of the partner The protocols USS and Modbus allows you to read the acknowledgement telegram by calling the S...

Page 261: ...a transferred from the periphery must be preceded by an Start followed by the data characters and the end character Depending of the byte width the following ASCII characters can be transferred 5Bit not allowed 6Bit 20 3Fh 7Bit 20 7Fh 8Bit 20 FFh The user data which includes all the characters between Start and End are transferred to the CPU when the End has been received When data is send from th...

Page 262: ... Character NAK Negative Acknowledge STX DLE Message data DLE ETX BCC Monitor delayed acknowledgment DLE Monitor delayed acknowledgment Active partner Passive partner You may transfer a maximum of 255Byte per message Note When a DLE is transferred as part of the information it is repeated to distinguish between data characters and DLE control characters that are used to establish and to terminate t...

Page 263: ...y in half duplex operation After a send command the acknowledgement telegram must be read by a call of the SFC 218 SER_RCV The telegrams for send and receive have the following structure Master Slave telegram STE LGE ADR PKE IND PWE STW HSW BCC 02h H L H L H L H L H L Slave Master telegram STE LGE ADR PKE IND PWE ZSW HIW BCC 02h H L H L H L H L H L where STX Start sign STW Control word LGE Telegra...

Page 264: ... of a slave have the following structure Start sign Slave address Function Code Data Flow control End sign A request can be directed to a special slave or at all slaves as broadcast message To mark a broadcast message the slave address 0 is used In opposite to a normal send command the broadcast does not require a telegram evaluation via SFC 218 SER_RCV Only write commands may be send as broadcast...

Page 265: ...ug Connection RS232C Logical states represented by voltage differences between the two cores of a twisted pair cable Serial bus connection in two wire technology using half duplex mode Data communications up to a max distance of 500m Data communication rate up to 115 2kBaud 9pin jack Connection RS485 Outline RS232 interface Connection RS232C RS485 interface Connection RS485 RxD TxD GND TxD RxD 3 2...

Page 266: ...an there be read by the PLC If the data is transferred via a protocol the adaption of the data to the according protocol happens automatically In opposite to ASCII and STX ETX the protocols 3964R USS and Modbus master require the acknowledgement of the partner An additional call of the SFC 217 SER_SND causes a return value in RetVal that includes among others recent information about the acknowled...

Page 267: ...ocol happens automatically Please regard that the Modbus master may access the IN res OUT buffer by according presetting of the read function code By means of a read access to the IN buffer function code 02h 04h the master may read data that it has sent to the Modbus slave before The data remain in the buffer until they are overwritten by the Modbus master The following picture shows the communica...

Page 268: ...se as a result of this all buffers are cleared If you don t want to alter the communication parameter any more you should place the call of the SFC 216 in the start up OB OB 100 Name Declaration Type Comment Protocol IN BYTE No of protocol Parameter IN ANY Pointer to protocol parameters Baudrate IN BYTE No of Baudrate CharLen IN BYTE 0 5Bit 1 6Bit 2 7Bit 3 8Bit Parity IN BYTE 0 Non 1 Odd 2 Even St...

Page 269: ...dow of 10ms Note The start res end sign should always be a value 20 otherwise the sign is ignored Data block at 3964R DBB0 Prio BYTE The priority of both partners must be different Prio 0 and 1 are possible DBB1 ConnAttmptNr BYTE Number of connection trials DBB2 SendAttmptNr BYTE Number of telegram retries DBB4 CharTimeout WORD Char delay time in 10ms time window DBB6 ConfTimeout WORD Ackn delay t...

Page 270: ...x x x x x x The parity is depending on the value even or odd For parity control the information bits are extended with the parity bit that amends via its value 0 or 1 the value of all bits to a defined status If no parity is set the parity bit is set to 1 but not evaluated 0 NONE 1 ODD 2 EVEN The stop bits are set at the end of each transferred character and mark the end of a character 1 1Bit 2 1 ...

Page 271: ...t Baudrate 4 Error at CharLength 5 Error at Parity 6 Error at StopBits 7 Error at FlowControl 809xh Error in SFC parameter value x where x 1 Error at Protocol 3 Error at Baudrate 4 Error at CharLength 5 Error at Parity 6 Error at StopBits 7 Error at FlowControl 8092h Access error in parameter DB DB too short 828xh Error in parameter x of DB parameter where x 1 Error 1st parameter 2 Error 2nd param...

Page 272: ...er After the transfer with SER_Send you receive the acknowledgement telegram of the partner by calling the SFC 218 SER_RCV Note Please regard that the SFC 216 is not called again during a communication because as a result of this all buffers are cleared This block allows to send data via the serial interface Name Declaration Type Comment DataPtr IN ANY Pointer to Data Buffer for sending data DataL...

Page 273: ...is no acknowledgement by partner 8x24h Error in SFC parameter x where x 1 Error in DataPtr 2 Error in DataLen 8122h Error in parameter Data of SFC 216 e g no DB 807Fh Internal error 809Ah RS232C interface not found 809Bh RS232C interface not configured ASCII Value Description 9000h Buffer overflow no data send STX ETX Value Description 9000h Buffer overflow no data send 9001h Data too long 256Byte...

Page 274: ...1h Data too long 256Byte 9002h Data too short 2Byte Modbus RTU ASCII Master Value Description 2000h Send ready without error 2001h Send ready with error 8080h Receive buffer overflow no space for receipt 8090h Acknowledgement delay time exceeded 80F0h Wrong checksum in respond 80FDh Length of respond too long 80FEh Wrong function code in respond 80FFh Wrong slave address in respond 9000h Buffer ov...

Page 275: ...End J J J Data evaluation End N J SFC 217 SER_SND RetVal 8xxxh 90xxh RetVal 2001h RetVal 2000h N N Error evaluation End J J SFC 218 SER_RCV Data evaluation End N J SFC 218 SER_RCV Error evaluation End Ende RetVal 700xh N J ASCII STX ETX Modbus slave SFC 217 SER_SND RetVal 900xh Error evaluation End J N SFC 217 SER_SND RetVal 9001h Error evaluation J SFC 218 SER_RCV N RetVal 0000h RetVal 8xxxh N Da...

Page 276: ...with a length of 124Byte DataPtr P DB5 DBX0 0 BYTE 124 Word where the number of received bytes is stored At STX ETX and 3964R the length of the received user data or 0 is entered At ASCII the number of read characters is entered This value may be different from the read telegram length At ASCII this word gets an entry in case of an error The following error messages are possible Bit Error Descript...

Page 277: ...r at DataLen 3 Error at Error 8122h Error in parameter Data of SFC 216 e g no DB 809Ah serial interface not found 809Bh serial interface not configured The following picture shows the basic structure for programming a receive command This structure can be used for all protocols SFC 218 SER_RCV RetVal 0000h RetVal 8xxxh N Data evaluation End J Error evaluation End N J RetVal Return value Principles...

Page 278: ...y the access under Modbus happens by means of the ranges 0x 1x 3x and 4x 0x and 1x gives you access to digital bit areas and 3x and 4x to analog word areas For the CPU 21xSER 1 from VIPA is not differentiating digital and analog data the following assignment is valid 0x Bit area for output Access via function code 01h 05h 1x Bit area for input Access via function code 02h 3x Word area for input Ac...

Page 279: ...ed into the according checksum circle of ASCII res RTU Always valid for the Byte sequence in a word is 1 Word High Byte Low Byte If the slave announces an error the function code is send back with a OR and 80h Without an error the function code is sent back Slave answer Function code OR 80h Error Function code OK This function enables the reading from a slave bit by bit Command telegram RTU ASCII ...

Page 280: ...ata 1 st Word Data 2 nd Word RTU ASCII frame 1Byte 1Byte 1Byte 1Word 1Word 1Word max 125 Words This function allows to alter a Bit in your slave A status change happens via Status Bit with the following values Status Bit 0000h Bit 0 Status Bit FF00h Bit 1 Command telegram RTU ASCII frame Slave address Function code Address Bit Status Bit RTU ASCII frame 1Byte 1Byte 1Word 1Word 1Word Respond telegr...

Page 281: ...ess Function code Address Word Value Word RTU ASCII frame 1Byte 1Byte 1Word 1Word This function allows you to send n words to the slave Command telegram RTU ASCII frame Slave address Functions code Address 1 st Word Number of words Number of Bytes Data 1 st Word Data 2 nd Word RTU ASCII frame 1Byte 1Byte 1Word 1Word 1Byte 1Word 1Word 1Word 1Word max 125Words Respond telegram RTU ASCII frame Slave ...

Page 282: ...h the following structure OB 100 Call SFC 216 configuration as Modbus RTU master with timeout setting and error evaluation OB 1 Call SFC 217 SER_SND where the data is send with error evaluation Here you have to build up the telegram according to the Modbus rules Call SFC 218 SER_RECV where the data is received with error evaluation Execute the project engineering of the slave The PLC user applicat...

Page 283: ...RetVal 2001h RetVal 2000h N N Error evaluation J J SFC 218 SER_RCV N J RetVal 0000h RetVal 8xxxh N Data evaluation J Error evaluation N J Start SER_SND RetVal 2001h J N Error evaluation J SFC 216 SER_CFG DB Timeout RetVal 8xxxh OB100 OB1 N SFC 217 SER_SND RetVal 9001h Error evaluation J SFC 218 SER_RCV N RetVal 0000h RetVal 8xxxh N Data evaluation Error evaluation N J Start Error evaluation J SFC ...

Page 284: ... configuration Here you set for the input and output range the start address from where on the fixed length of 16Byte for in and output are stored in the peripheral area of the CPU The data transfer via Modbus does not require a PLC application You only have to make sure that the data received by the master are evaluated in the CPU and that the data that is to be transferred to the master are stor...

Page 285: ...0 13 DB10 DBD 20 DW 16 ADAEAF00 with ADAEAF 00 data byte 14 16 1Byte not used data byte 14 16 not used by the module If there is no error the following data are transferred to the master by the slave DB11 DBD 0 DW 16 05100000 with 05 10 0000 Respond telegram slave address 05h function code 10h no error Offset 0000h DB11 DBD 4 DW 16 000810A0 with 0008 10 00 Respond telegram 1 Data byte Word count 0...

Page 286: ...52 4F Respond telegram E R R O DB11 DBD 4 DW 16 52000120 with 52 0001 20 Respond telegram R 0001h 1 as word DB11 DBD 8 DW 16 4E4F2044 with 4E 4F 20 44 Respond telegram N O D DB11 DBD 12 DW 16 41544100 with 41 54 41 00 Respond telegram A T A 00h Zero scheduling Slave answers with an error message If the slave replies an error the function code with 80h is send back marked with an OR DB11 DBD 0 DW 1...

Page 287: ...ion about the transfer protocols of the CPU 21x 2BS02 The following description includes Deployment of the RS232C interface Usage of the protocols ASCII STX ETX 3964 R and RK512 Parameterization Topic Page Chapter 10 Deployment CPU 21xSER 2 10 1 Principles 10 2 Protocols and Procedures 10 3 RS232C interface 10 7 Communication 10 8 Initialize interfaces 10 9 Interface parameters 10 11 Interface com...

Page 288: ...ted The internal CP of the CPU 21x 2BS02 is directly connected to the CPU portion via a Dual Port RAM also called page frame This page frame is available at the CPU section as standard CP interface The data transfer happens via the standard handling blocks SEND RECEIVE and FETCH The communication via the according protocols is controlled by connection commands that are programmed in the user appli...

Page 289: ... with start and end ID where STX stands for Start of Text and ETX for End of Text The STX ETX procedure is suitable for the transfer of ASCII characters 20h 7Fh It does not use block checks BCC Any data transferred from the periphery must be preceded by an Start followed by the data characters and the end character The effective data which includes all the characters between Start and End are tran...

Page 290: ...nly at 3964R NAK Negative Acknowledge only 3964R STX DLE Message data DLE ETX BCC Monitor delayed acknowledgment DLE Monitor delayed acknowledgment Active partner Passive partner You may transfer a maximum of 255Byte per message Note When a DLE is transferred as part of the information it is repeated to distinguish between data characters and DLE control characters that are used to establish and t...

Page 291: ...LE Reaction message DLE ETX BCC DLE only 3964R Active partner Passive partner Monitor delayed acknowledgment Monitor delayed acknowledgment The coordination flag is set in the partner PLC in active mode when a message is being received This occurs for input as well as for output commands When the coordination flag has been set and a message with this flag is received then the respective data is no...

Page 292: ...al to STX it will transmit a NAK The driver does not respond with an answer to the reception of a NAK When ZVZ expires during the reception the driver will send a NAK and wait for another connection request The driver also sends a NAK when it receives an STX while it is not ready The 3964R procedure appends a Block check character to safeguard the transmitted data The BCC Byte is calculated by mea...

Page 293: ...ate up to 115 2kBaud Via 9pin jack you may establish a serial point to point connection 9pin jack Connection RS232C Pin Description 1 CD 2 RxD 3 TxD 4 DTR 5 GND 6 DSR 7 RTS 8 CTS 9 RI The CPU 21x 2BS02 currently supports the following RS232C signals TxD Transmit Data The transmit data is transferred via the TxD line When the transmit line is not used the CPU 21x 2BS02 holds it at a logical 1 RxD R...

Page 294: ...LL Send user data SFC 231 RECEIVE Initialize a receive order SFC 237 RECEIVE ALL Receive user data SFC 233 CONTROL Block for communication control SFC 234 RESET Deletes all orders and activates new parameter The following text shows the approach of programming in easy steps Start up OB100 Call SYNCHRON with SFC 235 and enter the wanted block size Page frame basic address 0 Block size PAFE Paramete...

Page 295: ...deleted and predefined and the CP and the CPU agree about the block size Number of the logical interface page frame address to which the according order refers to SSNR must be 0 To avoid long cycle run times it is convenient to split large data amounts into smaller blocks for transmitting them between CP and CPU You declare the size of this blocks by means of block size A large block size high dat...

Page 296: ...e previous parameters are activated Analog to SEND the block requires a preceding VKE 1 O M 0 0 ON M 0 0 VKE 1 CALL SFC 230 SEND SSNR 0 ANR 201 ID for parameterization IND 0 QANF P DB9 DBX0 0 BYTE 20 Pointer to parameter for COM1 PAFE MB198 ANZW MD200 O M 0 0 ON M 0 0 VKE 1 CALL SFC 230 SEND SSNR 0 ANR 201 ID for parameterization IND 0 QANF P DB9 DBX20 0 BYTE 20 Pointer to parameter for COM2 PAFE ...

Page 297: ...eactivated MODI_1 Parameter following 0 81h 0 2 BYTE Baudrate BAUDRATE_DEF BAUDRATE_150 BAUDRATE_300 BAUDRATE_600 BAUDRATE_1K2 BAUDRATE_1K8 BAUDRATE_2K4 BAUDRATE_4K8 BAUDRATE_7K2 BAUDRATE_9K6 BAUDRATE_14K4 BAUDRATE_19K2 BAUDRATE_38K4 BAUDRATE_57K6 0 1 2 3 4 5 6 7 8 9 10 11 12 13 9 3 BYTE DataBits DATABIT_5 DATABIT_6 DATABIT_7 DATABIT_8 0 1 2 3 3 4 BYTE Parity PARITY_NONE PARITY_ODD PARITY_EVEN 0 1...

Page 298: ...r PROTOCOL_STXETX Data byte Type Designator Values Default Transmit channel 8 9 WORD BufAnz 1 n 1 10 11 WORD BufSize 16 1024 256 12 13 WORD ZNA time delay after job 0 n 0 Start code 14 15 WORD Quantity 1 2 1 16 BYTE Code 1 0 255 STX 17 BYTE Code 2 0 255 STX End code 18 19 WORD Quantity 1 2 1 20 BYTE Code 1 0 255 ETX 21 BYTE Code 2 0 255 ETX Receive channel 22 23 WORD BufAnz 1 n 1 24 25 WORD BufSiz...

Page 299: ... R _RK512 Data byte Type Designator Values Default Transmit receive channel 8 9 WORD BufAnz 1 n 1 10 11 WORD BufSize 16 1024 128 12 13 WORD ZNA time delay after job 0 n 0 14 15 WORD ZVZ char overdue time 1 n 200 16 17 WORD QVZ ack overdue time 1 n 500 18 19 WORD BWZ block delay time 1 n 10000 20 21 WORD STX number of retries connection set up 1 n 3 22 23 WORD DBL number of retries data blocks 1 n ...

Page 300: ...ET Deletes all orders and activates new parameters Cycle OB1 Create SEND and RECEIVE orders for send and receive initialization Create SEND ALL and RECEIVE ALL orders for user data transfer The following section contains a summary of this blocks More detailed information is to find in the chapter Integrated OBs SFBs SFCs The SEND block serves the initialization of a send order to a CP Please regar...

Page 301: ...der Bit Handshake convenient 1 Via the RECEIVE_ALL block the data received from the CP is transmitted from the CP to the CPU by using the declared block size Location and size of the data area that is to transmit with RECEIVE_ALL must be declared before by calling RECEIVE In the indicator word that is assigned to the concerned order the bit ENABLE DISABLE is set Data transition starts and Data tra...

Page 302: ... the data is received and is stored in Destination The update of the indicator word takes place via FETCH res CONTROL Please regard that a fetch command is only executed when the following conditions are met the FETCH has received a VKE 1 the Bit order in process in the indicator word has been reset The purpose of the CONTROL block is the following Update of the indicator word Query if a certain o...

Page 303: ...gard that some VIPA specific SFCs are only integrated in certain CPUs For example the SFCs for high speed counter and pulse duration modulation are only integrated in the CPUs of the System 100V The assignment of the according SFCs to the CPUs is to find in the sub chapter VIPA specific SFCs Here you ll also find hints for the description of the VIPA specific SFCs The following text describes Over...

Page 304: ...MC_WR_F 11 18 SFC 223 PWM 11 19 SFC 224 HSC 11 21 SFC 225 HF_PWM 11 23 SFC 227 TD_PRM 11 25 SFC 228 RW_KACHEL 11 27 Page frame communication Parameter 11 29 Page frame communication Parameter transfer 11 32 Page frame communication Source res destination definition 11 33 Page frame communication Indicator word ANZW 11 36 Page frame communication Parameterization error PAFE 11 43 SFC 230 SEND 11 44...

Page 305: ...cks OBs are available OB Description OB 1 Free cycle OB 10 Clock alarm OB 20 Delay alarm OB 35 Prompter alarm OB 40 Process alarm OB 80 Cycle time exceeded or clock alarm run out OB 82 Diagnostic alarm OB 85 OB not available or Periphery error at update process image OB 86 Slave failure res restart OB 100 Reboot OB 121 Synchronous errors OB 122 Periphery error at nth access The following system fu...

Page 306: ...redefine field inside work memory SFC 22 CREAT_DB Create data block SFC 23 DEL_DB Delete data block SFC 24 TEST_DB Test data block SFC 28 SET_TINT Set clock alarm SFC 29 CAN_TINT Cancel clock alarm SFC 30 ACT_TINT Activate clock alarm SFC 31 QRY_TINT Request clock alarm SFC 32 SRT_DINT Start delay alarm SFC 33 CAN_DINT Cancel delay alarm SFC 34 QRY_DINT Request delay alarm SFC 36 MASK_FLT Mask syn...

Page 307: ...ameters only for analog digital blocks CPs not possible via Profibus SFC 57 PARM_MOD Parameterize block only for analog digital blocks CPs not possible via Profibus SFC 58 WR_REC Write record set only for analog digital blocks CPs not possible via Profibus SFC 59 RD_REC Read record set only for analog digital blocks CPs not possible via Profibus SFC 64 TIME_TICK Read millisecond timer SFC 65 X_SEN...

Page 308: ...MMC_RD_F Read file on MMC SFC 222 MMC_WR_F Write to file on MMC SFC 223 PWM Parameterize pulse duration modulation SFC 224 HSC Parameterize high speed counter SFC 225 HF_PWM Parameterize HF pulse duration modulation up to 50kHz SFC 227 TD_PRM Parameterization for TD200 communication SFC 228 RW_Kachel Read write page frame SFC 230 Send Send via page frame page frame comm SFC 231 Receive Receive via...

Page 309: ...ry and select Extract The following structure is created in the destination directory To de archivate the SFC library you start the SIMATIC manager from Siemens Via File De archivate you open a dialog window to select an archive The SFC library is to find in the directory structure above under VIPA_S7 The file name is VIPA ZIP Choose VIPA ZIP and click on open Choose a destination directory where ...

Page 310: ...on parameters and has the following structure for the according protocols Data block at STX ETX DBB0 STX1 BYTE 1 Start ID in hexadecimal DBB1 STX2 BYTE 2 Start ID in hexadecimal DBB2 ETX1 BYTE 1 End ID in hexadecimal DBB3 ETX2 BYTE 2 End ID in hexadecimal DBB4 TIMEOUT WORD max delay time between 2 tele grams in a time window of 10ms Data block at 3964R DBB0 Prio BYTE The priority of both partners ...

Page 311: ...f a character 1 1Bit 2 1 5Bit 3 2Bit With this bit you affect the behaviour from signal Ready to send 0 RTS off 1 RTS is 0 at Receive RTS is 1 at Send Note For RS485 must FlowControl to be at 1 Error ID Error code Description 0000h no error 9001h Parameter Protocol is not available e g DB not loaded 9003h Parameter Baud rate is not available 9004h Parameter CharLength is not available 9005h Parame...

Page 312: ... At STX ETX and 3964R the length set in DataPtr or 0 is entered At ASCII the value may be different from the sent length when the data is sent that fast that not all data can be stored in the send buffer of 256Byte Error that is thrown in case of an error Error code Description 0000h no error 9001h Parameter Data is not available e g DB not loaded 9002h Parameter Length is not available 7000h Not ...

Page 313: ...fferent from the read telegram length At ASCII this word gets an entry in case of an error The following error messages are possible Bit Error Description 1 overrun Overrun when a character can not be read from the buffer fast enough 2 parity Parity error 3 framing error Error that shows that a defined bit frame is not met exceeds the allowed length or contains an additional bit sequence Error tha...

Page 314: ... of index and sub index It is possible to transfer maximum one data word process data per access via SDO Control parameter 1 Start order System 100V Slot number 0 21x 2CM02 Slot number 1 4 208 1CA00 System 200V Slot number 0 21x 2CM02 Slot number 1 32 208 1CA00 Address of the CANopen Node 1 127 40h read SDO 23h write SDO 1 DWORD 2Bh write SDO 1 WORD 2Fh write SDO 1 BYTE CANopen Index CANopen Subin...

Page 315: ...h 0x06040043 General parameter incompatibility reason 0x06040047 General internal incompatibility in the device 0x06060000 Access failed due to an hardware error 0x06070010 Data type does not match length of service parameter does not match 0x06070012 Data type does not match length of service parameter too high 0x06070013 Data type does not match length of service parameter too low 0x06090011 Sub...

Page 316: ...ess it should be at least 4Byte at SDO write access 1Byte 2Byte or 4Byte 0xF024 The SFC is not supported 0xF025 Write buffer in the CANopen master full service can not be processed at this time 0xF026 Read buffer in the CANopen master full service can not be processed at this time 0xF027 The SDO read or write access returned wrong answer see CANopen Error Codes 0xF028 SDO Timeout no CANopen partic...

Page 317: ...s This may be avoided by formatting the MMC before the write access At a write access from the CPU to the MMC the data is always stored not fragmentized When opening an already existing file you have to use the same file name and file size that you used at creation of this file A MMC is structured into sectors Every sector has a size of 512Byte Sector overlapping writing or reading is not possible...

Page 318: ... a diagnostic error message 0 means OK See the table below for the concerning messages Value Description Diagnostic messages 0000h No errors appears if new file is generated 0001h File already exists is not fragmentized and the length value is identical or smaller 8001h No or unknown type of MMC is plugged in Error messages 8002h No FAT on MMC found A001h File name missing This message appears if ...

Page 319: ...MMC from where on the data has to be transferred to the CPU During data transfer this Bit remains set The Bit is reset as soon as the data transfer is complete Return Value Word where a diagnostic error message is returned to 0 means OK The following messages may be set Value Description 0000h No errors data was read 8001h No or unknown type of MMC is plugged in 8002h No FAT found on MMC 9000h Bit...

Page 320: ...nside the file on the MMC where the data is written to During data transfer this Bit remains set The Bit is reset as soon as the data transfer is complete Return Value Word where a diagnostic error message is returned to 0 means OK The following messages may be set Value Description 0000h No errors 8001h No or unknown type of MMC is plugged in 8002h No FAT found on MMC 9000h Bit writing has been t...

Page 321: ...s this via the according output channel The SFC returns a certain error code You can see the concerning error messages in the table at the following page The PWM parameters have the following relationship Pulse length Pulse break Period length Pulse duty ratio 1000 500 700 Output DO Time Period length timebase x period Pulse length period length 1000 x pulse duty ratio Pulse break period length pu...

Page 322: ...d 1 Promille 1 Timebase If the calculated pulse duration is no multiplication of the timebase it is rounded down to the next smaller time base limit Value range 0 1000 Via MinLen you define the minimal pulse length Switches are only made if the pulse exceeds the here fixed minimum length Value range 0 60000 Via the parameter Ret_Val you get an error number in return See the table below for the con...

Page 323: ...lue range true false Fix the counting direction Hereby is 0 Counter is deactivated means Enable false 1 count up 2 count down Here you may preset a counter content that is transferred to the according counter via SetCounter true Value range 0 FFFFFFFFh Via Limit you fix an upper res lower limit for the counting direction up res down When the limit has been reached the according counter is set zero...

Page 324: ... configured as counter Error in the hardware configuration 8008h Parameter Direction outside the permissible range 8009h Parameter Channel outside the permissible range 9001h Internal error There was no valid address for a parameter 9002h Internal hardware error Please call the VIPA Service Per SetCounter true the value given by PresetValue is transferred into the according counter The Bit is set ...

Page 325: ...h The CPU determines an pulse series with an according pulse break relation and issues this via the according output channel The SFC returns a certain error code You can see the concerning error messages in the table at the following page The PWM parameters have the following relationship Pulse length Pulse break Period length Pulse duty ratio 1000 500 700 Output DO Time Period length 1 frequency ...

Page 326: ... smaller time base limit Value range 0 1000 Via MinLen you define the minimal pulse length in µs Switches are only made if the pulse exceeds the here fixed minimum length Value range 0 60000 Via the parameter Ret_Val you get an error number in return See the table below for the concerning error messages Value Description 0000h no error 8005h Parameter MinLen outside the permissible range 8006h Par...

Page 327: ...ble from VIPA The call of the SFC 227 specifies the terminal to communicate with To call the SFC you have to transfer the following parameters MPI address Enter the MPI address of the connected TD200 terminal Parameter type Byte Terminal Structure Pointer Points to the start of the data block containing the parameterization and the text blocks of the terminal You may create the data block with TDW...

Page 328: ... TD200 Output Periphery 128 Byte OFFSET_OUTPUT 16 Byte TD200 Return Value Type the bit memory byte marker byte where the resulting message should be stored For specification of the error messages see the table below Value Description 00h no error 10h Error at MPI_ADR 11h MPI_ADR contains MPI address of the CPU 12h Value in MPI_ADR exceeds max MPI address 20h Error in OFFSET_INPUT 21h Value in OFFS...

Page 329: ...proprietary communication systems and is completely at the user s disposal Please regard that a write access to the page frame area influences a communication directly Page frame i e Kachel no Type the page frame no that you want to access Value range 0 3 Page frame offset Fix here an offset within the specified page frame Value range 0 1023 Read Write This parameter specifies a read res write acc...

Page 330: ...te starting with Byte 712 in page frame 2 The read 4Byte are stored in DB10 starting with Byte 2 For this the following call is required CALL SFC 228 K_NR 2 OFFSET 712 R_W 0 SIZE 4 RET_VAL MB10 VALUE P DB10 DBX 2 0 Byte 4 0 1023 K 0 0 1023 K 1 0 1023 K 2 0 1023 K 3 712 715 K_NR 2 OFFSET 712 SIZE 4 VALUE Page frame R_W 1 R_W 0 SIZE 4 CPU Value Description 00h no error 01h 05h Internal error No vali...

Page 331: ...lication memory space short runtimes of the blocks The handling blocks don t need bit memory area time areas counter areas All handling blocks described in the following use an identical interface to the user application with this parameters SSNR Interface number ANR Order number ANZW Indicator word double word IND Indirect fixing of the relative start address of the data source res destination QA...

Page 332: ...specified DB Kind of parameterization direct indirect This parameter defines the kind of data on which the pointer QUANF points 0 QANF points directly to the initial data of the source res destination data 1 the pointer QANF ZANF points to a memory cell from where on the source res destination data are defined indirect 2 the pointer QANF ZANF points to a memory area where the source res destinatio...

Page 333: ...Block size During the boot process the stations agree about the block size size of the data blocks by means of SYNCHRON A high block size high data throughput but longer run times and higher cycle load A small block size lower data throughput but shorter run times of the blocks These block sizes are available Value Block size Value Block size 0 Default 64Byte 4 128Byte 1 16Byte 5 256Byte 2 32Byte ...

Page 334: ...ng to other parameter fields data blocks or data words The parameters SSNR ANR IND and BLGR are of the type integer so you may parameterize them indirectly Direct parameter transfer CALL SFC 230 SSNR 0 ANR 3 IND 0 QANF P A 0 0 BYTE 16 PAFE MB79 ANZW MD44 Indirect parameter transfer Please note that you have to load the bit memory words with the corres ponding values before CALL SFC 230 SSNR MW10 A...

Page 335: ... b 0 BYTE c P A 0 0 BYTE 2 P E b 0 BYTE c P E 20 0 BYTE 1 DB MB AB EB Definition P DBa a means the DB No from where the source data is fetched or where to the destination data is transferred P M The data is stored in a MB P A The data is stored in the output byte P E The data is stored in the input byte Valid range for a 0 32767 irrelevant irrelevant irrelevant Data Marker Byte AB EB Definition DB...

Page 336: ...arameters are stored in a DB QANF ZANF Indirect addressing for source and destination parameters The source and destination parameters are stored in a DB in a sequential order QANF ZANF valid DB No 0 32767 0 32767 Data word Definition DW No where the stored data starts DW No where the stored data starts Valid range 0 0 2047 0 0 0 2047 0 Length Definition Valid range Length of the DBs in Byte 8 fix...

Page 337: ...NZW The source and destination parameters and ANZW are stored in a DB in a sequential order QANF ZANF valid DB No 0 32767 0 32767 Data word Definition DW No where the stored data starts DW No where the stored data starts Valid range 0 0 2047 0 0 0 2047 0 Length Definition Valid range Length of the DBs in Byte 14 fix Length of the DBs in Byte 22 fix Indirect parameterization of source and destinati...

Page 338: ...or Bit 4 Bit 7 reserved 1 State management CPU Bit 0 Handshake convenient data exists 0 RECEIVE blocked 1 RECEIVE released Bit 1 order commissioning is running 0 SEND FETCH released 1 SEND FETCH blocked Bit 2 Order ready without errors Bit 3 Order ready with errors Data management handling block Bit 4 Data receive send is running Bit 5 Data transmission active Bit 6 Data fetch active Bit 7 Disable...

Page 339: ... a defect The QVZ error message can only occur with the type Q ZTYP AS PB QB or memory defects 5 Error at indicator word The parameterized indicator word can not be handled This error occurs if ANZW declared a data word res double word that is not any more in the specified data block i e DB is too small or doesn t exist 6 no valid ORG Format The data destination res source isn t declared neither a...

Page 340: ...if this order is blocked e g a virtual connection doesn t exist any longer Handshake convenient Set Per plug in according to the delete announcement in the order status bit Handshake convenient 1 is used at the RECEIVE block telegram exists at PRIO 1 or RECEIVE impulse is possible at PRIO 2 3 Analyze Per RECEIVE block The RECEIVE initializes the hand shake with the CP only if this bit is set Per a...

Page 341: ...ent but the impulse came per SEND DIRECT Delete Per handling blocks SEND or RECEIVE if the data transfer of an order is finished last data block has been transferred Analyze Per user During the data transfer CP AG the user must not change the record set of an order This is uncritical with PRIO 0 1 orders because here the data transfer is realizable in one block cycle Larger data amounts however ar...

Page 342: ...ase the according data area Analyze Per handling blocks SEND and RECEIVE if Bit 7 is set there is no data transfer anymore but the blocks announce an error to the CP In the length word the handling blocks SEND RECEIVE store the already transferred data of the current order i e the received data amount for receiving orders the sent data amount for sending orders Describe Per SEND RECEIVE during the...

Page 343: ...ws that the connection of the communication order is not yet established Together with the state index A SEND RECEIVE and FETCH are blocked Indicator word X 0 X 8 The connection has been established again e g after a CP reboot the SEND order is released SEND communication order Indicator word X 0 X 9 The connection has been established again the RECEIVE order is released RECEIVE communication orde...

Page 344: ... X 8 Messages at RECEIVE State under H1 Prio 0 1 Prio 2 Prio 3 4 State under TCP IP Prio 1 Prio 2 Prio 3 after reboot 0 A 0 A 0 A 0 A 0 0 0 1 after connection start X 0 X 4 X 0 0 9 after initial impulse X 0 X 2 X 0 X 2 X 0 X 2 Telegram received X 0 X 1 ready without error X 0 4 1 X 0 4 5 X 0 4 5 ready with error X No X 8 X No X 9 X No X 9 after RESET X D X A X D X A X D X 9 Messages at READ WRITE ...

Page 345: ...FE has the following structure Byte Bit 7 Bit 0 0 Bit 0 error 0 no error 1 error error No in Bit 4 to Bit 7 Bit 1 Bit 3 reserved Bit 4 Bit 7 error No 0 no error 1 wrong ORG Format 2 area not found DB not found 3 area too small 4 QVZ error 5 wrong indicator word 6 no Source Destinationparameters at SEND RECEIVE ALL 7 interface not found 8 interface not specified 9 interface overflow A reserved B in...

Page 346: ...he order Bit order active in ANZW 0 During block stand by only the indicator word is updated If the CP is able to take over the data directly the SEND block transfers the requested data in one session If the CP requests only the order parameters or the amount of the depending data is too large the CP only gets the sending parameters res the parameter with the first data block The according data re...

Page 347: ...ly the indicator word is updated The RECEIVE block reacts different depending from the kind of supply and the CP reaction If the CP transmits a set of parameters although the RECEIVE block itself got destination parameters the parameter set of the block has the priority above those of the CP Large amounts of data can only be transmitted in blocks Therefore you have to transmit the assigned serial ...

Page 348: ...r The partner station provides the Source data and transmits them via SEND_ALL back to the requesting station Via RECEIVE_ALL the data is received and is stored in Destination The update of the indicator word takes place via FETCH res CONTROL The handshake for initializing FETCH is only started if the FB VKE receives 1 the function has been released in the according CP indicator word order active ...

Page 349: ... it just transfers the announcements in the order status to the parameterized indicator word The block is independent from the VKE and should be called from the cyclic part of the application If ANR 0 the indicator word is built up and handled equal to all other handling blocks If the parameter ANR gets 0 the CONTROL command transmits the content of the order state cell 0 to the LOW part of the in...

Page 350: ...cal interface e g deletes all order data and interrupts all active orders With a direct function ANR 0 only the specified order will be reset on the logical interface The block depends on the VKE and may be called from cyclic time or alarm controlled program parts The block has two different operating modes RESET ALL RESET DIRECT Description Parameter Operating modes 11x 21x 31x 51x ...

Page 351: ... it is convenient to split large data amounts into smaller blocks for transmitting them between CP and CPU You declare the size of this blocks by means of block size A large block size high data throughput but also longer run times and therefore a high cycle time strain A small block size smaller data throughput but also shorter run times of the blocks Following block sizes are available Value Blo...

Page 352: ...ord of the block the indicator word that is parameterized in the SEND_ALL block the current order number is stored 0 means stand by The amount of the transmitted data for one order is shown in the data word of SEND_ALL which follows the indicator word Note In the following cases the SEND_ALL command has to be called for minimum one time per cycle of the block OB1 if the CP is able to request data ...

Page 353: ...ceiving amount is shown in the following word In the indicator word of the block the indicator word that is parameterized in the RECEIVE_ALL block the current order number is stored In the stand by running mode of RECEIVE_ALL the block indicator word is deleted Note In the following cases the RECEIVE_ALL command has to be called for minimum one time per cycle of the block OB1 if the CP should send...

Page 354: ...transfers the announcements in the order status to the parameterized indicator word The block is independent from the VKE and should be called from the cyclic part of the application If ANR 0 the indicator word is built up and handled equal to all other handling blocks If the parameter ANR gets 0 the CONTROL command transmits the content of the order state cell 0 to the LOW part of the indicator w...

Page 355: ...n and abbreviation list Structure of the registers and addressing examples Instruction list VIPA specific diagnostic entries Event IDs Topic Page Chapter 12 Instruction list 12 1 Alphabetical instruction list 12 2 Abbreviations 12 5 Registers 12 7 Addressing examples 12 8 Math instructions 12 11 Block instructions 12 13 Program display and null instruction instructions 12 14 Edge triggered instruc...

Page 356: ... 12 11 R 12 11 D 12 11 I 12 11 R 12 11 D 12 11 I 12 11 R 12 11 12 19 D 12 26 I 12 26 R 12 26 D 12 26 I 12 26 R 12 26 D 12 26 I 12 26 R 12 26 D 12 26 I 12 26 R 12 26 D 12 26 I 12 26 R 12 26 I 12 26 D 12 26 R 12 26 A 12 27 12 30 12 31 A 12 29 ABS 12 11 ACOS 12 12 AD 12 33 AN 12 27 12 30 12 31 AN 12 29 ASIN 12 12 ATAN 12 12 AW 12 33 BTD 12 25 BTI 12 25 BE 12 13 BEC 12 13 BEU 12 13 BLD 12 14 CAD 12 24...

Page 357: ...2 25 INVI 12 25 ITB 12 25 ITD 12 25 JBI 12 20 JC 12 20 JCB 12 20 JCN 12 20 JL 12 21 JM 12 21 JMZ 12 21 JN 12 21 JNB 12 20 JNBI 12 20 JO 12 20 JOS 12 20 JP 12 21 JPZ 12 21 JU 12 20 JUO 12 21 JZ 12 21 L 12 15 12 16 12 17 12 24 LAR1 12 23 LAR2 12 23 LD 12 17 LN 12 12 LOOP 12 21 MOD 12 11 NEGD 12 25 NEGI 12 25 NEGR 12 11 NOP 12 14 NOT 12 20 O 12 27 12 29 12 30 12 31 O 12 29 OD 12 33 ON 12 28 12 30 12 ...

Page 358: ... RRD 12 18 RRDA 12 18 S 12 19 12 34 SA 12 33 SAVE 12 20 SD 12 33 SE 12 33 SET 12 20 SIN 12 12 SLD 12 18 SLW 12 18 SP 12 33 SQR 12 12 SQRT 12 12 SRD 12 18 SRW 12 18 SS 12 33 SSD 12 18 SSI 12 18 T 12 22 12 23 12 24 TAK 12 24 TAN 12 12 TAR 12 24 TAR1 12 23 TAR2 12 24 TRUNC 12 25 UC 12 13 X 12 28 12 30 12 32 X 12 29 XN 12 28 12 30 12 32 XN 12 29 XOD 12 33 XOW 12 33 ...

Page 359: ...ondition code CC1 Condition code D area crossing register indirect addressed double word D IEC date constant DB Data block DBB Data byte in the data block DBD Data double word in the data block DBW Data word in the data block DBX Data bit in the data block DI Instance data block DIB Data byte in the instance DB DID Data double word in the instance DB DIW Data word in the instance DB DIX Data bit i...

Page 360: ...IB Periphery input byte direct periphery access PID Periphery input double word direct periphery access PIW Periphery input word direct periphery access PQB Periphery output byte direct periphery access PQD Periphery output double word direct periphery access PQW Periphery output word direct periphery access Q Output in the PIQ q Real number 32bit floating point number QB Output byte in the PIQ QD...

Page 361: ... Bit 7 ACCUx LH Bit 8 to Bit 15 ACCUx HL Bit 16 to Bit 23 ACCUx HH Bit 24 to Bit 31 The address registers contain the area internal or area crossing addresses for the register indirect addressed instructions The address registers are 32Bit wide The area internal or area crossing addresses have the following structure area internal address 00000000 00000bbb bbbbbbbb bbbbbxxx area crossing address 1...

Page 362: ...Immediate addressing L 27 Load 16Bit integer constant 27 in ACCU1 L L 1 Load 32Bit integer constant 1 in ACCU1 L 2 1010101010101010 Load binary constant in ACCU1 L DW 16 A0F0_BCFD Load hexadecimal constant in ACCU1 L End Load ASCII code in ACCU1 L T 500ms Load time value in ACCU1 L C 100 Load counter value in ACCU1 L B 100 12 Load constant as 2Byte L B 100 12 50 8 Load constant as 4Byte L P 10 0 L...

Page 363: ...instruction input address is calculated pointer value in address register 1 pointer P 12 2 Register indirect area crossing addressing For the area crossing register indirect addressing the address needs an additional range ID in the Bits 24 26 The address is in the address register Range ID Binary code hex Area P 1000 0000 80 Periphery area I 1000 0001 81 Input area Q 1000 0010 82 Output area M 10...

Page 364: ...LAR1 P 8 2 A I AR1 P 10 2 Result The input 18 4 is addressed by adding the byte and bit addresses Example when sum of bit addresses 7 L MD 0 at will calculated pointer e g P 10 5 LAR1 A I AR1 P 10 7 Result Addressed is input 21 4 by adding the byte and bit addresses with carry Example for pointer calculation ...

Page 365: ...rs The result is in ACCU1 D BR CC1 CC0 OV OS OR STA RLO FC Add up two integers 32Bit 1 ACCU1 ACCU2 ACCU1 D Y Y Y Y Subtract two integers 32Bit 1 ACCU1 ACCU2 ACCU1 D Multiply two integers 32Bit 1 ACCU1 ACCU2 ACCU1 D Divide two integers 32Bit 1 ACCU1 ACCU2 ACCU1 MOD Divide two integers 32Bit and load the rest of the 1 division in ACCU1 ACCU1 remainder of ACCU2 ACCU1 Floating point arithmetic 32Bit S...

Page 366: ... function is in ACCU1 The instructions may be interrupted by alarms SIN1 BR CC1 CC0 OV OS OR STA RLO FC Calculate the sine of the real number 1 ASIN2 Y Y Y Y Calculate the arcsine of the real number 1 COS1 Calculate the cosine of the real number 1 ACOS2 Calculate the arccosine of the real number 1 TAN1 Calculate the tangent of the real number 1 ATAN2 Calculate the arctangent of the real number 1 A...

Page 367: ...without parameter 1 FC r transfer Parameter FB FC call via parameters CC FB r BR CC1 CC0 OV OS OR STA RLO FC Conditional call of blocks without parameter 1 FC r Y transfer Parameter 0 0 1 0 FB FC call via parameters OPN BR CC1 CC0 OV OS OR STA RLO FC DB r Open a data block 1 2 DI r Open a instance data block 2 Parameter Open a data block via parameter 2 Block end instructions Status word BE BR CC1...

Page 368: ... the RLO is compared with the signal state of the instruction or edge bit memory FP detects a change in the RLO from 0 to 1 FN detects a change in the RLO from 1 to 0 FP I Q a b 0 0 to 127 7 BR CC1 CC0 OV OS OR STA RLO FC Detecting the positive edge in the RLO The bit addressed 2 M a b 0 0 to 1023 7 Y in the instruction is the auxiliary edge bit memory 2 L a b 0 0 to 1043 7 0 Y Y 1 2 DBX a b 0 0 t...

Page 369: ...B a 0 to 1043 local data byte 2 DBB a 0 to 8191 data byte 2 DIB a 0 to 8191 instance data byte 2 in ACCU1 2 g AR1 m register indirect area internal AR1 2 g AR2 m register indirect area internal AR2 2 B AR1 m area crossing AR1 2 B AR2 m area crossing AR2 2 Parameter via parameters 2 L Load IW a 0 to 126 input word 1 2 QW a 0 to 126 output word 1 2 PIW a 0 to 1022 periphery input word MW a 0 to 1022...

Page 370: ...ameters 2 L Load k8 8Bit constant in ACCU1 LL 1 k16 16Bit constant in ACCU1 L 2 k32 32Bit constant in ACCU1 3 Parameter Load constant in ACCU1 addressed via parameters 2 L 2 n Load 16Bit binary constant in ACCU1 L 2 Load 32Bit binary constant in ACCU1 3 L B 8 p Load 8Bit hexadecimal constant in ACCU1 LL 1 W 16 p Load 16Bit hexadecimal constant in ACCU1 L 2 DW 16 p Load 32Bit hexadecimal constant i...

Page 371: ...ent content of ACCU1 is saved in ACCU2 The status word is not affected L T f 0 to 255 Load time value 1 2 Timer parameter Load time value addressed via parameters 2 L C f 0 to 255 Load counter value 1 2 Counter parameter Load counter value addressed via parameters 2 LD T f 0 to 255 Load time value BCD coded 1 2 Timer parameter Load time value BCD coded addressed via parameters 2 LD C f 0 to 255 Lo...

Page 372: ... free are provided with zeros SRW Shift the contents of ACCU1 L to the right 1 SRW 0 15 Positions that become free are provided with zeros SRD Shift the contents of ACCU1 to the right 1 SRD 0 32 Positions that become free are provided with zeros SSI Shift the contents of ACCU1 L to the right with sign 1 SSI 0 15 Positions that become free are provided with the sign Bit 15 SSD Shift the contents of...

Page 373: ...R2 m area crossing AR2 2 Parameter via parameters 2 R BR CC1 CC0 OV OS OR STA RLO FC Reset I Q a b 0 0 to 127 7 Y input output to 0 1 2 M a b 0 0 to 1023 7 0 Y 0 set bit memory to 0 1 2 L a b 0 0 to 1043 7 local data bit to 0 2 DBX a b 0 0 to 8191 7 data bit to 0 2 DIX a b 0 0 to 8191 7 instance data bit to 0 2 c AR1 m register indirect area internal AR1 2 c AR2 m register indirect area internal A...

Page 374: ...ve RLO into BR Bit 1 Y Y Jump instructions Jump instructions Status word Jump depending on conditions 8 Bit operands have a jump width of 128 127 16 Bit operands of 32768 129 or 128 32767 JU LABEL BR CC1 CC0 OV OS OR STA RLO FC Jump unconditionally 1 2 JC LABEL BR CC1 CC0 OV OS OR STA RLO FC Jump if RLO 1 1 2 JCN LABEL Y Jump if RLO 0 2 0 1 1 0 JCB LABEL BR CC1 CC0 OV OS OR STA RLO FC Jump if RLO ...

Page 375: ... 1 and CC0 0 1 2 JM LABEL Jump if result 0 CC1 0 and CC0 1 1 2 JN LABEL Jump if result 0 1 2 CC1 1 and CC0 0 or CC1 0 and CC0 1 JMZ LABEL Jump if result 0 2 CC1 0 and CC0 1 or CC1 0 and CC0 0 JPZ LABEL Jump if result 0 2 CC1 1 and CC0 0 or CC1 0 and CC0 0 JL LABEL BR CC1 CC0 OV OS OR STA RLO FC Jump distributor 2 This instruction is followed by a list of jump instructions The operand is a jump lab...

Page 376: ...yte 1 2 LB a 0 to 1043 local data byte 2 DBB a 0 to 8191 data byte 2 DIB a 0 to 8191 instance data byte 2 g AR1 m register indirect area internal AR1 2 g AR2 m register indirect area internal AR2 2 B AR1 m area crossing AR1 2 B AR2 m area crossing AR2 2 Parameter via parameters 2 T Transfer the contents of ACCU1 L to IW 0 to 126 input word 1 2 QW 0 to 126 output word 1 2 PQW 0 to 1022 periphery ou...

Page 377: ...rameter via parameters 2 Load and transfer instructions for address register Load a double word from a memory area or a register into AR1 or AR2 LAR1 Load the contents from ACCU1 1 AR2 address register 2 1 DBD a 0 to 8188 data double word 2 DID a 0 to 8188 instance data double word 2 m 32Bit constant as pointer 3 LD a 0 to 1040 local data double word 2 MD a 0 to 1020 bit memory double word 2 into ...

Page 378: ...fer ACCU1 Bits 0 to 8 into status word Y Y Y Y Y Y Load instructions for DB number and DB length Load the number length of a data block to ACCU1 The old contents of ACCU1 are saved into ACCU2 The condition code bits are not affected L DBNO Load number of data block 1 L DINO Load number of instance data block 1 L DBLG Load length of data block into byte 1 L DILG Load length of instance data block i...

Page 379: ...1 from integer 16Bit to integer 1 32Bit Int To Doubleint ITB BR CC1 CC0 OV OS OR STA RLO FC Convert contents of ACCU1 from integer 16Bit to BCD 1 0 to 999 Int To BCD DTB Y Y Convert contents of ACCU1 from integer 32Bit to BCD 1 0 to 9 999 999 Doubleint To BCD RND BR CC1 CC0 OV OS OR STA RLO FC Convert a real number to 32Bit integer 1 RND Convert a real number to 32Bit integer 1 Y Y The number is r...

Page 380: ... L ACCU1 L 1 I ACCU2 L ACCU1 L 1 I ACCU2 L ACCU1 L 1 Comparison instructions with integer 32Bit Status word Comparing the integer 32Bit in ACCU1 and ACCU2 RLO 1 if condition is satisfied D BR CC1 CC0 OV OS OR STA RLO FC ACCU2 ACCU1 1 D ACCU2 ACCU1 1 D Y Y 0 0 Y Y 1 ACCU2 ACCU1 1 D ACCU2 ACCU1 1 D ACCU2 ACCU1 1 D ACCU2 ACCU1 1 Comparison instructions with 32Bit real number Status word Comparing the...

Page 381: ...ndirect area internal AR2 2 AR1 m area crossing AR1 2 AR2 m area crossing AR2 2 Parameter via parameters 2 AN BR CC1 CC0 OV OS OR STA RLO FC AND operation of signal state 0 I Q a b 0 0 127 7 Y Y Y Input output 1 2 M a b 0 0 1023 7 Y Y Y 1 Bit memory 1 2 L a b 0 0 1043 7 Local data bit 2 DBX a b 0 0 8191 7 Data bit 2 DIX a b 0 0 8191 7 Instance data bit 2 c AR1 m register indirect area internal AR1...

Page 382: ... CC0 OV OS OR STA RLO FC EXCLUSIVE OR operation at signal state 1 I Q a b 0 0 127 7 Y Y Input output 2 M a b 0 0 1023 7 0 Y Y 1 Bit memory 2 L a b 0 0 1043 7 Local data bit 2 DBX a b 0 0 8191 7 data bit 2 DIX a b 0 0 8191 7 Instance data bit 2 c AR1 m register indirect area internal AR1 2 c AR2 m register indirect area internal AR2 2 AR1 m area crossing AR1 2 AR2 m area crossing AR2 2 Parameter vi...

Page 383: ...BR CC1 CC0 OV OS OR STA RLO FC AND left parenthesis 1 AN Y Y Y Y AND NOT left parenthesis 1 O 0 1 0 OR left parenthesis 1 ON OR NOT left parenthesis 1 X EXCLUSIVE OR left parenthesis 1 XN EXCLUSIVE OR NOT left parenthesis 1 BR CC1 CC0 OV OS OR STA RLO FC Right parenthesis popping an entry off the nesting stack 1 Y gating RLO with the current RLO in the processor Y Y 1 Y 1 ORing of AND operations S...

Page 384: ...r 1 2 Timer para Timer addressed via parameters 2 Counter p Counter addressed via parameters O BR CC1 CC0 OV OS OR STA RLO FC OR operation at signal state T f 0 to 255 Y Y Timer 1 2 C f 0 to 255 0 Y Y 1 Counter 1 2 Timer para Timer addressed via parameters 2 Counter p Counter addressed via parameters ON BR CC1 CC0 OV OS OR STA RLO FC OR operation at signal state T f 0 to 255 Y Y Timer 1 2 C f 0 to...

Page 385: ...nd CC0 0 or CC1 1 and CC0 0 1 UO unordered math instruction CC1 1 and CC0 1 1 OS OS 1 1 BR BR 1 1 OV OV 1 1 AN BR CC1 CC0 OV OS OR STA RLO FC AND operation at signal state 0 0 Y Y Y Y Y Y Y Y Result 0 CC1 0 and CC0 0 1 0 Y Y Y 1 Result 0 CC1 1 and CC0 0 1 0 Result 0 CC1 0 and CC0 1 1 0 Result 0 CC1 0 and CC0 1 or CC1 1 and CC0 0 1 0 Result 0 CC1 0 and CC0 1 or CC1 0 and CC0 0 1 0 Result 0 CC1 1 an...

Page 386: ... BR CC1 CC0 OV OS OR STA RLO FC EXCLUSIVE OR operation at signal state 1 0 Y Y Y Y Y Y Y Result 0 CC1 0 and CC0 0 1 0 0 Y Y 1 Result 0 CC1 1 and CC0 0 1 0 Result 0 CC1 0 and CC0 1 1 0 Result 0 CC1 0 and CC0 1 or CC1 1 and CC0 0 1 0 Result 0 CC1 0 and CC0 1 or CC1 0 and CC0 0 1 0 Result 0 CC1 1 and CC0 0 or CC1 1 and CC0 0 1 UO unordered math instruction CC1 1 and CC0 1 1 OS OS 1 1 BR BR 1 1 OV OV ...

Page 387: ...U2 1 AD k32 AND 32Bit constant 3 OD OR ACCU2 1 OD k32 OR 32Bit constant 3 XOD EXCLUSIVE OR ACCU2 1 XOD k32 EXCLUSIVE OR 32Bit constant 3 Timer instructions Time instructions Status word Starting or resetting a timer addressed directly or via parameters The time value must be in ACCU1 L SP T f 0 to 255 BR CC1 CC0 OV OS OR STA RLO FC Start time as pulse on edge change from 0 to 1 1 2 Timer para Y 2 ...

Page 388: ...res in the address transferred as parameter S C f 0 to 255 BR CC1 CC0 OV OS OR STA RLO FC Presetting of counter on edge change from 0 to 1 1 2 Counter p Y 2 R C f 0 to 255 0 0 Reset counter to 0 1 2 Counter p 2 CU C f 0 to 255 Increment counter by 1 on edge change from 0 to 1 1 2 Counter p 2 CD C f 0 to 255 Decrement counter by 1 on edge change from 0 to 1 1 2 Counter p 2 FR C f 0 to 255 Enable co...

Page 389: ...tional specific entries in form of event IDs To monitor the diagnostic entries you choose the option PLC Module Information in the Siemens SIMATIC manager Via the register Diagnostic Buffer you reach the diagnostic window The diagnosis is independent from the operating mode of the CPU You may store a max of 100 diagnostic entries in the CPU The following page shows an overview of the VIPA specific...

Page 390: ...ossible at Slave CPU or error on slave configuration 0xE012 Error at parametrization configuration backplane bus 0xE013 Error at access shiftregistermode to digital module 0xE014 Error at Check_Sys 0xE015 Error at access master Additional info 1 irrelevant Additional info 2 slot master 32 integrated master Additional info 3 irrelevant 0xE016 Max blocksize at mastertransfer overrange Additional inf...

Page 391: ...iagram 2 22 Components 2 13 Construction 2 13 Deployment 3 1 Firmware update 3 17 Function security 1 6 LEDs 2 13 MPI interface 2 14 Operands 1 16 Operating modes 1 15 3 14 Overall reset 3 15 Factory setting 3 16 Parameters 3 9 Power supply 2 13 Project engineering 1 9 3 6 Including GSD 3 7 Project transfer 3 8 5 33 Requirements 3 6 Start up behavior 3 3 Structure 2 11 System overview 1 8 2 2 Tech...

Page 392: ...Cabling 7 21 Commissioning 7 26 Diagnostics 7 14 7 15 Device related 7 17 Standard 7 16 start 7 17 Example 7 28 Initialization phase 7 27 Installation guidelines 7 20 LEDs 2 18 Network examples 7 24 Parameter data 7 13 Profibus interface 2 18 Project engineering 7 7 Profibus section 7 10 Status messages 7 18 Technical data 2 25 CPU 21xDPM 6 1 Commissioning 6 13 LEDs 2 17 Operating modes 6 12 Profi...

Page 393: ...11 Multicast 4 16 4 31 N NCM diagnostic 4 39 NetPro 4 27 Addresses 4 30 Connections 4 29 Fast introduction 4 21 ID 4 29 LADDR 4 29 Route 4 29 Station 4 28 link up 4 28 Network 4 6 5 2 Variants 4 14 Network layer 4 4 O operating modes 2 13 Optical waveguide 6 4 7 6 ORG format 4 42 5 38 OVERALL RESET 3 3 Overview System 200V 1 5 P PAFE 11 31 Parity 9 12 11 9 Passive operation 10 6 PDO 8 17 Periphera...

Page 394: ...11 45 RECEIVE_ALL SFC 237 11 51 RESET SFC 234 11 48 SEND SFC 230 11 44 SEND_ALL SFC 236 11 50 Source Destination details11 33 SYNCHRON SFC 235 11 49 PWM SFC 223 11 19 SER_CFG SFC 216 11 8 SER_RCV SFC 218 9 18 11 11 SER_SND SFC 217 9 14 11 10 TD200 access SFC 227 11 25 SSNR 10 9 11 30 Star coupler 5 2 Start up behavior 3 3 Status report 11 36 Status word 12 8 Stop bits 9 12 11 9 STX ETX 9 3 10 3 Sw...

Reviews: