background image

33

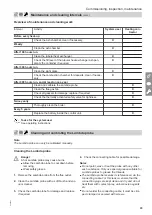
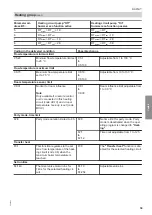
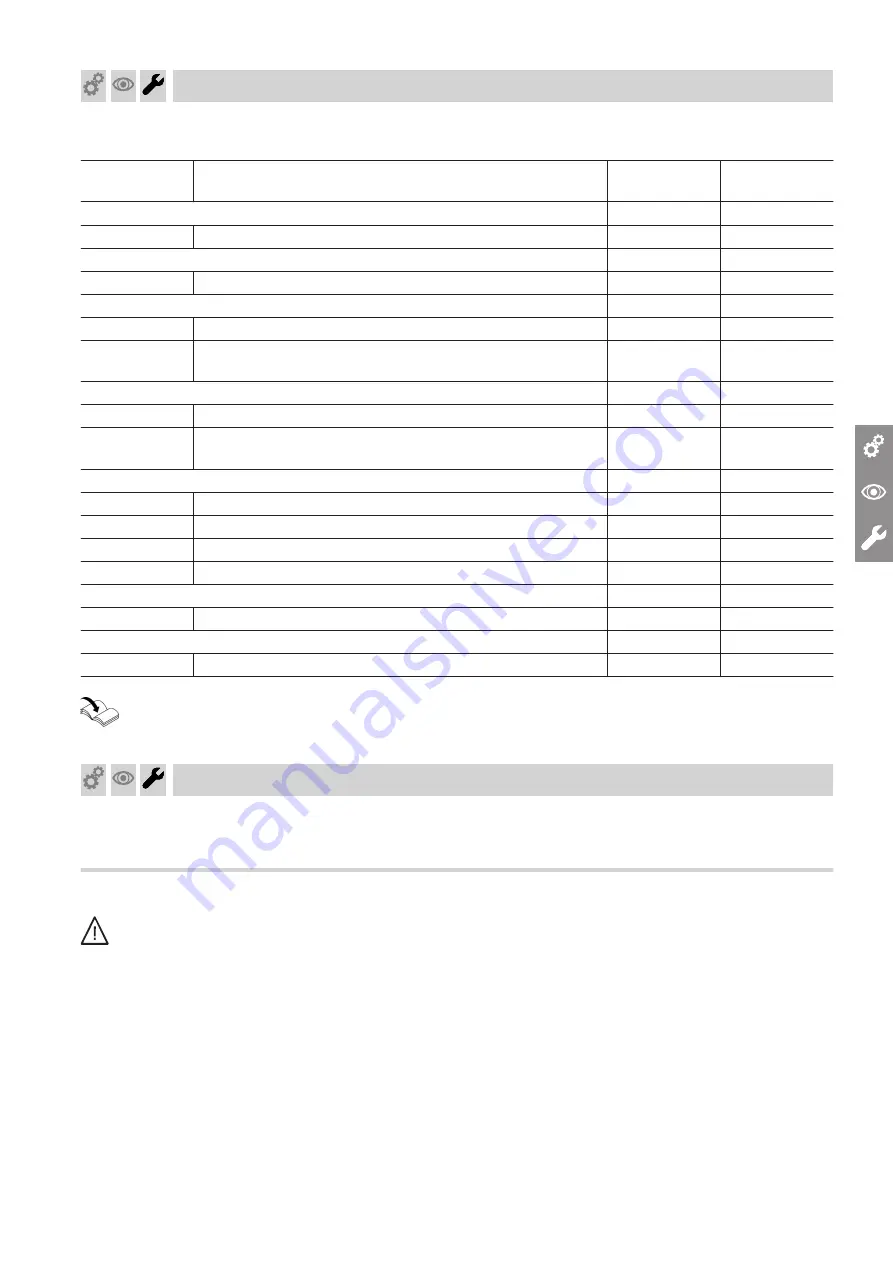
Overview of maintenance and cleaning work

Interval

Activity

System user

Heating con-

tractor

Before every heat-up


Check the ash chamber, clean if necessary.

X


Weekly


Clean the ash chamber.

X


After 100 hours run


Clean the tubular heat exchanger.

X


Check the fill level of the tubular heat exchanger ash pan,
empty the container if required.

X


After 300 hours run


Clean the sight glass.

X


Check the combustion chamber for deposits, clean if neces-
sary.

X


After 900 hours run, and at least once a year


Clean and calibrate the Lambda probe.


X


Clean the flue gas fan.


X


Check all gaskets for damage; replace if required.


X


Check the thermally activated safety valve for tightness.


X

Twice yearly


Thoroughly clean the boiler.


X

Every 5 years


Replace the battery inside the control unit.


X

Tasks for the system user

See operating instructions

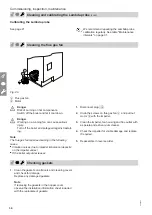
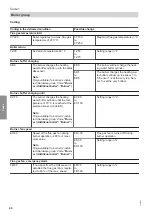
Cleaning and calibrating the Lambda probe

Note

The Lambda probe can only be calibrated manually.

Cleaning the Lambda probe

Danger

A hot Lambda probe may cause burns.

Allow the Lambda probe to cool down before
removing.

Wear safety gloves.

1. 

Remove the Lambda probe from the flue outlet.

2. 

Clean the Lambda probe with a soft brush and vac-
uum cleaner.

3. 

Check the Lambda probe for damage and replace
if required.

4. 

Check the connecting cable for possible damage.

Notes

Do not paint, wax or treat the probe with any other
such substance. Only use special grease suitable for
Lambda probes to grease the threads.

The Lambda probe receives its reference air via the
connecting cable. For this reason, ensure that the
connection plugs are kept clean and dry and do not
treat them with contact spray, anti-corrosion agents
etc.

Do not solder the connecting cable; it must be crim-
ped, clamped or secured with screws.

Commissioning, inspection, maintenance

Maintenance and cleaning intervals

 (cont.)

5684984


Summary of Contents for SH20

Page 1: ...stallation and service instructions for contractors Viesmann Vitoligno 250 S Type SH20 Wood gasification boiler for logs with a length of 50 cm or 100 cm VITOLIGNO 250 S 5684984 GB 5 2020 Please keep safe ...

Page 2: ... authorised by the installer Regulations to be observed National installation regulations Statutory regulations for the prevention of accidents Statutory regulations for environmental protection Codes of practice of the relevant trade associations Relevant country specific safety regu lations Safety instructions for working on the system Working on the system Isolate the system from the power sup ...

Page 3: ...ng system Ventilate the installation site Close the doors to living spaces to prevent flue gases from spread ing What to do if water escapes from the appliance Danger If water escapes from the appliance there is a risk of electric shock Switch OFF the heating system at the external isolator e g fuse box domestic distribution board Danger If water escapes from the appliance there is a risk of scald...

Page 4: ...t the same time this can lead to a reverse flow of flue gas Danger The simultaneous operation of the boiler and appliances that extract air to the outside can result in life threatening poisoning due to a reverse flow of flue gas Fit an interlock circuit or take suita ble steps to ensure an adequate supply of combustion air Safety instructions Safety instructions cont 5684984 ...

Page 5: ...n 16 Electrical connection extension kit for heating circuit with mixer 20 Overview of connections 20 Required settings 20 Other electrical connections 21 Power supply 21 Regulations 21 Plug fÖ Power supply 22 Fitting the cleaning tool mounting bracket 22 5 Commissioning inspec tion maintenance Steps commissioning inspection and maintenance 23 6 Coding levels Calling up coding level 1 35 Calling u...

Page 6: ...emory 52 Fault codes 52 11 Maintenance Fuse 55 Battery 55 High limit safety cut out STB 55 Triggering the function 55 Cancelling the function 55 Sensors 56 Connection 56 Carrying out an actuator test 56 Checking sensors 57 Lambda probe 58 Connection 58 Specification 58 12 Extension kit for heating circuit with mixer Extension kit components 59 Specification 59 Mixer motor 60 Changing the rotationa...

Page 7: ...F Secondary air damper 70 14 Commissioning service reports 71 15 Specification 72 16 Decommissioning and dis posal Final decommissioning and disposal 75 17 Certificates Declaration of conformity 76 18 Keyword index 77 Index Index cont 5684984 ...

Page 8: ...al protective equipment Danger During maintenance and cleaning work and when handling the ash pan there is a risk of fire and burns due to hot components and ash Wear suitable safety gloves Only dispose of the ash in fireproof containers with covers Note Before restarting the system all opened covers and flaps on the boiler must be closed again Safety and liability Occupational safety 5684984 Info...

Page 9: ...ion and identified as follows Symbol Meaning Steps required during commissioning Not required during commissioning Steps required during inspection Not required during inspection Steps required during maintenance Not required during maintenance Intended use The appliance is only intended to be installed and operated in sealed unvented heating systems that comply with EN 12828 with due attention pa...

Page 10: ...ppliance are used Product information Product description The Vitoligno 250 S is a boiler for the combustion of logs Charging from the top offers easy handling con trol via the Lambda probe guarantees low emissions and the integral heat management ensures maximum convenience For product dimensions and component designations see page 73 System examples Available system examples See www viessmann sc...

Page 11: ...fore be observed Siting Observe the following points with regard to siting No air contamination by halogenated hydrocarbons e g as contained in sprays paints solvents and cleaning agents No high accumulation of dust No high levels of humidity Free from frost and well ventilated Preparing for installation Minimum clearances 5684984 Installation ...

Page 12: ...an capacity 85 to 170 kW A 2 1 B Fig 2 Note Position the intake connector such that female connec tions A are pointing towards plugs B 1 Push the fan onto the casing and loosely secure with nuts 2 Secure the cable conduit with a screw 3 Tighten the nuts Installation sequence Installing the fan capacity 40 to 75 kW 5684984 Installation ...

Page 13: ...ney with a rise min 45 Max flue pipe length 3000 mm Flue pipe internal diameter 40 100 kW 7 200 mm 120 170 kW 7 250 mm 2 The entire flue pipe with cleaning aperture must be gas tight 3 Thermally insulate the flue pipe with fireproof insu lation minimum thickness 30 mm Note If condensate is likely to form inside the chimney we recommend you push the flue several centimetres into the chimney ensurin...

Page 14: ...ed safety valve E Thermally activated safety valve F Particle filter G Check valve H Pressure reducer K Cold water connection Connections Output kW 40 75 85 170 Flow DN 32 40 R 1 1 Return DN 32 40 R 1 1 Cold water supply On site in fixed metal pipe 2 5 to 3 5 bar 0 25 to 0 35 MPa DN 15 15 R Cold water outlet On site R Installation sequence Hydraulic connections 5684984 Installation ...

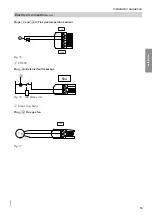
Page 15: ...E G Fig 5 Overview of electrical connections upper plug in strip A Plug aVG KM BUS B Plug a S Valve of return temperature raising facility C Plug sL Boiler circuit pump D Plug aML Enable additional boiler enable oil gas burner E Plug fÖ Power supply F Plug a A Buffer cylinder control valve G Plug Buffer cylinder sensors from left to right bottom centre top Installation sequence Electrical connecti...

Page 16: ...e temperature sensor B Plug aVH N A C Plug aG Flue gas temperature sensor D Plug a ÖA Hall sensor flue gas fan E Plug gÖA External fault message F Plug a Ö Flue gas fan Electrical connection Plug aVG KM BUS for extension kits 21 22 23 KM BUS 145 Fig 7 For extension kit installation Extension kit installation instructions For mixer module settings See page 20 Installation sequence Electrical connec...

Page 17: ... 0 5 A Plug sL Boiler circuit pump L1 PE N M 1 29 Fig 9 Max 2 A Plug aML Oil gas burner enable L1 PE N 13 14 11 12 11 12 179 A Fig 10 Max 2 A Plug aML Additional boiler enable L1 PE N 179 A L1 Fig 11 Max 2 A A Boiler enable Installation sequence Electrical connections cont 5684984 Installation ...

Page 18: ...cylinder sensor T1 T2 S3 B4 N N N A B C 9 Fig 13 A Buffer cylinder sensor bottom Pt1000 B Buffer cylinder sensor centre Pt1000 C Buffer cylinder sensor top Pt1000 Plug Outside temperature sensor 21 22 23 N 1 A Fig 14 A Pt1000 Installation sequence Electrical connections cont 5684984 Installation ...

Page 19: ...21 22 23 21 22 23 N 15 100A A Fig 15 A Pt1000 Plug gÖA External fault message N L A S3 T2 T1 50A Fig 16 230 V max 4 A A Alarm e g horn Plug a Ö Flue gas fan L1 PE N M 1 100 Fig 17 Installation sequence Electrical connections cont 5684984 Installation ...

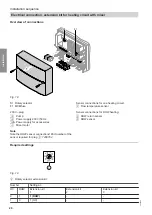
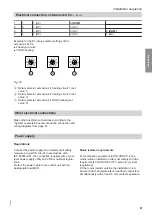
Page 20: ...er of the sensor required for plug aJ 7438702 Sensor connections for one heating circuit Flow temperature sensor Sensor connections for DHW heating DHW return sensor aJ DHW sensor Required settings 2 3 4 5 6 1 0 9 87 A Fig 19 A Rotary selector extension kit Number Setting at HC DHW Extension kit 1 Extension kit 2 Extension kit 3 0 1 1 DHW 1 0 1 HC Installation sequence Electrical connection extens...

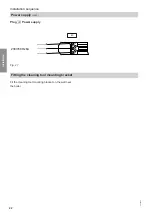
Page 21: ... diagrams from page 61 Power supply Regulations Connect the power supply and implement all safety measures e g RCD circuit in accordance with IEC 60364 4 41 the connection requirements of your local power supply utility and VDE or national regula tions Protect the power cable to the control unit with an appropriate fuse MCB Mains isolator requirements For combustion equipment to DIN VDE 0116 the m...

Page 22: ...ower supply N PE L1 230V 50Hz 6A 40 Fig 21 Fitting the cleaning tool mounting bracket Fit the cleaning tool mounting bracket on the wall near the boiler Installation sequence Power supply cont 5684984 Installation ...

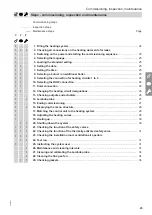
Page 23: ...esignations 26 13 Checking outputs and actuators 26 14 Lambda probe 27 15 Ending commissioning 27 16 Displaying the menu structure 28 17 Matching the control unit to the heating system 28 18 Adjusting the heating curves 28 19 Heating up 30 20 Shutting down the system 30 21 Checking the function of the safety valves 22 Checking the function of the thermally activated safety valve 31 23 Checking the...

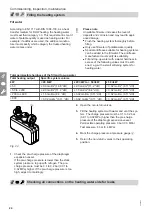
Page 24: ...m volume kW 20 l kW 20 l kW to 50 l kW 50 l kW 50 3 0 mol m3 16 8 dH 2 0 mol m3 11 2 dH 0 02 mol m3 0 11 dH 50 to 200 2 0 mol m3 11 2 dH 1 5 mol m3 8 4 dH 0 02 mol m3 0 11 dH 200 to 600 1 5 mol m3 8 4 dH 0 02 mol m3 0 11 dH 0 02 mol m3 0 11 dH 600 0 02 mol m3 0 11 dH 0 02 mol m3 0 11 dH 0 02 mol m3 0 11 dH Fig 22 1 Check the pre charge pressure of the diaphragm expansion vessel If the pre charge p...

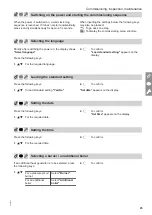
Page 25: ...pears on the display Loading the standard setting Press the following keys 1 To load standard setting Yes No 2 d To confirm Set date appears on the display Setting the date Press the following keys 1 For the required date 2 d To confirm Set time appears on the display Setting the time Press the following keys 1 For the required time 2 d To confirm Selecting a burner an additional boiler If an addi...

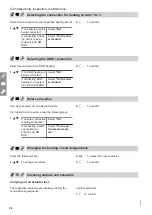
Page 26: ...be connected via an external module If a Vitosolic is connected press the following keys 1 If no solar connection is being connected Select No If connecting a solar connection to a Vitosolic via KM BUS Select On the ex ternal solar mod ule 2 d To confirm Changing the heating circuit designations Press the following keys 1 To change the letters 2 Ù Ú To select the next character 3 d To confirm Chec...

Page 27: ... 4 Call up the service menu on the control unit Probe heating is activated automatically 5 Hang the Lambda probe for at least 15 minutes outside the boiler in the installation room without any earth contact Calibrating the Lambda probe 1 d å simultaneously for approx 4 seconds The Service menu appears 2 for Service functions 3 d to confirm 4 for Calibrate O2 probe 5 d to confirm 6 to select 7 d to...

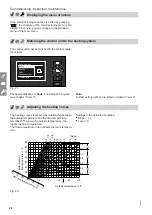
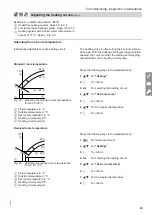
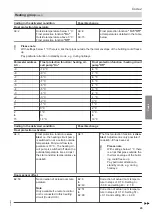
Page 28: ... are listed in chapter Code 2 Adjusting the heating curves The heating curves represent the relationship between the outside temperature and the flow temperature Simplified The lower the outside temperature the higher the flow temperature The flow temperature in turn affects the room tempera ture Settings in the delivered condition Slope 1 4 Level 0 0 2 Outside temperature in C Boiler water or flo...

Page 29: ... B Outside temperature in C C Set room temperature in C D Heating circuit pump Off E Heating circuit pump On Press the following keys in the standard menu 1 For Heating 2 d To confirm 3 Ù Ú For selecting the heating circuit 4 For Set room temp 5 d To confirm 6 For the required temperature 7 d To confirm Reduced room temperature 3 14 20 C 110 3 C A D E B 20 C 14 C Fig 26 Adjusting the reduced room ...

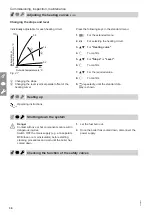
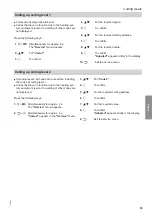
Page 30: ... Slope or Level 6 d To confirm 7 For the required value 8 d To confirm 9 ä repeatedly until the standard dis play is shown Heating up Operating instructions Shutting down the system Danger Contact with live or hot components can result in dangerous injuries Switch OFF the mains supply e g at a separate MCB fuse or a mains isolator before starting cleaning procedures and wait until the boiler has c...

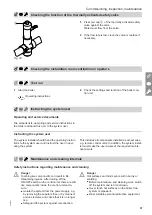
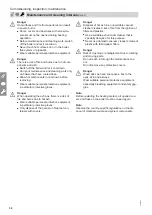
Page 31: ...ote control units In addition the system instal ler must make the user aware of the required mainte nance work Maintenance and cleaning intervals Safety instructions regarding maintenance and cleaning Danger Touching live components can result in life threatening injuries After turning off the ON OFF switch on the control unit there are still live components inside the control unit enclo sure Isol...

Page 32: ...ipment in particular protective gloves Only dispose of the hot ash in fireproof con tainers with covers Danger Disposal of hot ash in an unsuitable vacuum cleaner creates a risk of fire from the ignition of filters and plastics Use a suitable ash vacuum cleaner that is specially designed for this purpose Never use domestic vacuum cleaners made of plastic with fabric paper filters Danger Risk of cr...

Page 33: ...operating instructions Cleaning and calibrating the Lambda probe Note The Lambda probe can only be calibrated manually Cleaning the Lambda probe Danger A hot Lambda probe may cause burns Allow the Lambda probe to cool down before removing Wear safety gloves 1 Remove the Lambda probe from the flue outlet 2 Clean the Lambda probe with a soft brush and vac uum cleaner 3 Check the Lambda probe for dam...

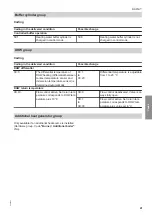
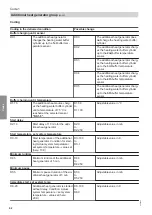
Page 34: ...peller imbalance deposits on the impeller vanes If the boiler output decreases 1 Disconnect plug a Ö 2 Undo the screws on flue gas fan A and pull out motor B with the impeller 3 Clean the impeller fan housing and flue outlet with a spatula and ash vacuum cleaner 4 Check the impeller for visible damage and replace if required 5 Reassemble in reverse order Checking gaskets 1 Clean the gaskets on all...

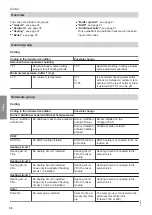
Page 35: ... ä Exit the service menu Calling up coding level 2 At coding level 2 all codes are accessible including the codes at coding level 1 Codes that have no function due to the heating sys tem equipment level or the setting of other codes are not displayed Press the following keys 1 Simultaneously for approx 4 s The Service menu appears 2 ä Simultaneously for approx 4 s Code 2 appears in the Service men...

Page 36: ...dditional heat source available Burner Addition al boiler Burner Burner installed on the Vitoligno 250 S Burner Addition al boiler Addition al boiler Additional boiler installed DHW DHW No No DHW heating installed DHW On the mix er module DHW heating is connected to the ex tension kit Heating circuit 1 Heating circuit 1 No No heating circuit 1 installed Heating circuit 1 On the mixer module Heatin...

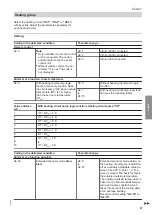
Page 37: ...ing circuit pump logic function A5 1 to A5 15 With heating circuit pump logic func tion see the following table Value address A5 With heating circuit pump logic function Heating circuit pump Off 1 OT RTset 5 K 2 OT RTset 4 K 3 OT RTset 3 K 4 OT RTset 2 K 5 OT RTset 1 K 6 OT RTset 7 to OT RTset 1 K to 15 OT RTset 9 K Coding in the delivered condition Possible change Summer eco function absolute A6 ...

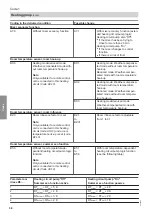
Page 38: ...de without room tempera ture hook up B0 3 Heating mode reduced mode Weather compensated mode with room temperature hook up Room temperature sensor room influence B2 0 Room influence factor 0 is set Note Only available if a remote control unit is connected in this heating circuit code A0 0 and a room temperature hook up is set code B0 0 B2 1 to B2 31 Room influence factor adjustable from 1 to 31 Ro...

Page 39: ...nfluence Note Only available if a remote control unit is connected in this heating circuit code A0 0 and a room temperature hook up is set code B0 0 C8 1 to C8 30 Room influence limit adjustable from 1 to 30 C Party mode time limit F2 8 Party mode duration limited to 8 h F2 0 No time limit for party mode Party mode is deactivated when the oper ating program is changed to Heat ing F2 1 to F2 12 Tim...

Page 40: ... Sensor 1 is at the very top Sen sor 5 is at the very bottom Burner buffer charging until EC 70 The burner charges the heating water buffer cylinder until the tem perature of 70 C is reached at the selected sensor code EB Note Only available if a burner is instal led Hardware group Code Burn er Additional boiler Burner EC 30 to EC 100 Setting range in C Burner fan speed ED 80 Speed of the flue gas...

Page 41: ...sor and immersion temperature sensor is determined automatically 0C 1 to 0C 20 Differential temperature is adjustable from 1 to 20 C DHW return temperature 0D 10 Flow control active Set return tem perature corresponds to DHW tem perature plus 10 C 0D 0 Flow control deactivated Valve is al ways fully open 0D 1 to 0D 30 Flow control active Set return tem perature corresponds to DHW tem perature plus...

Page 42: ...ional heat source charg es the heating water buffer cylinder until a temperature of 75 C is reached at the selected sensor D0 1 5 D1 50 to D1 100 Adjustable value in C Start delay D2 10 Start delay of 10 min for the addi tional heat generator D2 0 to D2 250 Adjustable value in min Start temperature set system temperature D3 10 Start temperature of the additional heat generator Condition for start ...

Page 43: ...1 Parallel operation of both heat generators is possible Note Parallel operation only possible if the additional heat generator has a boiler circuit pump D7 0 Parallel operation of both heat gen erators is not possible Code 1 Additional heat generator group cont 5684984 Codes ...

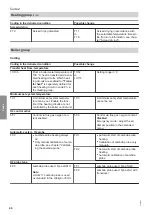
Page 44: ... quickly low values or slowly high values when the outside temperature changes 1 step 10 min Outside temperature offset 92 0 No outside temperature correction 92 10 to 92 10 Correction of the outside tempera ture by the value set in C Heating group Select the heating circuit HC1 HC2 or HC3 with keys Ù Ú Adjust the parameters separately for each heating circuit Coding Coding in the delivered condit...

Page 45: ...rotection activation A4 0 Frost protection function is ena bled i e the heating circuit pump is switched on at a certain outside temperature Minimum flow tem perature is 10 C The heating cir cuit pump is switched off when the outside temperature rises Adjust the start and stop temperatures via code A3 A4 1 The frost protection function is disa bled Adjustment is only possible if code A3 9 has been...

Page 46: ...Enable the func tion if the heating circuits are not controlled by the boiler control unit 13 0 A minimum set system temperature cannot be set O2 control active 5F 1 Control via flue gas oxygen con tent enabled 5F 0 Control via flue gas oxygen content disabled Emergency mode adjust the air damper position in the extended menu Automatic system O2 probe F9 0 Lambda probe heating always on Only manua...

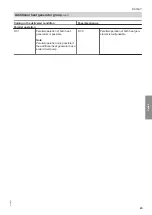
Page 47: ... culation can be adjusted in steps of 0 1 kW Range calculation standard outside temperature 97 0 The standard outside temperature for the range calculation is 0 C 97 50 to 97 50 Setting range in C DHW group Coding Coding in the delivered condition Possible change DHW set temperature reheating suppression 67 0 Reheating suppression of external solar control unit disabled 67 1 to 67 90 DHW set value...

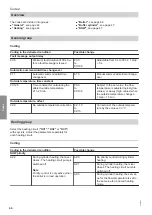
Page 48: ... Menu point Terminate service Diagnosis Buffer Heating DHW Boiler Buffer drawing Select with Fig 30 Press the following keys 1 Simultaneously for approx 4 s The Service menu appears 2 For Diagnosis 3 d To confirm 4 For the required parameter 5 ä repeatedly until the standard display is shown This terminates the diagnosis The Diagnosis menu is divided into the following sub menus General see page 4...

Page 49: ...Valve position boiler Valve position buffer Diagnosis Heating sub menu Note Select the respective heating circuit by pressing Ù Ú Operating program Operating status Time prog Set room temp Red set room temp Slope Level Heating circuit pump Diagnosis DHW sub menu Operating program Operating status Time prog Set DHW temperature Actual DHW temperature Set return temp Actual return temp Diagnosis KM B...

Page 50: ...tware version Calling up operating conditions and sensors Via the information menu of the extended menu and in the service menu diagnosis and boiler sub menus you can call up operating states and scan sensors Diagnosis and service scans Diagnosis cont 5684984 Diagnosis ...

Page 51: ...splay The following faults are displayed as plain text The meaning of the fault and the fault code shown to the right are detailed in the table on page 52 Excess temperature Repeat heat up Fault O2 probe Boiler flow Boiler return Flue gas sensor Outside sensor Buffer sensor top Buffer sensor centre Buffer sensor bottom Flow sensor DHW sensor Return sensor KM BUS Calling up fault codes from the fau...

Page 52: ...it safety cut out and press the reset button only possible once the boiler water temperature is 70 C and acknowledge the fault 20 Control mode Short circuit boiler water temperature sensor Check boiler water temperature sensor 21 Control mode Short circuit return tem perature sensor for the boiler Check the return temperature sen sor for the boiler 22 Control mode Short circuit flue gas tem peratu...

Page 53: ...remote control unit 1 Check KM BUS connection be tween boiler and remote control unit 1 45 No room influence from re mote control unit 2 No connection between boiler and remote control unit 2 Check KM BUS connection be tween boiler and remote control unit 2 46 No room influence from re mote control unit 3 No connection between boiler and remote control unit 3 Check KM BUS connection be tween boile...

Page 54: ...e sen sor 65 No flow control DHW heating Lead break return tem perature sensor DHW heating Check return temperature sensor DHW heating 90 Burner blocked Fuel too damp Lambda probe inaccu rate Logs poorly charged Use suitable dry fuel Recalibrate Lambda probe Acknowledge with OK 91 Boiler running with fixed air damper setting Lambda probe heavily contaminated Lambda probe faulty Electronics fault R...

Page 55: ...er temperature exceeds 95 C the high limit safety cut out responds Note The high limit safety cut out can only be reset man ually Cancelling the function Note The high limit safety cut out can only be reset unlocked once the boiler water temperature has reached approx 70 C After each triggering of the high limit safety cut out check that the thermally activated safety valve is reset 1 Undo protect...

Page 56: ...ators Actuators for the corresponding mixer modules Press the following keys 1 å Simultaneously for approx 4 s The Service menu appears 2 For Actuator test 3 d To confirm 4 For the required actuator category 5 d To confirm 6 For the required actuator or relay output Note The actuator test is terminated automati cally if no further input is made for 5 min 7 d To confirm 8 d To terminate 9 ä repeate...

Page 57: ...Fig 33 Temperature in C 0 100 200 300 0 75 1 25 1 75 2 25 Resistance in kΩ A Fig 34 A Data point shown Resistance of 1078 kΩ at a temperature of 20 C 1 Pull out corresponding plug 2 Check the sensor resistance at the plug 3 Compare the test result with the actual temperature For details about calling up information see chapter Diagnosis In case of severe deviation Check for correct installation an...

Page 58: ... 4 6 8 10 12 14 10 5 0 5 10 15 20 25 30 35 40 16 18 20 22 A Oxygen content O2 in the flue gas Probe voltage Us mV 45 Fig 35 A λ 1 5 Test point Plug a K no 3 and 4 see page 66 Probe type LSM 11 Permiss ambient temperature During storage and transport 40 to 100 C During operation 150 to 600 C constant flue gas temperature with heating switched on 800 C max flue gas temperature with heating switched ...

Page 59: ...ge and transport 20 to 70 C Curve 0 1 1 10 100 0 20 40 60 80 100 Temperature in C Resistance in kΩ 25 Fig 36 Mixer motor Rated voltage 230 V Rated frequency 50 Hz Rated current 2 A Power consumption 5 5 W Protection class I IP rating IP 32 D to EN 60 529 ensure through design installation Permissible ambient temperature During operation 0 to 40 C During storage and transport 20 to 65 C Rated relay...

Page 60: ...r disconnect it from the mains voltage e g at the fuse or mains isolator Remove the casing cover see chapter Overview of electrical connections 2 gS BU Fig 37 Switch cores BK and BK on plug gS 3 Refit the casing cover 4 Check the rotational direction Extension kit for heating circuit with mixer Mixer motor 5684984 Functions ...

Page 61: ...ampers a ÖA Hall sensor aVH N A X15 CAN BUS aVG KM BUS Buffer cylinder sensor aG and aNL Weather flue gas temperature sen sors and aJ FL and RT sensors a K Lambda probe a J N A fA Flue gas fan gJ N A aBA Fault message X1 Buffer cylinder control valve power cable boiler circuit pump boiler valve aBÖ High limit safety cut out Connection and wiring diagram PCB KSK 2 01b 5684984 Appendix ...

Page 62: ...62 230 V connection Fig 39 Connection and wiring diagram Connections 5684984 Appendix ...

Page 63: ...63 LV connection Fig 40 Connection and wiring diagram Connections cont 5684984 Appendix ...

Page 64: ...nformation 1 Flue gas fan L PE 2 Flue gas fan N 3 5 6 7 Plug aBA Fig 42 Assignment Function Additional information 1 Fault message common contact Floating contact 2 Fault message Max 250 V 2 A Connection and wiring diagram 230 V plugs 5684984 Appendix ...

Page 65: ...ating 6 A 3 Mains N 4 Main load burner Max 2 A fuse rating 4 A 5 Buffer cylinder valve open Max 0 5 A fuse rating 4 A 6 Buffer cylinder valve close Max 0 5 A fuse rating 4 A 7 Boiler valve open Max 0 5 A fuse rating 4 A 8 Boiler valve close Max 0 5 A fuse rating 4 A 9 Boiler circuit pump Max 2 A fuse rating 4 A Connection and wiring diagram 230 V plugs cont 5684984 Appendix ...

Page 66: ...230 V jumper L LV plugs Plug a K Lambda probe 198 Fig 46 Assignment Function Additional information 1 Lambda probe 14 V Heating white 2 Lambda probe 14 V Heating white 3 Lambda probe Actual value black l 4 Lambda probe GND GND grey Note Test point Assignment 3 and 4 Connection and wiring diagram 230 V plugs cont 5684984 Appendix ...

Page 67: ...re sensor 17 GND Fig 48 Assignment Function Additional information 1 Return temperature sensor Pt1000 2 Return temperature sensor GND Plug aG and aNL 1 15 GND 15 1 169 Fig 49 Assignment Function Additional information 1 Outside temperature sensor Pt1000 2 Flue gas temperature sensor Pt1000 3 4 GND for both sensors Connection and wiring diagram LV plugs cont 5684984 Appendix ...

Page 68: ...r cylinder sensor 1 top Pt1000 2 Buffer cylinder sensor 2 Pt1000 3 Buffer cylinder sensor 3 Pt1000 4 5 6 GND for all 3 sensors Plug aVG KM BUS KM Bus KM Bus 145 145 Fig 51 Assignment Function Additional information 1 KM BUS 2 KM BUS Connection and wiring diagram LV plugs cont 5684984 Appendix ...

Page 69: ... 4 5 3 CAN BUS high Pin 7 4 CAN BUS low Pin 2 5 CAN BUS GND Pin 3 6 Plug a ÖA Fan 100A 100A Fig 53 Assignment Function Additional information 1 Fan speed 24 V Hall sensor red 2 Fan speed input Hall sensor white 3 Fan speed 24 V GND Hall sensor black Connection and wiring diagram LV plugs cont 5684984 Appendix ...

Page 70: ...y air damper Winding 3 red 6 Primary air damper Winding 4 yellow Plug s F Secondary air damper M 204 Fig 55 Assignment Function Additional information 1 Secondary air damper GND black 2 Secondary air damper Winding 1 brown 3 Secondary air damper Winding 2 orange 4 Secondary air damper GND white 5 Secondary air damper Winding 3 red 6 Secondary air damper Winding 4 yellow Connection and wiring diagr...

Page 71: ...aintenance service Date By Maintenance service Maintenance service Maintenance service Date By Maintenance service Maintenance service Maintenance service Date By Maintenance service Maintenance service Maintenance service Date By Commissioning service reports Commissioning service reports 5684984 Appendix ...

Page 72: ...0 10 10 10 Output kW 85 100 120 170 Flue gas temperature rated heating output wood C 180 180 180 180 Flue gas temperature rated heating output oil C 172 172 168 168 Flue gas mass flow rate rated heating output wood g s 58 4 72 88 108 Max draught wood 1 Pa 25 25 25 25 Required chimney draught 2 Pa 10 10 10 10 1 Maximum overpressure during the start phase chimney cold in the flue pipe downstream of ...

Page 73: ... A Hopper door B Boiler module with high limit safety cut out C Ash chamber door D Primary air damper with servomotor E Boiler circuit pump F Sockets for electrical connection G Valve of return temperature raising facility with servomotor H Cleaning door top K Flow temperature sensor in boiler L Flange for fitting the burner trolley combustion chamber maintenance cover on both sides M Return tempe...

Page 74: ... mm 550 550 550 550 1080 1080 1080 1080 d mm 214 214 214 214 480 480 480 480 e mm 1331 1331 1389 1389 1328 1328 1386 1386 f mm 811 811 869 869 635 635 636 636 g mm 600 600 600 600 800 800 800 800 h mm 200 200 200 200 400 400 400 400 k mm 770 770 773 773 770 770 876 876 l mm 300 300 400 400 300 300 400 400 m mm 1892 1892 2012 2012 1892 1892 2012 2012 n mm 350 350 350 350 630 630 630 630 o mm 175 17...

Page 75: ...ot part of ordi nary household waste For decommissioning the system isolate the system from the power supply and allow components to cool down where appropriate All components must be disposed of correctly Decommissioning and disposal Final decommissioning and disposal 5684984 Appendix ...

Page 76: ...igno 250 S complies with the standard EN 303 5 In accordance with the following directives this product is designated with 2006 95 EC 2004 108 EC 2006 42 EC 97 23 EC Wolfurt 13 April 2015 Viessmann Holzheiztechnik GmbH Ing Christian Rubin MAS Management Certificates Declaration of conformity 5684984 Appendix ...

Page 77: ...minals 15 Extension kit 20 Connections 20 Required settings 20 Setting rotary selector S1 20 F Fault code deletion 52 Fault display Acknowledging 51 Hiding 51 Plain text 51 Fault history 51 Fault memory 51 Fault message Acknowledging 51 Calling up 51 Faults 51 Fill water 24 Flow temperature Electronic Minimum limit 39 Maximum limit 39 Flue gas fan cleaning 34 Fuse 55 G Gaskets 34 H Heating circuit...

Page 78: ...1 65 Plug X15 69 Primary air damper plug 70 Return temperature sensor plug 67 Secondary air damper plug 70 Power switching on 25 Power supply 21 R Reduced room temperature 29 Relay test 26 56 S Sensors Checking 26 57 Scanning 50 Service functions 48 Set room temperature adjustment 29 Setting the date 25 Setting the time 25 Siting 11 Solar connection 26 Specification 72 Standard room temperature 29...

Page 79: ...79 5684984 ...

Page 80: ... Shropshire TF1 7YP GB Telephone 44 1952 675000 Fax 44 1952 675040 E mail info uk viessmann com Viessmann Werke GmbH Co KG D 35107 Allendorf Telephone 49 6452 70 0 Fax 49 6452 70 2780 www viessmann com 5684984 Subject to technical modifications ...

Reviews: