background image

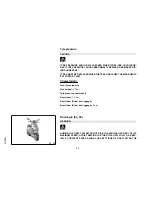
Tyrepressure

CAUTION

TYRE PRESSURE SHOULD BE CHECKED WHEN TYRES ARE COLD.INCOR-
RECT TYRE PRESSURE CAUSES ABNORMAL TYRE WEAR AND MAKES RID-
ING DANGEROUS.

TYRES MUST BE REPLACED WHEN THE TREAD REACHES THE WEAR LIMITS
SET FORTH BY LAW.

Characteristic

Front tyre pressure

Front wheel:

 1.3 bar

Tyre pressure (rear wheel)

Rear wheel:

 1,8 bar

Rear wheel (Driver and luggage)

Rear wheel (Driver and luggage):

 2 bar

02_02

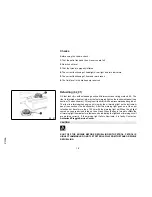
Runningin (02_02)

WARNING

DURING THE FIRST 1000 KM DO NOT RIDE THE VEHICLE OVER 80% OF ITS
MAXIMUM SPEED. AVOID TWISTING THE THROTTLE GRIP FULLY OR KEEP-
ING A CONSTANT SPEED ALONG LONG SECTIONS OF ROAD. AFTER THE

20

2 Use

Summary of Contents for ET2 50

Page 1: ...mation tips and precautions for using your vehicle It also describes features details and devices to assure you that you have made the right choice We believe that if you follow our suggestions you will soon get to know your new scooter and it will serve you well for a long time to come This booklet forms an integral part of the vehicle should the vehicle be sold it must be transferred to the new ...

Page 2: ...regular checks that should be carried out on the vehicle at an authorised Dealer or Service Centre The booklet also contains instructions for simple repairs Any operations not specifically described in this booklet require the use of special tools and or particular technical knowledge to carry out these operations refer to any authorised Dealer or Service Centres 2 ...

Page 3: ...ging the environment Vehicle intactness The incomplete or non observance of these regulations leads to the risk of serious damage to the vehicle and sometimes even the invalidity of the guarantee The signs that you see on this page are very important They are used to highlight parts of the booklet that should be read with particular care The different symbols are used to make each topic in the man...

Page 4: ...4 ...

Page 5: ...3 Automatictransmission 24 Safedriving 25 MAINTENANCE 27 Huboillevel 28 Tyres 29 Sparkplugdismantlement 30 Removingtheairfilter 31 Airfiltercleaning 32 Secondaryairsystem 33 Intakeplug 33 Checkingthebrakeoillevel 34 Battery 35 Long periods of inactivity 36 Fuses 37 Frontlightgroup 38 Headlightadjustment 39 Frontdirectionindicators 40 Rearopticalunit 40 Rear viewmirrors 41 Idleadjustment 41 Frontan...

Page 6: ...6 ...

Page 7: ...Vespa ET2 50 Chap 01 Vehicle 7 ...

Page 8: ...Turn signal indicator light F Engine oil warning light G Light indicator H Fuel warning light I Headlight indicator L Headlight high beam dipped beam selector M Turn signal selector N Horn button P Start button Q Throttle R Rear brake lever S Digital clock Calendar 8 1 Vehicle ...

Page 9: ...month day and seconds can be seen besides hours and minutes In order to adjust the above mentioned functions operate button U The digital clock is powered by a battery battery life is about 2 years lift the whole instrument panel to replace the battery It is advisable to take your vehicle to an Authorised Service Centre for this operation 9 1 Vehicle ...

Page 10: ...eering lock installed OFF Ignition blocked key can be extracted steering lock not on ON Starter position steering lock not on key cannot be extracted 01_04 Lockingthesteeringwheel 01_04 Turn the handlebar to the left as far as it will go turn the key to LOCK and remove the key CAUTION DO NOT TURN THE KEY TO LOCK OR KEY OFF WHILE RIDING Releasingthesteeringwheel Reinsert the key and turn it to OFF ...

Page 11: ...ft turn indicators flashing move lever B to the left to set the right turn indicators flashing move it to the right The lever automatically returns to the central position and the indicators remain on To turn the indicators off press the lever towards the switch 01_06 Hornbutton 01_06 Horn button E 11 1 Vehicle ...

Page 12: ... Lightswitch 01_07 0 Low beam and tail light 1 High beam and tail light 01_08 Start upbutton 01_08 To start the engine press the starter button P after pulling either one of the two brake levers 12 1 Vehicle ...

Page 13: ...rked with the identification code to be quoted when ordering duplicates WARNING WE RECOMMEND KEEPING THE DUPLICATE KEY TOGETHER WITH ITS CODE IN A SAFE PLACE AND NOT ON THE VEHICLE 01_10 Openingthesaddle 01_10 01_11 Insert the key in lock A turn it anticlockwise and tip the saddle forward After having tipped the saddle place the helmet as shown in the figure 13 1 Vehicle ...

Page 14: ...01_11 01_12 14 1 Vehicle ...

Page 15: ...mmend that you check that the prefix and chassis number stamped on the vehicle correspond with those in the vehicle documents CAUTION PLEASE REMIND THAT ALTERING IDENTIFICATION REGISTRATION NUM BERS CAN LEAD TO SERIOUS PENAL SANCTIONS IMPOUNDING OF THE VEHICLE ETC Reartopboxopening Press the key when it is in OFF or ON to open the glove box With the key is in LOCK the glove box is locked 15 1 Vehi...

Page 16: ...01_15 Bagclip 01_15 To use the retractable bag hook B located at the front end of the saddle pull it forward lightly 16 1 Vehicle ...

Page 17: ...Vespa ET2 50 Chap 02 Use 17 ...

Page 18: ...ne oil tank B with new recommended engine oil The rider is informed when engine oil is low by the oil warning light on the instrument panel see section The dashboard After this warning light goes on at the next refuel do not travel more than 150 km with the warning light on When the oil light comes on you are advised to top up the oil tank When the key is turned to ON the oil warning light illumin...

Page 19: ...USE OF OILS AND SPARK PLUGS OTHER THAN THOSE RECOMMENDED CAN SHORTEN THE LIFE OF THE ENGINE Recommended products eni i Ride PG 2t Synthetic based lubricant for low smoke 2 stroke engines and additives API TC JASO FC ISO L EGD Characteristic Oil mixer tank In plastic of capacity 1 35 lt including reserve 0 400 lt Topping up mixer oil reservoir Topping up oil reservoir 0 5 0 7 l 19 2 Use ...

Page 20: ...IMITS SET FORTH BY LAW Characteristic Front tyre pressure Front wheel 1 3 bar Tyre pressure rear wheel Rear wheel 1 8 bar Rear wheel Driver and luggage Rear wheel Driver and luggage 2 bar 02_02 Runningin 02_02 WARNING DURING THE FIRST 1000 KM DO NOT RIDE THE VEHICLE OVER 80 OF ITS MAXIMUM SPEED AVOID TWISTING THE THROTTLE GRIP FULLY OR KEEP ING A CONSTANT SPEED ALONG LONG SECTIONS OF ROAD AFTER TH...

Page 21: ...brake lever B or front brake lever C and then press starter button A A Place the vehicle on the center stand and check that the rear tire is not touching the ground B Keep the throttle closed C Insert the ignition key and turn it to ON When turning the key to ON the oil warning light and fuel warning light go on for a few seconds indicating that the bulb and circuit for the oil warning light are w...

Page 22: ...start the engine B In case of battery or starter motor inefficiency Place the vehicle on stand E make sure that the rear wheel is off the ground turn the key switch D to ON and use kick starter F C If fuel tank is empty After refuelling the scooter start the engine by pressing the starter button A with the throttle at a minimum to provide maximum aspiration for the tap If the scooter fails to star...

Page 23: ... OFF to stop the engine ex tractable key Catalyticsilencer CAUTION TAMPERING WITH THE CATALYTIC SILENCER MAY CAUSE SEVERE DAMAGE TO THE ENGINE CAUTION WHEN PARKING THE VEHICLE DUE TO THE HIGH TEMPERATURES THE CAT ALYTIC CONVERTER CAN REACH ALWAYS BE CAREFUL THAT THE MUF 23 2 Use ...

Page 24: ...o engine speed and transmitted torque If you have to stop on an uphill slope traffic lights traffic jam etc only use the brake to keep the vehicle still leaving the motor running at idling speed Using the motor to keep the vehicle still can cause the clutch to overheat This problem is due to the friction of the clutch parts on the capstan It is therefore recommended to avoid con ditions of prolong...

Page 25: ...braking effect is initially lower Under these conditions it is a good idea to operate the brakes from time to time 4 Do not brake hard on a wet surface on dirt tracks or on any slippery road surface 5 If you have to brake use both brakes in order to divide the braking action between both wheels 6 Avoid starting off by mounting the vehicle while it is still resting on its stand In any case the rear...

Page 26: ...nd therefor dangerous to ride CAUTION RIDING UNDER THE INFLUENCE OF ALCOHOL DRUGS OR CERTAIN MEDI CINES CAN BE EXTREMELY DANGEROUS FOR ONESELF AND FOR OTHERS CAUTION ANY ELABORATION THAT MODIFIES THE VEHICLE S PERFORMANCES SUCH AS TAMPERING WITH ORIGINAL STRUCTURAL PARTS IS STRICTLY FORBID DEN BY LAW AND RENDERS THE VEHICLE NO LONGER CONFORMING TO THE APPROVED TYPE AND DANGEROUS FOR RIDING 26 2 Us...

Page 27: ...Vespa ET2 50 Chap 03 Maintenance 27 ...

Page 28: ...th the specified oil Characteristic Rear hub oil Quantity approx 75 cm 03_01 Rest the vehicle on its centre stand on an even surface Unscrew the dipstick A dry it with a clean cloth and then reinsert it screwing it tightly into place Take out the dipstick and check that the oil level reaches the 3rd notch from the bottom Screw the dipstick back into place completely CAUTION RUNNING THE ENGINE WITH...

Page 29: ...NO SPECIFIC FUNCTION FOR THIS MODEL Recommended products AGIP GEAR SAE 80W 90 Lubricant for gearboxes and transmissions API GL 4 03_04 Tyres 03_04 Periodically check the inflation pressure of each tire when they are cool The tires have wear indicators and must be replaced as soon as the indicators are visible on the tread Check also for cuts on the tire walls and uneven tread wear Tires must be ch...

Page 30: ...he plug it should be hand tightened initially Be sure to engage the threads properly by holding it at the correct angle Use the spark plug wrench only to fully tighten the plug Refit the shielded plug cap carefully If you need to access the spark plug when the engine is hot to avoid the risk of burning the hands work from above by tipping open the saddle and removing the helmet compartment Refit t...

Page 31: ... 5 000 KM THE SPARK PLUG MUST BE CHECKED EVERY 5 000 KM AND CHANGED EVERY 15 000 KM INJECTION VEHICLES Characteristic recommended spark plug CHAMPION RN3C Electrode gap 0 6 0 7 mm 03_07 Removingtheairfilter 03_07 03_08 Dissemble left hand lower side panel unscrew the four fixing screws B and the two knobs accessible by tipping the saddle and removing the helmet compartment re move air cleaner plug...

Page 32: ...ure of 50 petrol and 50 specified oil 4 Gently squeeze the filtering element let it drip dry and then refit it CAUTION IF THE VEHICLE IS USED ON DUSTY ROADS IT IS NECESSARY TO CARRY OUT MAINTENANCE CHECKS OF THE AIR FILTER MORE OFTEN TO AVOID DAM AGING THE ENGINE Recommended products AGIP FILTER OIL Special product for the treatment of foam filters 32 3 Maintenance ...

Page 33: ... filter replace the O ring seal located in the cover CAUTION CONTACT AN AUTHORISED PIAGGIO SERVICE CENTRE TO CARRY OUT THESE OPERATIONS 03_10 Intakeplug 03_10 Remove the cap of the transmission cover operating on the corresponding release slots with a plain slot screwdriver Wash the sponge in water and soap without re moving it from its seat Dry it with compressed air before refitting it taking ca...

Page 34: ...orough check of the braking system Should level be restored follow the instructions below Remove the front handlebar cover following instructions indicated in the Front headlight assembly section then unscrew the 2 screws B lift the cover of the brake fluid reservoir C and add the necessary quantity of fluid fluid must always be over the minimum level Check these levels with the reservoir in a hor...

Page 35: ...LU ID CAUSES IRREPARABLE DAMAGE SPECIALLY TO THE RUBBER GASKETS IN THE BRAKING SYSTEM 03_13 Battery 03_13 To have access to the battery it is necessary to remove the saddle Keys section and the access hatch to the battery compartment unscrewing the star head screws A shown in the figure CAUTION IN ORDER TO AVOID DAMAGING THE ELECTRICAL SYSTEM NEVER DISCON NECT THE WIRING WHILE THE ENGINE IS RUNNIN...

Page 36: ... absorption by vehicle components with constant power consumption Poor battery performance may also be due to environmental conditions and the cleanliness of the poles In order to avoid difficult starts and or irreversible damage to the battery follow any of these steps At least once a month start the engine and run it slightly above idle speed for 10 15 minutes This keeps all the engine component...

Page 37: ...S CAN CAUSE IRREPARABLE DAMAGE TO THE VEHICLE S ELECTRONIC CONTROL UNIT WARNING USED BATTERIES ARE HARMFUL FOR THE ENVIRONMENT COLLECTION AND DISPOSAL SHOULD BE CARRIED OUT IN COMPLIANCE WITH REGULA TIONS IN FORCE 03_14 Fuses 03_14 The electrical system is protected by a plug fuse B located to the left of the battery compartment The ignition system headlight and the rear light are not fuse protect...

Page 38: ...b for high and low beam and no 1 bulb for position light remove the front of the handlebar fairing as described below 1 Remove the rear view mirrors as described and illustrated in section Adjusting the rear view mirrors 2 Remove the front grille panel by unscrewing screw A after having removed the Piaggio shield by means of a screwdriver Be careful not to scratch the paint 3 Unscrew the 3 screws ...

Page 39: ...reen Mark the screen with a horizontal line 85 90 cm from the ground Start the engine switch on the headlight lower beam and position it so that the boundary between the brightly illuminated area and the surrounding area is no higher than the line you have drawn The headlight position is adjusted by means of screw A located immediately beneath the headlight as shown in section Tyre pressure 39 3 M...

Page 40: ... indicator bulbs remove screws E The bulbs have a bayonet coupling to remove them press gently and twist counterclockwise about 30 To reassemble the parts follow the above steps on the opposite order N B IF MISTING IS NOTICED ON THE INSIDE OF THE HEADLAMP GLASS THIS DOES NOT INDICATE A FAULT AND IS ATTRIBUTABLE TO HUMIDITY AND OR TO LOW TEMPERATURES THE PHENOMENON SHOULD QUICKLY DISAPPEAR WHEN THE...

Page 41: ...by means of an idle speed adjuster screw A located on the carburetor See figure to carry out this operation and open the saddle and remove the helmet compartment Adjust the slack from the throttle cable B Be sure to refit the rubber cover when you have completed the adjustment Adjust the idle speed with the rear wheel off the ground vehicle on stand and with a warm engine Rotate the screw in or ou...

Page 42: ...his case especially in consideration of the fundamental role that the brakes have in your driving safety we recommend that you take the vehicle to an Authorized Piaggio Help Point in order to have appropriate checks carried out CAUTION BRAKING SHOULD BEGIN AFTER ABOUT 1 3 OF THE BRAKE LEVER STROKE CHECK THE BRAKE PADS PERIODICALLY EVERY 5000 KM IFTHE THICK NESS OF ONE OR BOTH PADS IS IN THE REGION...

Page 43: ... 03_26 03_27 The scooter is equipped with Tubeless tires If the tire is punctured it loses air very slowly unlike a standard tire with inner tube This makes for safer riding Slow deflation also makes it possible to use the INFLATE AND REPAIR spray in an emergency VESPA has a special compartment for this INFLATE AND REPAIR which can be purchased separately The tire must be professionally repaired o...

Page 44: ...erform a few revolutions slowly then replace the spark plug 3 Drain up all the vehicle fuel spread antirust grease on the uncoated metal parts keep the wheels off the ground by resting the chassis on two wooden wedges 4 For the battery follow the procedures described in the Battery section 5 Drain the petrol from the carburettor float chamber through the bleed cap Recommended products eni i Ride P...

Page 45: ...ed by washing WARNING To avoid the appearance of oxidations wash the vehicle every time it is used in certain areas or in special conditions of Environmental seasonal conditions use of salt de icer chemical products on the road in winter Air pollution city and or industrial areas Salinity and humidity of the atmosphere marine areas hot and wet weather WARNING Prevent deposits from remaining on the...

Page 46: ...D OFF AND COULD DAMAGE THE PAINTWORK NEVER USE RAGS SOAKED IN PETROL OR DIESEL OIL TO CLEAN THE PAINTED OR PLASTIC SURFACES IN ORDER TO PREVENT THEM LOSING THEIR SHINE AND MECHANICAL CHARACTERISTICS WARNING WHEN WASHING THE ENGINE WITH A HIGH PRESSURE WATER JET ONLY USE FAN SPRAY JETS DO NOT PLACE THE NOZZLE CLOSER THAN 60 CM DO NOT USE WATER AT TEMPERATURES OVER 40 C DO NOT DIRECT THE JETS DIRECT...

Page 47: ...Due to the presence of high voltage this element should only be checked by an expert Contact an Authorised Piaggio Service Centre LACK OF COMPRESSION Spark plug loose Loose cylinder head worn piston retaining rings Contact an Authorised Service Centre HIGH CONSUMPTION AND LOW PERFORMANCE Air filter blocked or dirty Clean with water and shampoo and impregnate with petrol and specific oil Air filter...

Page 48: ...ggio Service Centre INEFFICIENT SUSPENSION Oil leak worn limit switch bumpers worn shock absorber attachment points Contact an Authorised Service Centre AUTOMATIC TRANSMISSION PROBLEMS Deteriorated roller housing or belt Contact an Authorised Service Centre INCREASED EXHAUST NOISE Deterioration of the SAS system and or of the tab Contact an Authorised Service Centre 48 3 Maintenance ...

Page 49: ...Vespa ET2 50 Chap 04 Technicaldata 49 ...

Page 50: ... Fixed to 17 Carburettor Weber 12 OM Carburettor Dellorto PHVA 12 Spark plugs CHAMPION RN3C Max speed According to current legislation SPECIFICATION Maximum width 710 mm Maximum length 1780 mm Maximum height 1090 mm Wheel base 1275 mm Fuel Unleaded gasoline oil mixture and carburetor Automatic vacuum tap Fuel intake Reed valve on crankcase 50 4 Technicaldata ...

Page 51: ...tor and gear final drive Oil mixer tank In plastic of capacity 1 35 lt including reserve 0 400 lt Topping up mixer oil reservoir Topping up oil reservoir 0 5 0 7 l Fuel tank Plastic capacity 8 6 l including 1 5 l reserve Front suspension Steering tube with single fork arm double acting shock absorber with coil spring Rear suspension Swing arm and single chamber double acting hydraulic shock absorb...

Page 52: ...ge lever on right end of handlebars Rear brake Ø 110 mm drum brake with expanding shoes mechanically controlled lever on the handlebar left hand end Curbside weight 98 Kg Maximum load Driver only 04_01 Toolkit Wrenches one box wrench 13 21 mm one lever bar for box wrench one double screwdriver and an Allen wrench The tools are located in a toolbox under the saddle 52 4 Technicaldata ...

Page 53: ...Vespa ET2 50 Chap 05 Sparepartsanda ccessories 53 ...

Page 54: ...AL SPARE PARTS CAUSES YOUR WARRANTY RIGHTS TO EXPIRE WARNING PIAGGIO MARKETS ITS OWN LINE OF ACCESSORIES THAT ARE RECOG NISED AND GUARANTEED FOR USE IT IS THEREFORE ESSENTIAL TO CON TACT AN AUTHORISED DEALER OR SERVICE CENTRE IN ORDER TO CHOOSE AND FIT ACCESSORIES CORRECTLY THE USE OF NON ORIGINAL ACCES SORIES MAY AFFECT THE STABILITY AND OPERATION OF YOUR VEHICLE AND REDUCE SAFETY LEVELS WITH POT...

Page 55: ...Vespa ET2 50 Chap 06 Scheduledmaint enance 55 ...

Page 56: ...e prescribed intervals of time even if you have not reached the predicted mileage Punctual vehicle servicing is necessary for the correct use of the guarantee For any further information concerning Warranty procedures and Scheduled Maintenance please refer to the Warranty Booklet MAINTENANCE TABLE km x 1 000 1 5 10 15 20 25 30 35 40 45 50 55 60 Safety fasteners I I I I I I I Spark plug I R I R I R...

Page 57: ...oes CVT rollers R R R R R R Tyre pressure and wear I I I I I I I I I I I I I Vehicle road test I I I I I I I I I I I I I Idle speed A A A A A A A Odometer gear L L L L L L L Suspension I I I I I I Steering A I I I I I I Transmission L L L L L L Mixer oil pipes I I I I I I I I INSPECT AND CLEAN ADJUST LUBRICATE OR REPLACE IF NECESSARY C CLEAN R REPLACE A ADJUST L LUBRICATE Clean the SAS air filter ...

Page 58: ...5W 40 Synthetic based lubricant for high performance four stroke engines JASO MA MA2 API SL ACEA A3 AGIP FILTER OIL Special product for the treatment of foam filters eni i Ride PG 2t Synthetic based lubricant for low smoke 2 stroke engines and additives API TC JASO FC ISO L EGD AGIP GP 330 Water repellent stringy calcium spray grease R I D A D R 2 10 b 2 R I Na 2 42 I A T A 2 I M D G class 2 UN 19...

Page 59: ...TABLE OF CONTENTS B Battery 35 C Checks 18 Clock 9 F Fuses 37 I Identification 15 K Keys 13 M Maintenance 27 P Puncture 43 R Refuelling 18 T Toolkit 52 Tyres 29 V Vehicle 7 59 ...

Page 60: ... changes to components parts or accessories which it considers necessary to improve the product or which are required for manufacturing or construction reasons Not all versions models shown in this publication are available in all countries The availability of each model should be checked at the official PIAGGIO sales network Copyright 2012 Piaggio C S p A All rights reserved Reproduction of this ...

Reviews: