background image

14

PREPARATION FOR OPERATION

INSTALLATION OF THREE-BLADE KNIFE AND COVER OF SPOOL 
WITH CUTTING LINE

Petrol grass cutter allows to work with three-blade knife and 
cutting line, depending on the needs.

Do not operate the petrol grass cutter without shield installed.

INSTALLATION OF THREE-BLADE KNIFE


Install shield (

12

). 


Install three-blade knife (

24

) (

fig. F

) on the spindle (

22

).


Put washer on, use the supplied key to tighten the nut while 
keeping hexagonal key in the spindle lock hole to lock the spindle 
(

22

) (

fig. E

).

INSTALLATION OF COVER OF SPOOL WITH CUTTING LINE


Install shield (

12

).


Screw cover of spool with cutting line (

15

) onto spindle (

22

counter-clockwise.


Put end of the hexagonal key into spindle lock hole (

23

) to lock 

the spindle (

fig. E

).


Tighten cover of spool with cutting line.


Before operation remove cover from the blade for cutting excess 
cutting line (

25

) (

fig. F

). 

INSTALLATION OF HANDLE

Handle (

9

) allows easy and ergonomic operation of the petrol grass 

cutter 


Set handle (

9

) on the drive shaft cover (

11

).


Use six supplied fixing screws (

14

) to install the handle (

fig. A

).


Adjust handle to ergonomic position.


Tighten fixing screws with supplied key.

SETTING TILT ANGLE OF HANDLE

Handle of the petrol grass cutter allows for tilt angle adjustment. 
Ergonomic tilt angle setting allows for long operation of the tool 
without operator fatigue. 


Switch off engine of the petrol grass cutter.


Loosen fixing screws (

14

) (

fig. A

).


Set required handle tilt angle.


Tighten the fixing screws.

INSTALLATION AND ADJUSTMENT OF SHOULDER STRAP

Switch off the engine before installation and adjustment of the 
shoulder strap and shoulder strap holder.

Appropriate adjustment of the shoulder strap facilitates using the 
device.  


Put the shoulder strap spring hook (

31

) (

fig. H

) in the shoulder 

strap holder (

2

).


Adjust the shoulder strap so the cutting element is parallel to the 
ground.


Carefully put the cutting element (

13

) on the ground. 


Move the shoulder strap holder so the grass cutter is properly 
balanced.


When using three-blade knife, hold the knife approx. 10 cm above 
the ground, so it does not touch the ground.


Use the shoulder strap fastener (

32

) (

fig. I

) to adjust shoulder strap 

length to set the most comfortable working position. 

There is spring hook with quick release mechanism on the end 

of the shoulder strap. Use it in emergency situation, when you 
need to immediately free from the device. 

Petrol grass cutter must always be attached to shoulder strap 
during operation. Otherwise safe manoeuvring the grass cutter 
is impossible, it may lead to injuries of the operator or other 
persons. Never use the shoulder strap with faulty quick-release 
mechanism.

OPERATION / SETTINGS

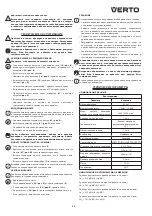
PREPARATION OF FUEL BLEND

As a fuel for the petrol grass cutter use petrol-oil blend at a 25:1 
ratio. 

Most problems with combustion engines result directly or 
indirectly from fuel used. You must not use oil designed for four-
stroke engines to prepare fuel blend. Never mix petrol with oil 
inside the grass cutter fuel tank.

Always mix petrol with oil in a canister designed for such purpose.

Accordingly to the below table, mix petrol (lead-free with octane 
number 

95

) with good quality engine oil for two stroke engines at 

25

:1 ratio.

Petrol

Two-stroke engines oil

1 litre

4

0 ml

2

 litres

8

0 ml

5

 litres

2

00 ml


Pour appropriate amount of oil into a canister, and add exactly 
measured amount of petrol.


Screw the cap and mix thoroughly.

STARTING THE ENGINE 

Never start the engine without shield for cutting element 
installed. Use of improper or damaged shields may cause serious 
injuries.

Improperly wound cutting line or inappropriate cutting 
accessories cause increased vibrations.

The petrol grass cutter is equipped with the switch, which protects 
against accidental starting.

Switching on

 – move ignition switch (

28

) (

fig. G

) to “

start

” position, 

choke lever (

38

) (

fig. N

) to ”

ON

”, position and pull the starter line 

strongly. After few failed attempts pump fuel with the membrane 
pump (

39

) (

fig. N

) and try again. After starting the engine you can 

start working after more than ten seconds. Switch off choke by 
slowly moving choke lever to “

OFF

” position.

To increase engine speed press the button for locking throttle lever 
(

29

) and press throttle lever (

30

) (

fig. G

).

Switching off 

– release pressure on the throttle lever (

30

). Move the 

ignition switch (

28

) to „

stop

” position.

Cutting parts rotate for some time after the motor is switched 
off. Never use the petrol grass cutter during rain and in 
moisture environment. Never operate faulty device. All parts 
must be assembled properly and must fulfill requirements that 
ensure safe operation of the petrol grass cutter. Any damaged 
protective element or part must be repaired or replaced 
immediately.

IDLE RUNNING SPEED ADJUSTMENT

Adjust idle running speed if the cutting element rotates even 
when the throttle lever (30) (fig. G) is in idle position.

Engine idle speed should be adjusted so the engine does not 
stall and the cutting element does not rotate. If engine speed is 
too high or too low after switching the grass cutter, adjust idle 
engine speed. 


Locate the idle running speed adjustment screw (

40

) behind the 

air filter casing (

5

) (

fig. N

).


Start the grass cutter engine.


Use screwdriver to carefully turn the idle running speed 
adjustment screw (clockwise to increase speed, counter-clockwise 
to reduce speed).

INSTRUCTIONS REGARDING SAFE USE


When cutting high grass perform the work gradually, by layers. 


Keep the petrol grass cutter away from hard objects and cultivated 
plants. 


Operate the petrol grass cutter only when the grass is dry. 


When trimming edges drive the tool along lawn edge. 

Summary of Contents for 50G490

Page 1: ...RU UA HU MOTOROS F KASZA RO MOTOCOASA PE BENZINA CZ BENZ NOV KOSA SK BENZ NOV KOSA SI MOTORNA KOSA LT TRIMERIS LV BENZ NA TRIMERIS EE BENSIINIMOOTORIGA TRIMMER BG HR BENZINSKA KOSILICA SR KOSA SA UNU...

Page 2: ...2...

Page 3: ...T S 31 RO INSTRUCTIUNI DE DESERVIRE 36 CZ INSTRUKCE K OBSLUZE 41 SK N VOD NA OBSLUHU 45 SI NAVODILA ZA UPORABO 50 LT APTARNAVIMO INSTRUKCIJA 55 LV LIETO ANAS INSTRUKCIJA 59 EE KASUTUSJUHEND 64 BG 68 H...

Page 4: ...4 1 2 3 6 7 4 5 8 10 11 12 13 9 A 14 B 15 16 C 18...

Page 5: ...5 D 21 20 19 21 E 23 22 F 24 25 26 G 28 30 29 H 31 I 32 J 33 K 34 35 L 36 M 37 N 39 O 42 41...

Page 6: ...nij si e korek wlewu paliwa jest dok adnie dokr cony PL Je eli stwierdzono nieszczelno ci lub wyciek paliwa to nie nale y uruchamia silnika gdy grozi to po arem W czasie pracy kosa spalinowa znacznie...

Page 7: ...i pokrzyw w ogrodzie Nale y stosowa wy cznie akcesoria odpowiednie dla danego urz dzenia i przestrzega wskaz wek podanych w instrukcji obs ugi Kosa spalinowa przeznaczona jest wy cznie do zastosowa am...

Page 8: ...b innych Nigdy nie u ywaj pasa naramiennego z zepsutym mechanizmem szybkiego rozpinania PRACA USTAWIENIA PRZYGOTOWANIE MIESZANKI PALIWOWEJ Jako paliwo do kosy spalinowej nale y stosowa mieszank benzyn...

Page 9: ...owemu uruchomieniu silnika Zachowa ostro no ze wzgl du na ostrze do przycinania y ki tn cej Kiedy kosa spalinowa nie jest u ywana ostrze powinno by zawsze zabezpieczone WYMIANA SZPULI Z Y K TN C Upewn...

Page 10: ...3 dB Poziom mocy akustycznej praca z no em tr jz bnym LwA 108 2 dB A K 3 dB Poziom ci nienia akustycznego praca z y k tn c LpA 99 1 dB A K 3 dB Poziom mocy akustycznej praca z y k tn c LwA 107 6 dB A...

Page 11: ...ania norm and fulfils requirements of the following Standards valamint megfelel az al bbi szabv nyoknak EN ISO 11806 1 2011 EN ISO 14982 2009 Ostatnie dwie cyfry roku w kt rym umieszczono znak CE 11 L...

Page 12: ...o carefully tighten the fuel plug Do not start the engine when fuel leakage is found it may cause fire The petrol grass cutter heats considerably during operation Be careful and do not touch hot parts...

Page 13: ...vice and follow all instructions contained in the manual Petrol grass cutter is intended for amateur use only Use the tool according to its purpose only DESCRIPTION OF DRAWING PAGES Below enumeration...

Page 14: ...fuel for the petrol grass cutter use petrol oil blend at a 25 1 ratio Most problems with combustion engines result directly or indirectly from fuel used You must not use oil designed for four stroke...

Page 15: ...over of spool with cutting line fig D Clean inside the cover of spool with cutting line thoroughly remove all residues of ground and grass Unwind both ends of the line from spool by approximately 15 c...

Page 16: ...RIEBNAHME DIESES GER TES GR NDLICH DIE VORLIEGENDE BETRIEBSANLEITUNG DURCH UND BEWAHREN SIE SIE AUF DETAILLIERTE SICHERHEITSVORSCHRIFTEN SICHERHEITSHINWEISE F R BETRIEB DER MOTORSENSE WARNUNG Beim Geb...

Page 17: ...k rper gegen das Ger t geschlagen hat Pr fen Sie ob das Ger t nicht besch digt ist und falls n tig lassen Sie es vor der weiteren Arbeit reparieren immer wenn die Sense berm ig zu schwingen anf ngt so...

Page 18: ...ohne angebrachte Abdeckung darf nicht betrieben werden DREIZAHNMESSER MONTIEREN Die Abdeckung 12 montieren Das Dreizahnmesser 24 Abb F an der Spindel 22 montieren Die Unterlegscheibe Mutter einlegen m...

Page 19: ...ten des Motors rotieren die Schneideelemente immer noch Verwenden Sie die Motorsense nie beim Regen und in feuchtem Umfeld Niemals mit defektem Ger t arbeiten Alle Teile sind richtig zu montieren und...

Page 20: ...einem Drahthacken oder Sechskantschl ssel den Brennstofffilter 37 Abb M durch die F ll ffnung herausnehmen Den Brennstofffilter abbauen und mit Benzin reinigen bzw gegen einen neuen austauschen Den Br...

Page 21: ...gen Sie den Vertreiber oder lokale Verwaltung nach Informationen ber die Entsorgung Das Altger t enth lt Sto e die nicht neutral f r die Umwelt sind Das der Wiederverwertung nicht zugef hrte Ger t ste...

Page 22: ...22 15 360 15m 1 2 3 4 5 6 7 8 9 10 11 12 15 13 14...

Page 23: ...3 4 5 6 7 8 9 10 11 12 13 14 15 18 19 20 21 22 23 24 3 25 26 28 29 30 31 32 33 34 35 36 37 38 39 40 41 42 1 1 2 1 3 1 4 1 5 1 6 1 7 2 8 1 9 1 12 24 F 22 22 E 12 22 15 B 23 E 25 F 9 9 11 14 A 14 A 10 I...

Page 24: ...24 13 10 32 I 25 1 95 1 40 2 80 5 200 28 G start 38 N ON 3 39 N OFF 30 28 stop 30 G 5 40 N 15 B 23 E 18 C 21 D...

Page 25: ...18 C 19 20 D 15 21 D 5 42 O 41 O 6 37 M 7 35 K 4 34 K 36 L 43 cm3 1 4 1 9 KM 7000 8500 1 1 6 25 1 1 2 L7RTC TORCH o L8RTF NHSP LD 0 6 0 7 255 10 460 16 2 5 7 5 2017 LpA 95 9 K 3 LwA 108 2 K 3 LpA 99 1...

Page 26: ...K 1 5 2 Grupa Topex Sp ka z ograniczon odpowiedzialno ci Sp ka komandytowa ul Pograniczna 2 4 Grupa Topex Grupa Topex 4 1994 90 631 Grupa Topex 2 YYV 2 YY V GRUPA TOPEX Sp z o o Sp k ul Pograniczna 2...

Page 27: ...27 15 360 15m 1 2 3 4 5 6 7 8 9 10 11 12 15 13 14...

Page 28: ...1 2 3 4 5 6 7 8 9 10 11 12 13 14 15 18 19 20 21 22 23 24 25 26 28 29 30 31 32 33 34 35 36 37 38 39 40 41 42 1 1 2 1 3 1 4 1 5 1 6 1 7 2 8 1 9 1 12 24 F 22 22 E 12 16 17 22 15 B 23 E 25 F 9 9 11 14 A 1...

Page 29: ...29 31 H 2 13 10 32 I 25 1 95 25 1 1 40 2 80 5 200 28 G start 38 N ON 3 39 N OFF 29 30 G 30 28 stop 30 G 5 40 N Regularnie usuwa resztki trawy z os ony i szpuli z y k tn c...

Page 30: ...30 15 23 E 18 C 21 D 35 15 23 E 18 C 19 20 D 15 21 D 5 42 O 41 O 6 37 M 7 35 K 4 34 K 36 L 43 cm3 1 4 1 9 7000 8500 1...

Page 31: ...rendeltet sellenes haszn latb l ered k rok rt A motor kikapcsol sa ut n a v g elemek tov bb forognak Ne engedje meg a motoros f kasza haszn lat t gyermekeknek s a haszn lati utas t st nem ismer szem l...

Page 32: ...a KARBANTART S T ROL S Az zemanyagot kiz r lag arra rendeltetett jel lt z rt kann kban t roljon sz raz s h v s helyen A r szegys geket tartsa megfelel llapotban hogy a motoros f kasza biztons gosan m...

Page 33: ...s z r furatba cs sztatva reteszelje az ors t E bra H zza meg a v g zsin r cs ve h zat Haszn latbav tel el tt vegye le a v d bor t st a v g zsin r f l sleg t lev g 25 k sr l F bra A FOGANTY FELSZEREL S...

Page 34: ...an forgassa el az alapj rati szab lyz csavart jobbra a fordulatsz mot n veli m g balra cs kkenti TAN CSOK A BIZTONS GOS ZEMELTET SHEZ Magasra n tt f vet fokozatosan t bb menetben kell lekasz lni A mot...

Page 35: ...m zemanyagok vizet vehetnek fel amely a t rol s sor n az zemanyag kever k sz tv l s hoz s savak keletkez s hez vezethet A savas zemanyag k ros thatja a motort J rjon el vatosan vigy zzon a v g zsin r...

Page 36: ...i rece deoarece reprezint un poten ial pericol de rev rsarea combustibilului deci riscul c se poate aprinde de la elemetele fierbin i ale cositoarei S nu faci plinul dep ind nivelul maxim al bacului D...

Page 37: ...sare n jurul copacilor c r rilor ierbii ncurcate stufului i urtzicilor din gr din Trebuie aplicate doar accesoriile corespunz toare utilajului respectiv i respectate recomand rile specificate n instru...

Page 38: ...te iar operatorul sau chiar persoane ter e pot fi accidenta i Nici odat nu utiliza centura cu dispozitivul de deschiderea rapid defectat LUCRUL AJUSTAREA PREGATIREA AMESTECULUI DE COMBUSTIBIL Combusti...

Page 39: ...Inainte de ncepe cur area verificarea ori repararea cositoarei trebuie s te asiguri c motorul este oprit i este rece Deconecteaz conductorul bujiei 35 fig K cu scopul de aevita o pornire nt mpl toare...

Page 40: ...siunii acustice lucrul cu cu itul cu trei t i uri LpA 95 9 dB A K 3 dB Nivelul puterii acustice lucrul cu cu itul cu trei t i uri LwA 108 2 dB A K 3 dB Nivelul presiunii acustice lucrul cu firul t iet...

Page 41: ...se p esv d te zda je uz v r plnic ho hrdla palivov n dr e dn uta en V p pad zji t n net snosti nebo niku paliva nesm te kosu uv d t do provozu proto e hroz nebezpe po ru CZ Benz nov kosa se za provoz...

Page 42: ...hradn p slu enstv ur en pro toto za zen a dodr ujte pokyny uveden v n vodu k obsluze Benz nov kosa je ur ena v hradn k vyu it p i kutilsk ch prac ch Za zen je nutno pou vat v souladu s jeho ur en m P...

Page 43: ...hanismem rychl ho rozep n n PROVOZ NASTAVEN P PRAVA PALIVOV SM SI Jako palivo do benz nov kosy pou vejte sm s benz nu a oleje v pom ru 25 1 V t ina probl m se spalovac mi motory p mo nebo nep mo souvi...

Page 44: ...pojistn z padky 18 po obou stran ch krytu c vky s vy nac strunou obr C Vyjm te c vku se strunou 19 pru ina 20 mus z stat v krytu c vky obr D Pe liv o ist te vnit ek krytu c vky s vy nac strunou odstr...

Page 45: ...a m e m t za n sledek ob anskopr vn a trestn st h n PREKLAD P VODN HO N VODU NA POU ITIE BENZ NOV KOSA 50G490 POZOR PREDT M AKO ZA NETE POU VA ZARIADENIE JE POTREBN SI POZORNE PRE TA TENTO N VOD A US...

Page 46: ...n hradn diely odpor an v robcom DR BA A USKLAD OVANIE Palivo usklad ujte v lu ne v uzavret ch kanistr ch na toto ur en ch a ozna en ch na suchom a chladnom mieste V etky podjednotky udr iavajte v n le...

Page 47: ...ktor je s as ou pr slu enstva a zablokujte vreteno 22 tak e do otvoru blokovania vretena budete vs va es hrann k obr E MONT KRYTU CIEVKY SO ACOU STRUNOU Namontujte kryt 12 Na vreteno 22 namontujte kr...

Page 48: ...r nevyp nal a aby sa rezn s iastka neot ala Ak je po spusten kosy po et ot ok pr li vysok alebo pr li n zky vykonajte nastavenie po tu ot ok motora pri behu napr zdno Za krytom vzduchov ho filtra 5 n...

Page 49: ...k m prestane pracova pre nedostatok paliva Ka d sez nu pou vajte erstv palivo V iadnom pr pade nenap ajte do palivovej n dr e istiace prostriedky preto e by to mohlo sp sobi po kodenie motora Venujte...

Page 50: ...izvajalec ne nosi odgovornosti za kodo nastalo zaradi neustrezne uporabe kose Po odklopu motorja se rezilna nitka e naprej obra a Kose ne smejo uporabljati otroci in osebe ki niso seznanjene z navodil...

Page 51: ...bi bili prepri ani v varno delovanje kose Z namenom ohranitve varnosti zamenjajte vse izrabljene ali po kodovane dele Varujte pred vlago Hranite izven dosega otrok Uporabljajte rezilne elemente ustre...

Page 52: ...teno 22 privijte za ito bobna z rezilno nitko 15 v smeri ki je nasprotna smeri gibanja urinega kazalca slika B Z vlo itvijo konca inbus klju a v odprtino blokade vretena 23 zablokirajte vreteno slika...

Page 53: ...a v desno za pove anja obratov v levo e so obrati previsoki NASVETI ZA VARNO UPORABO Pri ko nji visoke trave je delo treba opravljati po stopnjah po slojih Koso je treba dr ati stran od trdih objektov...

Page 54: ...bi hranjena v istem stanju na vodoravni povr ini na suhem mestu nedostopnim za otroke Goriva z dodatkom alkohola etilnega ali metilnega lahko vsrkavajo vlago kar med hranjenjem vodi k separaciji sesta...

Page 55: ...kuras i silies bei nuo kaitusi oliapjov s element u sidegs Nepilkite kuro daugiau nei leid ia nurodyta maksimali kuro bako at yma LT Pasteb j kad kuras i siliejo ar kitok nesandarum nejunkite variklio...

Page 56: ...nendri ir dilg li pjovimui sode Galima naudoti tik iam renginiui skirtus priedus b tina laikytis ioje aptarnavimo instrukcijoje esan i nuorod i benzinin oliapjov pritaikyta tik m g ji kiems darbams N...

Page 57: ...kan io dir o kurio greitai atsegamas mechanizmas yra suged s DARBAS IR NUSTATYMAI KURO MI INIO GAMINIMAS Benzininei oliapjovei turi b ti naudojamas benzino tepalo mi inys kurio santykis 25 1 Didesn da...

Page 58: ...g stat e iakamp rakt 23 pav E atsukite pjovimo lyno rit s gaubt 15 pav B Tvirtai suimkite rit s gaubt spauskite abejuose rit s gaubto onuose esan ius apsauginius u raktus 18 pav C I imkite pjovimo lyn...

Page 59: ...KOJUMS NO ORI IN LVALODAS BENZ NA TRIMERIS 50G490 UZMAN BU PIRMS UZS KT LIETOT IEK RTU NEPIECIE AMS UZMAN GI IZLAS T DOTO INSTRUKCIJU UN SAGLAB T TO DETALIZ TIE DRO BAS NOTEIKUMI DRO BAS NOTEIKUMI TRI...

Page 60: ...i tai speci li paredz t s un apz m t s sl gt s kann s saus un aukst viet Ir j uztur atbilsto st vokl visus apak mezglus dro am iek dedzes dzin ja trimmera darbam Dro bas nol kos main t nolietot s vai...

Page 61: ...st ra atsl gu E z m GRIEZ JAUKLAS SPOLES AIZSEGA MONT A Piestiprin t aizsegu 12 Pie darbv rpstas 22 pieskr v t griez jauklas spoles aizsegu 15 grie ot pret ji pulkste r d t ju kust bas virzienam B z m...

Page 62: ...immera dzin ju Ar skr vgriezi uzman gi pagriezt tuk gaitas apgriezienu regul cijas skr vi pa labi lai palielin tu apgriezienus pa kreisi ja apgriezieni ir p r k augsti NOR D JUMA DRO AI EKSPLUAT CIJAI...

Page 63: ...piejaukumu var absorb t mitrumu kas uzglab anas laik noved l dz degvielas mais juma sast vda u separ cijai un sk bju veido anos ds mais jums var rad t dzin ja boj jumus J uzman s ar asmeni p rm r gi g...

Page 64: ...imaalse k tusetaseme P rast k tusepaagi t itmist veenduge et selle kork oleks tihedalt kinni keeratud EE Kui ilmnevad k tuselekked ei tohi trimmerit k ivitada sest see v ib viia tulekahjuni T tamise a...

Page 65: ...a muruplatside ri puude ja teeradade mbrust samuti aga k rget rohtu putkesid ja v sa Kasutage vaid konkreetsele trimmerile m eldud tarvikuid ja j rgige kasutusjuhendis toodud juhistest Trimmer ei ole...

Page 66: ...ETTEVALMISTAMINE Bensiinimootoriga trimmeri k tusena kasutatakse bensiini li segu suhtes 25 1 Enamus bensiinimootorite probleeme on otseselt v i kaudselt seotud kasutatud k tusega Olge eriti t helepa...

Page 67: ...oonis B lukustades kuuskantv tme abil spindli luku ava 23 joonis E Haarake kindlalt pooli kattest Vajutage alla kinnitusklambrid 18 j hvipooli katte kummalgi k ljel joonis C Eemaldage j hvipool 19 ved...

Page 68: ...kej hviga LwA 107 6 dB A K 3 dB Vibratsiooni tase t tades l ikej hviga ah 6 91 m s2 K 1 5 m s2 Vibratsiooni tase t tades kolmehambalise l iketeraga ah 5 97 m s2 K 1 5 m s2 KESKKONNAKAITSE CE rge visak...

Page 69: ...69 15 360 15m 1 2 3 4 5 6 7 8 9 10 11 12 15 13 14...

Page 70: ...0 1 2 3 4 5 6 7 8 9 10 11 12 13 14 15 18 19 20 21 22 23 24 25 26 28 29 30 31 32 33 34 35 36 37 38 39 40 41 42 1 1 2 1 3 1 4 1 kompl 5 1 6 1 7 2 8 1 9 1 12 24 F 22 22 E 12 22 15 B 23 E 25 F 9 14 A 14 A...

Page 71: ...71 10 I 31 H 2 13 10 cm 32 I 25 1 95 25 1 1 40 ml 2 80 ml 5 200 ml 28 G start 38 N ON 3 39 N OFF 29 30 G 30 28 stop o e 30 G 5 40 N 15 B 23 E...

Page 72: ...72 18 C 21 D 35 K 15 B 23 E 18 C 19 20 D 15 cm 21 D 5 42 O 41 O 6 37 M 7 35 K 4 34 K 36 L 43 cm3 1 4 kW 1 9 KM 7000 8500 min 1 1 6 l h...

Page 73: ...otor dio za rezanje jo uvijek se okre e Ne smijete trimer davati na kori tenje djeci ili osobama koje nisu upoznale upute za upotrebu Nemojte kositi ako su blizu druge osobe osobito djeca ili ivotinje...

Page 74: ...biste bili sigurni da e trimer besprijekorno i sigurno raditi Iz sigurnosnih razloga zamijenite istro ene ili o te ene dijelove ure aja titite od vlage Dr ite van dohvata djece Koristite odgovaraju e...

Page 75: ...te E MONTA A TITNIKA PULE S NAJLONSKOM NITI Montirajte titnik 12 Na vreteno 22 stavite titnik pule s najlonskom niti 15 u smjeru suprotnom do smjera kazaljke na satu crte B Stavite nastavak esterokutn...

Page 76: ...em zra nog filtera 5 na ite vijak za regulaciju okretaja praznog hoda 40 crte N Pokrenite motor trimera Uz pomo odvija a oprezno okrenite vijak za regulaciju okretaja praznog hoda prema desno kako bis...

Page 77: ...dohvata djece Gorivo u kojem je dodatak alkohola etilnog ili metilnog mogu apsorbirati vlagu to tijekom skladi tenja dovodi odvajanja komponenata mje avine goriva i nastajanja kiselina Benzin sa kise...

Page 78: ...o maskimalnog nivoa rezervoara Nakon to je napunjen uveriti se da je ep za ulivanje goriva SR pravilno zavrnut Ukoliko je utvr eno postojanje upljine ili odlivanje goriva motor se ne sme pokretati jer...

Page 79: ...trske i koprvie u ba tama Treba koristiti isklju ivo pribor koji odgovara datom ure aju i pridr avati se saveta koji su dati u uputstvu za upotrebu Kosa sa unutra njim sagorevanjem namenjena je isklju...

Page 80: ...avanja operatera ili drugih osoba Zabranjena je upotreba ramenog pojasa sa neispravnim mehanizmom za brzo otkop avanje RAD POSTAVKE PRIPREMANJE ME AVINE GORIVA Kao gorivo za kosu sa unutra njim sagore...

Page 81: ...slika K sa sve ice kako bi se izbeglo slu ajno pokretanje motora Obratiti pa nju na se ivo za presecanje ile za se enje Kada se kosa sa unutra njim sagorevanjem ne koristi se ivo uvek treba da bude os...

Page 82: ...2 dB A K 3 dB Nivo akusti nog pritiska rad sa ilom za se enje LpA 99 1 dB A K 3 dB Nivo akusti ne snage rad sa ilom za se enje LwA 107 6 dB A K 3 dB Izmerena vrednost podrhtavanja rad sa ilom za se e...

Page 83: ...83 50G490 GR 3 15...

Page 84: ...84 360 15m 1 2 3 4 5 6 7 8 9 10 11 12 15 13 14 1 2 3 4 5 6 7 8 9 10 11 12 13 14 15 18 19 20 21 22 23 24 25 26 28 29 30 31...

Page 85: ...85 32 33 34 35 36 37 38 39 40 41 42 1 1 2 1 3 1 4 1 5 1 6 1 7 2 8 1 9 1 12 24 F 22 22 E 12 22 15 B 23 E 25 F 9 9 11 14 A 14 A 31 H 2 13 10 32 I 25 1 95...

Page 86: ...86 1 40 ml 2 80 ml 5 200 ml 28 G start 38 N ON 3 39 N OFF 30 28 stop 30 G 5 40 N 15 B 23 E 18 C 21 D 35 K 15 B 23 E...

Page 87: ...cm3 1 4 kW 1 9 KM 7000 8500 min 1 1 6 l h 25 1 1 2 l L7RTC TORCH o L8RTF NHSP LD 0 6 0 7 mm 255 mm 10 460 mm 16 2 5 mm 7 5 kg 2017 LpA 95 9 dB A K 3 dB LwA 108 2 dB A K 3 dB LpA 99 1 dB A K 3 dB LwA 1...

Page 88: ...no hayan le do las instrucciones utilicen la motoguada a Deje de trabajar si cerca hay otras personas y especialmente ni os o animales de compa a RECUERDE El operario o el usuario es responsable por...

Page 89: ...da ado y si es necesario rep rela antes de empezar a trabajar Si la motoguada a vibra demasiado ap guela inmediatamente y compruebe el motivo Debe utilizar nicamente piezas de repuesto originales rec...

Page 90: ...uada a sin la protecci n colocada MONTAJE DEL CUCHILLO DE TRES DIENTES Monte la protecci n 12 Monte el cuchillo de tres dientes 24 imagen F sobre el husillo 22 Coloque la arandela gire la tuerca con l...

Page 91: ...con los requisitos que garantizan un funcionamiento correcto y seguro de la motoguada a Cualquier componente o pieza protectora defectuosa debe ser reparada o reemplazada inmediatamente AJUSTE DE REVO...

Page 92: ...lo por uno nuevo Instale el filtro de combustible en el tanque de combustible 7 y apriete el tap n de combustible Al instalar el filtro de combustible tenga cuidado de que ninguna suciedad se filtre e...

Page 93: ...l decespugliatore a scoppio bisogna rispettare le norme di sicurezza Per la propria sicurezza e quella di terze persone si prega di leggere il presente manuale prima di iniziare il lavoro Si prega di...

Page 94: ...azione del decespugliatore dopo l urto con un corpo estraneo controllare che il decespugliatore non sia danneggiato e se necessario ripararlo prima di riprendere il lavoro se il decespugliatore inizia...

Page 95: ...a scoppio pu essere utilizzato sia con la stella di taglio che con la bobina di filo di taglio a seconda delle necessit vietato utilizzare il decespugliatore a scoppio senza le protezioni montate MONT...

Page 96: ...Spegnimento rilasciare la leva dell acceleratore 30 Porre l interruttore di accensione 28 nella posizione stop Dopo lo spegnimento del motore gli elementi di taglio non si arrestano immediatamente vie...

Page 97: ...pertura del serbatoio Smontare il filtro del carburante e lavarlo con benzina o sostituirlo Montare il filtro del carburante nel serbatoio 7 e serrare il tappo del serbatoio Durante il montaggio del f...

Page 98: ...o dalle autorit locali I dispositivi usati contengono sostanze nocive per l ambiente I dispositivi non riciclati costituiscono un rischio potenziale per l ambiente e per la salute umana Ci si riserva...

Page 99: ...99...

Page 100: ...100...

Reviews: