AVOCENT® UNIVERSAL
MANAGEMENT GATEWAY APPLIANCE
Quick Installation Guide
590-1480-631D
1
The Avocent® Universal
Management Gateway appliance
provides extensive access to
attached devices. Care must be
taken to avoid compromising your
security policies.
The appliance ships with the
following default settings:
• DHCP, SSH v2 and HTTPS are
enabled.
• All autosensing ports are
enabled.
• Ethernet and CLI Setup ports
are enabled.
The following accounts exist by
default:
• admin
• operator
• user
Shell access for admin is enabled.
The first time you access the
appliance, you must log in as admin
and create and confirm a password
for the admin account.
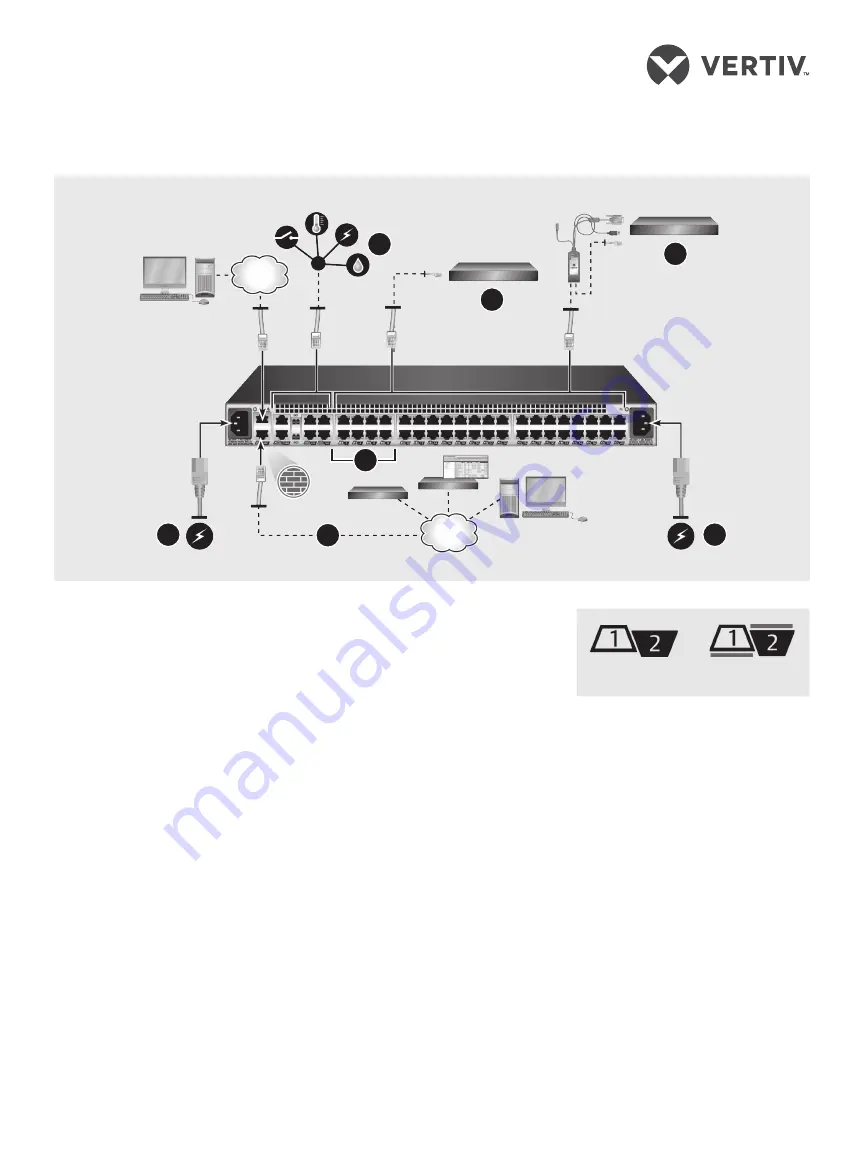
1. Rack mounting
the appliance
For detailed rack and/or wall
mounting instructions, see the
Avocent® Universal
Management Gateway
Appliance Mounting Bracket
Quick Installation Guide.
2. Connecting
to your network
Connect a UTP cable from the
primary network port to your
network. For redundancy,
connect both network ports.
3. Connecting
external sensors
The appliance supports
environmental sensors
connected to ports labeled TH,
DI, COM or SNSR. DO ports are
physical relays that can be used
to turn on/off a DC powered
device. For a list of the sensors
and configuration requirements,
see the Avocent® Universal
Management Gateway
Appliance Installer/User Guide.
4. Using autosensing ports
The appliance has autosensing
ports used to connect serial,
power, service processor and
KVM targets (depending on the
model). Autosensing ports are
indicated by a turquoise line.
5. Connecting targets
Using UTP cables and
supported DB9 or DB25
console adaptors, connect
targets to the appliance. For
KVM targets, connect using an
UMIQ module. See the UMIQ
Module Quick Installation Guide
for more instructions.
WARNING:
Connected serial
devices should not exceed 13
volts.
Standard
Port
Autosensing
Port
Avocent® Universal Management Gateway 6000 Appliance Rear
4
2
8
3
5
5
8


