1
Using the Product
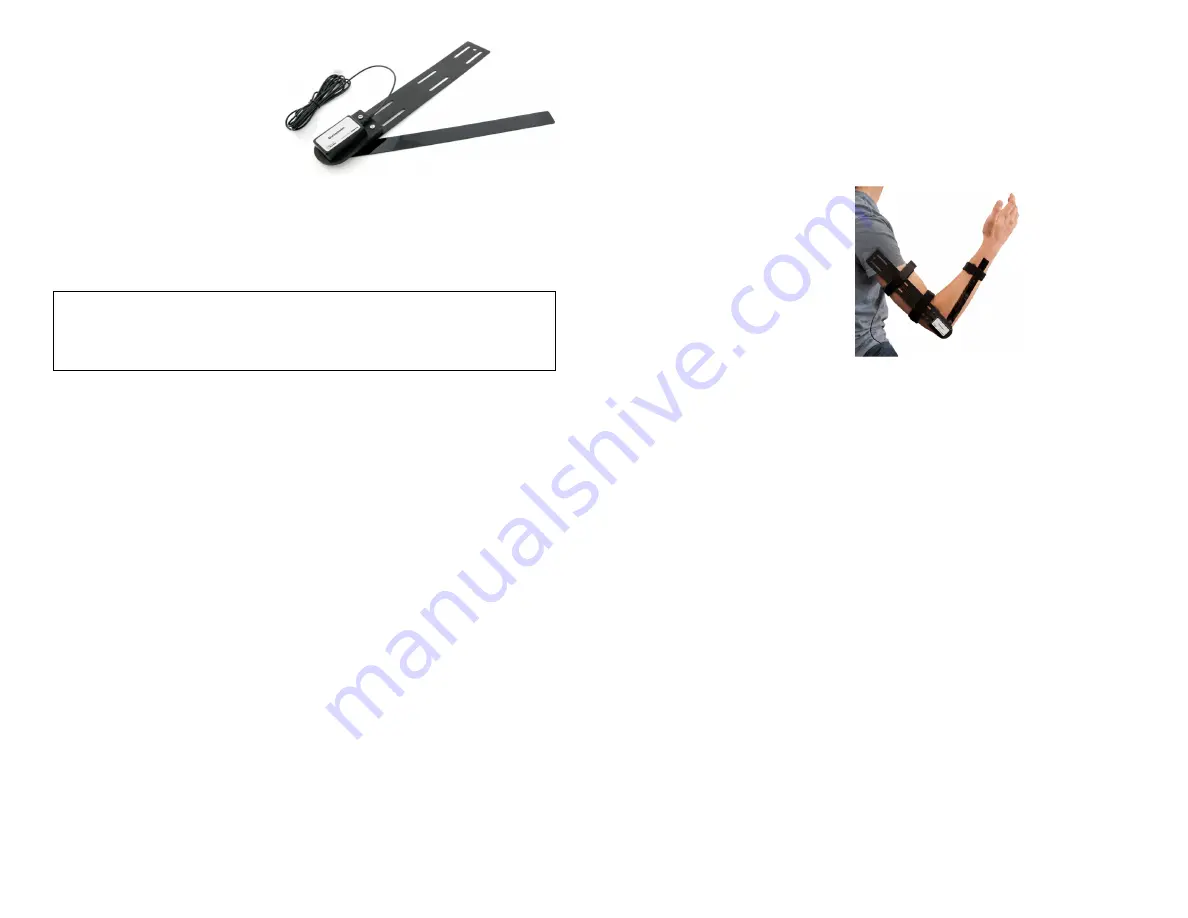
Attaching the Goniometer to a Person
1. Select one member of the group to be the test subject. Thread two 24-inch
elastic straps through the slots that can be found on the stationary arm of the
Goniometer.
2. Secure the stationary arm of the Goniometer to the upper leg or arm of the
subject using the elastic straps, as shown in Figure 1.
Figure 1
3. Make sure the dial on the sensor is centered on the joint being studied.
Reposition and secure the Goniometer, if necessary.
4. Using a single 14-inch elastic strap, secure the flexible arm of the Goniometer
to the foreleg or forearm.
5. Verify that the subject can move freely with the Goniometer attached to the
limb being studied.
Changing the Flexible Arm of the Goniometer
The Goniometer comes with a set of flexible arms that vary in size. For subjects
with smaller limbs, you may want to use one of the smaller joint arms on this
sensor. To change the flexible arm, simply loosen and remove the screw that
secures the arm to the dial. Select the appropriate joint arm and fasten it to the
sensor with the screw provided. Verify that the terminal edge of the joint arm is
aligned with the set screw on the side of dial. Reposition the flexible arm of the
Goniometer, if necessary.
Helpful Hints
You can easily reverse the reporting direction of the Goniometer using the data-
collection software. This is very useful for comparing joint activity from left and
right limbs. The instructions for reversing direction are dependent on the data-
collection software you are using.
l
Logger
Pro
Users: Choose Set Up Sensors from the Experiment menu, then
select your interface (LabQuest, LabPro, etc.). Click the image representing the
Goniometer. Select Reverse Direction, and then close the dialog box.
l
LabQuest Users: Tap the angle reading on the Meter screen. Choose Reverse
Direction. Select the box for the Goniometer.
l
Graphical Analysis Users: Click or tap the Angle meter and turn on Reverse.
Goniometer
(Order Code GNM-BTA)
The Goniometer measures the angle
of a joint, such as the knee or elbow.
Use it to measure the range of
motion of a limb during different
types of physical activity. A set of
elastic straps can be used to secure the sensor to the subject for dynamic
measurements of joint angle during different types of physical activity. You can
also use it with a Vernier EKG Sensor to measure muscle activity during different
phases of limb motion. In addition, the sensor head can be detached from both
arms of the sensor for use in STEM and engineering activities.
Note:
Vernier products are designed for educational use. Our products are not
designed nor are they recommended for any industrial, medical, or commercial
process such as life support, patient diagnosis, control of a manufacturing
process, or industrial testing of any kind.
What's Included
l
Goniometer: joint angle sensor attached to metal stationary arm
l
12-inch flexible joint arm (comes attached to sensor)
l
10-inch flexible joint arm
l
8-inch flexible joint arm
l
24-inch elastic hook and loop straps (2)
l
14-inch elastic hook and loop straps (2)
Compatible Software
See
www.vernier.com/manuals/gnm-bta
for a list of software compatible with the
Goniometer.
Getting Started
1. Connect the sensor to the interface (LabQuest Mini, LabQuest 3, etc.).
2. Start the appropriate data-collection software (Logger
Pro
®
, LabQuest
®
App,
or Vernier Graphical Analysis™) if not already running, and choose New from
File menu. The software will identify the sensor and load a default
data-collection setup.
3. Zero the sensor to report positive and negative joint angles from the subject's
starting position. To zero sensors,
l
Logger
Pro
Users: Choose Zero from the Experiment menu.
l
LabQuest Users: Choose Zero from the Sensors menu on the Meter screen.
l
Graphical Analysis Users: Click or tap the Angle Meter and choose zero.
4. You are now ready to collect data.
If you are collecting data using a Chromebook™, mobile device such as iPad
®
or
Android™ tablet, or a Vernier wireless interface, please see the following link for
up-to-date connection information:


