VMA502
BASIC DIY KIT WITH ATMEGA2560 FOR ARDUINO
®
USER MANUAL
Page 1: ...VMA502 BASIC DIY KIT WITH ATMEGA2560 FOR ARDUINO USER MANUAL ...
Page 2: ...aning and user maintenance shall not be made by children without supervision Indoor use only Keep away from rain moisture splashing and dripping liquids 3 General Guidelines Refer to the Velleman Service and Quality Warranty on the last pages of this manual Familiarise yourself with the functions of the device before actually using it All modifications of the device are forbidden for safety reason...
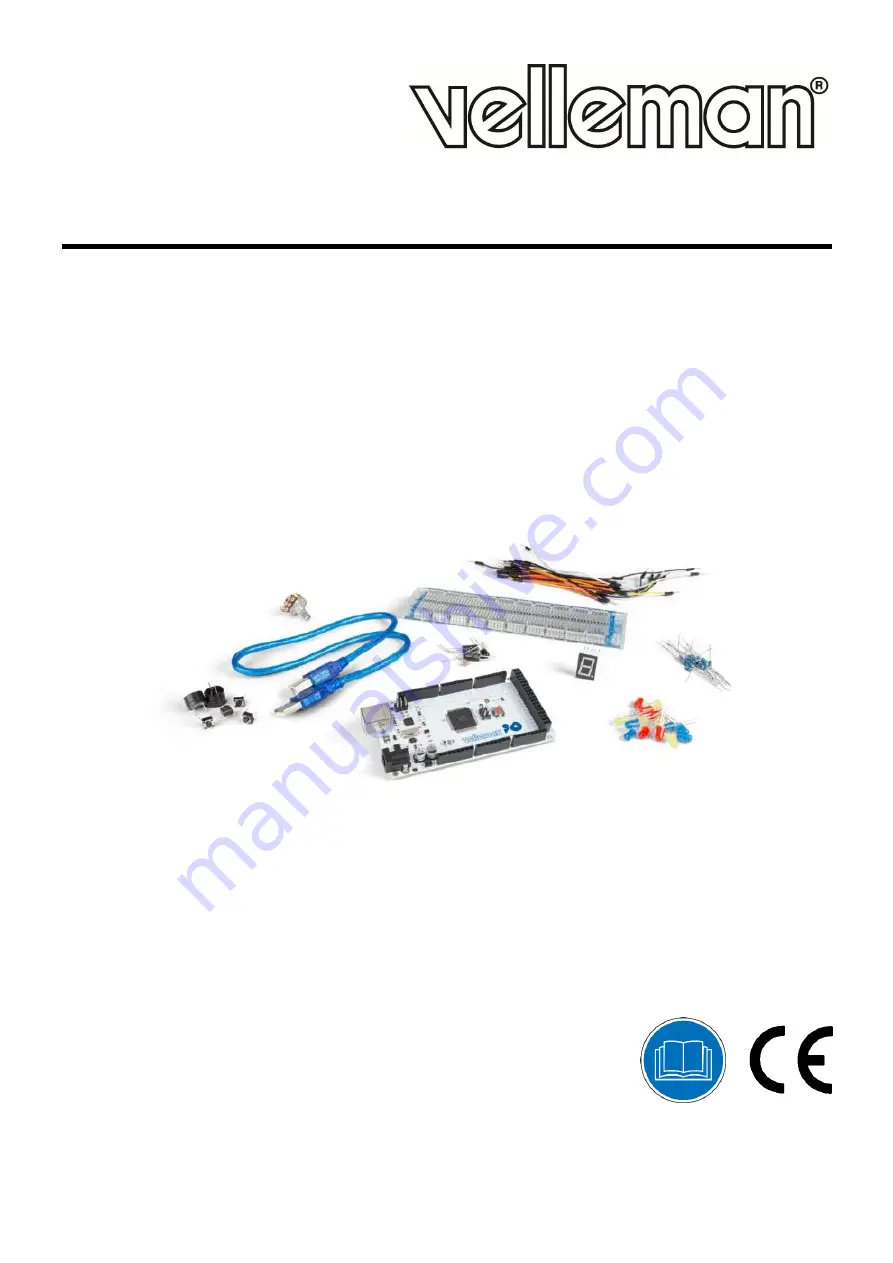
Page 3: ... 1K resistor RA1K0 5 x 10K resistor RA10K0 1 x 830 hole breadboard 4 x 4 pin key switch 1 x active buzzer VMA319 1 x passive buzzer 1 x infrared sensor diode 1 x LM35 temperature sensor LM35DZ 2 x ball tilt switch similar to MERS4 and MERS5 3 x phototransistor 1 x single digit 7 segment LED display 30 x breadboard jumper wire 1 x USB cable 6 The ATmega2560 Mega VMA101 The VMA101 Arduino compatible...
Page 4: ...e PWM output analogue input pins 16 DC current per I O pin 40 mA DC current for 3 3 V pin 50 mA flash memory 256 kB of which 8 kB used by bootloader SRAM 8 kB EEPROM 4 kB clock speed 16 MHz dimensions length 112 mm width 55 mm weight 62 g 7 Operation 7 1 The Breadboard Breadboards are one of the most fundamental pieces when learning how to build circuits In this tutorial we will introduce you to w...
Page 5: ...nents to each side of the IC without interfering with the functionality of the leg on the opposite side Ravine 7 2 A Blinking LED Let s start with a simple experiment We are going to connect an LED to one of the digital pins rather than using LED13 which is soldered to the board Required Hardware 1 x red M5 LED 1 x 220 Ω resistor 1 x breadboard jumper wires as needed Follow the diagram below We ar...
Page 6: ... 6 Velleman nv Connection Programming Code Result After programming you will see the LED connected to pin 10 blinking with an interval of approximately one second Congratulations the experiment is now successfully completed ...
Page 7: ... voltage or current is fed to the analogue load the device using the power by repeated pulse sequence being on or off Being on the current is fed to the load being off it is not With the adequate bandwidth any analogue value can be encoded using PWM The output voltage value is calculated via the on and off time output voltage turn on time pulse time maximum voltage value PWM has many applications ...
Page 8: ...VMA502 V 02 05 04 2019 8 Velleman nv Required Hardware 1 x variable resistor 1 x red M5 LED 1 x 220 Ω resistor 1 x breadboard jumper wires as needed Connection Programming Code ...
Page 9: ...sider this as the analogue value reading project adding the PWM analogue value assigning part Result After programming rotate the potentiometer knob to see changes of the displaying value Also note the obvious change of brightness on the breadboard 7 4 The Active Buzzer An active buzzer is widely used on computers printers alarms etc as a sound making element It has an inner vibration source Simpl...
Page 10: ...is weak the resistant increases A phototransistor is commonly applied in the measurement of light light control and photovoltaic conversion Let s start with a relative simple experiment The phototransistor is an element that changes its resistance as light strength changes Refer to the PWM experiment replacing the potentiometer with a phototransistor When there is a change in light strength there ...
Page 11: ...VMA502 V 02 05 04 2019 11 Velleman nv Connection Programming Code Result After programming change the light strength around the phototransistor and observe the LED changing ...
Page 12: ...f the flames will then be converted to a fluctuating level signal The signals are the input into the central processor Required Hardware 1 x flame sensor 1 x buzzer 1 x 10KΩ resistor 1 x breadboard jumper wires as needed Connection Connect the negative to the 5 V pin and the positive to the resistor Connect the other end of the resistor to GND Connect one end of a jumper wire to a clip which is el...
Page 13: ...a common and easy to use temperature sensor It does not require other hardware you just need an analogue port to make it work The difficulty lies in compiling the code to convert the analogue value it reads to Celsius temperature Required Hardware 1 x LM35 sensor 1 x breadboard jumper wires as needed ...
Page 14: ...VMA502 V 02 05 04 2019 14 Velleman nv Connection Programming Code Result After programming open the monitoring window to see the current temperature ...
Page 15: ...as mercury tilt or rolling ball switches The Simple Tilt Activated LED This is the most basic connection of a tilt switch but can be a handy while one is learning about them Simply connect in series with an LED resistor and battery Reading the Switch State with a Microcontroller The layout below shows a 10K pull up resistor The code states the built in pull up resistor that you can turn on by sett...
Page 16: ...VMA502 V 02 05 04 2019 16 Velleman nv Programming Code ...
Page 17: ...egment displays can be divided into displays with common anode and displays with common cathode Common anode displays refer to displays that combine all the anodes of the LED units into one common anode COM For the common anode display connect the common anode COM to 5 V When the cathode level of a certain segment is low the segment is on when the cathode level of a certain segment is high the seg...
Page 18: ...VMA502 V 02 05 04 2019 18 Velleman nv Programming Code ...
Page 19: ...his product and the latest version of this manual please visit our website www velleman eu The information in this manual is subject to change without prior notice COPYRIGHT NOTICE The copyright to this manual is owned by Velleman nv All worldwide rights reserved No part of this manual may be copied reproduced translated or reduced to any electronic medium or otherwise without the prior written co...
Page 20: ...n shocks falls dust dirt humidity and by the article as well as its contents e g data loss compensation for loss of profits consumable goods parts or accessories that are subject to an aging process during normal use such as batteries rechargeable non rechargeable built in or replaceable lamps rubber parts drive belts unlimited list flaws resulting from fire water damage lightning accident natural...