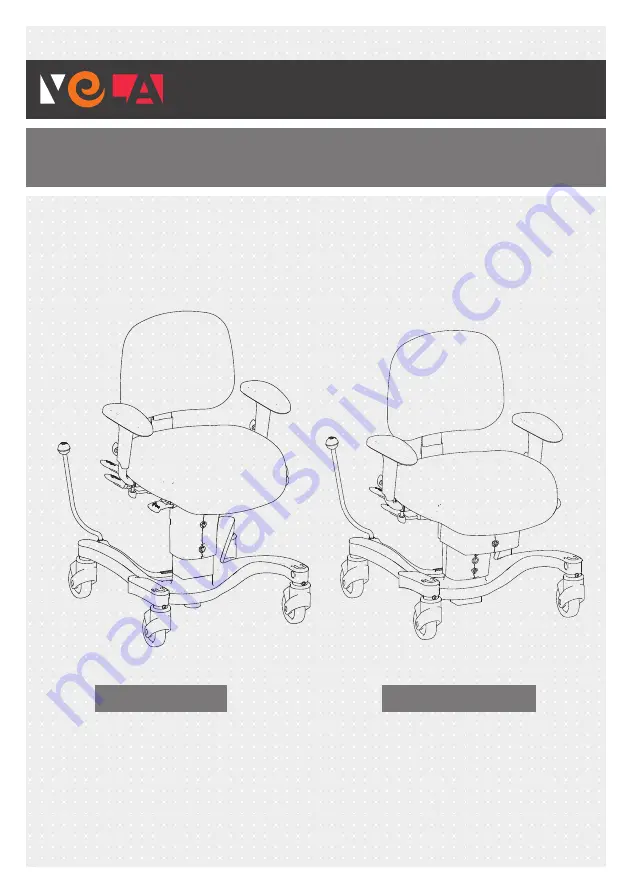
VELA Tango
VELA Tango 700
VELA Tango 700EL
700 & 700EL
VERSION:
I N S T R U C T I O N F O R U S E
E N
Manual no. 105675
Page 1: ...VELA Tango VELA Tango 700 VELA Tango 700EL 700 700EL VERSION I N S T R U C T I O N F O R U S E E N Manual no 105675...
Page 2: ...ment Electric 10 2 0 3 Height adjustment Manual 10 2 0 4 Setting angle of seat 11 2 0 5 Setting angle of backrest 11 2 0 6 Adjusting lumbar support 11 2 0 7 Setting the back height 11 2 0 8 Back bolt...
Page 3: ...ant Please read this user manual carefully and keep it safe for when you need to refer to it This manual is also available on VELA s website www vela eu where you can also find other relevant informat...
Page 4: ...tended for the user Only the user or trained professionals should adjust the chair while the user is sitting in it Use Never use the electric height adjustment for more than two minutes at a time Use...
Page 5: ...d should be replaced Contact your VELA supplier The brake function does not work The brake is not activated See section 2 0 13 2 0 18 or 2 0 21 The armrest seems loose One of the hand screws might be...
Page 6: ...d to the following specifications Emission class CISPR 11 Group 1 Class B See more details at www vela eu 1 3 3 SURGE PROTECTION A fuse is installed on the chair which secures the chair against power...
Page 7: ...hear and squeeze Keep hands and fingers away from moving parts Icon Read Instruction For Use before use Icon Part used Type B cf IEC60601 1 covering the following areas of the chair Labels 60 x 22 5 m...
Page 8: ...has been made directly with VELA this applies VELA assumes no liability for damages to the product or the user caused by Transportation Misuse Normal wear and tear Wrong use Use of spare parts and acc...
Page 9: ...parts 1 9 RECYCLING AND DISPOSAL This product contains recyclable materials Therefore the product must be disposed of in accord ance with local regulations and not together with ordinary household was...
Page 10: ...eight Note Height function should only be used continuously for one minute then a nine minute break should follow 2 0 3 HEIGHT ADJUSTMENT MANUAL Adjusted by pulling up the front handle on the right ha...
Page 11: ...d side Only operate the handle when someone is sitting in the chair as the backrest tilts forward 2 0 6 ADJUSTING LUMBAR SUPPORT The backrest can be adjusted to provide optimal lumbar support by pulli...
Page 12: ...NG THE ARMREST WIDTH Adjusted by loosening the screw under the seat on the seat support and adjusting the armrest width by pulling out the armrest Remember to tighten the screw when done 2 0 9 ADJUSTI...
Page 13: ...to the left 0 neutral and 90 to the right 2 0 13 BRAKE The brake is activated by moving the handle on the side of the chair forward Unlock the chair by moving the handle back into the upright position...
Page 14: ...n the underside of the left or right hand armrest as required Remember position the switch correctly see section 2 0 2 2 0 16 CHANGING THE SEAT The seat can be replaced by removing the four thumbscrew...
Page 15: ...under the armrest the hand box or angle switch 2 0 22 SETTING THE ANGLE OF THE BRAKE Loosen the thumbscrew and remove the brake rod from the holder Insert the brake rod in the desired side and angle R...
Page 16: ...ox or switches 4 wheel brake brakes on all wheels and provides a stable seat on uneven skewed surfaces Note On the electric version it is advisable to activate or deactivate the brake completely when...