background image

Version 0.5 

26 August 2004 

Page 1 of 37 

For use with Vega 50 FXO – H.323 version 04.01.05.1 T017 or greater. 

© 2002-2004 VegaStream Ltd. 


This document describes how to configure a Vega 50 FXO H.323 unit using the web browser 
interface.  The configuration described will allow the Vega to be rapidly installed and tested. 


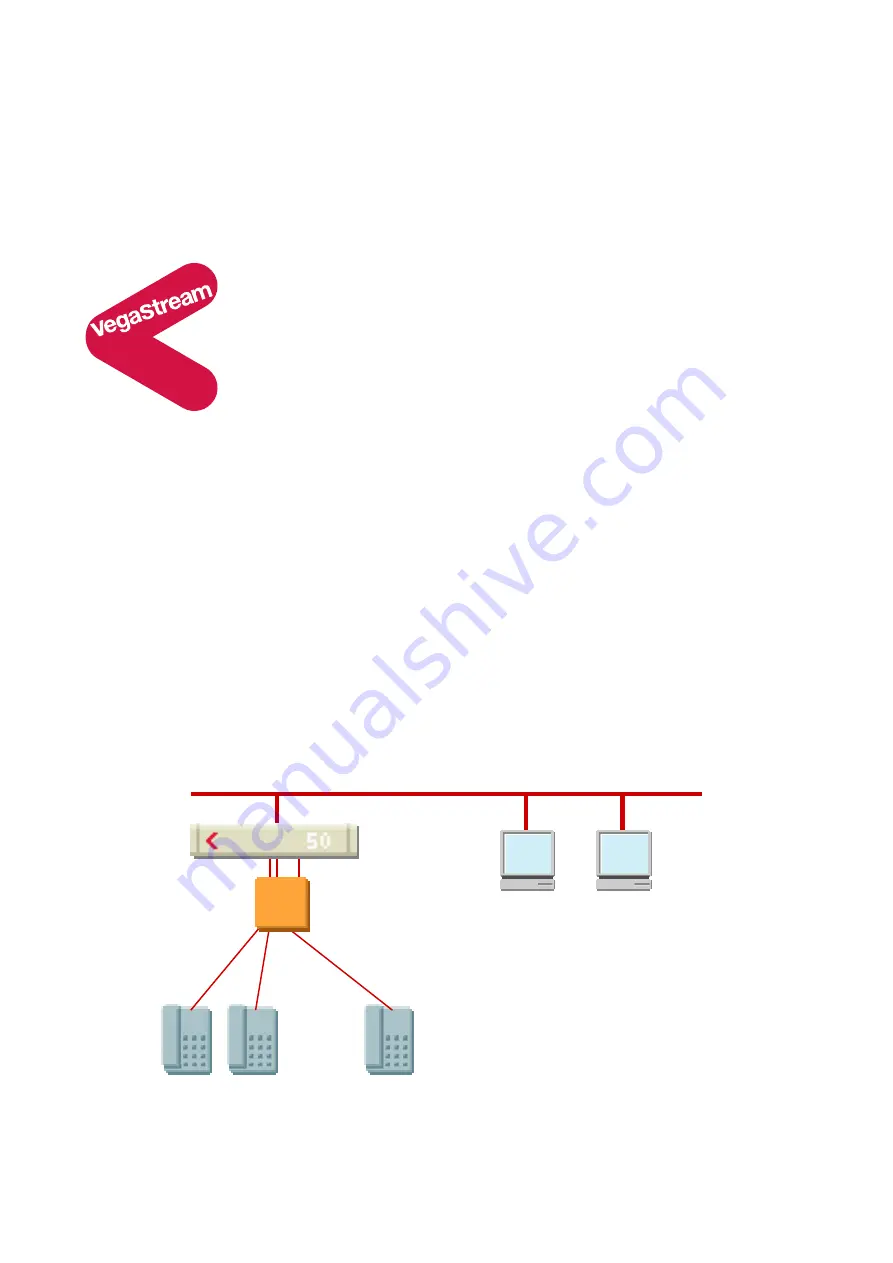
The instructions below configure the Vega 50 FXO (connected to 8 extension ports of a PBX or a 
CO Switch) as follows: 

• 

Calls presented to the Vega from the PBX or CO switch will be routed to a pre-defined IP 
address based upon the physical port on the Vega on which the call arrived.  (IP 
addresses 192.168.1.100 to 192.168.1.107) 

• 

Calls received by the Vega on the H.323 interface will be routed to the telephony interface.  
The physical interface over which the call is routed will be defined by the IP address of the 
H.323 device making the outbound call.  The telephone number that will be dialled will be 
the number presented by the H.323 device. 

Initial configuration 

Vega 50 FXO (H.323)
Standalone mode 

– R5.1

…  


LAN

POTS Telephones 


Vega 50 FXO 


pbx 

Summary of Contents for H.323

Page 1: ...ows Calls presented to the Vega from the PBX or CO switch will be routed to a pre defined IP address based upon the physical port on the Vega on which the call arrived IP addresses 192 168 1 100 to 19...

Page 2: ...ect your Vega to LAN Telephone and Power 2 Configure the basic LAN parameters 3 Configure password and login timeout 4 Check and configure LAN settings and Host name 5 Configure H 323 parameters 6 Con...

Page 3: ...a standard or fast Ethernet hub or switch 10 baseT or 100 baseTx The connector nearest the ferrite core should be plugged into the Vega Telephony Connect the PBX or CO switch to the 8 POTS ports Note...

Page 4: ...he Vega connect the serial interface of the Vega to a PC serial interface using a 9 way male to female straight through cable Configure a terminal emulator program such as Microsoft s HyperTerminal fo...

Page 5: ...ion 04 01 05 1 T017 or greater 2002 2004 VegaStream Ltd 3 Configure password and login timeout Now configuration will be carried out using a web browser Enter the IP address of the Vega into the Addre...

Page 6: ...04 Page 6 of 37 For use with Vega 50 FXO H 323 version 04 01 05 1 T017 or greater 2002 2004 VegaStream Ltd Enter the default Username and Password Username admin Password admin Select On the left hand...

Page 7: ...sword and Re enter Password then select and then click here to return Optional Change the timeout1 default is 240 seconds can extend to 7200 seconds 2hrs select and then click here to return 1 If the...

Page 8: ...1 05 1 T017 or greater 2002 2004 VegaStream Ltd 4 Check and configure LAN settings and Host name On the left hand side menu select LAN Optional If there are any LAN values that need to be set up e g N...

Page 9: ...er working with another Vega leave the H 323 LAN Configuration alone if it is to work with other manufacturer s devices it is often best to untick the indicated items as these are advanced H 323 featu...

Page 10: ...For use with Vega 50 FXO H 323 version 04 01 05 1 T017 or greater 2002 2004 VegaStream Ltd 6 Configure the Dial Plan On the left hand side menu select Dial Plan Firstly turn off the default profile In...

Page 11: ...sion 04 01 05 1 T017 or greater 2002 2004 VegaStream Ltd disable un tick Enabled then select and then click here to return Now create a new profile and in it create dial plan entries to handle calls b...

Page 12: ...Page 12 of 37 For use with Vega 50 FXO H 323 version 04 01 05 1 T017 or greater 2002 2004 VegaStream Ltd In the Profiles section for Profile 2 the new profile Select Set Name Outbound_To_LAN select an...

Page 13: ...Version 0 5 26 August 2004 Page 13 of 37 For use with Vega 50 FXO H 323 version 04 01 05 1 T017 or greater 2002 2004 VegaStream Ltd In the Profiles section for Profile 2 Outbound_To_LAN Select...

Page 14: ...et Name IF_06_To_LAN Set Source IF 06 This takes a call from IF 06 marked CH1 on the rear of the Vega and stores the interface ID on which the call arrived in store 1 Set Destination IF 05 TEL 2 1 TA...

Page 15: ...07 This takes a call from IF 07 marked CH2 on the rear of the Vega and stores the interface ID on which the call arrived in store 1 Set Destination IF 05 TEL 2 1 TA 192 168 1 101 This routes the call...

Page 16: ...Version 0 5 26 August 2004 Page 16 of 37 For use with Vega 50 FXO H 323 version 04 01 05 1 T017 or greater 2002 2004 VegaStream Ltd On the left hand side menu select Dial Plan...

Page 17: ...version 04 01 05 1 T017 or greater 2002 2004 VegaStream Ltd Now create a new profile and in it create a dial plan entry to handle calls being received inbound from the LAN In a similar manner to addi...

Page 18: ...et Name From_LAN_to_IF_06 Set Source IF 05 TAC 192 168 1 100 TEL If a call arrives from IP address 192 168 1 100 then take the presented number and store it in store 1 Set Destination IF 06 TEL 1 Dial...

Page 19: ...or use with Vega 50 FXO H 323 version 04 01 05 1 T017 or greater 2002 2004 VegaStream Ltd For more details on the operation of the dial planner including the various tokens that may be used see the se...

Page 20: ...323 version 04 01 05 1 T017 or greater 2002 2004 VegaStream Ltd 7 Configure audio parameters On the left hand side menu select Media Channels Add more codecs so that by default the Vega will handle ca...

Page 21: ...323 version 04 01 05 1 T017 or greater 2002 2004 VegaStream Ltd In H 245 Capabilities Select again Select on H245 Cap ID 1 Select required codec type in this case g7231 select and then click here to r...

Page 22: ...te the Capability Description list that tells the Vega which of the codecs it can use Update entry 1 to select all voice codecs and the other entries to configure them for the correct capability Ids F...

Page 23: ...et Voice Capdesc Index to 1 voice select and then click here to return This has selected all voice codecs to be offered for calls With Fax Capdesc Index set to 2 t38Tcp it has selected this codec for...

Page 24: ...Version 0 5 26 August 2004 Page 24 of 37 For use with Vega 50 FXO H 323 version 04 01 05 1 T017 or greater 2002 2004 VegaStream Ltd...

Page 25: ...ust 2004 Page 25 of 37 For use with Vega 50 FXO H 323 version 04 01 05 1 T017 or greater 2002 2004 VegaStream Ltd 8 Configure POTS parameters On the left hand side menu select POTS Scroll down to the...

Page 26: ...Version 0 5 26 August 2004 Page 26 of 37 For use with Vega 50 FXO H 323 version 04 01 05 1 T017 or greater 2002 2004 VegaStream Ltd For QSL ID 1 in the QSLACK Codec Configuration section Select...

Page 27: ...27 of 37 For use with Vega 50 FXO H 323 version 04 01 05 1 T017 or greater 2002 2004 VegaStream Ltd Ensure that NT mode is disabled NT is not ticked then select and then click here to return Repeat s...

Page 28: ...new calls arriving by the PBX or CO switch presenting ringing voltage to the Vega The Vega needs to have parameters adjusted to configure the detector for the ring tone s it is going to be presented w...

Page 29: ...Version 0 5 26 August 2004 Page 29 of 37 For use with Vega 50 FXO H 323 version 04 01 05 1 T017 or greater 2002 2004 VegaStream Ltd Scroll down to the bottom of the page...

Page 30: ...Version 0 5 26 August 2004 Page 30 of 37 For use with Vega 50 FXO H 323 version 04 01 05 1 T017 or greater 2002 2004 VegaStream Ltd Select...

Page 31: ...off time length of longest silence in the incoming ringing voltage cadence Set Shortest ring on time length of shortest ring in the incoming ringing voltage cadence Table 1 lists the standard values t...

Page 32: ...Version 0 5 26 August 2004 Page 32 of 37 For use with Vega 50 FXO H 323 version 04 01 05 1 T017 or greater 2002 2004 VegaStream Ltd select and then click here to return...

Page 33: ...of 37 For use with Vega 50 FXO H 323 version 04 01 05 1 T017 or greater 2002 2004 VegaStream Ltd 9 Configure pointer to CD ROM documentation On the left hand side menu select LAN Scroll to the bottom...

Page 34: ...version 04 01 05 1 T017 or greater 2002 2004 VegaStream Ltd To configure for operation using the CD in the local PC CD ROM drive Set Path or URL D Content help v50fxoh_R5 htm Substitute appropriate d...

Page 35: ...ges The changes to the configuration must be saved and activated This is carried out as follows On the left hand side menu select Save Select and after the configuration has been saved click here to r...

Page 36: ...This will send all the configuration parameters to the tftp server and save them as the file initial_cfg txt Note you may want to choose a unique name rather than initial_cfg txt especially if you ar...

Page 37: ...your web browser Tools internet options Security select internet and custom level and configure Microsoft VM Java permissions and Scripting parameters as indicated below 2 Where there are multiple se...

Reviews: