background image

TS

I Special servo drive for hybrid electro-hydraulic system of injection molding machine        User Manual 


10


Chapter 2    Installation and connection of servo driver   


Figure 2

9, and then take out the cover in direction 2.   

‹


Mounting of cover 
After connecting the cables of main circuit terminals and control circuit terminals, cramp the cover in 
direction 1 as shown in Figure 2

10, press down the cover in direction 2 and then tighten the cover 

screws.  


Figure 2

9 Removal of cover                                        Figure 2

10 Mounting of cover 

‹


Mounting of operation panel 
Please refer to 2.3.1 Removal and mounting of operation panel.     

"


Note:


Do not directly mount the cover with operation panel on the driver, otherwise, the operation panel will 
have poor contact.   

2.3.4 Open and Close of Doors of TS

I

4T176A and Above Power Class Driver with 

Sheet-metal Enclosure 

‹


Opening of the door 

Press the latch following direction 1 in Figure 2

11 and open the door following direction 2.   

‹


Removal of operation panel   

The operation panel is connected to the control board through the standard network cable and will not 
interfere with the open/close of the door. To remove the operation panel, refer to section 2.3.1 Removal 
and Mounting of Operation Panel   

‹


Mounting of cover 

After connecting the cables of main circuit terminals and control circuit terminals, close the door following 
direction 1 in Figure 2

12, and then press down the latch following direction 2 to lock the door. 


Figure 2

11 opening the door


Figure 2

12 closing the door 

Summary of Contents for TS-I Series

Page 1: ...User Manual TS I series servo drive is introdution V T ...

Page 2: ......

Page 3: ...ntrol algorithm according to the features of the injection molding machine increase the response speed and smooth moving speed of the injection molding machine and the mutual conversion of pressure control This manual is the operation and commissioning instruction manual for TS I series synchronous servo driver for electrolytic mixing system of the injection molding machine This manual provides th...

Page 4: ...edback card communication adapter card meeting the industry application requirement Full series standard shared DC bus design Realizing standard shared DC bus schemeshared DC bus without modifying the driver or adding peripheral circuit It is applicable to such industry applications as paper making chemical fiber metallurgy and EPS Adaptability Design Independent duct design The full series suppor...

Page 5: ...ad protection IGBT short circuit protection abnormal current detection protection relay suction pull on anomaly protection Perfect terminal protection function short circuit and overload protection for the 24V 13V and 10V power supply of the control terminal operation panel cable reverse connection protection input signal cable disconnection and abnormal analog input protection Over temperature pr...

Page 6: ...er password protection The technical secrets such as system specific process parameters cannot be copied User Self defined Parameter Display Function User can choose the common parameters displayed by the operation panel and use to key switch such parameters User can define the parameters displayed upon running and stopping respectively User can define such parameters as pressure temperature flux ...

Page 7: ... accident or loss safety measures such as redundancy or bypass shall be taken Installation Note Note z When handling and installing the driver please hold the driver bottom Do not hold the enclosure only Otherwise your feet may be injured and the driver may be damaged because of dropping z The driver shall be mounted on the fire retardant surface such as metal and kept far away from the inflammabl...

Page 8: ...herwise the driver will be damaged z It is forbidden to connect the driver output terminals to the capacitor or LC RC noise filter with phase lead otherwise the internal components of the driver may be damaged z Please confirm that the power supply phases rated voltage are consistent with those indicated by the nameplate otherwise the driver may be damaged z Do not perform dielectric strength test...

Page 9: ...z The heatsink and the braking resistor have high temperature Please do not touch such device otherwise you may be burnt z When using in some special machine please use a mechanical interlock device z The phase rotation of output U T1 V T2 and W T3 should be identical with that of the U V and W of the motor otherwise fault will occur z Please do not change the driver parameter randomly Most of the...

Page 10: ...the following when the goods arrives Confirm the following when the goods arrive Items to be confirmed Method of confirming Whether the goods are the driver you ordered Check if the information in the nameplate is same with that in the order Whether there is any damage Check if the package and the unit are damaged in transportation Whether the fasteners become loosened If necessary use a screwdriv...

Page 11: ...ral Devices 13 2 7 Functions of Main Circuit Terminal 14 2 8 Attention for Main Circuit Wiring 15 2 9 Connection of rotating PG and temperature sensor cable of the motor 18 2 10 The main circuit and the control terminal of a circuit wiring diagram 19 2 11 The control circuit terminal function 20 2 12 Schematic Diagram of Control Board 23 2 13 Descriptions of Control Circuit Terminals 23 2 14 Descr...

Page 12: ...4 4 Definition of multi function analog value A0 output 53 Chapter 5 Alarm and diagnosis of servo drive 54 5 1 Faults and Solutions 54 5 2 Troubleshooting Procedures 59 Chapter 6 Debugging selection and function application 60 6 1 Answer the questions in debugging process 60 6 2 Method of selecting the main components of the injection molding machine electrolytic mixing system 63 6 3 Multi pump co...

Page 13: ...series drives are introdution 1 Chapter 1 TS I series servo drive is introdution 1 1 Product Model Description The digits and letters in the driver model field on the nameplate indicate such information as the driver series power supply class power class and software hardware versions 1 2 Product Nameplate Description ...

Page 14: ...14 38 2 39 0 TS I 4T045A 30 12 46 7 45 0 TS I 4T060A 40 75 62 3 60 0 TS I 4T075A 47 85 75 9 75 0 TS I 4T091A 68 67 92 1 91 0 TS I 4T112A 83 75 113 6 112 0 TS I 4T150A 115 81 157 2 150 0 TS I 4T176A 122 97 160 0 176 0 TS I 4T210A 130 48 196 0 210 0 TS I 4T253A 182 42 232 0 253 0 TS I 4T304A Three phase AC380V 50Hz 60Hz Allowable voltage range 323V 528V Voltage unbalance 3 Allow the frequency fluctu...

Page 15: ... power class Figure 1 1 Product component name 1 5 Product Outline Mounting Dimension and Weight TS I 4T017A and below power class TS I 4T024A and above power class Figure 1 2 Product outline and mounting dimension Cover Mounting hole Cooling fan Nameplate Operation panel Cover Mounting hole Cooling fan Enclosure Nameplate Dust guard Dust guard Upper cover Operation panel Lower cover Nameplate Lea...

Page 16: ...m ate weight kg TS I 4T009A 118 190 167 105 173 60 5 4 5 5 2 6 TS I 4T013A TS I 4T017A 155 249 177 136 232 69 8 5 5 4 5 TS I 4T024A TS I 4T030A 210 337 200 150 324 88 2 7 8 5 TS I 4T039A TS I 4T045A TS I 4T060A 285 440 233 200 425 107 5 2 5 7 17 TS I 4T075A TS I 4T091A 315 575 248 220 553 123 5 2 5 10 25 TS I 4T112A TS I 4T150A 404 615 255 270 590 86 5 3 0 10 35 TS I 4T176A TS I 4T210A 465 745 325...

Page 17: ...d Mounting Dimension Button type operation panel V6 DP02 Rear view of operation panel Figure 1 3 Operation panel outline and mounting dimension V6 DP05 is the mounting pallet when the operation panel is to install on the electric control cabinet The outline and dimension are as follows Pallet V6 DP05 Open pore dimension of pallet Figure 1 4 Pallet outline and mounting dimension ...

Page 18: ...50Ω 1 150 TS I 4T013A 500W 100Ω 1 175 TS I 4T017A 500W 75Ω 1 120 TS I 4T024A 800W 50Ω 1 185 TS I 4T030A Built in as standard 1000W 40Ω 1 200 TS I 4T039A 1300W 30Ω 1 200 TS I 4T045A 1500W 25Ω 1 200 TS I 4T060A 2500W 20Ω 1 150 TS I 4T075A 3700W 15Ω 1 120 TS I 4T091A 4500W 15Ω 1 180 TS I 4T112A 5500W 10Ω 1 160 TS I 4T150A Built in as option 9600W 13 6Ω 2and 180 TS I 4T176A 9600W 13 6Ω 2 and 160 TS I ...

Page 19: ...g the installation Mount the driver vertically in the electric control cabinet mount the cooling fan or air conditioner to prevent the ambient temperature from rising to above 45 ºC For the sites with adverse environment we recommend you install the heatsink outside of the cabinet or use the water cooled or liquid cooled driver 2 2 Mounting Direction and Space In order not to reduce the cooling ef...

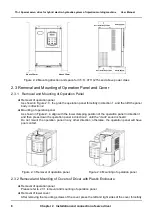
Page 20: ...e 2 4 align with the lower clamping position of the operation panel in direction 1 and then press down the operation panel in direction 2 until the crack sound is heard Do not mount the operation panel in any other direction otherwise the operation panel will have poor contact Figure 2 3 Removal of operation panel Figure 2 4 Mounting of operation panel 2 3 2 Removal and Mounting of Covers of Drive...

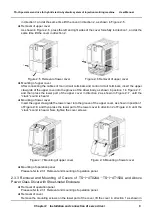
Page 21: ... in Figure 2 7 and then press the lower part of the upper cover in direction 2 as shown in Figure 2 7 until the crack sound is heard Mounting of lower cover Insert the upper claw grab the lower cover into the groove of the upper cover as shown in position 1 of Figure 2 8 and then press the lower part of the lower cover in direction 2 of Figure 2 8 until the crack sound is heard Now tighten the cov...

Page 22: ...tion panel on the driver otherwise the operation panel will have poor contact 2 3 4 Open and Close of Doors of TS I 4T176A and Above Power Class Driver with Sheet metal Enclosure Opening of the door Press the latch following direction 1 in Figure 2 11 and open the door following direction 2 Removal of operation panel The operation panel is connected to the control board through the standard networ...

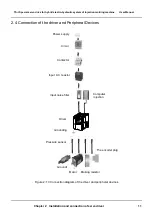
Page 23: ...ion and connection of servo driver 11 2 4 Connection of the driver and Peripheral Devices Figure 2 13 Connection diagram of the driver and peripheral devices Power supply Circui Contactor Input AC reactor Input noise filter Computer injection Pressure sensor Driver Grounding Groundi Braking resistor The encoder plug Motor ...

Page 24: ...ere is switch type reactive load compensation capacitor or load with silicon control at the same power node there will be high peak current flowing into input power circuit which damages the rectifier components 3 When the voltage imbalance of the three phase power supply of the driver exceeds 3 the rectifier component will be damaged 4 It is required that the input power factor of the driver shal...

Page 25: ... 32 25 M4 1 2 1 5 6 M4 1 2 1 5 6 TS I 4T017A 40 32 M4 1 2 1 5 6 M4 1 2 1 5 6 TS I 4T024A 63 40 M5 2 5 3 0 6 M5 2 5 3 0 6 TS I 4T030A 63 63 M5 2 5 3 0 6 M5 2 5 3 0 6 TS I 4T039A 100 63 M6 4 0 5 0 10 M6 4 0 5 0 10 TS I 4T045A 100 100 M6 4 0 5 0 16 M6 4 0 5 0 16 TS I 4T060A 125 100 M6 4 0 5 0 25 M6 4 0 5 0 16 TS I 4T075A 160 100 M8 9 0 10 0 25 M8 9 0 10 0 16 TS I 4T091A 200 125 M8 9 0 10 0 35 M8 9 0 ...

Page 26: ...esistor U T1 V T2 W T3 Three phase AC output terminal PE terminal Note The driver equipped with braking unit as standard can realized shared DC bus and braking function if needed connect DC reactor and braking function should contact factory and the teminal of main circuit B1 B2 should change to 1 2 B1 B2 Terminal symbol Terminal name and function description R L1 S L2 T L3 Three phase AC input te...

Page 27: ... to protect the driver input against over current or disconnect the input power for maintenance Please confirm that the power supply phases and rated voltage are consistent with that of the nameplate otherwise the driver may be damaged 2 8 2 Motor Wiring It is forbidden to short circuit or ground the driver output terminal otherwise the internal components of the driver will be damaged Avoid short...

Page 28: ...For the grounding wire diameter requirement refer to 3 3 Models of main circuit peripheral devices Do not share grounding wire with the welding machine and other power equipment In the applications with more than 2 drivers keep the grounding wire from forming a loop Correct Wrong Figure 2 14 Grounding wiring 2 8 4 Countermeasures for Conduction and Radiation Interference 图 2 16 噪声电流图例 Figure 2 15 ...

Page 29: ...tor wire they shall be kept orthogonal When analog voltage and current signals are adopted for remote frequency setting shielded twisted pair cable shall be used The shielded layer shall be connected to the PE terminal of the driver and the signal cable shall be no longer than 50m The wires of the control circuit terminals RA RB RC and other control circuit terminals shall be separately routed It ...

Page 30: ...terminal 2 9 2 Defintion of pins and illustration drawing Pin Name Description of function Definition of pins 3 COS 8 COS Rotating COSINE feedback signal 4 SIN 9 SIN Rotating SINE feedback signal 5 REF EXC 10 REF EXC Rotating excitation signal 11 PTC130 14 PTC130 Internal temperature sensing resistor of the motor 1 KTY84 130 6 KTY84 130 Internal temperature sensing resistor of the motor optional 1...

Page 31: ...vo drive for hybrid electro hydraulic system of injection molding machine User Manual Chapter 2 Installation and connection of servo driver 19 2 10 The main circuit and the control terminal of a circuit wiring diagram ...

Page 32: ...ed non shielded network cable X1 Servo function enabled X2 X3 X4 X5 X6 Digital input X7 See P5 01 P5 06 Parameter setting Input specification 24VDC 5mA Frequency range 0 200Hz Voltage range 24VDC 20 Pulse input 0 1 50KHz 13V Pressure sensor power supply 10V 3 internal isolated with COM Maximum output current 10mA with short circuit and overload protection 10V Analog input reference voltage 10V 3 i...

Page 33: ...e no less than 5kΩ 1 Wiring mode of the multi functional input output terminals When the internal 24V power supply of the drive is used the external controller adopts NPN sink current wiring mode When the internal 24V power supply of the drive is used the external controller adopts PNP draw off current wiring mode User controller Inside of drive The near end of the shielding cable is grounded 24 U...

Page 34: ...k current wiring mode Note The short circuit bar between terminal 24V and terminal PLC must be removed When the external power supply is used the external controller adopts PNP draw off current wiring mode Note The short circuit bar between terminal 24V and terminal PLC must be removed User controller Inside of drive The near end of the shielded cable is grounded 24 User Controller Inside of drive...

Page 35: ...er 23 2 12 Schematic Diagram of Control Board 2 13 Descriptions of Control Circuit Terminals Terminal number Termina l screw Tightening torque N m Wire specification mm2 Wire type 10V 13V AI1 AI2 AI3 CANH CANL 485 485 AO1 AO2 GND M3 0 5 0 6 0 75 Shielded twisted pair cable 24V PLC X1 X2 X3 X4 X5 X6 X7 COM RA RB RC RA1 RB1 M3 0 5 0 6 0 75 Shielded cable ...

Page 36: ...resistor selection ON there is 100Ω terminal resistor OFF there is no terminal resistor There is no terminal resistor S3 AI2 selection mode I is the current input 0 20mA V is the voltage input 0 10V 0 10V voltage input S2 Connection of analog ground or digital ground NC COM does not share the ground COM GND shares the ground NC COM does not share the ground S1 Power supply via digital terminal NC ...

Page 37: ...draulic system of injection molding machine User Manual Chapter 2 Installation and connection of servo driver 25 2 15 Cautions for installing servo motor and pressure sensor Installation method of servo motor Installation method of pressure sensor ...

Page 38: ...rent Green V DC voltage On DC bus voltage of the driver is displayed Green Hz A Setting pressure Blinking Setting pressure is displayed Green Hz V Setting speed On Setting speed is displayed Green Hz A Feedback pressure On Actual pressure is displayed Green On Servo is enabled via panel Off Servo is enabled via terminal MON Method of issuing running command Blinking Servo is enabled via host compu...

Page 39: ...rst level menu increase function code according to edit bit 6 In second level menu increase the function code data Decrease Key 7 In first level menu decrease function code according to edit bit 8 In second level menu decrease the function code data Shift Key 1 In first level menu use key to move edit bit of PX YZ menu 2 In second level menu use key to move the edit bit of data 3 In stop run statu...

Page 40: ...P6 00 P6 10 P7 group P7 00 P7 10 P8 group P8 00 P8 20 P9 group P9 00 P9 25 PA group PA 00 PA 08 Pb group Pb 00 Pb 23 PC group PC 00 PC 07 Pd group Pd 00 Pd 11 H0 group H0 00 H0 17 User operation area P area H1 group H1 00 H1 10 d0 group d0 00 d0 11 d1 group d1 00 d1 11 Protection area of user password P0 00 Equipment status area d area d2 group d2 00 d2 24 A0 00 protection area Function code displ...

Page 41: ...hen data is 1234 5 operation panel displays 1234 When data is 123 45 operation panel displays 123 4 When data is 12 345 operation panel displays 12 34 Display set hex code From data bit 1 to 4 the characters of 0 1 9 A B C D E and F can be displayed or set Meanings of 0 0 0 0 displayed in second level menu After entering second level menu besides the displayed data there are also 4 dots this means...

Page 42: ...unction code parameter Fast menu FASt Fast menu includes some common function codes and you can start the drive by setting only a few function codes so as to realize the fast application See 5 2 for the table of fast menu function code parameter Non factory setting function code menu ndFt This menu mode is used to search for the function codes different from the leave factory values for the conven...

Page 43: ...bled At Drive is in auto tuning Loc2 Except M key other keys are locked bASE Basic menu P0 02 0 Loc3 Except RUN and STOP RST keys other keys are locked CoPy Drive parameters are being downloaded and this symbol will be displayed when parameters are downloaded to drive For example set Pb 23 2 or 3 ndFt Non factory setting of function code P0 02 2 dEFt Restore to factory settings P0 01 2 to 5 P CLr ...

Page 44: ...ously After P Set is displayed the password setting is successful See 4 8 3 for password setting Password Verification Enter password function code enter password correctly and you can see the parameters protected by password See 4 8 4 descriptions of password verification Clear Password After passing password verification enter password function code set 0000 continuously for two times P CLr is d...

Page 45: ... locked and only the password protection is enabled 2 Power on the drive again to lock the operation panel 3 If no key is pressed within 5 minutes after setting the function code the operation panel is locked automatically Unlock Keys Press ESC keys at the same time for shuttle type turning anti clock wise is equivalent to key to unlock 3 7 Operation Panel Display and Key Operation 3 7 1 Classific...

Page 46: ...enu edit status of PX YZ to return to P0 00 If there is password setting or key locking setting and if no key is pressed for 5 minutes the panel will enter password protection or locking status automatically Display Status and Operation Procedure Display parameters at stopping status Modify frequency directly Time out and stop modifying Fault occurs Fault reset Time out and stop modifying Display ...

Page 47: ...y password and the password is 3 If the password protection is not enabled you can press ESC PRG to enable the password in last example of P0 00 You can verify the password according to the following process Note If you use RS 485 communication mode to perform password verification please refer to Appendix A Description of register 0xF000 in Modbus communication protocol 25 00 P0 0 0 0 0 0 0 3Time...

Page 48: ...ering Set the machine configuration parameters Analog calibration ction molding machine test run Set the machine for the terminal operation mode Complete N Y Set the P0 04 0 setting parameters of motor P9 02 P9 07 Set the P9 23 1 P9 24 1 press the RUN button to display the At after stopping display parameter display Set the P0 03 1P0 04 1 configuration of P0 13 P1 00 P1 09 and other related parame...

Page 49: ...ssure control mode and command channel taking the analog input signal as an example Set P0 03 1 Oil pressure control mode speed flow setting command P0 04 1 AI3 analog value setting pressure setting command P1 03 1 AI1 analog value setting feedback pressure command P1 04 1 AI2 analog value setting Configuration parameters for selected machine P0 13 Max speed is set via calculation of flow meter P1...

Page 50: ...rameters P value of P3 00 pressure loop I value of P3 01 pressure loop P value for P3 08 stabilizing pressure and I value for P3 09 stabilizing pressure P value for P4 00 motor speed loop and I value for P4 01 motor speed loop and the Pd 00 torque output the max value The greater the oil pressure Kp the faster the system response speed but the oscillation will occur more easily The greater the Ki ...

Page 51: ... read only and cannot be changed Function code selection Function code parameter setting list User setting Used for recording parameters by user 4 1 List of Basic Menu Function Codes Function code number Function code name Factory setting Setting range Unit Prop erty Function code selection User setting Group P0 Basic Function Parameter P0 00 User password 0000 0 FFFF 0000 No password Other Passwo...

Page 52: ...rpm P0 13 System Max speed 2000 0 9999 rpm Set according to the calculated flow P1 group of machine configuration parameters P1 00 Capacity of oil tank 40 0 350 cc rev P1 01 Output signal of pressure sensor 0 0 4 0 0 10V 1 1 10V 2 0 5V 3 1 5V 4 4 20mA P1 02 Measure range of pressure sensor 250 0 0 350 0 kgf cm2 P1 03 Method of issuing pressure command 1 0 5 0 Via digital panel P0 05 1 Via AI1 anal...

Page 53: ...t to stop P2 02 Display parameter selection at running 789C 0000 FFFF LED ones place 0 e given speed rpm 1 Bus voltage V 2 AI1 V 3 AI2 V 4 AI3 V 5 DI 6 Motor position 7 Motor speed rpm 8 Given the pressure 9 Actual pressure A A given torque B Running speed rpm C Output current A D Output torque E Output power F The output voltage V Ten hundred thousand ibid P2 03 Display parameter selection at sto...

Page 54: ...ient Ki3 0 200 0 1 000s P3 06 1st group pressure proportional coefficient Kp4 2 250 0 6 000 P3 07 1st group pressure integration coefficient Ki4 0 200 0 1 000s P3 08 Stable pressure proportional coefficient Kp 3 000 0 8 000 P3 09 Coefficient of integral stability of pressure Ki 0 150 0 1 000s P3 10 Pressure differential coefficient 0 010 0 5 00ms Group P4 The velocity vector control parameters P4 ...

Page 55: ...terminal filtering time 0 010 0 000 1 000 s Group P6 Analog Reference Parameter P6 00 AI1 to AI3 and DI analog value input curve selection 000 0 444 Units bit Reference pressure from AI1 0 Marked by P6 group 1 Marked by H0 group Tens bit AI2 feedback pressure 0 Marked by P6 group Others Invalid Hundreds bit Reference flow from AI1 0 Marked by P6 group 1 Marked by H1 group P6 01 AI zero drift clear...

Page 56: ... 0 0 0 200 0 P7 07 AO1 bias 0 0 0 200 0 P7 08 AO2 gain 100 0 0 0 200 0 P7 09 AO2 bias 0 0 0 200 0 P7 10 Selection of positive and negative gain and bias 0000 0000 1111 Ones place AO1 gain 0 Positive 1 Negative Tens place AO1 bias 0 Positive 1 Negative Hundreds place AO2 gain 0 Positive 1 Negative Thousands place AO2 bias 0 Positive 1 Negative P8 Group Plunger pump and multi pump control parameters...

Page 57: ...rging pump 0 0 16 pcs P8 11 Pump function in system 0 0 4 0 Merging pump 1 Merging splitting control pump 2 Merging splitting following pump 3 Splitting control pump 4 Splitting following pump P8 12 Min control speed for stopping auxiliary pump 200 0 500 rpm P8 13 Pressure threshold during stopping of auxiliary pump 95 0 0 100 0 P8 14 Delay time for stopping of auxiliary pump 0 30 0 0 10 00 P8 15 ...

Page 58: ...er factor Since learning P9 16 Magnetic saturation coefficient Since learning P9 17 Pulse number of PG per rotation 1024 1 9999 P9 18 PG direction 0 0 1 0 positive 1 reverse P9 19 Installation angle of PG 16160 0 65535 P9 20 Detection time for PG cable 2 0 0 8 0 s P9 21 Motor speed to PG speed 1 000 0 001 65 535 P9 22 PG type 4 0 8 0 No PG 1 ABZ increase type 3 ABZUVW increase type 3 COSINE and SI...

Page 59: ...mple anomaly LED thousands place encoder disconnection PA 07 Fault masking and alarm 3 2000 0000 2222 LED ones place 10V output error LED tens place Analog input error LED hundreds place Motor over temperature PTC LED thousands place abnormal communication 1 serial operation panel PA 08 Fault masking and alarm 4 0002 0000 2222 LED ones place Communication was abnormal in 2 terminal serial LED tens...

Page 60: ...Reserved 1 303 PC 04 Master slave mode 0 0 2 0 SCIA slave SCIB slave mode 1 SCIA master SCIB slave mode 2 SCIA slave SCIB master mode PC 05 Operation address from master to slave set by master 1 00 0 10 0 Master preset frequency written in function code of slave 0 P0 05 The other is invalid PC 06 CAN baud rate 5 0 5 bps 0 20K 1 50K 2 125K 3 250K 4 500K 5 1M PC 07 CAN address 1 1 247 1 247 1 main p...

Page 61: ...0000 rpm d0 06 Total power up time on time 0 0 65535 kh d0 07 Total operation time of the drive 0 0 65535 kh d0 08 Record of maximum temperature of heatsink 0 0 0 100 0 d0 09 Record of maximum bus voltage fluctuation 0 0 1000 V d0 10 Reserved 0 30000 d0 11 Reserved 0 5 Group d1 Product Identity Parameters d1 00 Serial number 35355 8A1b d1 01 Software version number of control board 1000 0 00 99 99...

Page 62: ...arking parameters for reference pressure H0 00 Adjustment coefficient for 170kgf cm2 reference pressure 100 0 0 0 160 0 H0 01 Adjustment coefficient for 160kgf cm2 reference pressure 100 0 0 0 160 0 H0 02 Adjustment coefficient for 150kgf cm2 reference pressure 100 0 0 0 160 0 H0 03 Adjustment coefficient for 140kgf cm2 reference pressure 100 0 0 0 160 0 H0 04 Adjustment coefficient for 130kgf cm2...

Page 63: ...0 0 0 0 160 0 H1 Group Multi section linear marking parameters for reference flow speed H1 00 Adjustment coefficient 100 reference flow 100 0 0 0 160 0 H1 01 Adjustment coefficient 90 reference flow 90 0 0 0 160 0 H1 02 Adjustment coefficient 80 reference flow 80 0 0 0 160 0 H1 03 Adjustment coefficient 70 reference flow 70 0 0 0 160 0 H1 04 Adjustment coefficient 60 reference flow 60 0 0 0 160 0 ...

Page 64: ...rnal fault input 2 Using the third group pressure PI 9 Motor temperature switch PTC KTY input 3 Using the fourth group pressure PI 10 Swash plate enabled 4 Big pump enable No Definition of function 5 Second oil channel Definition of multi function relay and Y terminal output No Definition of function 5 RS485 communication output 0 Signal output for servo running 6 Cooling fan output 1 Servo failur...

Page 65: ...esponds to 10V 20mA 51 Pressure setting Max measure range of pressure sensor corresponds to 10V 20mA 52 Output voltage Two fold motor rated voltage corresponds to 10V 20mA 53 Bus voltage 1000V corresponds to 10V 20mA 54 AI1 10V corresponds to 10V 20mA 20mA corresponds to 5V 10mA 55 AI2 10V corresponds to 10V 20mA 20mA corresponds to 5V 10mA 56 AI3 10V corresponds to 10V 20mA 20mA corresponds to 5V...

Page 66: ...nergy braking components Improper setting of motor parameters Set motor parameters properly If any special motor is used Learn the motor s parameters 2 E oc2 Over current protection when deceleration operation The motor s power goes beyond the driver s maximum drive current Replace to drive with proper model If any special motor is used Learn the motor s parameters Improper setting of motor parame...

Page 67: ...re Check whether fan wirings are well connected Replace a new fan of the same model Drive module failure Seek for technical support 11 E oH1 Heatsink 1 over temperature protection Temperature detection circuit failure Seek for technical support Ambient over temperature Lower the ambient temperature Blockage of air duct Clean the dusts wools and other Fan failure Check whether fan wirings are well ...

Page 68: ...Ur Current detection fault Current detection circuit failure Seek for technical support Wrong connection Correct the connection error as Motor failure Replace the motor after Invert module failure Seek for technical support 20 E GdF Output to ground short circuit Too big ground leakage current at the Seek for technical support 21 E LV1 Abnormal power failure Mains power fluctuation or momentary Ch...

Page 69: ... input voltage Check whether the analog input voltage complies with the requirements Analog input circuit failure Seek for technical support 29 E AIF Analog input abnormal Analog input circuit signal interfered Increase the P6 22 and P6 24 AI filtering time The motor temperature signal reaches the alarm setting value Strengthen ventilation and heat dissipation Thermistor resistance failure Check t...

Page 70: ... operation panel The parameters are directly downloaded without undergoing copy and upload operations Perform download before uploading the parameters 34 E CPy Copy failure Control board software version incompatible Check if d1 09 is consistent Expansion card connection is loosened Ask professional technicians to maintain 36 E dL4 Expansion card connection abnormal Expansion card failure Seek for...

Page 71: ...TS I Special servo drive for hybrid electro hydraulic system of injection molding machine User Manual Chapter 5 Alarm and diagnosis of servo drive 59 5 2 Troubleshooting Procedures ...

Page 72: ...t be performed upon running check if the function code could not modification upon running A 4 When display is not available check if the drive function code has been encrypted A 5 When display is not available check if the drive operation panel has been locked III Why did the fans of drives of certain power classes will rotate upon power up while others could not A The fans of the 4T030A drives a...

Page 73: ...s if so use the I to V conversion board 4 Check if the voltage of AI1 and AI3 to GND exceed 10V if so adjust it 5 3 Feedback signal error of pressure sensor Check the actual pressure displayed by driver and check the voltage of AI2 to GND and judge if error occurs and the motor will not run if this is true 1 Check the output signal and measure range of the pressure sensor and check if P1 01 and P1...

Page 74: ...nt output A 5 Internal leakage in oil pump severe overheat A 6 Internal leakage occurs when the system pressure of oil circuit is high A 7 Over temperature of hydraulic oil VIII Why E AIF analog input abnormal is reported A 1 Check if the input type of analog values and jumper of the control board are correct for analog input voltage set the corresponding jumper to the V side For analog current in...

Page 75: ... According to the feature of the servo motor the motor torque is decreased gradually as its speed is increasing When the motor torque reaches the 150 rated speed the internal magnetic field of the servo motor will be saturated and the torque will be decreased sharply so this speed shall not be used as the working speed of the motor in the mixing system so we select the following parameters Vmax 14...

Page 76: ...rvo pump and servo motor you can get the Kt factor from the manufacturer of the servo motor and then calculate the max operating current based on this factor I Tmax Kt A So the rated current of the servo driver is Ie 0 80 1 0 I A This is mainly dependent on the machine structure and materials According to the calculated Ie check if the specification model and technical parameters of the servo driv...

Page 77: ... are slave and work in parallel and they act run and stop synchronously and their working mode is identical with one servo pump system The main issue to be solved is the flow and energy saving control requirements Multi pump split merged flow Two or more servo electrolytic mixing system can form multi pump split merged system to meet the requirements of big flow and also the requirements of high e...

Page 78: ...nd function application 2 Multi pump split merged structure The wiring method of main oil circuit and the second oil circuit system is identical with that of the single unit The master slave systems can be controlled via CAN communication RS485 communication analog output analog input and digital terminal and the principle is as follows ...

Page 79: ...English version TS 20141230 I 1 0 BOM 37110041 printed for the first time This document is subject to change without notice All rights reserved Any unauthorized reproduction or copy is forbidden ...

Reviews: