

4008062-01
1. You need to know:
• will optional HeatShift be used
*
• what
fi
nishing trim will be used
*
• required cavity size—see installation manual
• thickness and type of wall
fi
nish around
fi
replace
• what optional accessories are being used
• what venting con
fi
guration is used -
top / rear / co-axial / co-linear
2. Carefully unpack appliance and loose items
that come with it, trim and accessories; recycle
packaging. Keep barrier screen protected.
3. Remove window and set aside to avoid damage.
4. Take out of
fi
rebox any loose items which have
been packed inside for transportation.
5. Check that you have all the components in
hand for installation, including:
• liner panels (in separate carton)
• fuel bed (in separate cartons)
• remote battery and wall switch kit
• HeatShift components if needed
(in separate cartons)
• Trim (in separate carton)
• gas conversion kit (if required)
• venting components and accessories
• electrical components if needed
6. Look up dimensions, clearances, and venting,
HeatShift information in installation manu-
als supplied with appliance and accessories to
ensure that installation space is of appropriate
dimensions.
7. Install stando
ff
s on appliance.
8. Convert appliance for venting if needed.
9. Install appliance in framing cavity.
10. Install and connect venting system.
11. Install HeatShift components if used.
*
12. Install power supply (if necessary).
13. Install wall switch kit including remote battery
holder (required).
14. Perform initial set-up to match remote control
receiver and handset.
15. Install fan and wi
fi
module, if used.
16. If appliance needs gas conversion, convert now
using optional kit listed in appliance manual.
You may need to remove burner to proceed.
17. Connect gas supply to appliance and test for
gas leaks.
18. Install liner panels in
fi
rebox.
19. Install fuel bed in
fi
rebox.
20. Re
fi
t window, check spring-loaded window
return and seal.
21.
Reinstall Hot Glass Warning plate on window
if it has been removed.
22. Check lighting and adjust the aeration settings
if necessary.
23. Apply cement board and wall
fi
nish. If
using
1530CIK, install trim frame
fi
rst
.
24. Install remote control handset wall holder.
25.
Install trim and barrier screen.
26.
INSTRUCT THE CONSUMER ON HOW TO
OPERATE AND MAINTAIN THE FIREPLACE.
•
show where the controls AND BATTERIES
are (gas valve, receiver, battery holder, ac-
cessories) and how to access them
•
show how to operate the remote control,
accessories
•
show how to turn the
fi
replace o
ff
in case of
emergency
Leave all instruction manuals and documents,
including this one, with the consumer.
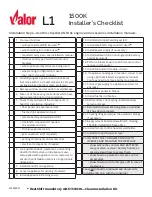
Installation Steps—Use this checklist AND the engine and accessories installation manuals.
1500K
Installer’s Checklist
L1
* HeatShift mandatory with 1530CIK—Clean Installation Kit


