21
VAIO Operating and installation instructions
To carefully light the wood-burning stove for the first time, please proceed as follows:
1. Lighting for the first time
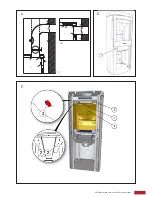
Turn the regulator knob (fig. E, 1) clockwise to the maximum position. Lay two pieces of wood (5-8 cm
diameter) horizontally on the bottom of the fire compartment (1-1.5 kg). Then lay 6 to 10 pieces of kindling
crosswise and diagonally over them. Add 4 firelighters to the top layer of kindling. Light the firelighters
and shut the door. If there is a problem with condensation in the door, you can leave the door slightly ajar
if necessary before closing it. When the fire has completely gone out, open the door and leave open until
the stove has cooled down to room temperature.
2. Lighting the stove for the second time
Turn the regulator knob (fig. E, 1) clockwise to the maximum position. Lay two pieces of wood (5-8 cm
diameter) horizontally on the bottom of the fire compartment (1-1.5 kg). Then lay 6 to 10 pieces of kindling
crosswise and diagonally over them. Add 4 firelighters to the top layer of kindling. Light the firelighters
and shut the door. If there is a problem with condensation in the door, you can leave the door slightly ajar
if necessary before closing it.
Once there are no more yellow flames and there is an adequate layer of embers, you can add more wood.
An adequate layer of embers is achieved when the floor of the fire compartment is covered with nicely
glowing embers. Add two more pieces of wood (up to 1.2 kg per piece) with a diameter of approx. 7-9 cm.
After lighting the fire, once all pieces of wood are burning, turn the regulator knob (1) to the middle posi-
tion. The fire should burn out and the stove should be allowed to cool down to room temperature before
lighting it again.
3. Lighting the stove for the third time
The procedure is the same as when lighting the fire for the second time, however, this time, more wood is
required. The fire should burn out and after the fire has gone out, the stove should cool down.
Subsequently lighting the stove:
Follow the normal instructions, see the “Lighting” and “Adding more wood” sections.
Follow the normal instructions, see the “Lighting” and “Adding more wood” sections.
It is very important to heat the stove properly in order to achieve successful combustion. A cold wood-bur-
ning stove and a cold chimney constitute a challenge for the combustion process. It is important to achieve
a high flue gas temperature as quickly as possible.
Turn the regulator knob (1) clockwise to the maximum position. Lay two pieces of wood (5-8 cm diameter)
horizontally on the bottom of the fire compartment (0.9-1.2 kg). Then lay 6 to 10 pieces of kindling cross-
wise and diagonally over them. Place 2-4 firelighters between the top layer of kindling wood. Light the
firelighters and shut the door. If there is a problem with condensation in the door, you can leave the door
slightly ajar if necessary before closing it. Once all pieces of kindling wood are burning, turn the regulator
knob (1) to the middle position. If the fire goes out when you are adjusting it, turn the regulator knob back
to the maximum position until the fire burns better. Then turn the regulator knob to the middle position.
The kindling wood should burn up fully until no more flames are visible. Only then should you add more
wood.
Important!
Do not open the ash pan during the heating phase. It should always remain closed when the stove is in
operation as otherwise the automatic controller for the flow of air could become damaged. Only open the
door when lighting the stove, adding more wood and cleaning the stove.

