


Determine what you need to do to prevent IP address conflicts:
n
Installing cameras with Quick-Connect USB devices on a non-DHCP network:
configure each camera
and each Quick-Connect USB device
with static IP addresses before connecting them to the network.
n
Installing cameras with other Quick-Connect devices on a non-DHCP network:
configure each camera
with a static IP address before connecting it to the network.
n
Installing cameras with an AV Bridge MATRIX PRO on a non-DHCP network:
configure each camera
with a static IP address before connecting it to the network. The AV Bridge MATRIX PRO will also
need a static IP address.
If you need to do any of these things, work with the network administrator to determine the appropriate
network configuration.
See
Configuring the Camera with a Static IP Address
for step-by-step instructions to configure a static IP
address.
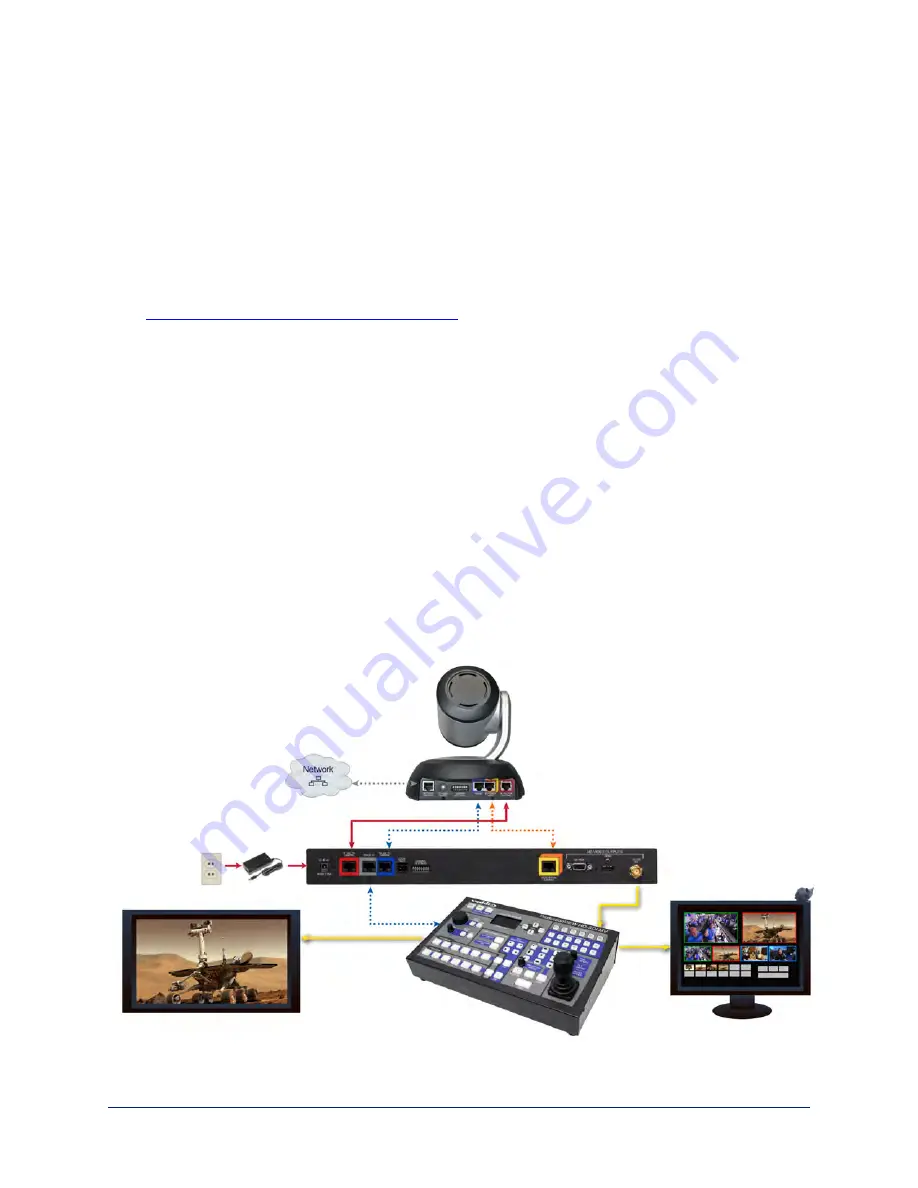
Basic Connections: RoboSHOT QCCU System
RoboSHOT QCCU systems ship with the camera and a Quick-Connect Universal CCU (QCCU). The
QCCU powers the camera and provides fine control over color and lighting (CCU) adjustments. This
system is designed for a live production environment and is typically installed with a camera controller and
multi-view preview monitor.
Caution
Connect the power cable from the QCCU to the camera's power port marked
36 VDC For QCCU Only
.
DO NOT connect it to the camera's EZ-Power Video port. Connecting the power cable from the QCCU to
the wrong port on the camera will damage the camera and void your warranty.
Pro Tip
Use the color coding on the camera and the QCCU – blue goes to blue, yellow/orange goes to
yellow/orange, red goes to red.
This diagram shows a RoboSHOT 12 camera. The RoboSHOT 30, RoboSHOT 12E CAT-5, and
RoboSHOT 30E CAT-5 connect in the same way.
32
Complete Manual for RoboSHOT CAT-5 Professional PTZ Camera Systems


