Cabling Notes
Use Cat-5e or better cable. Use shielded cabling if the cables will be coiled, run tightly with other cables,
or routed near sources of electromagnetic interference such as power lines or fluorescent light fixtures.
We recommend using high-quality connectors and a high-quality crimping tool.
Caution
Do not use pass-through RJ-45 connectors when making cables for this product. Poorly
crimped connectors of this type can cause intermittent connections and degraded signal
quality. They can also damage the connectors on the product, which will void your warranty.
Intact
– will make reliable contact
with cable connector
Damaged
– Bent contact fingers
will NOT make reliable contact
with cable connector
Pro Tip
Label all cables at both ends.
Basic Connections
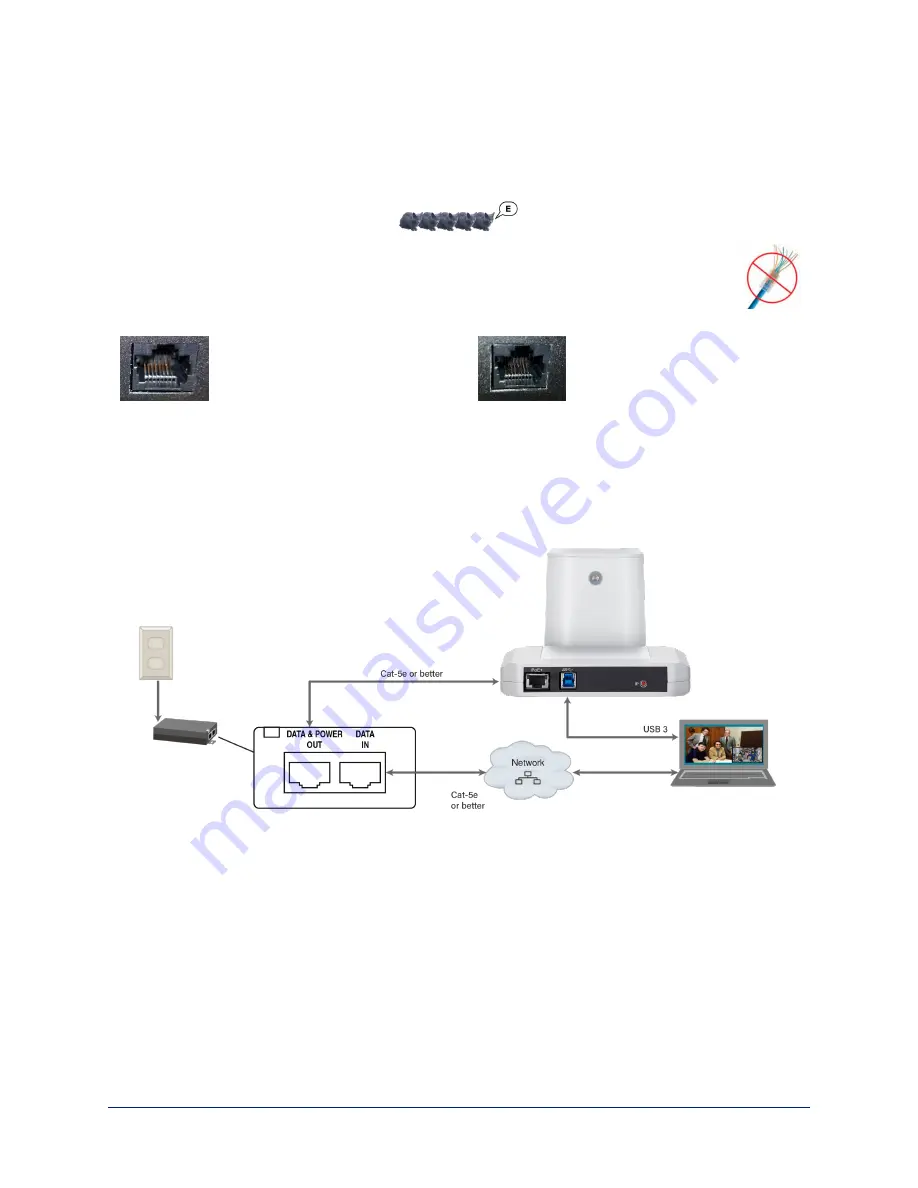
The camera receives power and network connectivity from its PoE connection. Connect a computer to
the camera’s USB port for conferencing.
Pre-Installation Functional Check
If you're installing the camera where it's hard to reach, you may want to verify functionality before you
install it.
1. Connect the camera.
2. Connect power. The camera's status light turns white.
3. Connect the camera's USB port to your computer.
4. Verify that you can select the camera as the USB video capture device for conferencing.
If the camera turns on and is available as a USB device, continue with the installation.
5
Complete Manual for the IntelliSHOT-M Auto-Tracking Camera


