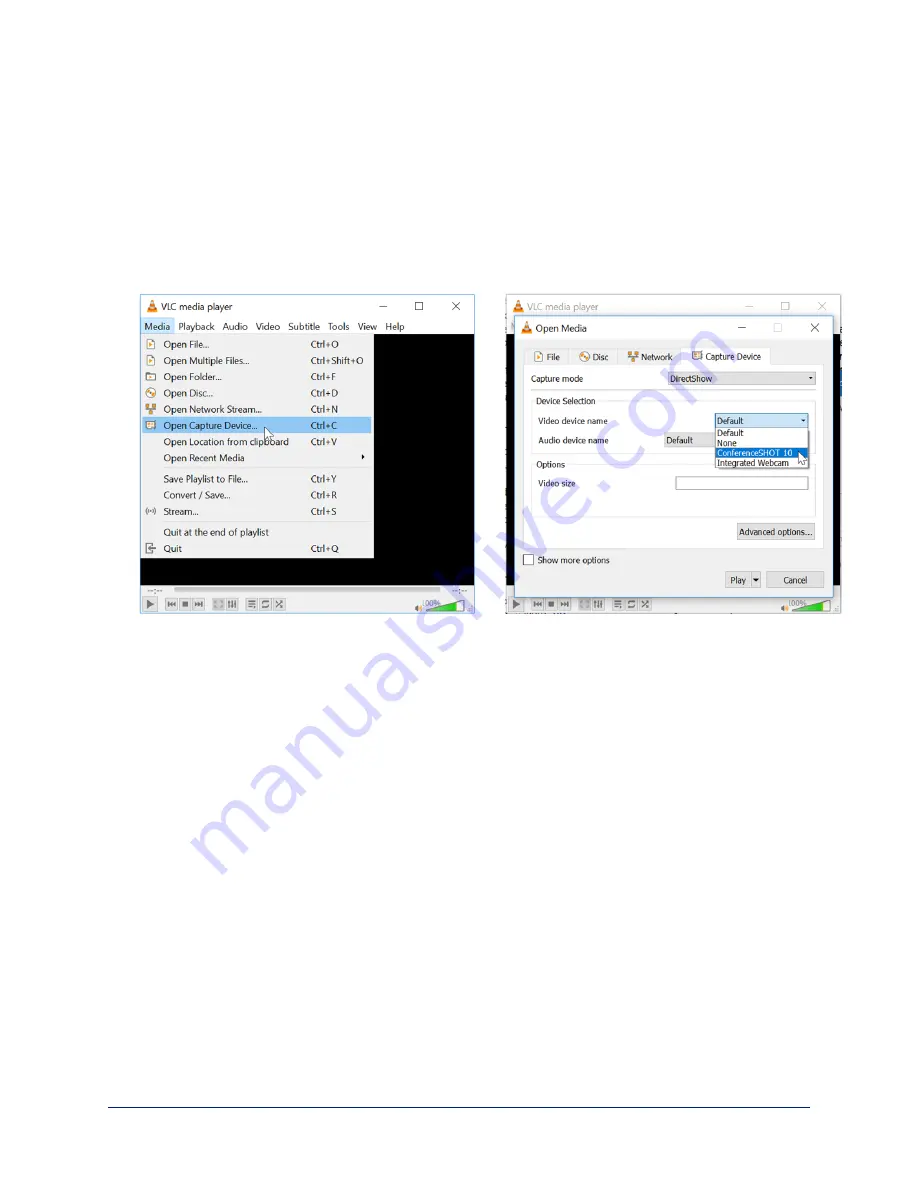
To get the camera's IP address:
1. Connect the camera to the network, and connect the camera's USB cable to your computer. Then
power up the camera. If necessary, your computer loads the appropriate USB driver.
2. Open a media player such as VLC Media Player and view the USB stream (If you use VLC Media
Player, this is the "Open Capture Device" option under Media.). The camera is available as a video
capture device; the device name is ConferenceSHOT AV.
The screen shots below show how you would access the USB stream using VLC Media Player. In this
example, the capture device is a ConferenceSHOT 10 camera. The steps are the same for the
ConferenceSHOT AV camera; only the video device name differs.
3. Point the remote at the camera and press the Data Screen button. The camera overlays its IP address
and MAC address on the video output.
4. Press the button again to dismiss the information display.
If the Camera Is At 169.254.1.1
This is the camera's default IP address. This means one of these things:
n
The camera is not connected to the network.
n
The network does not automatically assign IP addresses, and you need to configure the camera for the
network.
To access the camera's web interface, connect a cable from your computer's network port to the camera's
network port.
After you have done the initial device set-up, you will need to configure the camera for the network.
17
Complete Manual for the ConferenceSHOT AV Enterprise-Class Conferencing System


