


Commissioning
6 Commissioning
6.1
TZIDC
bieten
1.
Feed in pneumatic supply power
2.
Feed in electrical supply power
• Feed in setpoint current 4 ... 20 mA (ter11 / -12)
3.
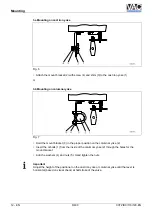
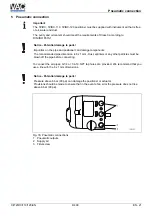
Check mount:
• Press
and hold. Additionally, press or until operating mode 1.3 (manual
adjustment within the sensor range) is displayed. Release
.
• Press or to move the actuator into the mechanical end position. Check the end
positions. The rotation angle is displayed in degrees. For high speed mode, press and
simultaneously
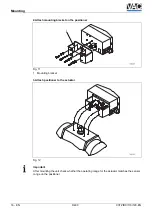
Recommended range:
- between -28 ... 28° for linear actuators
- between -57 ... 57° for rotary actuators
Minimum angle: 25°
4.
Run Autoadjust
Important
Autoadjust is available for software version 2.XX and higher.
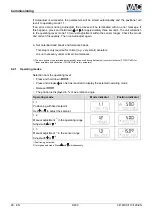
For linear actuators
1)
:
• Press
and hold until
is displayed. Release the control button
• Press
again and hold until the countdown ends
• Release
. This starts the Autoadjust
For rotary actuators
1)
:
•
Press
and hold until
is displayed. Release the control button
•
Press
and hold till the countdown ends
•
Release
. This starts the Autoadjust
With a successful Autoadjust, the parameters are stored automatically and the positioner
returns to operating mode 1.1.
If an error occurs during Autoadjust, the action is terminated with an error message. In this
event, press and hold or for approximately three seconds. The unit switches to the
operating level, mode 1.3 (manual adjustment within the sensor range). Check the mount and, if
necessary, correct. Afterwards repeat the Autoadjust.
5.
Set potential dead bands and tolerance bands.
This step is only required for critical (e.g., very small) actuators. In a standard situation, it is
not necessary.
1) The zero position is determined automatically and saved during Autoadjust (for linear actuators, counter-clockwise
(CTCLOCKW), and for rotary actuators, clockwise (CLOCKW)).
CI/TZIDC/110/120-EN
D400
EN - 23


